


How to teardown Moto Z to replace Screen and battery
BY kaye | 九月 18th, 2016 | 8 | 4
Featuring a 5.5-inch AMOLED screen, Qualcomm Snapdragon 820 chipset, 2600mAh battery and only 5.2mm body thickness, this newly released Moto Z (also called Moto Z Droid in US version) is a reliable and powerful device which supports Moto Mods intelligent module, here we’re going to tear this Moto Z apart to show you how to replace LCD screen replacement, battery, and other small components.
Repair tools needed:
- Heat gun or hair dryer
- Metal opening tool
- T4 screwdriver
- Tweezers
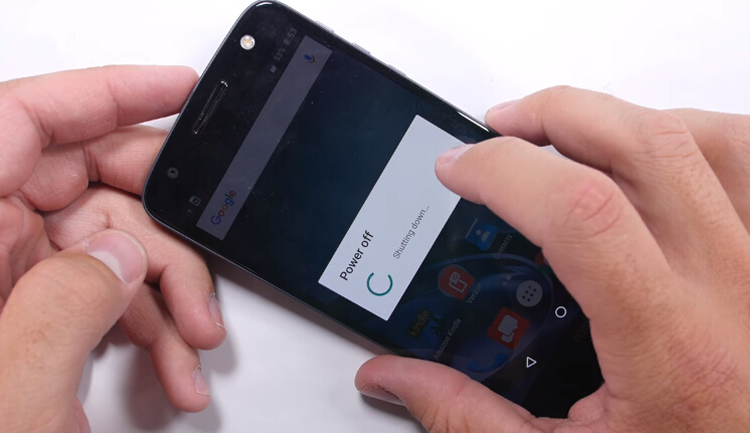
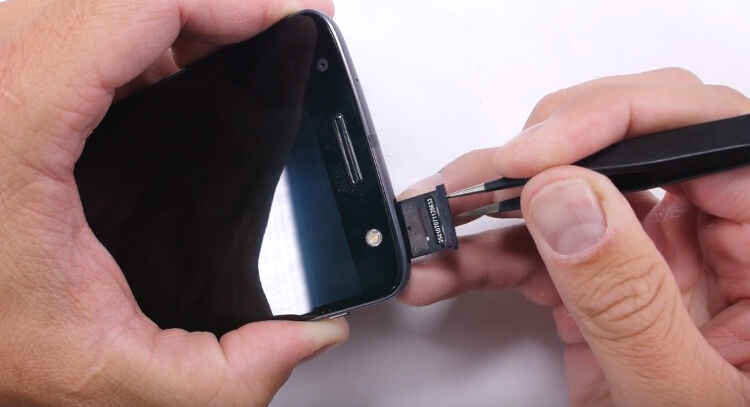
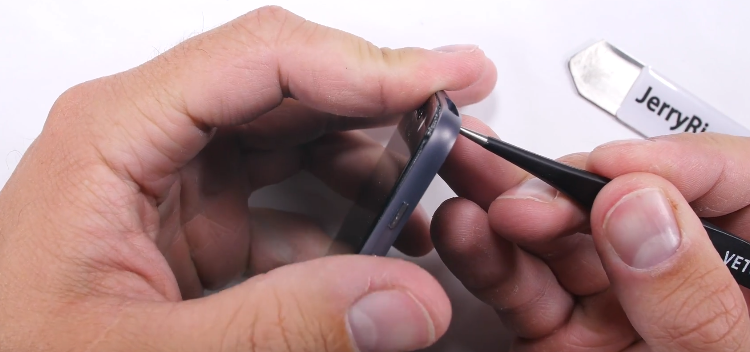
Step 1 Power off the Moto Z and take out the sim CARD tray.
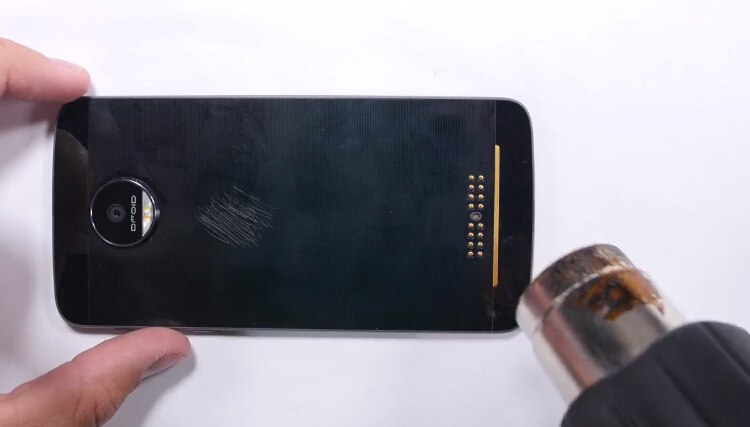
Step 2 Remove the top and bottom cover
Heat up the back glass cover, especially the top and bottom plastic part, to melt the adhesives underneath.
Then use a metal opening tool to pry up the bottom plastic cover.
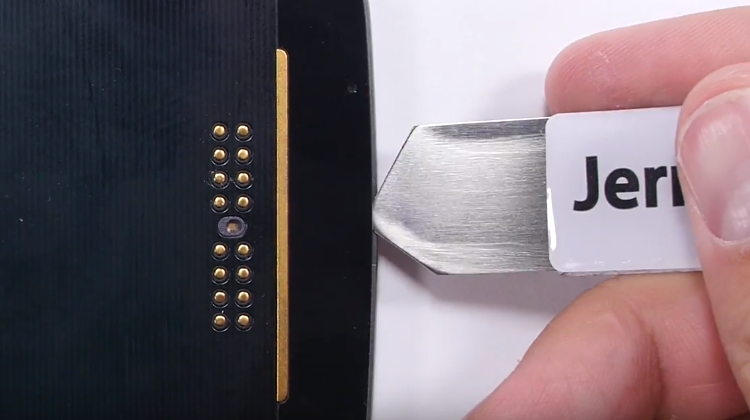
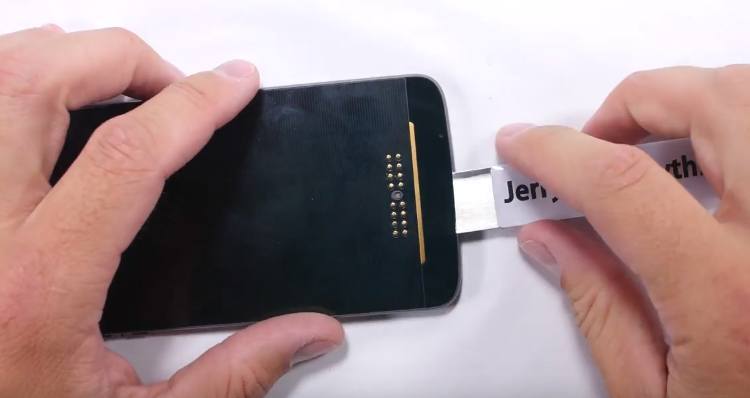
If you feel it hard to remove, then apply more heat.
Then do the same thing to the top cover and remove it.

Now remove the gold bar on the bottom section of the phone, actually there is no actual value to it, just remove it.
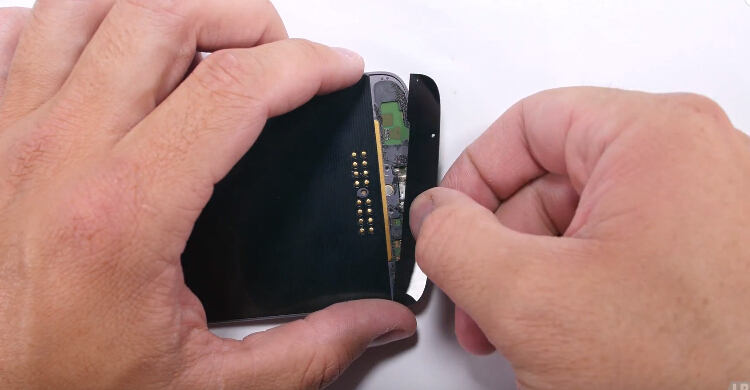
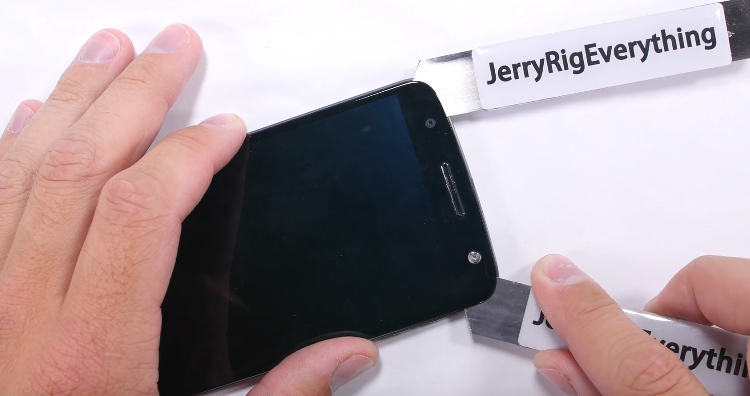
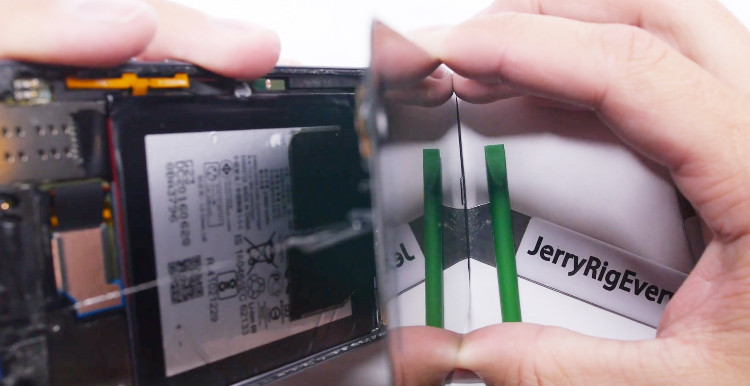
Step 3 Remove AMOLED screen
After removing 2 back panel covers, you can gently push up on the screen from the back side now without removing the back glass panel.
After opening a small gap then insert the metal opening tool.
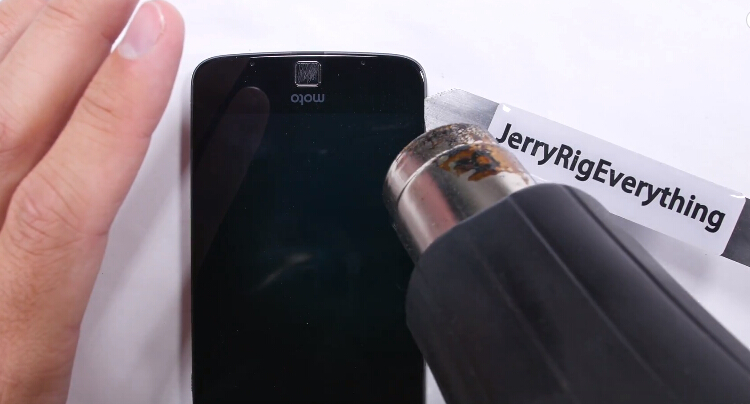
And use another one to slide along the screen edges to cut all the screen adhesives. Again if you feel difficult then apply more heat.
Note when pry up the home button part, you need to be very careful not to damage the flex cable underneath.
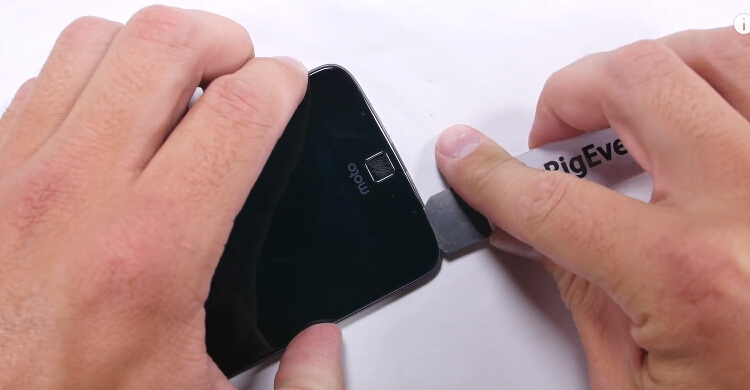
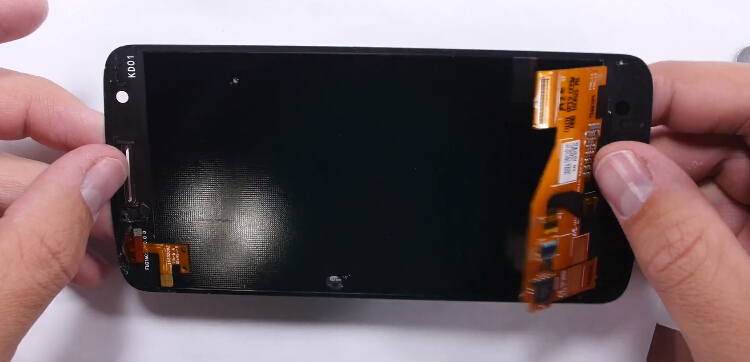
After loosening all the adhesives, then we can separate the screen from the middle frame assembly.
Be careful with the home button flex cable connected to the motherboard.
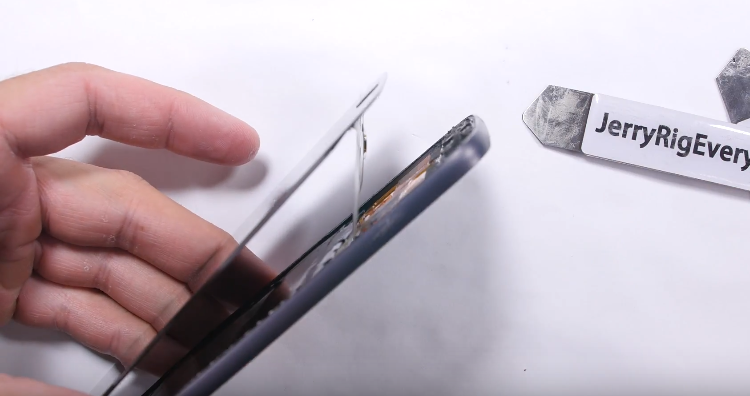
Loosen the home button flex cable connector before removing the screen assembly.

Here we removed the screen assembly with the home button and flex cable from the phone body.
From the above steps we can see that removing the screen is not that complicated like other phones, there is no need to remove all the other parts inside.
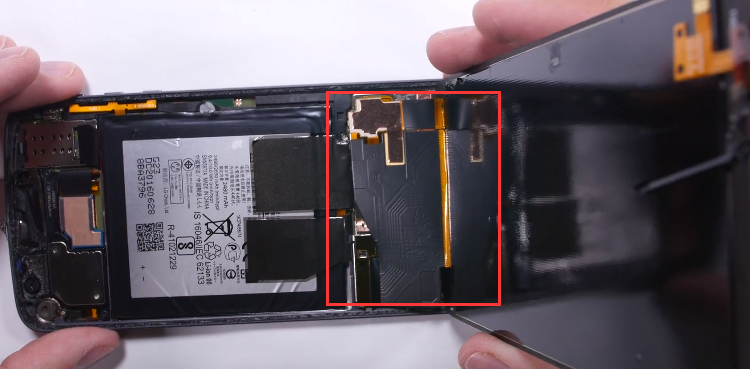
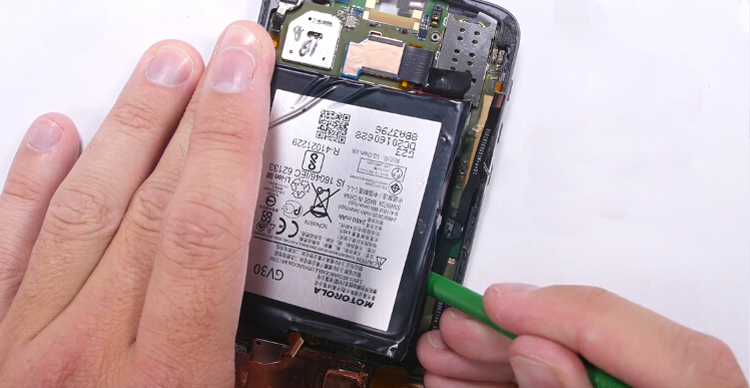
Step 4 Remove the battery
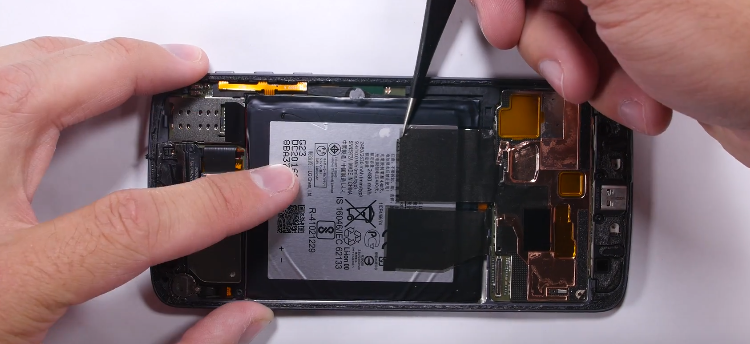
If you need to replace your battery then let’s continue our job. First, we need to peel off the 2 tapes covering the battery and motherboard.
By the way, we can remove the front earpiece by undoing 2 T4 screws holding on, with these 2 screws off then the earpiece can pop up and removed easily from the phone.(Note: this step is unnecessary for battery replacement)


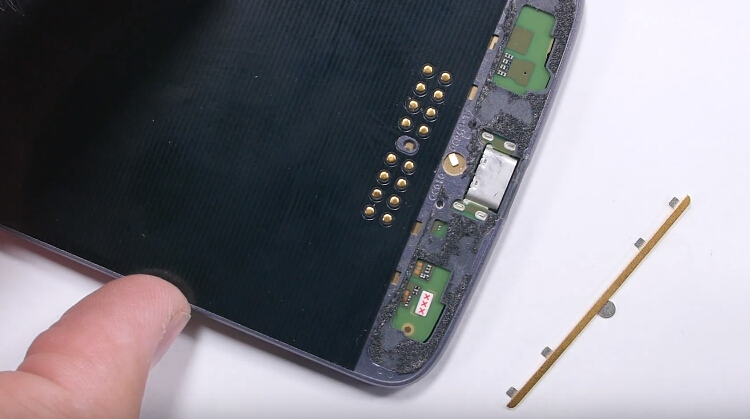
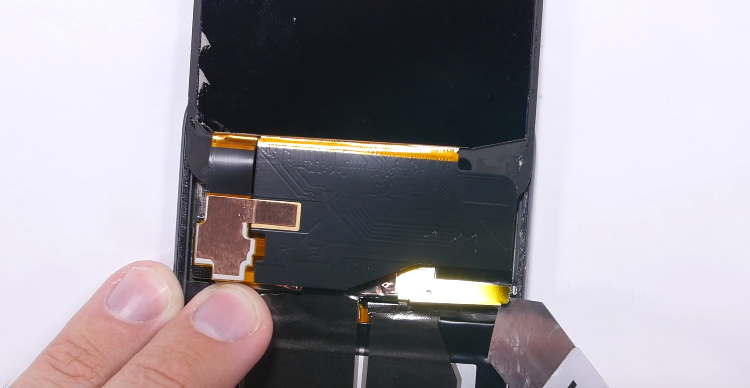
Moving down, we can see a black plastic piece which holds the battery connector underneath. Remove the plastic piece.
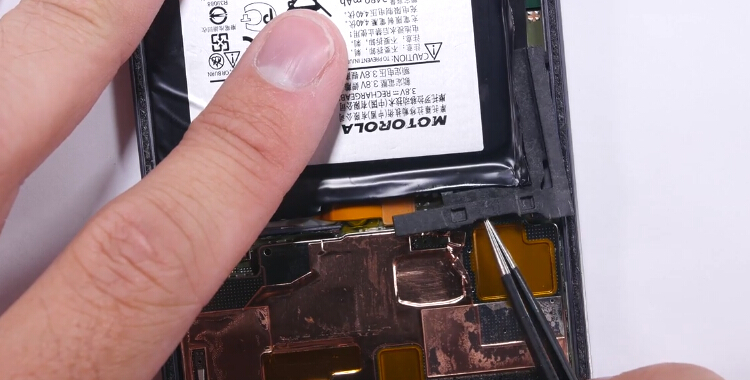
Now we can disconnect the battery connector.
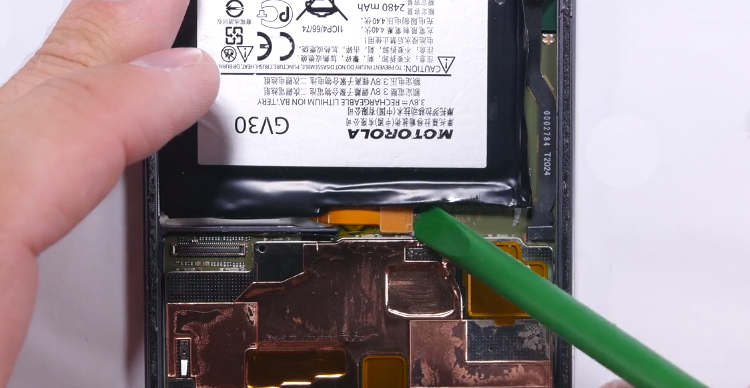
Now the battery can be lifted out from the bottom of the phone. Be careful not to bend or puncture battery.
Next steps below we’re just to show you what else can be removed from the phone, if you just need to replace the screen or battery, then these steps are unnecessary. Look at the middle plate assembly, we have 2 screws to deal with.
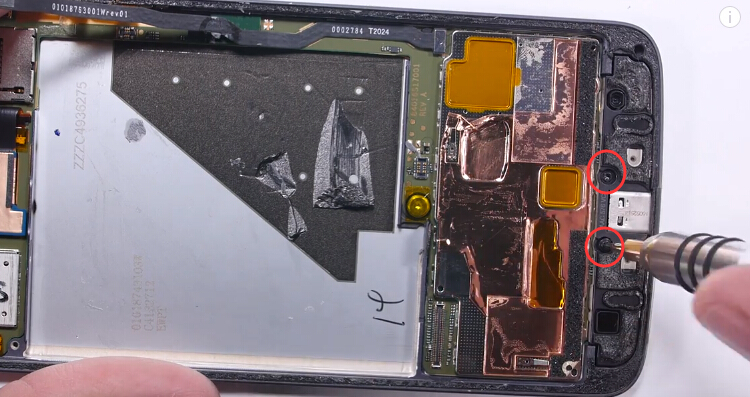
After removing these 2 screws, then we can remove the plastic cover which holding on charging port.
Near the charging port cover, there is a metal plate over the mainboard can be removed.
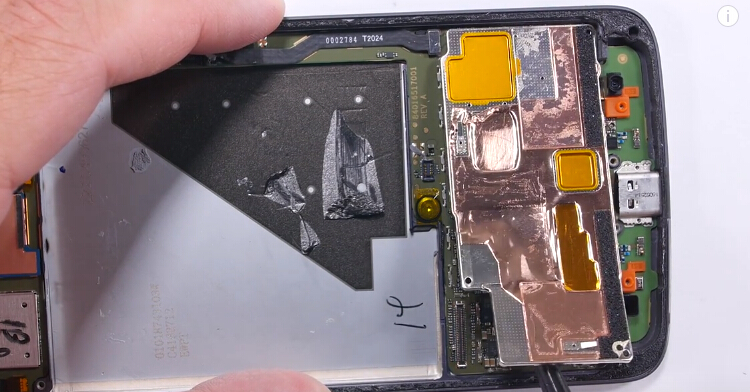
We can see that the charging port flex are not replaceable, which is integrated into the mainboard.
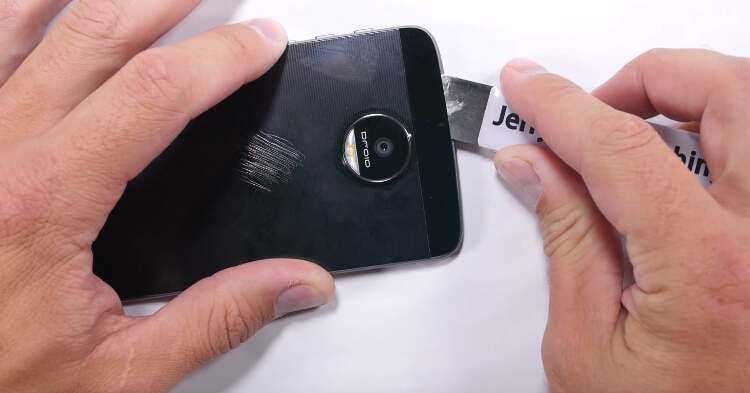
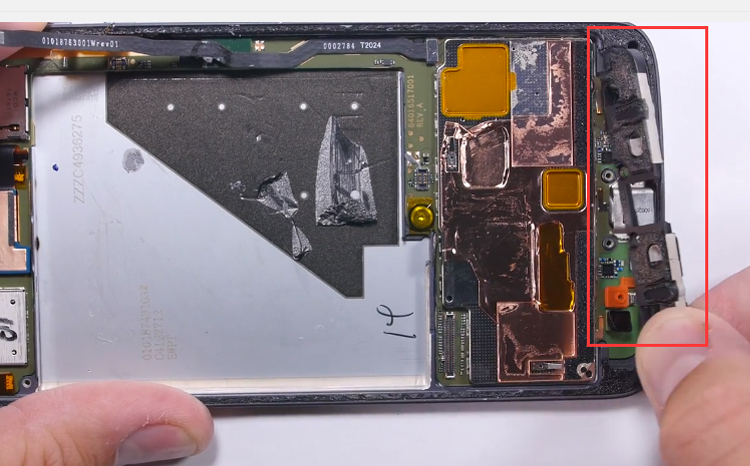
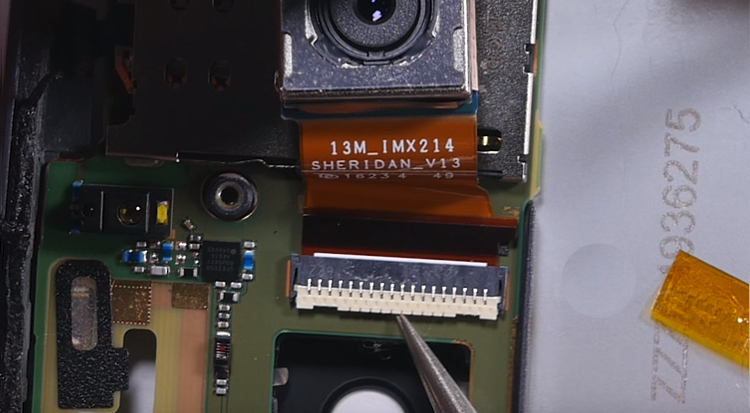
Next, we are planning to remove the rear-facing camera. Just lift up the little latch and slide it out.

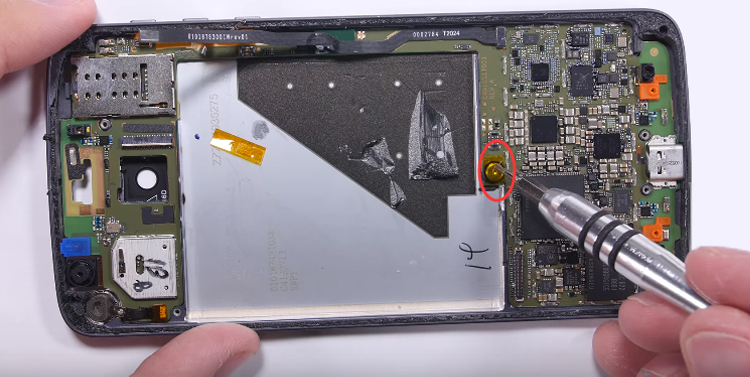
And there is a bigger screw securing the motherboard to middle plate, unscrew it.
Thought the motherboard can be taken out now, however, it seems that the motherboard doesn’t want to come out, if you try it you can feel it.
In order not to cause damages to the motherboard, you’d better leave it there.
Though this teardown work we can see that replacing the screen and battery is not so difficult, however, the non-removable charging port makes the repair job harder if you have a problem with the charging port, besides, the motherboard is hard to take out neither.
So this is what we can do to replace the screen and battery replacement, any ideas don’t hesitate to share with us!
(Picture source from Jerryrigeverything)
You may also like:
- Moto G5 Disassembly/Teardown Review for repair
- How to Take Apart the Moto X for Screen/Parts Repair
- How to Repair Motorola Moto X Screen
|
|
 |
|
|
|
|
|---|


RECOMMENDED PARTS
POPULAR ARTICLE
- How to teardown Moto G4 Plus for screen, camera and battery replacement repair
- Why the Moto Droid Turbo 2 Has the Best Shatter Proof Screen
- How to Repair a Cracked Motorola Moto X Screen
- How to Fix Motorola Moto G Problems
- iPhone X Water Damage Repair Guide (Still Work in 2019)
- How Much Does It Cost To Replace An iPhone XS Display?
- iPhone X Explosion: 7 Small But Important Things To Note
- 7 Ways To Fix Your iPad Not Charging In 2018
- iPhone 7 Screen Replacement | iPhone 7 Repair
- Which Parts of iPhone X and iPhone XS Are Exchangeable?
- iPhone X, XS, XS Max, and XR Battery Comparison
- How To Fix iPhone XS/XS Max, And XR Bluetooth Connection Issue
- Apple Will Fix the iPhone 8/8 Plus/X Auto Brightness Issue in iOS 12
- iPhone got exploded too?! How to protect your phone from battery explosion
- HTC 10 DIY Teardown for screen, charging port, battery replacement
- 6 Quick Tips To Distinguish Between Real And Fake iPhone SE
- Analysis on: Are China made LCDs for iPhone 5S Compatible with iPhone SE?
- How to Replace the Galaxy S7, S7 Edge Battery Replacement
- How to Disassemble the Galaxy S7 LCD Assembly to Replace Screen, Charging Port and Home Button
- How to Repair Samsung Galaxy S7 Edge Cracked Screen
- How to Tear Down/Disassemble the Galaxy S7 for Screen Replacement
- How to Fix Phone Gets Hot and Battery Drains Fast
- Xperia Z5 Premium USB Charging Port Replacement Tutorial
- How to Replace Your Broken Sony Xperia Z5 Premium Screen Step by Step Guide
- 15 Tips to Improve Your Galaxy Note 5’s Battery Life
- How To Replace A Cracked Motorola Droid Turbo 2 Screen
- How To Fix iPhone 6S Auto Shutdown When It Still Has Battery?
- How To Replace A HTC One A9 Cracked Screen
- How to Distinguish the Fake Apple Earpod from the Real One
- How to Replace the LG V10 Screen in 5 Steps
- How To Solder/Replace A Samsung Galaxy or iPhone Charging Port
- The Cost of Repairing a Cracked Galaxy S6, S6 Edge Screen
- How To Fix Cracked Xperia Z5 For Screen Replacement
- What’s Need to Be Prepared As a Startup Cell Phone Repair Shop
- *Update* The Root of Differences among Copy iPhone LCDs: Structure
- Important Info: Pay Attention To Defective Recycled iPhone LCDs
- How to Replace Galaxy Note 5, S6 Edge Plus Battery
- Are The Flood of New High Copy iPhone LCD Screens as Good as The OEM Ones?
- iPhone 6+ and iPhone 6S+ Screen Comparison Report
- How to Recover Photos and Data with Broken Screens
- How To Identify Different LG G4 Model Numbers
- How to Fix Cracked iPhone 6S for Screen Replacement
- Cost of Repairing a Damaged Screen on the LG G4
- How To Fix LG G4 Digitizer Touch Screen Issue
- As a Newbie, What You Should Know About Jailbreaking
- How To Tear Down/Disassemble Galaxy S6 Edge Plus For Screen Replacement
- 90% Of People Don’t Know These Cellphone Battery Information
- Insider Tips to Save Your Water-damaged Device
- How to Set Up ETrade Supply’s Adhesive Dispenser Robot
- Top 10 iPhone 6 Problems and Solutions
- How To Fix Vertical Lines On An iPhone Screen After Replacement
- How to Replace Sony Xperia Z3+ Screen/Screen Replacement Guide
- How To Disassemble/Tear Down Sony Xperia Z3+
- How to Assemble Small Parts on iPhone 6 LCD Screen Assembly
- Reasons Behind & Solutions for iPhone 6 Frame and LCD Separation Issues
- How to Replace The LG G4 Charging Port
- How to Replace the Cracking LG G4 Screen in 10 Minutes
- How To Replace An Oneplus One Cracked Screen
- iPhone 5 LCD Screen Assembly Small Parts List
- How to Replace the HTC One M9 Charging Port
- How to Replace HTC M9 LCD Screen Assembly
- Top 5 Most Common iPhone 6 Issues You May Come Across
- How To Tear Down The Samsung Galaxy S6 In 10 Steps
- The Cost Of Repairing A Cracked Nexus 6 Screen
- How To Repair A Nexus 6 Cracked Screen
- How To Disassemble Nexus 6 In 10 Steps
- The Cost Of Repairing A Broken iPhone 6 Screen
- Five Minutes Work to Replace Your iPhone 6 Plus Broken Screen
- How to Repair a Cracked Samsung Galaxy S5 Screen
 How to teardown Moto G4 Plus for screen, camera and battery replacement repair
 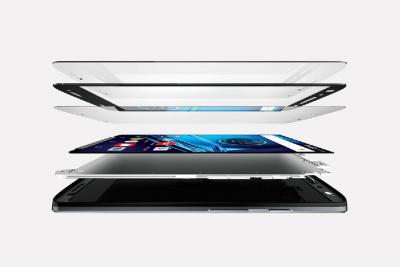 Why the Moto Droid Turbo 2 Has the Best Shatter Proof Screen
 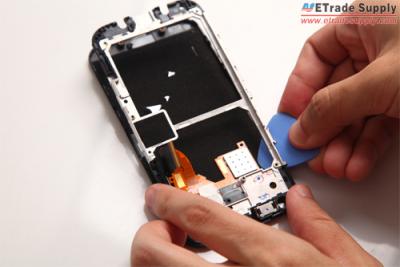 How to Repair a Cracked Motorola Moto X Screen
  How to Fix Motorola Moto G Problems
  IOS 17.4 official version pushed to block battery vulnerability
  Is the Chinese-made rear case for the iPhone 15 series going on the market?
  New products coming:USB to MFI Lightning Cable
  Big BUG of iPhone 15
  How Chinese celebrate Christmas?
  Disadvantages of iPhone 15 Standard Edition
  Rumors about the Samsung Galaxy S24 Ultra
  TWS Wireless Bluetooth Headset: Connect Your Wireless World
  iPhone 15 Black Screen Self-Rescue Guide
  Comparison of LCD screens of different mobile phones
  Successfully submitted!
Hi,
Do you have that two back cover glass parts? I need to replace them.
Hi Oliwer,
Here is the Moto Z battery door you can choose,may it have what you need.
Happy every day..
if you may noticed.
moto z droid, back camera replacement only on this phone, any idea where to by a replacement?
Hello,
This is a great tutorial! I was curious if you have found a vendor to purchase replacement rear facing cameras and lenses? I have cracked my camera and need to replace both. I cannot seem to find one for the droid force xt1650?
I can find cameras for the ultra and maxx xt1080, but i also can’t see if they are compatible or not 🙁 any help would be great.
Thanks,
Hi there, I’m doing a project based on Moto mod MDK stuff, related to Display Personality Card. Can you please help me ? Thank you.. 🙂
Hi, How can i help you?
Hiya, will you guys bee carrying the rear camera lens glass cover? Mine has some scratches so I’d like to replace it? Many thanks!
Hi, sorry that we don’t have the moto z replacement in stock at the moment, we’ll keep you informed once it’s available asap.