


How to Replace The LG G4 Charging Port
BY Davi | 六月 5th, 2015 | 1 | 2
LG's G4s charging port is soldered onto the motherboard, and if your G4 device won't charge we highly recommend you take it to a repair shop for help. Special tools and skills are needed to replace a charging port. But if you are confident you can do this job and want to fix the issue by yourself, this guide will help you out.
Step 1: Power off the device and remove the LG G4's battery door you shouldn't need the help of a case opening tool or a pry tool.

Step 2: Remove the LG G4's removable battery.

Step 3: Undo the 11 screws to remove the LG G4's rear housing from the screen assembly.


Tip: the screws are all the same so no worries about mixing them up.
Step 4: Pry up the G4's screen connector as well as the front and rear-facing camera flex connectors to release the logic board.


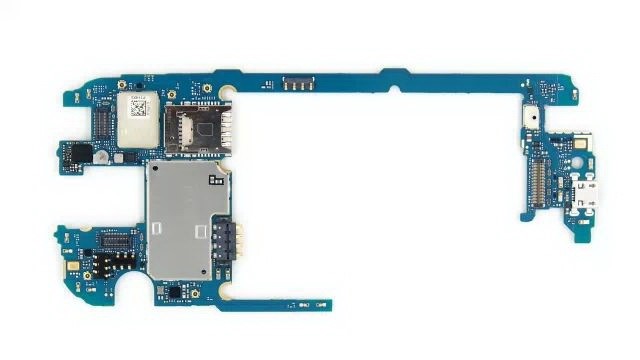
Step 5: Since the charging port is soldered onto the motherboard, what we will need to do is to use a heat gun and soldering iron to remove the defective part so that we can replace it with a new one. (Notice: the charging port is soldered on the motherboard with 4 contacts, and be sure to be careful with the IC next to it. It can be easily damaged.)
We have a video tutorial of replacing Galaxy or iPhone fixed charging port. The process is almost the same, so you check it for inference:
Step 6: After replacing the charging port, put the mainboard back on the front housing assembly, reconnecting the LCD screen assembly flex cable.

Step 7: Insert the rear-facing camera into the slot, reconnecting the flex cables on the motherboard.

Step 8: Reassemble the rear housing and fasten the 11 screws into it.

**Step 9: **Reinstall the battery door, and test your LG G4 to see if it will charge now.

One more tip, handling a soldering iron is not easy, make sure to protect your eyes and the IC on the motherboard. We highly recommend wearing goggles when using the soldering gun.
|
|

|
|
|
|
|
|---|


 IOS 17.4 official version pushed to block battery vulnerability
  Is the Chinese-made rear case for the iPhone 15 series going on the market?
  New products coming:USB to MFI Lightning Cable
  Big BUG of iPhone 15
  Successfully submitted!
Can you provide the the exact usb receptacle (maybe a link) needed for the replacement ?