How To Solder/Replace A Samsung Galaxy or iPhone Charging Port
BY May | 一月 5th, 2016 | 0 | 4
Charging port is one of the most vulnerable parts in a smartphone. The charging port is easily to loosen after being plugged in and out or getting stuck by dusts or rust. A broken charging port will certainly influence the charging speed as well as the charging result. To replace a charging port only costs less, but requires more complicated skills than replace a charging port with PCB board. Here we walk you through how to replace a Samsung Galaxy phone or an iPhone charging port.
Tools Needed:
- Heat Gun
- Soldering Tin
- Soldering Paste
- Toothpicks
- Tweezers
Samsung Galaxy S2/3/4/5/6, Note 2/3/4/5, Note Edge/S6 Edge/S6 Edge Plus USB Charging Port Soldering Tutorial Guide
(Take Galaxy S3 as an example.)
Step 1: Get some soldering paste with the help of a toothpick, gently apply it around the welding areas of a charging port.

Step 2: Heat uniformly on the welding areas.

Generally, the charger port is built into a PCB board (aka a daughter board), which should be heated at about 280 ~ 300 centi-degree in the first minute, 320 centi-degree will be fine afterwards.

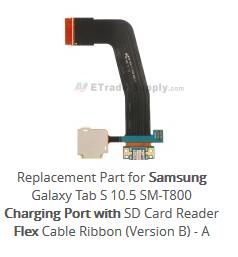
As for the charging port being built into a flex ribbon (i.e. Galaxy Tab S 10.5 charging port with flex), the heating temperature should be turned down to 280 centi-degree from beginning to end so as to protect the fragile flex cable ribbon from burnt.
Step 3: Gently remove the charger port with the help of a tweezers.

Step 4: Apply some soldering tin around the welding areas of the daughter board evenly, then apply the soldering paste in the same path.

Step 5: Gently put the replacement USB charger port in the soldering areas, slightly adjust the charging port to the right place, fix it with a tweezers while heat it at the same time.

iPhone 4/4S/5/5C/5S/6/6 Plus/6S/6S Plus USB Charging Port Soldering Tutorial Guide
(Take iPhone 5 as an example.)
Step 1: Heat up around the charging port welding areas uniformly.

Step 2: Gently remove the charging port by a tweezers.

Step 3: Apply some soldering tin around the welding areas of the daughter board evenly, then apply the soldering paste in the same path.

Step 4: Gently put the replacement USB charger port in the soldering areas, slightly adjust the charging port to the right place, fix it with a tweezers while heat it at the same time.

Please check below tutorial video for more details:
You may also like:
- How to Change Samsung Galaxy S6 Charging Port
- How to replace iPhone 8 screen, battery and charging port
- How To Replace Samsung Galaxy S8/S8+ LCD Screen
|
|

|

|

|

|

|
|---|


