


How to Set Up ETrade Supply’s Adhesive Dispenser Robot
BY Davi | 八月 14th, 2015 | 1 | 1
Machines can help us save a lot more time and energy by doing tasks for us. In our repair community, we also want your to help you guys to be more efficient and save time on troublesome things like dispensing adhesive on frame or housing. We showed you guys our analysis of iPhone 6 front assembly with frame separation issue before. One of the reasons that issue existed is the adhesive, which was not applied to the frame firmly. Furthermore, we made a video to tell you how we handle our adhesive dispenser robot and how it works. Now, check out how to set up the robot and handle its basic operation.
Follow the steps below to set up the adhesive dispenser robot:
Get the equipment ready:
1. The first thing you want to do is plug the power cord into the back of the dispenser, but don't plug it into the wall.
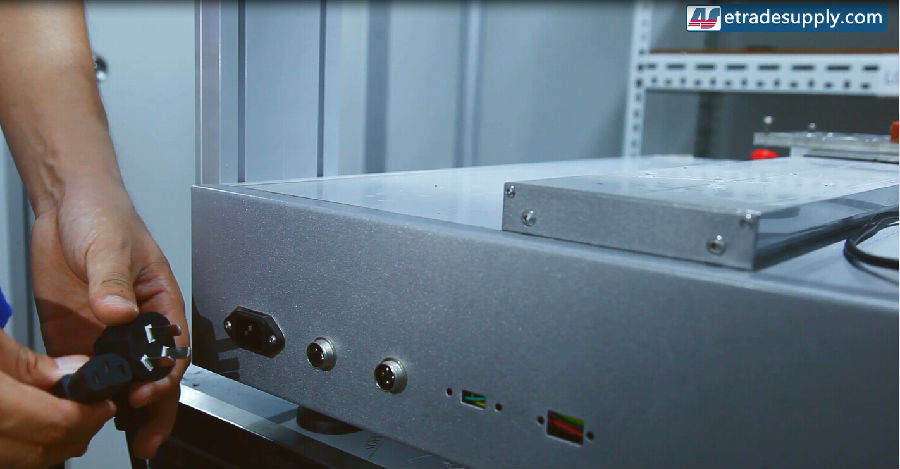
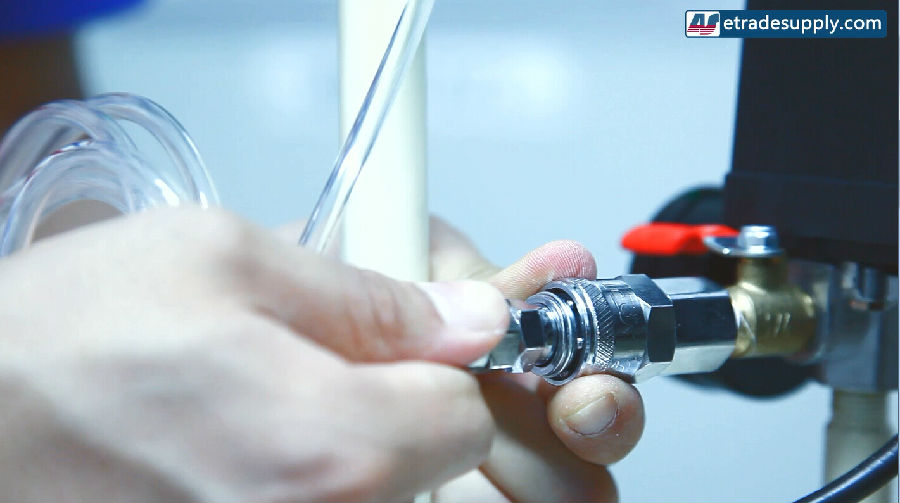
2. Next is the Air pressure controller, you want to take the cable and plug that into the back of the dispenser and screw it tight.
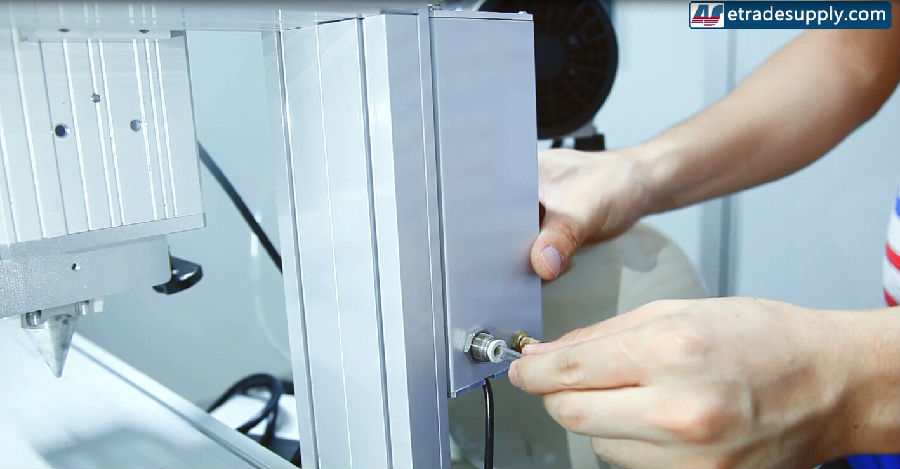
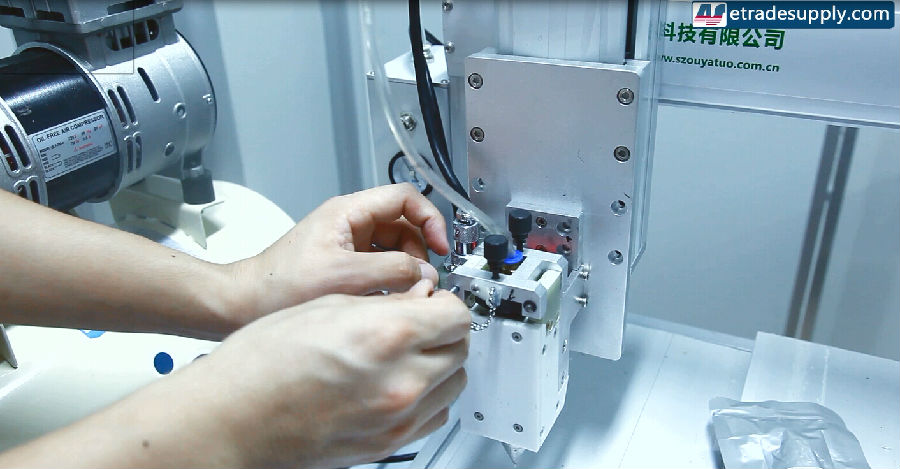
3. Now plug in the dispenser controller. Make sure the shorter end of the plug is facing up
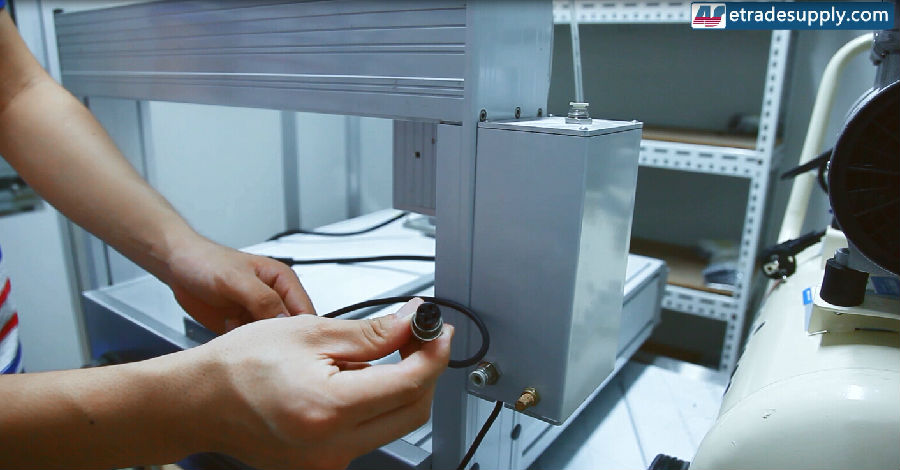
4. Next, plug in the temperature controller into the heater and screw it in.
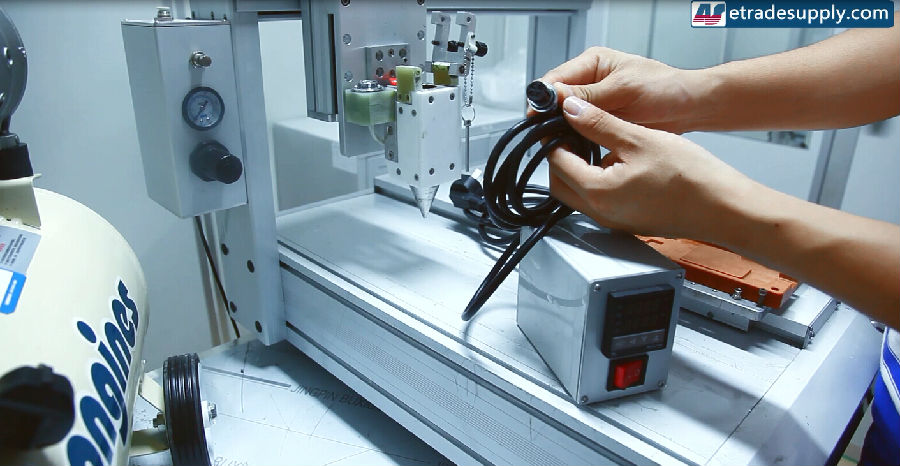
5. Then you want to plug in the air flow tubing into the top of the dispenser controller.
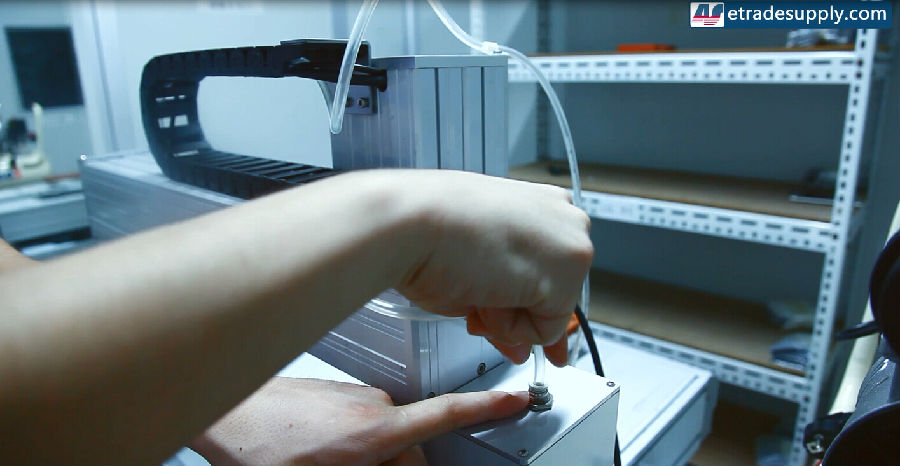
*Notice: if you want to remove the tubing press down on the plastic ring and pull the tub out.
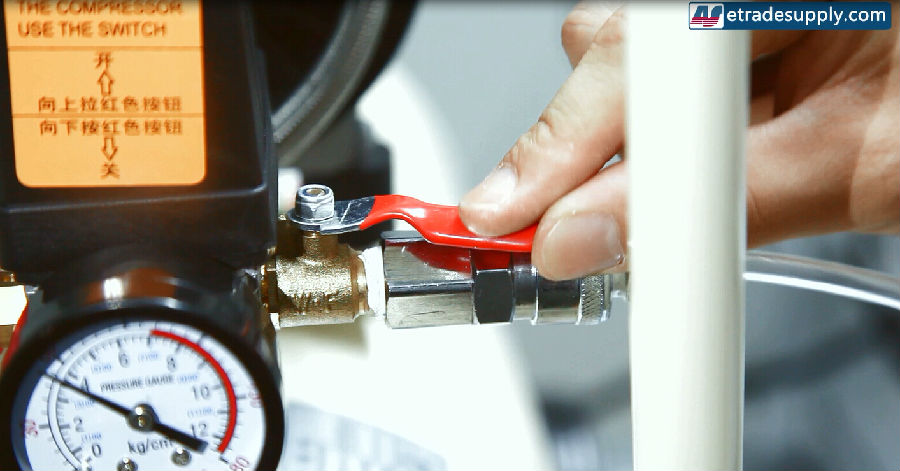
6. Pull back the ring on the compressor's outlet and plug the tubing into it.
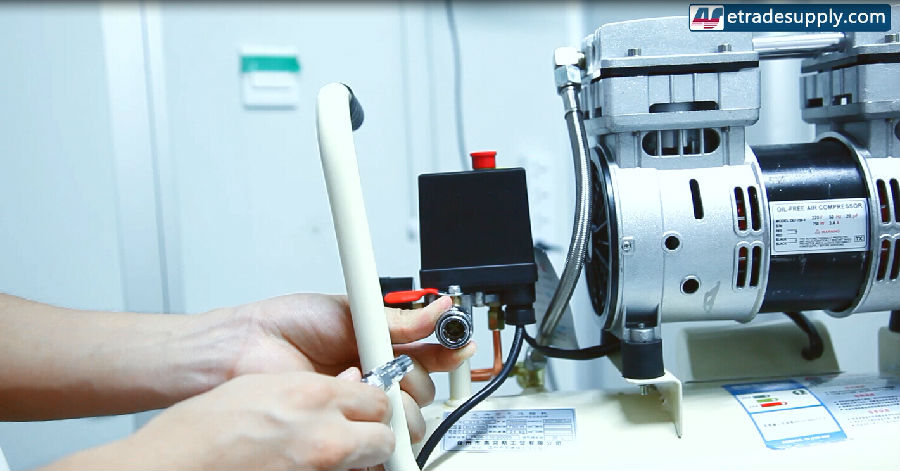
Notice: Don't forget to open the airflow before you are ready to turn everything on.
7. You'll then want to plug the other end of the tubing into the dispenser controller.
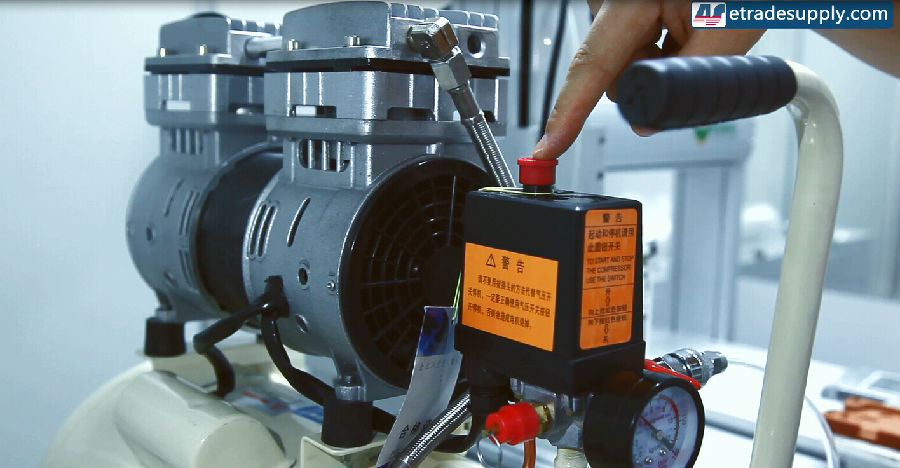
*Notice: when you're ready you can turn the compressor on with this switch on top. Pull up to turn it on and push it down to turn it off.
*Notice: if you need to you can pull this ring to release pressure. Air will come out from hole around the ring.
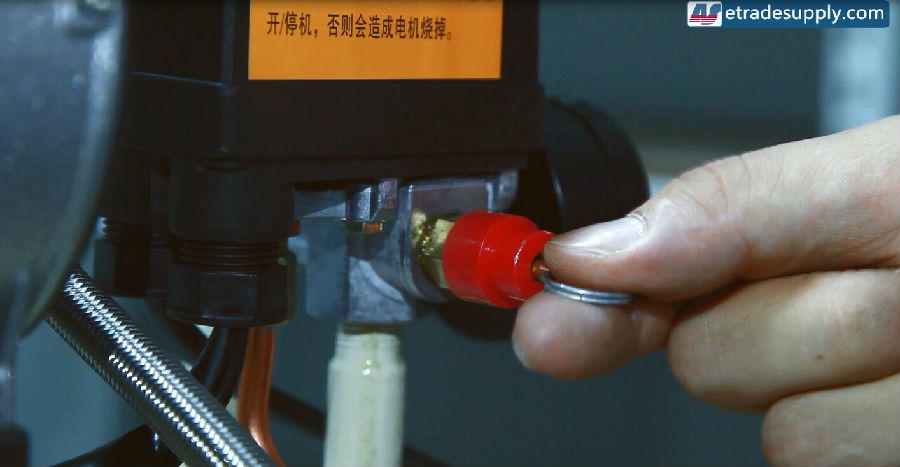
* Notice: you need to completely rotate the lever to open the air flow.
How to get the adhesive ready:
1. Obviously, the first step is to take it out of its package, then you want to remove the tip by twisting it off.
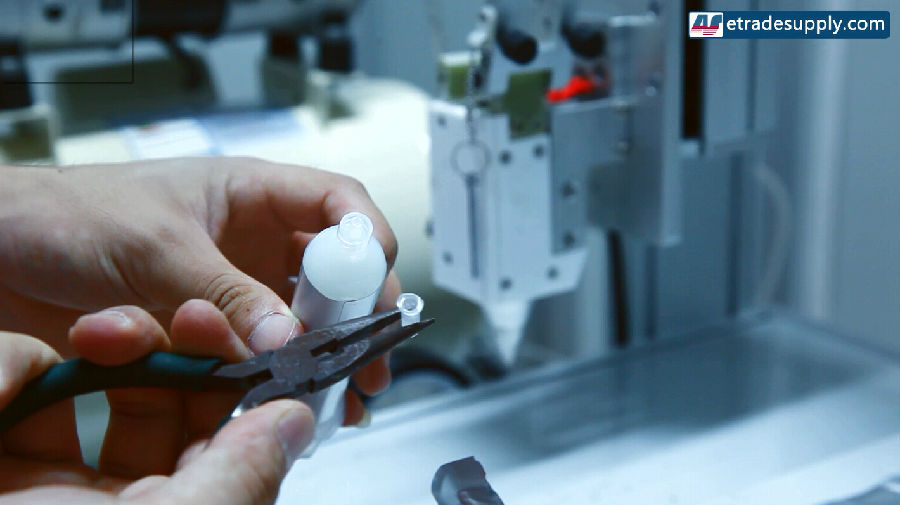
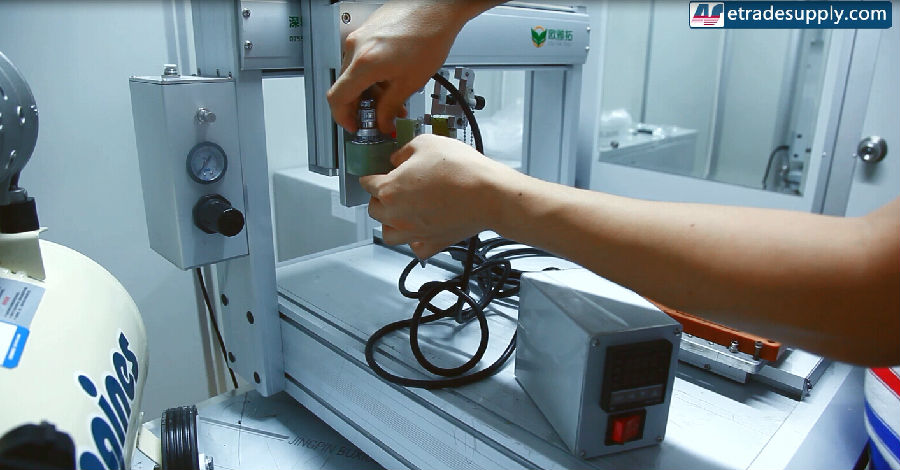
2. Next, you want to attach the needle head to the adhesive and make sure it is screwed on tight. You don’t want it flying off on you
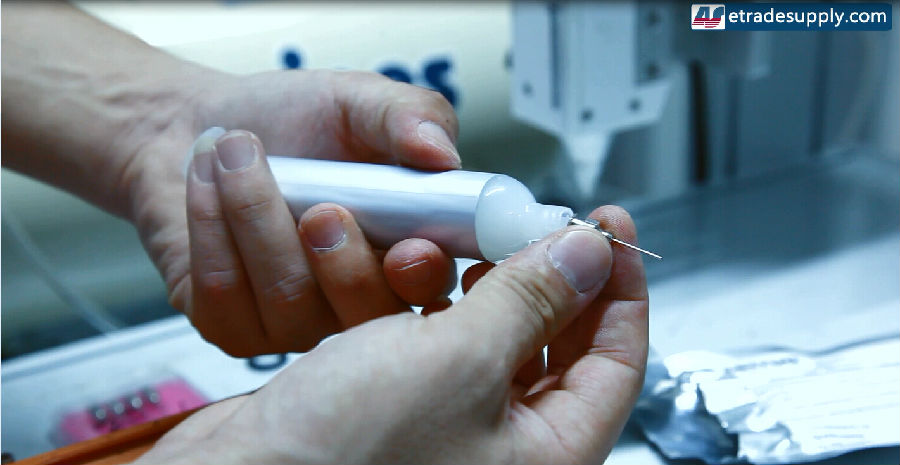
3. You'll need to remove the cap from the back and install an O ring on the attachment for the dispenser controller. Make sure it is secure in the gap.

5. Plug at the end of the adhesive and twist the attachment so the adhesive is locked in

7. You then want to remove the sticker on the outside of the container and slide it into the heater pushing it down all the way.

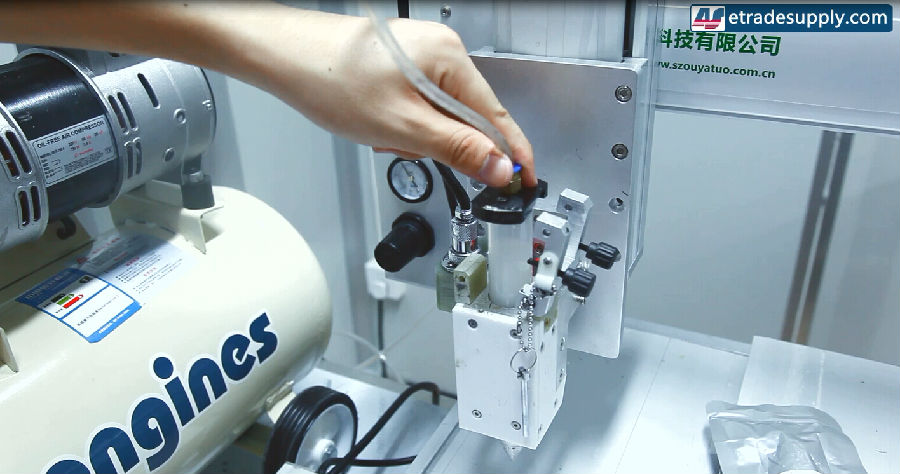
8. Pull down the locking door to lock the adhesive in place, and the place the locking bar into the hole.
9. You'll then need to adjust the screws on top to make sure everything is tight and secure.

10. Next, plug everything into the wall for power.

11. Turn on the heat controller. You want the heat to be set to about 120. You can do so by pressing the arrow keys and then pressing set once you have the correct temperature.

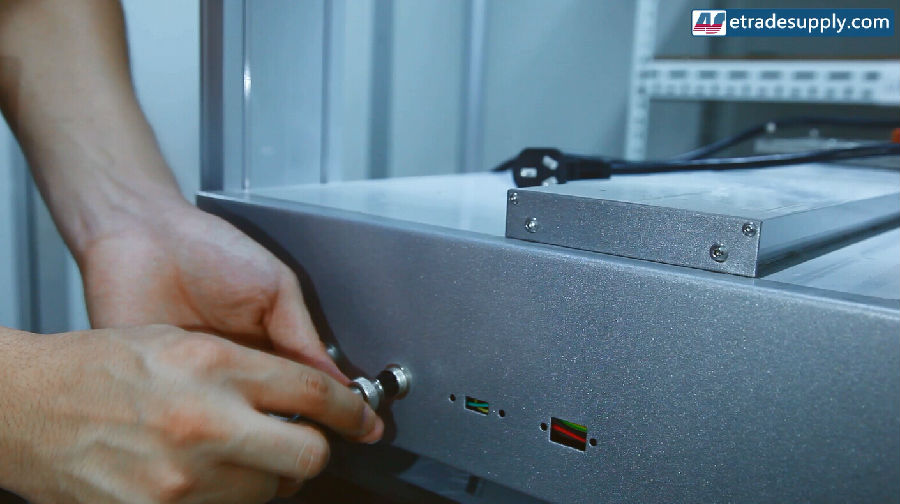
13. Now turn on the dispenser, and then you'll need to twist the red nob to have the machine reset itself to ready

Basic Operation:
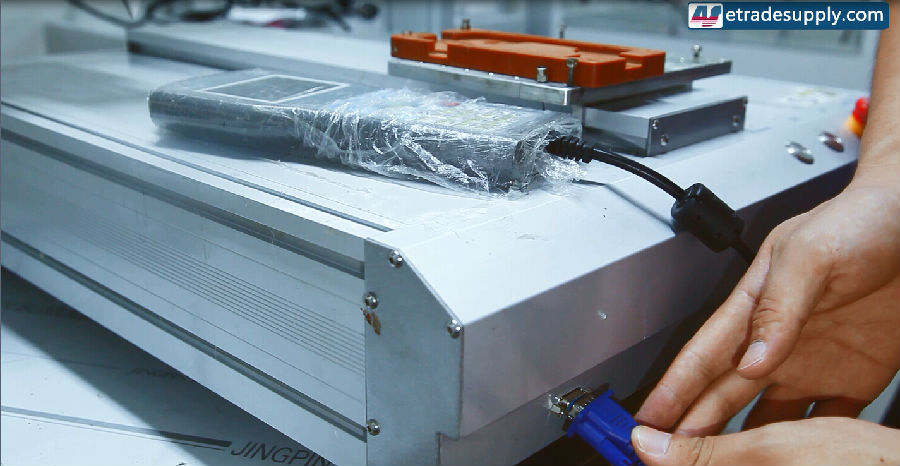
1. You'll want to set the mold in place.

2. Then you want to program in where you want the dispenser to apply the adhesive

3. Just set the part into the mold, press the start button, and the machine will do the rest.

We do recommend that you double check to make sure the adhesive was applied properly afterward. You can also check our video for help:
What is what for your reference:


|
|

|
|
|
|
|
|---|


 IOS 17.4 official version pushed to block battery vulnerability
  Is the Chinese-made rear case for the iPhone 15 series going on the market?
  New products coming:USB to MFI Lightning Cable
  Big BUG of iPhone 15
  Successfully submitted!
Isn’t new frame adhesive and lcd adhesive sufficient to hold a S4 combo? I thought an adhesive dispenser is only needed for devices that are only held in by the surrounding frame and have no assistance from a mid frame adhesive or lcd back adhesive?