Full Process Presentation on HUAWEI P40 Pro Teardown
BY kaye | 二月 23rd, 2021 | 0 | 0
Huawei P40 Pro is a smart phone that was launched in April 2020. Today I bring you an article on how to disassemble Huawei P40 Pro to understand the internal structure and parts.Maybe the whole process will be a bit complicated,if you work in a repair shop,we hope this article can be helpful to you.
Used Tools: SIM card eject tool, Philips inflatable park Screwdriver, tweezers, Spudger, Ultra-thin plastic sheet, suction cup, plastic card, hot air gun
Step 1: Remove the rear shell
1.1 Remove the SIM card tray. Because Huawei P40 Pro has an IP68 waterproof and dustproof rubber ring, we found that there is a waterproof and dustproof rubber ring inside the SIM card.
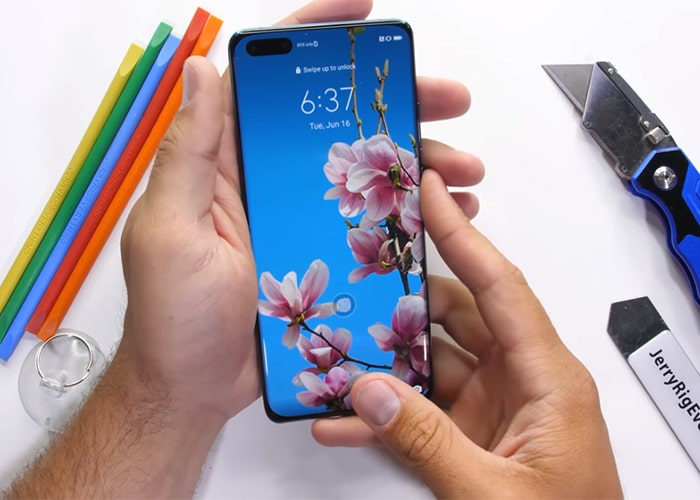
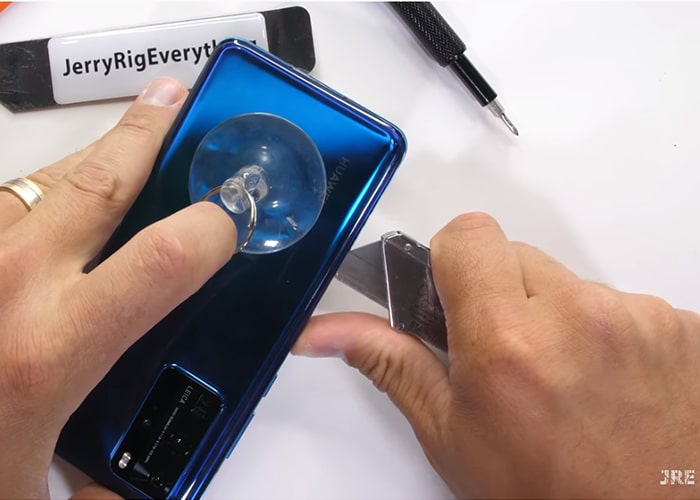
1.2 Remove the rear panel: heat it to 90 degrees with a heat gun for 5 minutes, insert the disassembly sheet into the gap, and then suck the back cover with a suction cup,use a wire stripper to slowly cut along the gap of the back cover. After opening it cover. It should be noted that since the machine supports IP68 waterproof and dustproof, lots of glue is used inside. You must be careful not to cut your fingers.
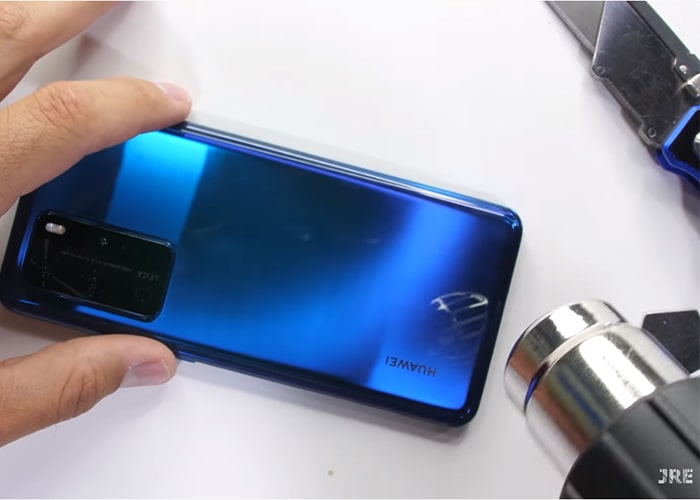
1.3 Remove the back cover of the phone
Step 2: Disassemble the motherboard
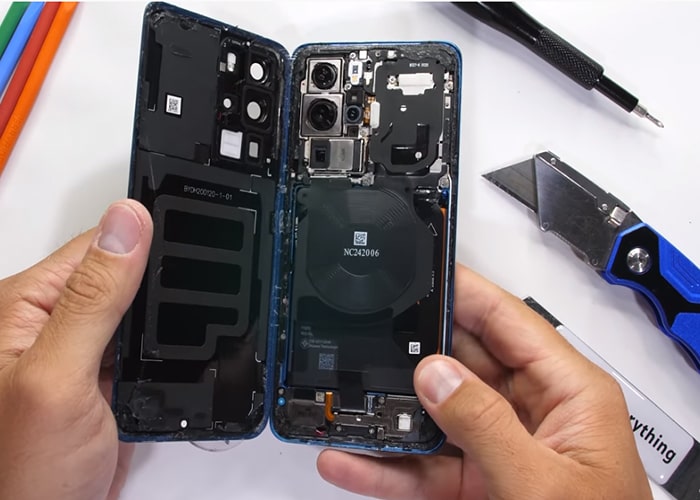
2.1 Before removing the motherboard and camera module, you need to remove 11 fixing screws
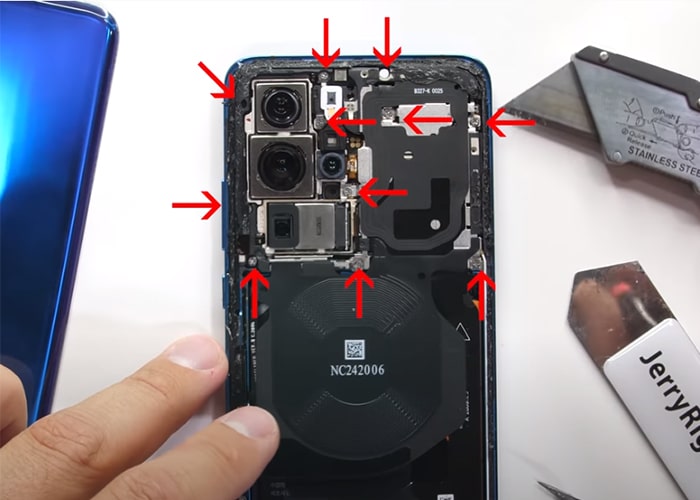
2.2 Remove the wireless charging module and cooling film
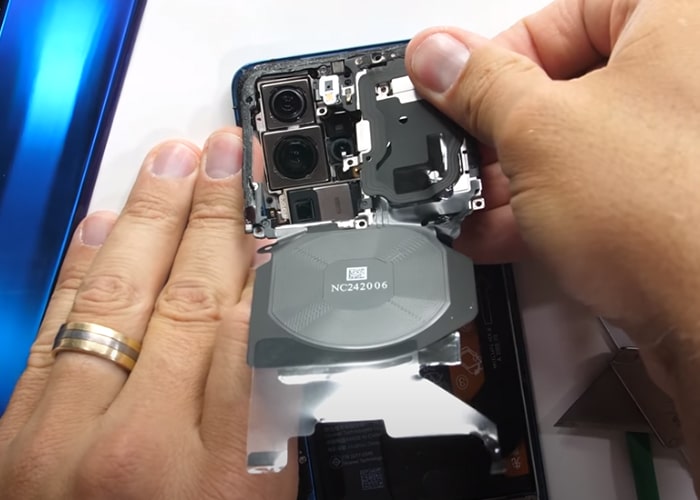
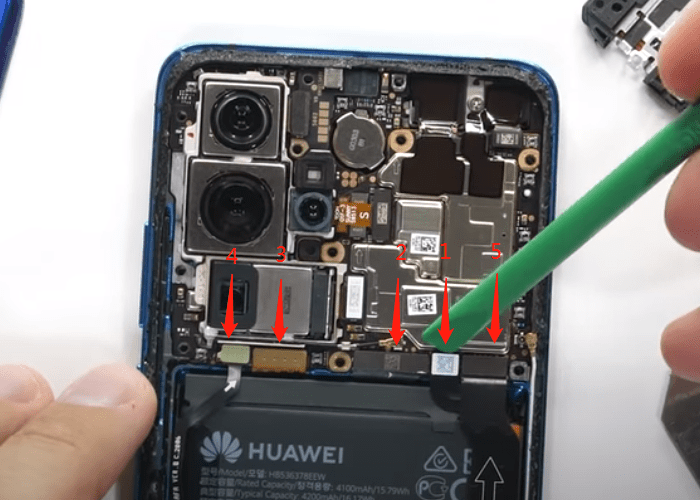
2.3 Pull off the battery BTB, Pull off the TBT of Type-C port, main FPC, screen, antenna plate, periscope telephoto camera, TOF, main camera, and ultra-wide-angle camera in turn.
2.4 Remove these 2 fixing screws
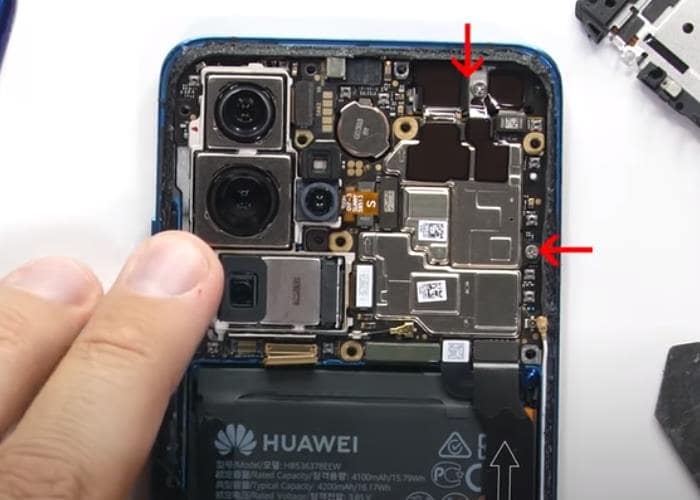
2.5 Tear off the thermal conductive graphite and pick out 3 BTB
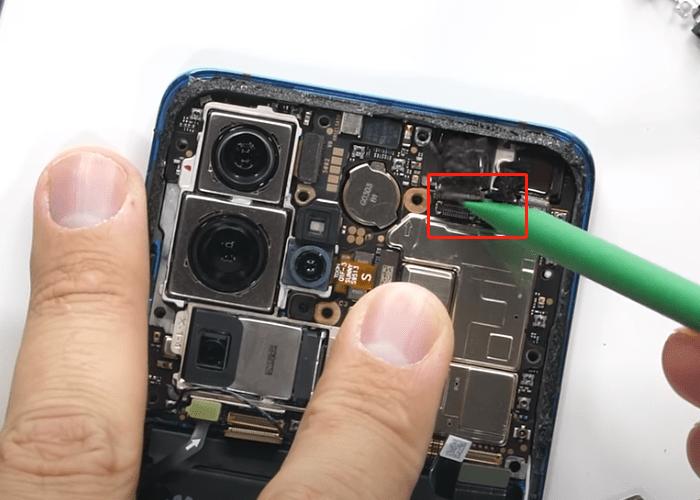
2.6 Remove the entire motherboard
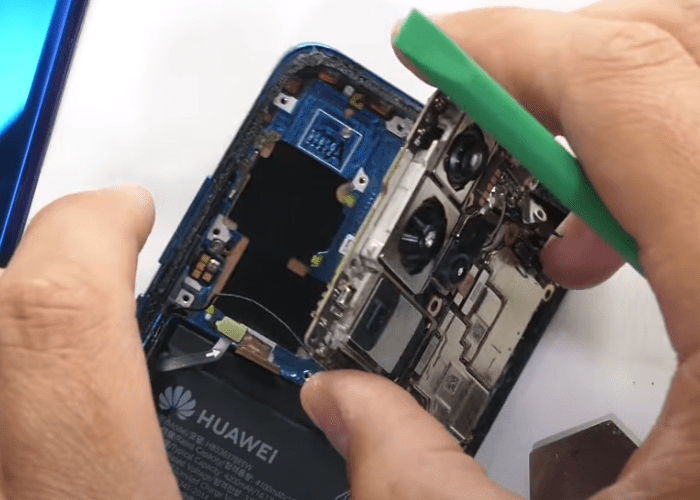
2.7 Open the periscope camera BTB and take out the camera
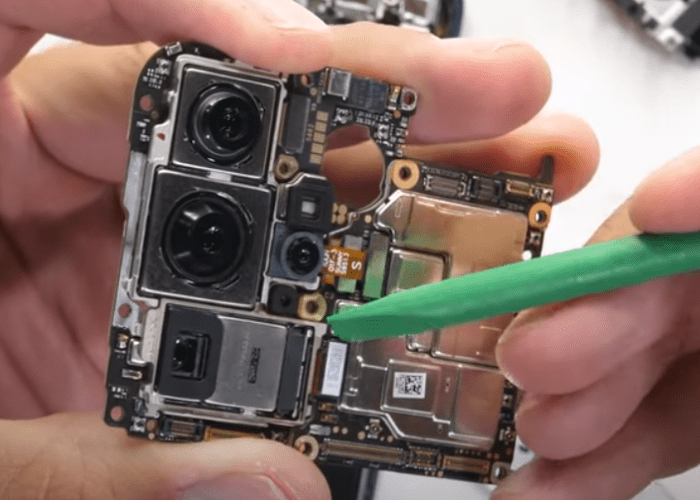
2.8Pick up TOF, main camera and ultra-wide-angle camera BTB in turn
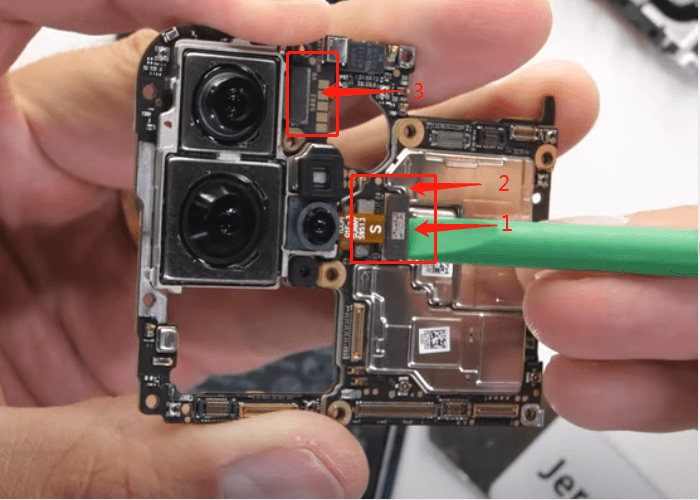
2.9 Take out the main camera
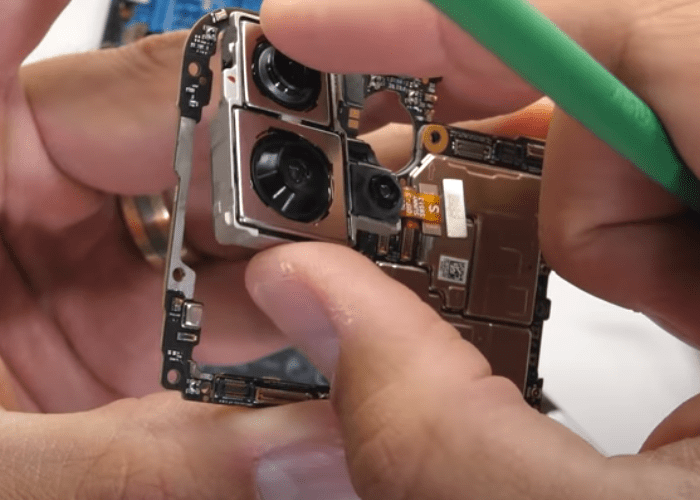
Step 3:Remove the battery
3.1Remove the battery produced by HUIZHOU Desay, the battery capacity is 4200mAh. Using ATL batteries can effectively guarantee battery life.
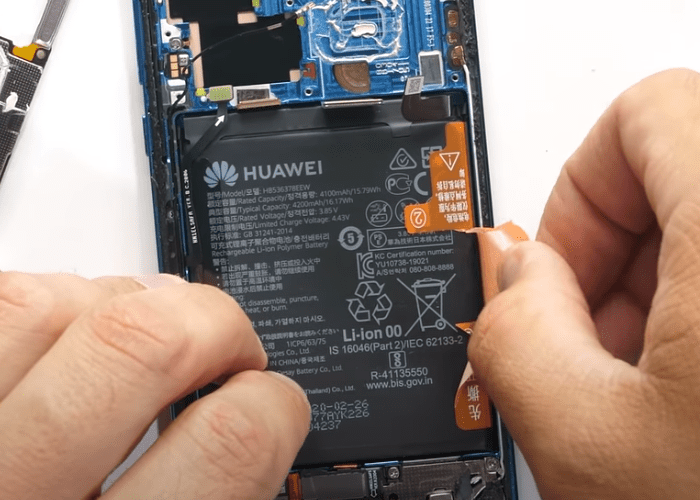
3.2 Maybe you can use the disassembly piece
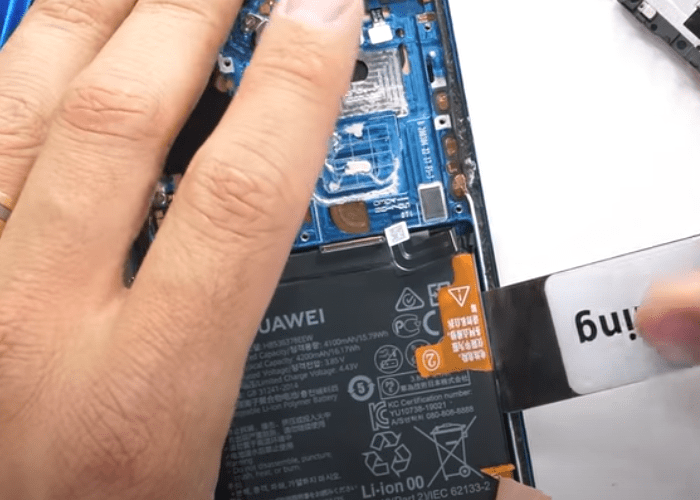
Step 4: Remove the sub-board part
4.1 Firstly, we should remove these 7 screws
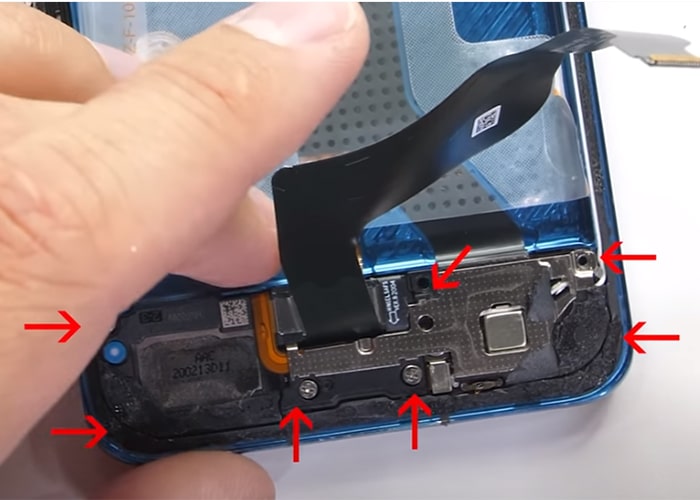
4.2 Open the speaker, fingerprint under the screen and the BTB and coaxial cable interface of the main FPC, and remove the screws
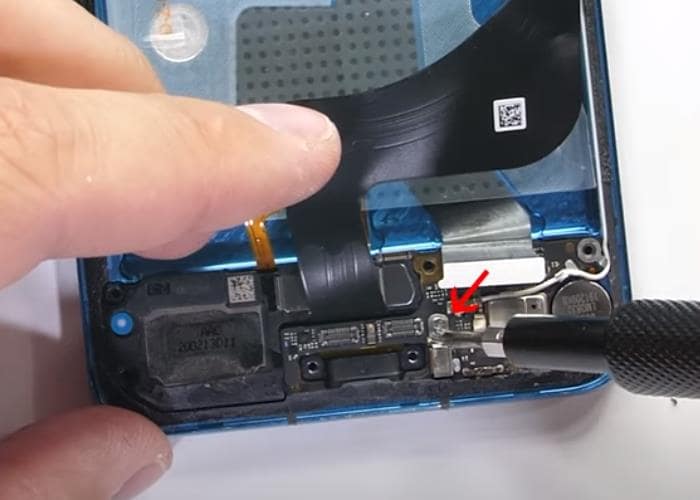
4.3 Remove the sub-board
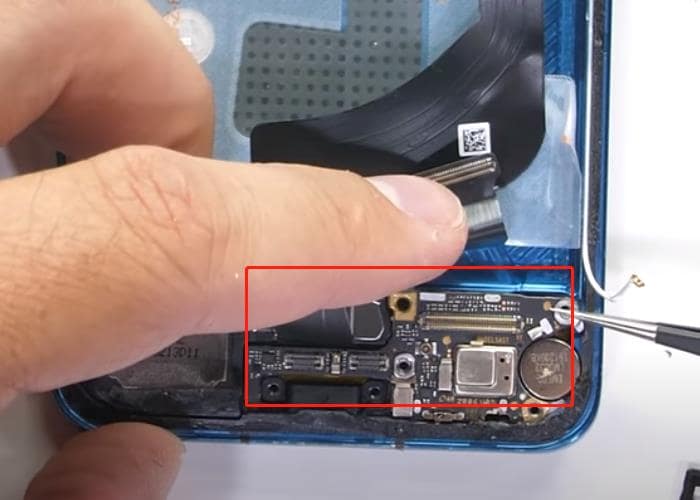
4.4 Take out the loudspeaker
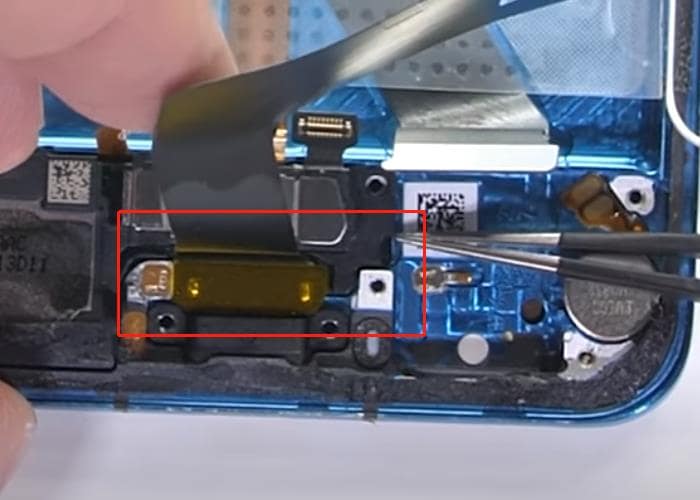
4.5 Take out the Type-C charging port
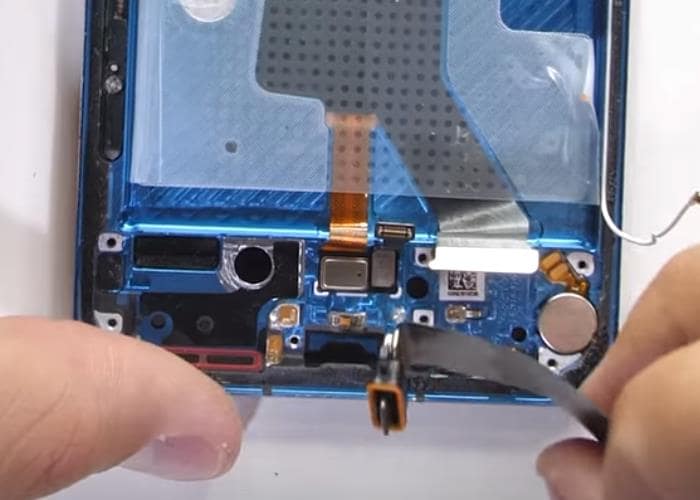
Step 5: Disassemble the screen
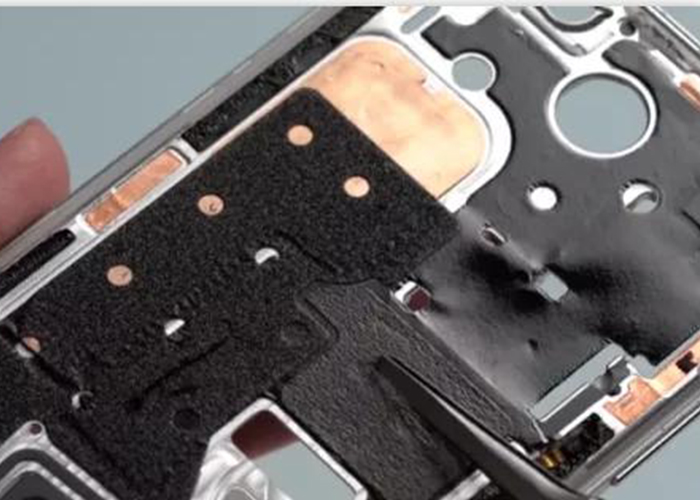
drop the glue on the edge of the screen, heat it and then drip it from the gap in the middle frame, and then use the suction cup and disassembly sheet to open the panel. It can be seen that there is a buffer foam in the middle of the mobile phone frame at the bottom of the screen, and there is a VC soaking plate under the buffer foam, and the black part on the upper right is the heat dissipation film.
Notice: Huawei P40 Pro has a complicated internal structure, which contains too many small parts and components inside. We need to be careful with the classification of the parts and screws. For any questions about the Huawei P40 Pro teardown procedure above, please leave your comments. Furthermore, you may check our Huawei P Smart LCD screen and digitizer and small parts in our shop if you are looking for iPad repair tools and components. Contact us if you have interests.
RECOMMENDED PARTS
POPULAR ARTICLE
- How to Fix the iPhone Face ID Issue by Replacing the Front Camera Blue Lenses
- Big News About iPhone 13 Features – How Much do You Expect?
- Explanations on iPhone X Series Aftermarket Screen Touch Issues
- Huawei P30 Teardown and Reassembly for Display Screen Replacement
- iPhone X Water Damage Repair Guide (Still Work in 2019)
- How Much Does It Cost To Replace An iPhone XS Display?
- iPhone X Explosion: 7 Small But Important Things To Note
- 7 Ways To Fix Your iPad Not Charging In 2018
- iPhone 7 Screen Replacement | iPhone 7 Repair
- Which Parts of iPhone X and iPhone XS Are Exchangeable?
- iPhone X, XS, XS Max, and XR Battery Comparison
- How To Fix iPhone XS/XS Max, And XR Bluetooth Connection Issue
- Apple Will Fix the iPhone 8/8 Plus/X Auto Brightness Issue in iOS 12
- iPhone got exploded too?! How to protect your phone from battery explosion
- HTC 10 DIY Teardown for screen, charging port, battery replacement
- 6 Quick Tips To Distinguish Between Real And Fake iPhone SE
- Analysis on: Are China made LCDs for iPhone 5S Compatible with iPhone SE?
- How to Replace the Galaxy S7, S7 Edge Battery Replacement
- How to Disassemble the Galaxy S7 LCD Assembly to Replace Screen, Charging Port and Home Button
- How to Repair Samsung Galaxy S7 Edge Cracked Screen
- How to Tear Down/Disassemble the Galaxy S7 for Screen Replacement
- How to Fix Phone Gets Hot and Battery Drains Fast
- Xperia Z5 Premium USB Charging Port Replacement Tutorial
- How to Replace Your Broken Sony Xperia Z5 Premium Screen Step by Step Guide
- 15 Tips to Improve Your Galaxy Note 5’s Battery Life
- How To Replace A Cracked Motorola Droid Turbo 2 Screen
- How To Fix iPhone 6S Auto Shutdown When It Still Has Battery?
- How To Replace A HTC One A9 Cracked Screen
- How to Distinguish the Fake Apple Earpod from the Real One
- How to Replace the LG V10 Screen in 5 Steps
- How To Solder/Replace A Samsung Galaxy or iPhone Charging Port
- The Cost of Repairing a Cracked Galaxy S6, S6 Edge Screen
- How To Fix Cracked Xperia Z5 For Screen Replacement
- What’s Need to Be Prepared As a Startup Cell Phone Repair Shop
- *Update* The Root of Differences among Copy iPhone LCDs: Structure
- Important Info: Pay Attention To Defective Recycled iPhone LCDs
- How to Replace Galaxy Note 5, S6 Edge Plus Battery
- Are The Flood of New High Copy iPhone LCD Screens as Good as The OEM Ones?
- iPhone 6+ and iPhone 6S+ Screen Comparison Report
- How to Recover Photos and Data with Broken Screens
- How To Identify Different LG G4 Model Numbers
- How to Fix Cracked iPhone 6S for Screen Replacement
- Cost of Repairing a Damaged Screen on the LG G4
- How To Fix LG G4 Digitizer Touch Screen Issue
- As a Newbie, What You Should Know About Jailbreaking
- How To Tear Down/Disassemble Galaxy S6 Edge Plus For Screen Replacement
- 90% Of People Don’t Know These Cellphone Battery Information
- Insider Tips to Save Your Water-damaged Device
- How to Set Up ETrade Supply’s Adhesive Dispenser Robot
- Top 10 iPhone 6 Problems and Solutions
- How To Fix Vertical Lines On An iPhone Screen After Replacement
- How to Replace Sony Xperia Z3+ Screen/Screen Replacement Guide
- How To Disassemble/Tear Down Sony Xperia Z3+
- How to Assemble Small Parts on iPhone 6 LCD Screen Assembly
- Reasons Behind & Solutions for iPhone 6 Frame and LCD Separation Issues
- How to Replace The LG G4 Charging Port
- How to Replace the Cracking LG G4 Screen in 10 Minutes
- How To Replace An Oneplus One Cracked Screen
- iPhone 5 LCD Screen Assembly Small Parts List
- How to Replace the HTC One M9 Charging Port
- How to Replace HTC M9 LCD Screen Assembly
- Top 5 Most Common iPhone 6 Issues You May Come Across
- How To Tear Down The Samsung Galaxy S6 In 10 Steps
- The Cost Of Repairing A Cracked Nexus 6 Screen
- How To Repair A Nexus 6 Cracked Screen
- How To Disassemble Nexus 6 In 10 Steps
- The Cost Of Repairing A Broken iPhone 6 Screen
- Five Minutes Work to Replace Your iPhone 6 Plus Broken Screen
- How to Repair a Cracked Samsung Galaxy S5 Screen


 How to Fix the iPhone Face ID Issue by Replacing the Front Camera Blue Lenses
  Big News About iPhone 13 Features – How Much do You Expect?
  Explanations on iPhone X Series Aftermarket Screen Touch Issues
  Huawei P30 Teardown and Reassembly for Display Screen Replacement
  IOS 17.4 official version pushed to block battery vulnerability
  Is the Chinese-made rear case for the iPhone 15 series going on the market?
  New products coming:USB to MFI Lightning Cable
  Big BUG of iPhone 15
  How Chinese celebrate Christmas?
  Disadvantages of iPhone 15 Standard Edition
  Rumors about the Samsung Galaxy S24 Ultra
  TWS Wireless Bluetooth Headset: Connect Your Wireless World
  iPhone 15 Black Screen Self-Rescue Guide
  Comparison of LCD screens of different mobile phones
  Successfully submitted!