Huawei P30 Teardown and Reassembly for Display Screen Replacement
BY kaye | August 27th, 2019 | 0 | 1
Huawei P30 is a great smartphone model in 2019. Since we have made the point about the highlights of Huawei P30 on the previous blog article of 6 Highlights of Buying Huawei P30, you must eager to know the internal parts and structure of this smartphone model. Here Etrade Supply makes a demonstration about Huawei P30 teardown and reassembly for display screen replacement. Maybe the whole process would be a little complicated, we hope you could learn something from this article if you work in a repair shop.
1. Huawei P30 Teardown
Used Tools: SIM card eject tool, Philips inflatable park Screwdriver, tweezers, Spudger, Ultra-thin plastic sheet, suction cup, plastic card, hot air gun
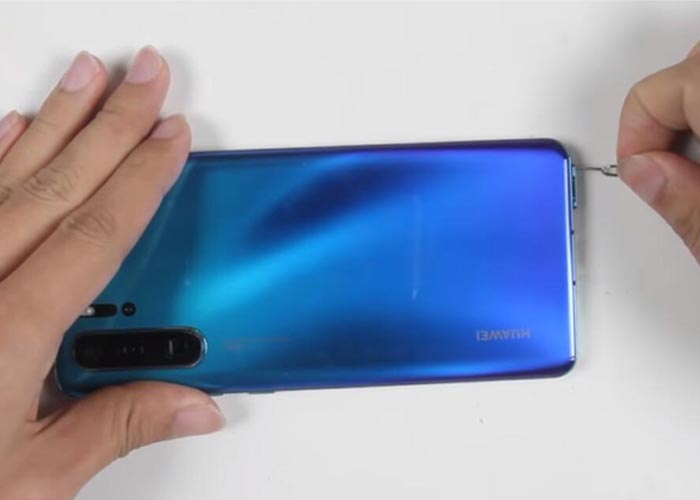
1.1 Power off the phone, use the SIM card eject tool to stick the SIM card tray hole and take out the SIM card tray
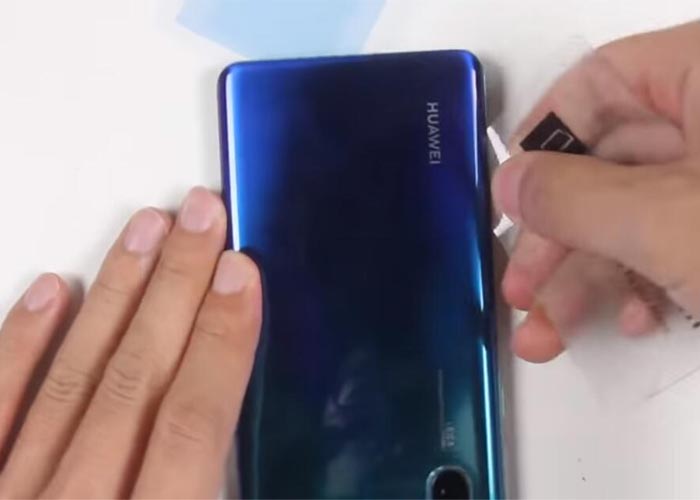
1.2 120℃ Hot air gun blow, use ultra-thin sheets to separate and pray up the back housing
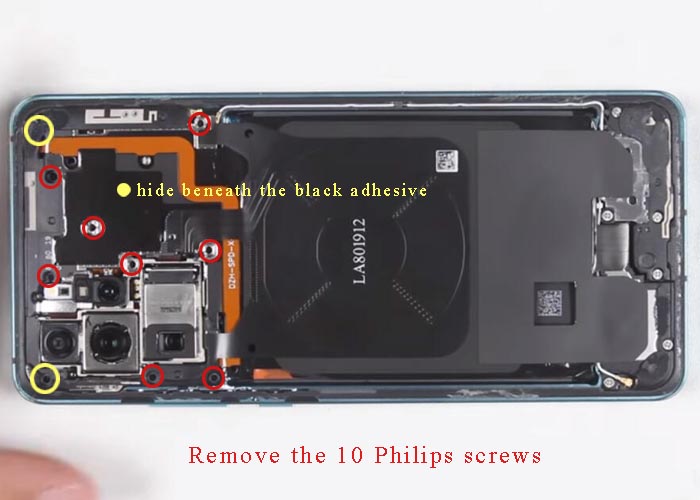
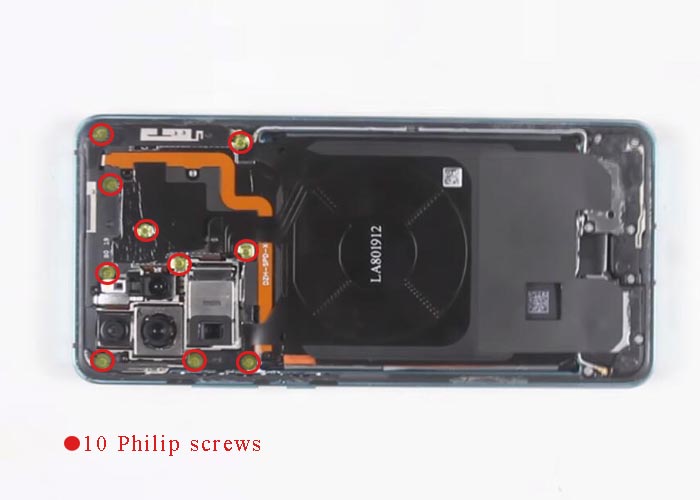
1.3 Undo the 10 Philips screws, and two of them are underneath of black adhesive. Use tweezers to remove the black adhesive
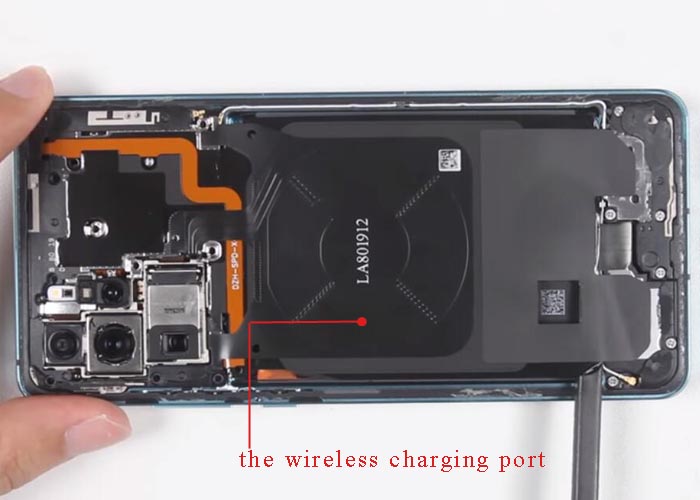
1.4 Use a spudger to pray and take out the wireless charging port
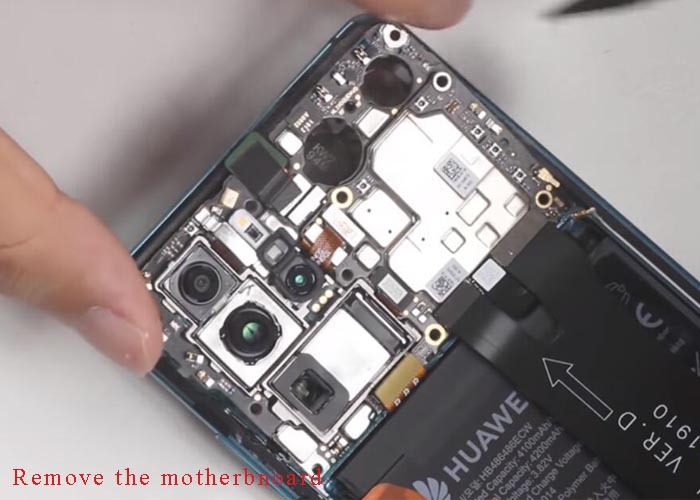
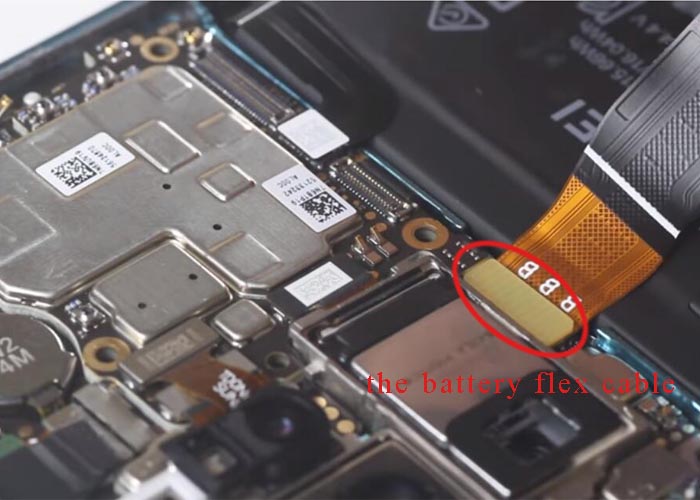
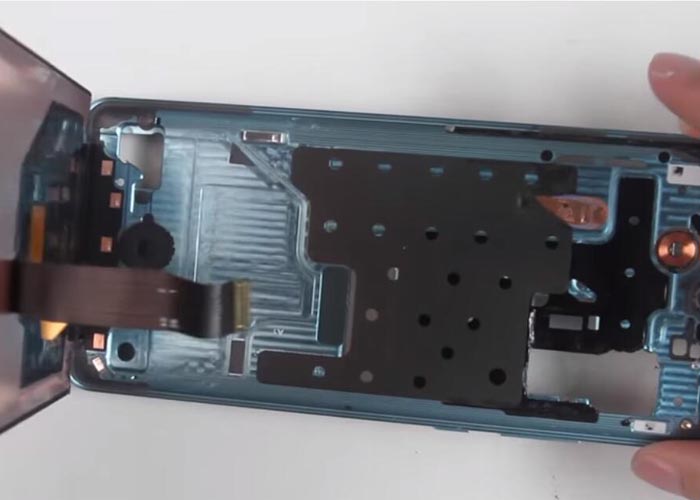
1.5 Disconnect the flex cable and remove the motherboard
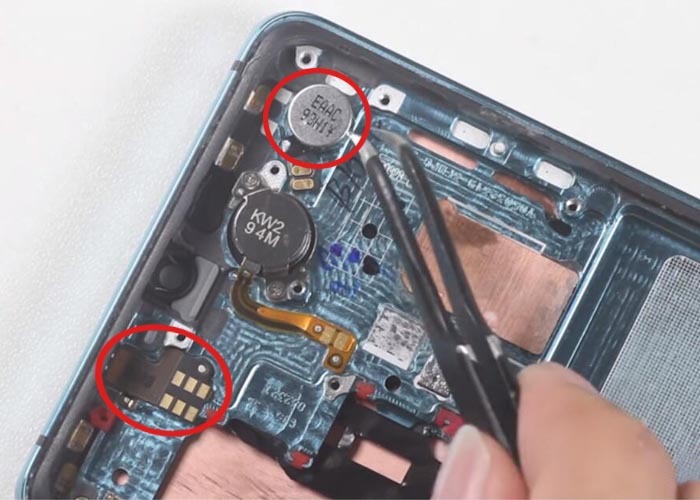
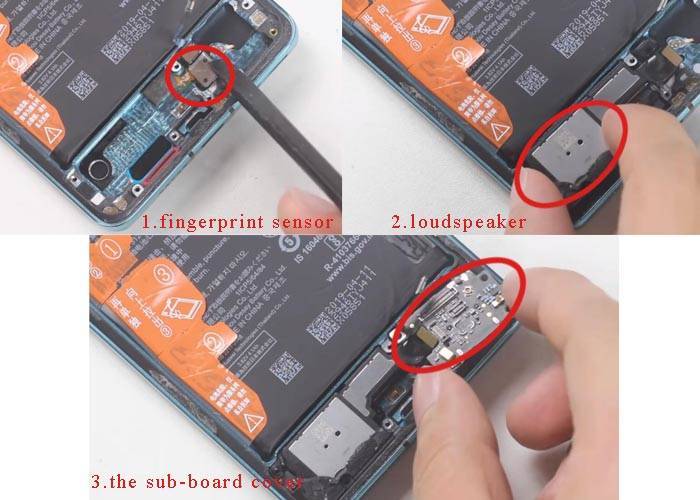
1.6 Disconnect the flex cables from the sub-board cover, USB port, signal ports, and then take out the loudspeaker and fingerprint sensor
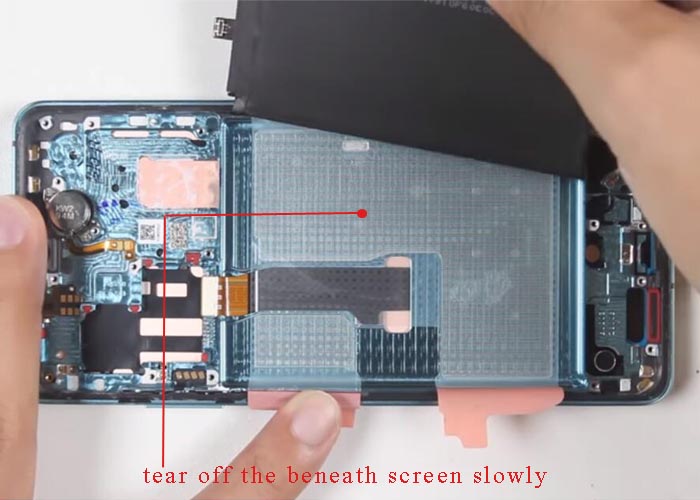
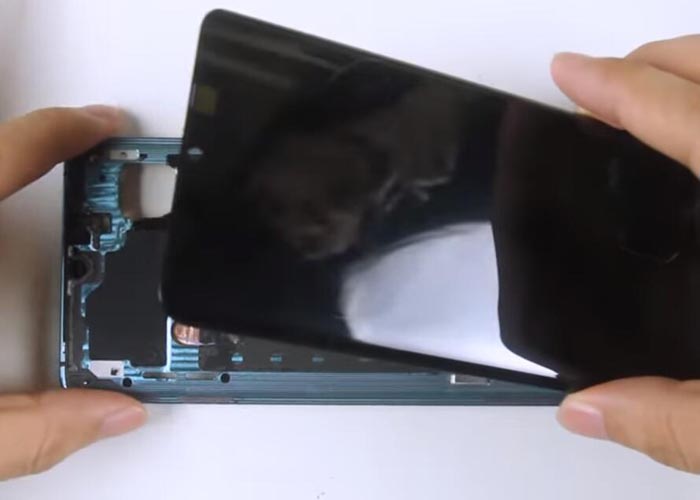
1.7 Remove the battery, tear off the beneath screen slowly
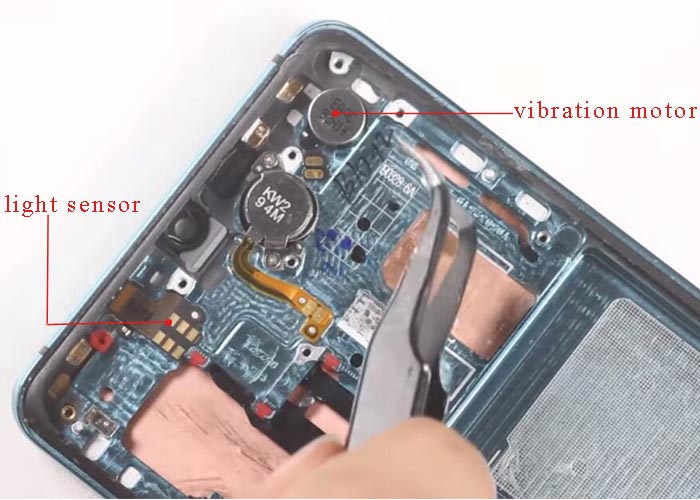
1.8 Take out the light sensor and vibration motor
2. Huawei P30 New Screen installation and Reassembly
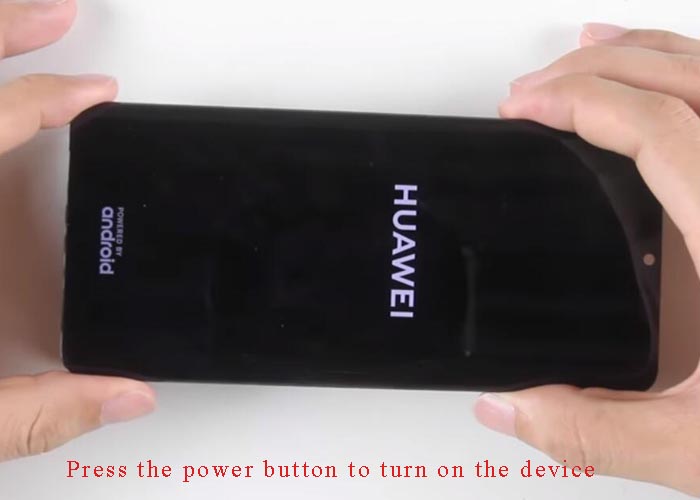
2.1 Huawei P30 LCD screen test: connect the battery cable and the new screen cable to the motherboard, press the power button to turn on the device
2.2 Install the light sensor and vibration motor back
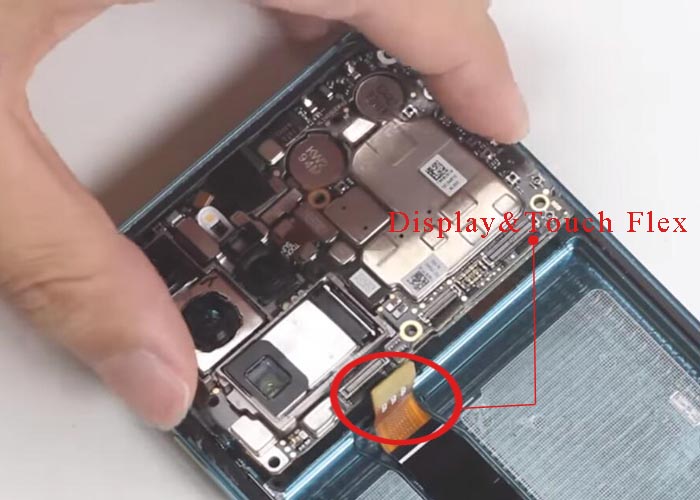
2.3 Install the motherboard back and connect the display & touch Flex
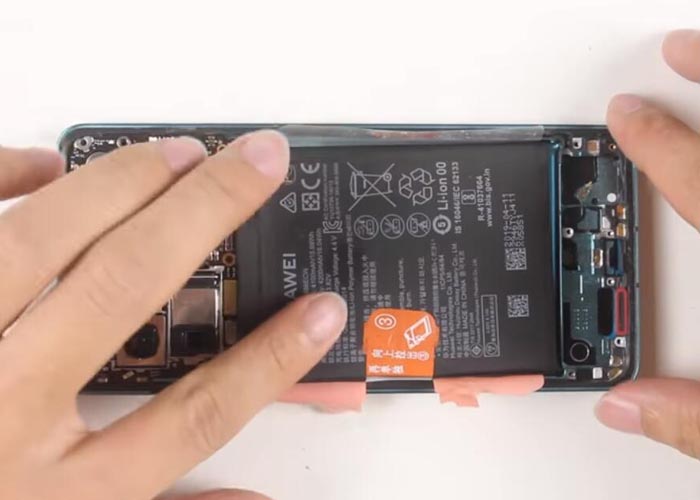
2.4 Place the beneath adhesive screen and install the battery back
2.5 Install the fingerprint sensor, loudspeaker, then the sub-board cover, don’t mess up the order
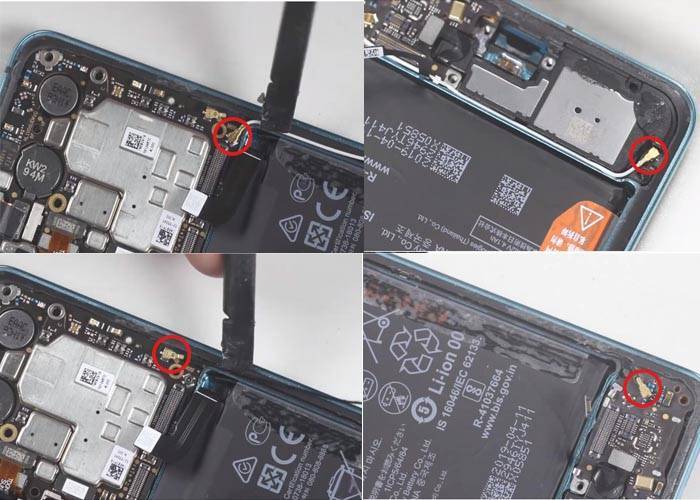
2.6 Connect the two signal wires back to the port, place the wires right in the position of the groove
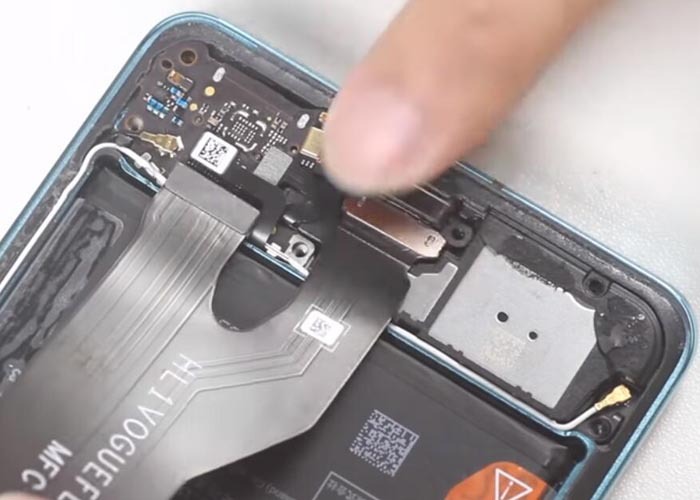
2.7 Connect the fingerprint sensor and USB port back
2.8 Install the sub-board cover and screw the seven Philips screws back
2.9 Install the wireless charging port back and screw the 10 Philips screws back
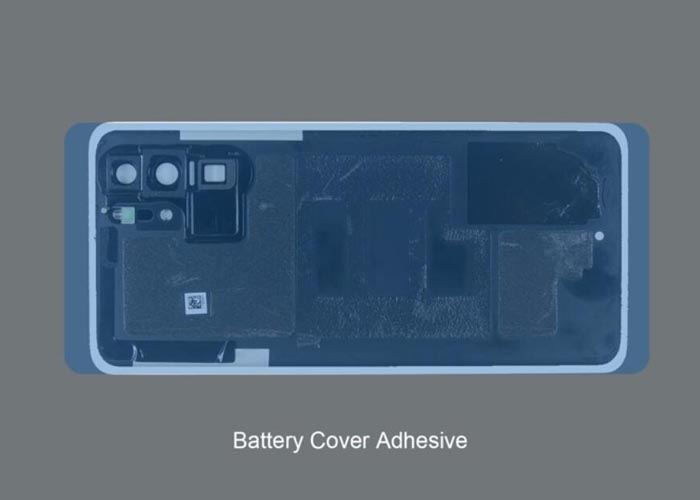
2.10 Place the battery cover adhesive and seal up the back housing
3. For display screen with on frame replacement
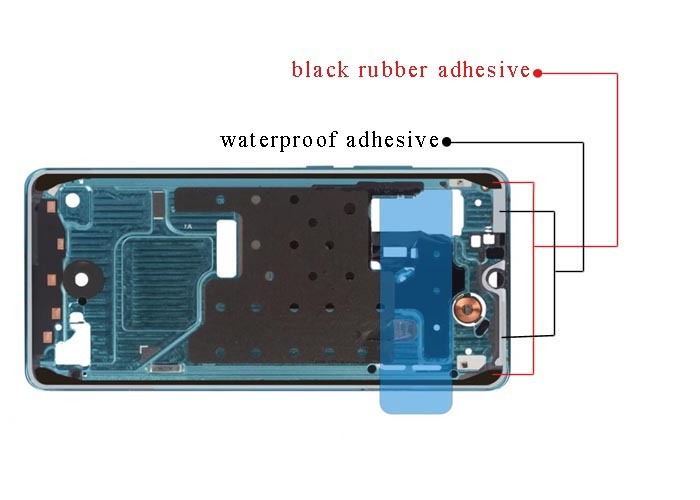
3.1 80℃ hot air gun blow and slowly remove the black rubber adhesive on the screen edge as well as the waterproof adhesive
3.2 Hot air gun blow again, separate the original screen from the frame with ultra-thin plastic sheet and suction cup
3.3 New screen test, like the same process as 2.1
3.4Remove the vibration speaker from the original screen to the new screen with a plastic card under 80℃ hot air gun blowing
3.5 Seal the new screen to the frame and reassembly
The whole steps about Huawei P30 teardown and reassembly above are quoted from YouTube video. As our recommendation, you can go to our website for other Huawei P series replacement parts such as Huawei P30 Pro parts or Huawei P30 Lite parts. Etrade Supply also provides smartphone repair technique support. You may contact us for your problems on our Email, or leave us on the comments below. We are glad to help you.
Disclaimer: All the pictures in this article are collected from YouTube video, if we infringe the copyright of the author's, please contact us and notify it and we will remove them immediately. Thanks for understanding.
RECOMMENDED PARTS
-
For Huawei P30 LCD Screen and Digitizer Assembly Replacement - Black - Without Logo - Grade S+
-
For Huawei P30 Pro Tempered Glass Screen Protector - Grade R
-
For Huawei P20 Pro Battery Door Replacement - Blue - With Logo - Grade S+
-
For Huawei P20 Pro Home Button Flex Cable Ribbon Replacement - Black - Grade S+
POPULAR ARTICLE
- 6 Highlights for Buying Huawei P30 Pro
- Huawei Mate 9 Teardown to Repair LCD screen and Battery
- How to Replace the Huawei Honor 8 Broken Screen
- How to Tear down the Huawei P9 for Screen, Battery, Camera Replacement
- iPhone X Water Damage Repair Guide (Still Work in 2019)
- How Much Does It Cost To Replace An iPhone XS Display?
- iPhone X Explosion: 7 Small But Important Things To Note
- 7 Ways To Fix Your iPad Not Charging In 2018
- iPhone 7 Screen Replacement | iPhone 7 Repair
- Which Parts of iPhone X and iPhone XS Are Exchangeable?
- iPhone X, XS, XS Max, and XR Battery Comparison
- How To Fix iPhone XS/XS Max, And XR Bluetooth Connection Issue
- Apple Will Fix the iPhone 8/8 Plus/X Auto Brightness Issue in iOS 12
- iPhone got exploded too?! How to protect your phone from battery explosion
- HTC 10 DIY Teardown for screen, charging port, battery replacement
- 6 Quick Tips To Distinguish Between Real And Fake iPhone SE
- Analysis on: Are China made LCDs for iPhone 5S Compatible with iPhone SE?
- How to Replace the Galaxy S7, S7 Edge Battery Replacement
- How to Disassemble the Galaxy S7 LCD Assembly to Replace Screen, Charging Port and Home Button
- How to Repair Samsung Galaxy S7 Edge Cracked Screen
- How to Tear Down/Disassemble the Galaxy S7 for Screen Replacement
- How to Fix Phone Gets Hot and Battery Drains Fast
- Xperia Z5 Premium USB Charging Port Replacement Tutorial
- How to Replace Your Broken Sony Xperia Z5 Premium Screen Step by Step Guide
- 15 Tips to Improve Your Galaxy Note 5’s Battery Life
- How To Replace A Cracked Motorola Droid Turbo 2 Screen
- How To Fix iPhone 6S Auto Shutdown When It Still Has Battery?
- How To Replace A HTC One A9 Cracked Screen
- How to Distinguish the Fake Apple Earpod from the Real One
- How to Replace the LG V10 Screen in 5 Steps
- How To Solder/Replace A Samsung Galaxy or iPhone Charging Port
- The Cost of Repairing a Cracked Galaxy S6, S6 Edge Screen
- How To Fix Cracked Xperia Z5 For Screen Replacement
- What’s Need to Be Prepared As a Startup Cell Phone Repair Shop
- *Update* The Root of Differences among Copy iPhone LCDs: Structure
- Important Info: Pay Attention To Defective Recycled iPhone LCDs
- How to Replace Galaxy Note 5, S6 Edge Plus Battery
- Are The Flood of New High Copy iPhone LCD Screens as Good as The OEM Ones?
- iPhone 6+ and iPhone 6S+ Screen Comparison Report
- How to Recover Photos and Data with Broken Screens
- How To Identify Different LG G4 Model Numbers
- How to Fix Cracked iPhone 6S for Screen Replacement
- Cost of Repairing a Damaged Screen on the LG G4
- How To Fix LG G4 Digitizer Touch Screen Issue
- As a Newbie, What You Should Know About Jailbreaking
- How To Tear Down/Disassemble Galaxy S6 Edge Plus For Screen Replacement
- 90% Of People Don’t Know These Cellphone Battery Information
- Insider Tips to Save Your Water-damaged Device
- How to Set Up ETrade Supply’s Adhesive Dispenser Robot
- Top 10 iPhone 6 Problems and Solutions
- How To Fix Vertical Lines On An iPhone Screen After Replacement
- How to Replace Sony Xperia Z3+ Screen/Screen Replacement Guide
- How To Disassemble/Tear Down Sony Xperia Z3+
- How to Assemble Small Parts on iPhone 6 LCD Screen Assembly
- Reasons Behind & Solutions for iPhone 6 Frame and LCD Separation Issues
- How to Replace The LG G4 Charging Port
- How to Replace the Cracking LG G4 Screen in 10 Minutes
- How To Replace An Oneplus One Cracked Screen
- iPhone 5 LCD Screen Assembly Small Parts List
- How to Replace the HTC One M9 Charging Port
- How to Replace HTC M9 LCD Screen Assembly
- Top 5 Most Common iPhone 6 Issues You May Come Across
- How To Tear Down The Samsung Galaxy S6 In 10 Steps
- The Cost Of Repairing A Cracked Nexus 6 Screen
- How To Repair A Nexus 6 Cracked Screen
- How To Disassemble Nexus 6 In 10 Steps
- The Cost Of Repairing A Broken iPhone 6 Screen
- Five Minutes Work to Replace Your iPhone 6 Plus Broken Screen
- How to Repair a Cracked Samsung Galaxy S5 Screen