


How To Replace iPhone 8 Screen, Battery and Charging Port?
BY kaye | 九月 25th, 2017 | 0 | 11
iPhone 8, the new generation smartphone of iPhone, launched at Sep.12th with prices start from $699. It has a 4.7-inches LCD screen, A11 Bionic, new glass design and support wireless charging. Here we will full tear down the iPhone 8 to see what inside it and offer some tips for how to replace iPhone 8 LCD screen replacement, battery and charging port.
Repair tools needed:
- Hot air gun
- Suction cup separator
- Phillips screwdriver
- Tri-point screwdriver
- Pentaloble screwdriver
- Tweezers
- Case opening tool
- Ejection tool
1. Before opening the phone, we should turn off the phone and take out the SIM card with an ejection tool.
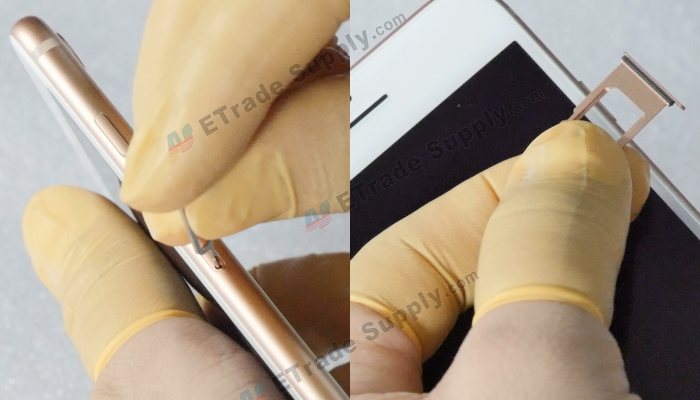
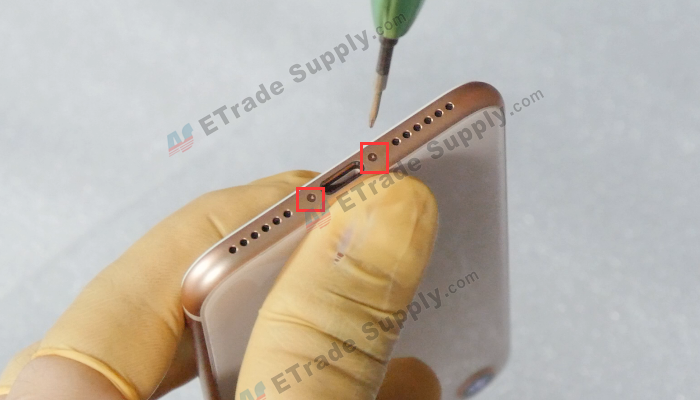
2. Undo 2 screws on the phone bottom shown as the picture below with a screwdriver.
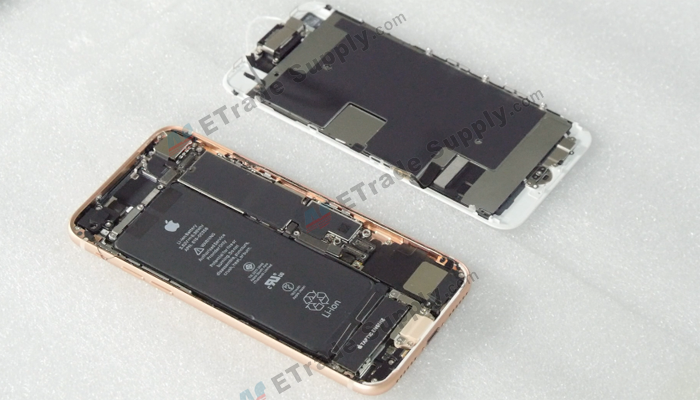
3. Heating the phone with a heat gun then we can gap it with a suction cup. Insert a pry bar into the gap then slide it along the phone.


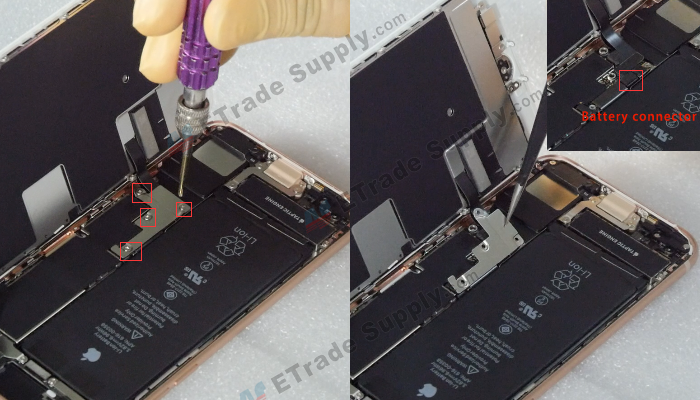
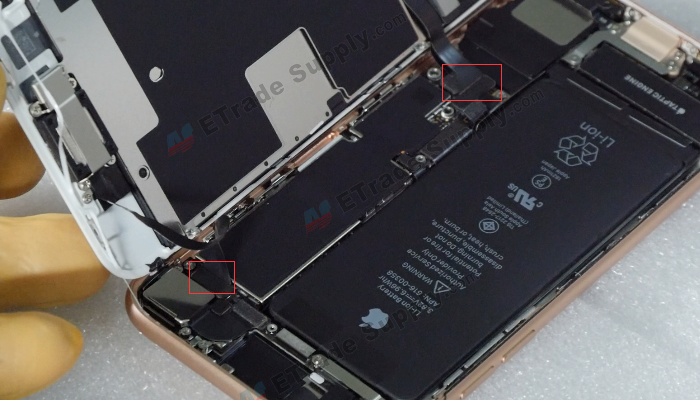
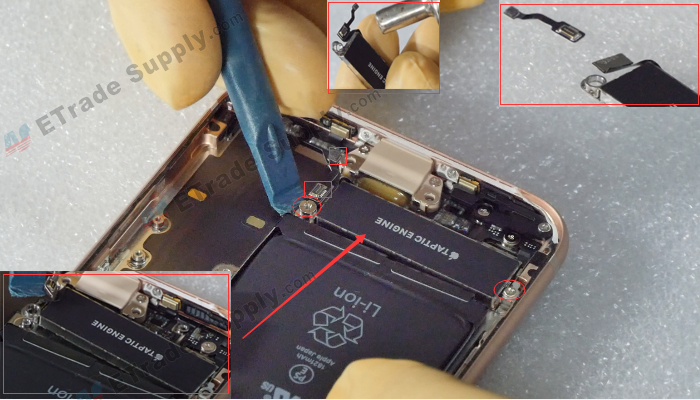
4. Undo 4 screws shown as the picture below with a screwdriver, remove the metal cover with tweezers and release the battery connector with a pry tool.
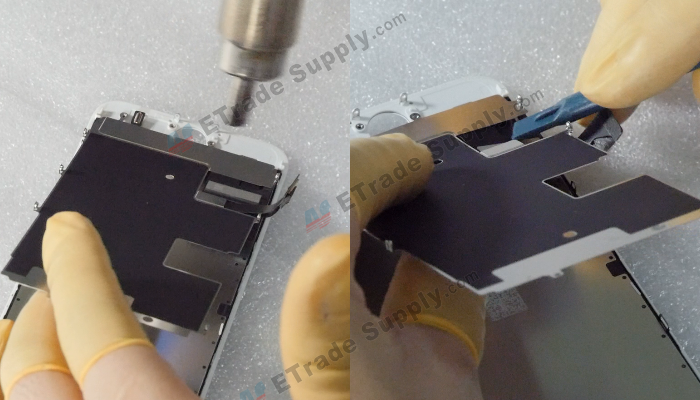
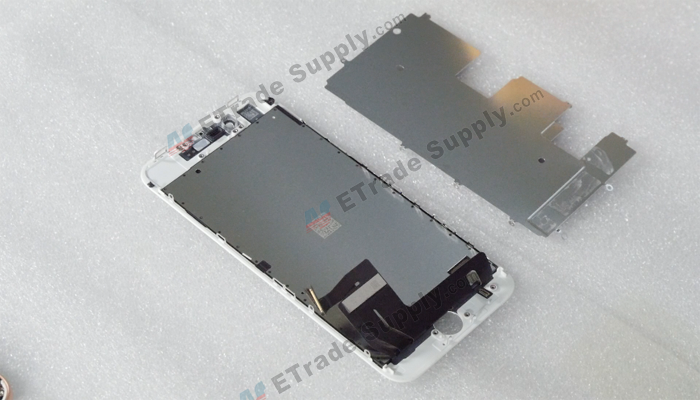
5. Release 3 screws with a screwdriver shown as the picture below, remove the metal cover with tweezers
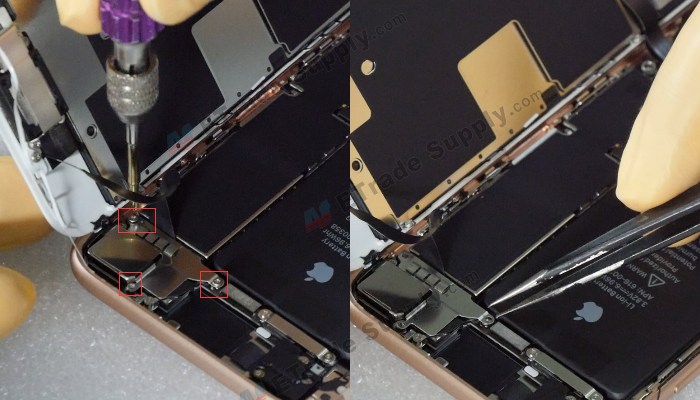
6. Release the front-facing camera flex cable connector, LCD screen flex cable connector and touch screen flex cable connector shown as the picture below with a pry tool.
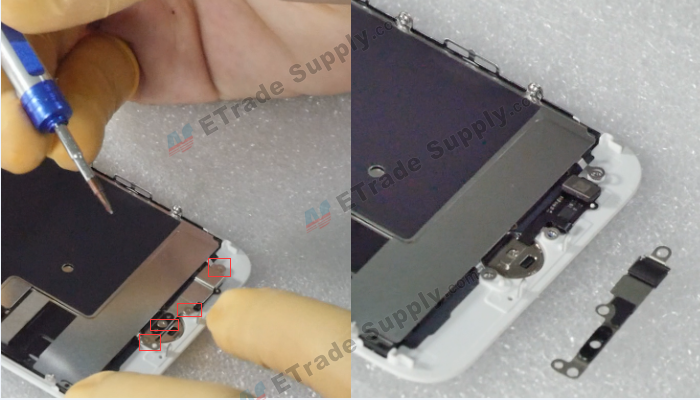
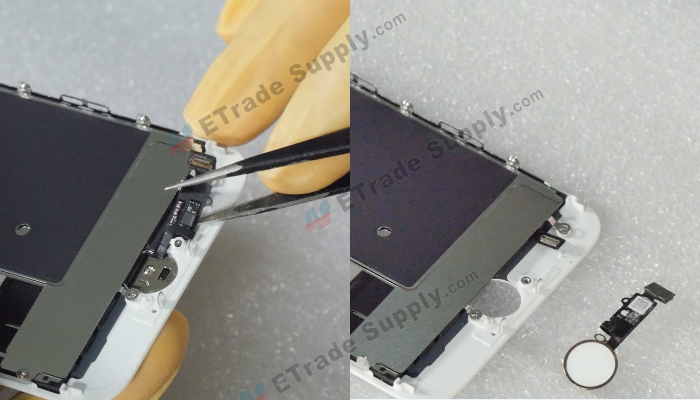
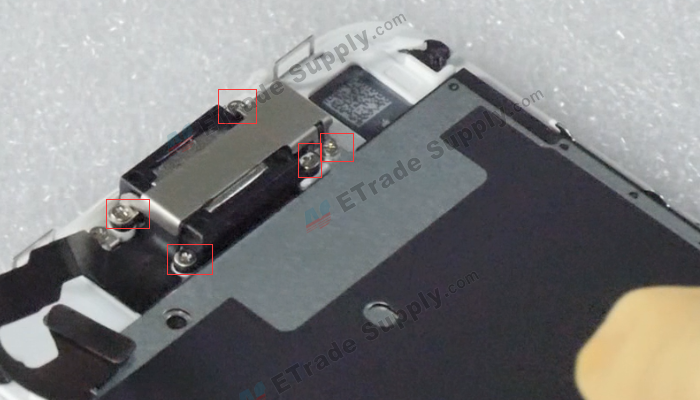
7. Undo 4 screws on the home button metal cover shown in the picture below, remove the metal cover with tweezers.
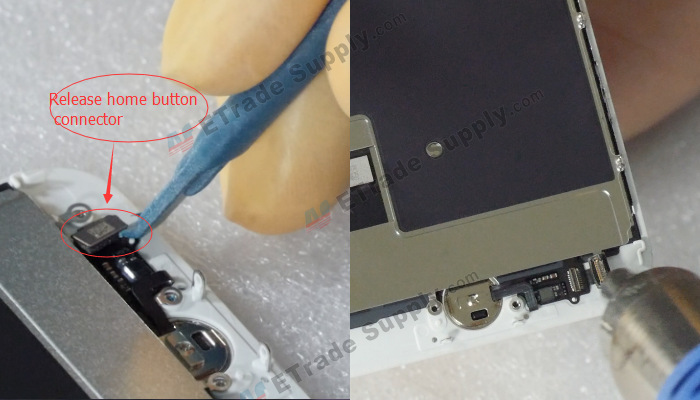
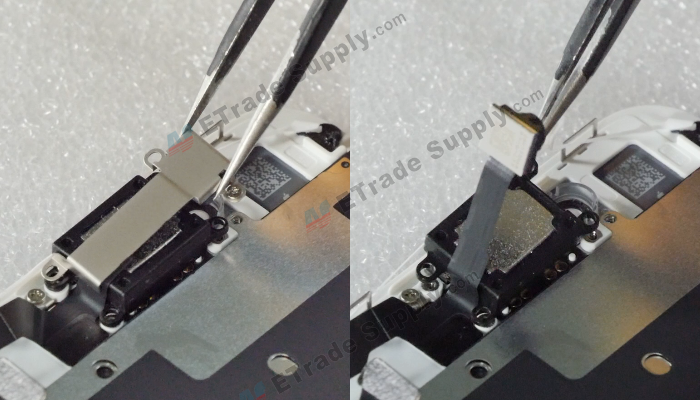
8. Release the home button connector with a pry tool, heat the home button flex cable with a heat gun then it can be removed easily with tweezers.
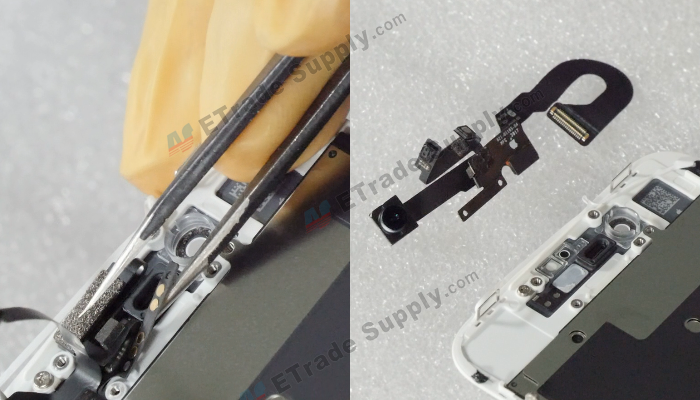
9. Undo 5 screws on the metal cover shown in the picture below with a screwdriver then we can remove the metal cover and ear speaker with tweezers.
10. Heating the front-facing camera and sensor flex cable with a heat gun then we can remove it easily with tweezers.
11. Undo 6 screws on the metal plate with a screwdriver, heating the bottom of the metal plate then we can separate the metal plate easily with a pry tool.
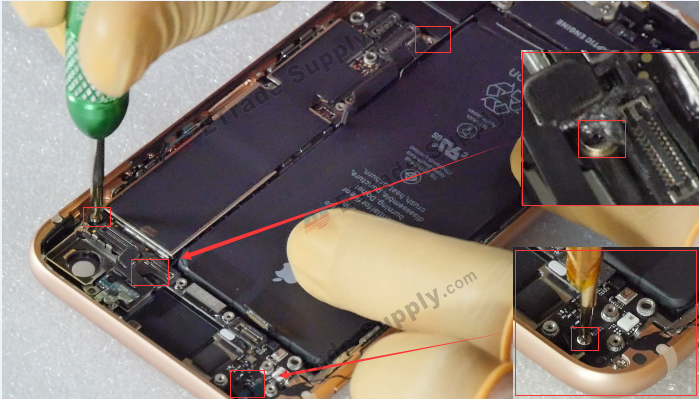
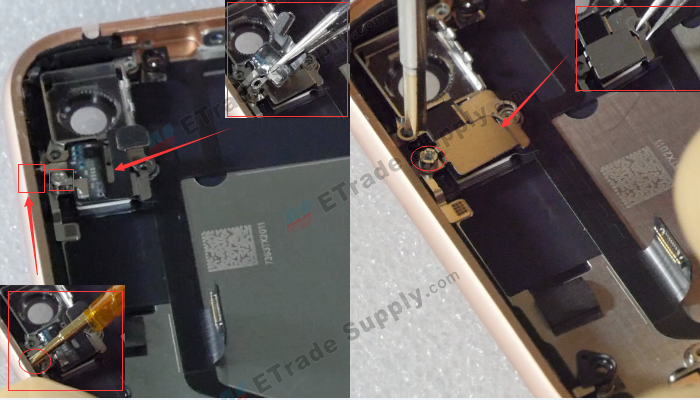
12. Undo 2 screws on the metal cover shown as the picture below with a screwdriver, release the rear camera flex cable with a pry tool then we can remove the rear camera with a pry tool.
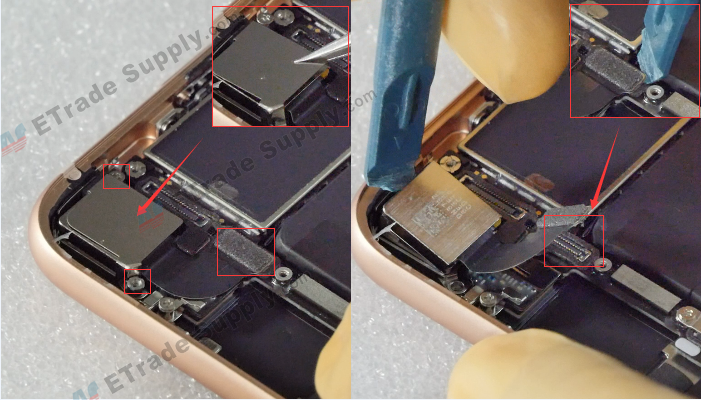
13. Undo 6 screws shown as the picture below with a screw then we can remove the covers with tweezers.
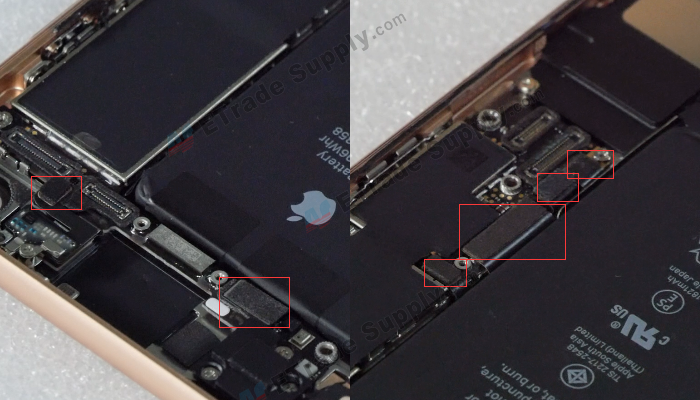
14. Release all connectors on the motherboard shown as the picture below with a pry tool.
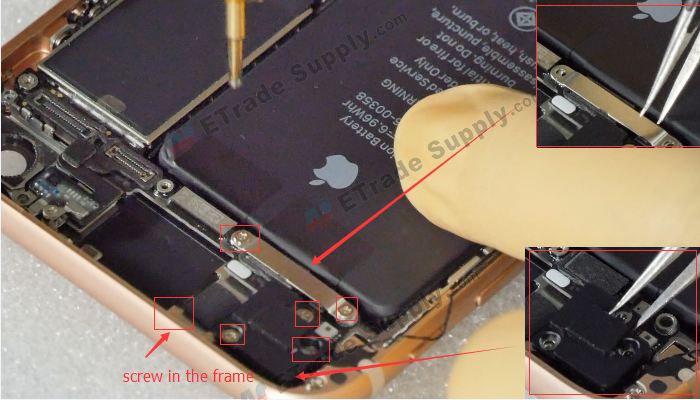
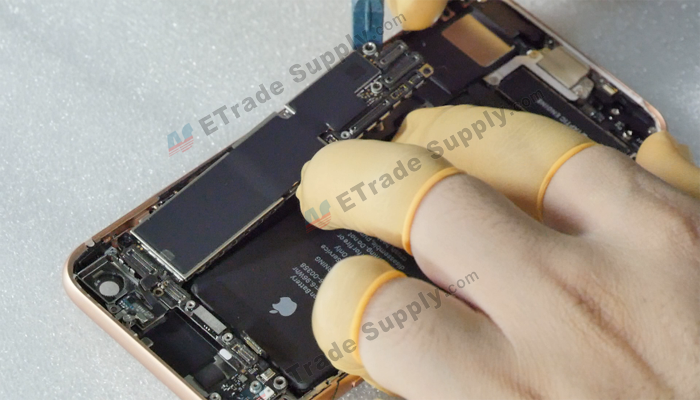
15. Undo 4 screws shown as the picture below with a screwdriver then we can remove the motherboard with a pry tool.
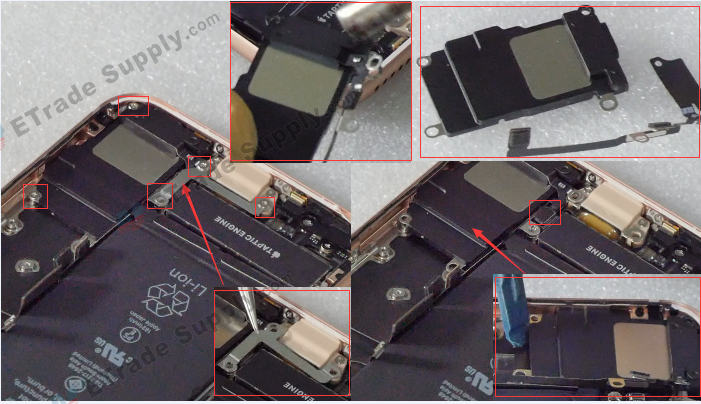
16. Undo 5 screws shown as the picture below with a screwdriver, release the connector with a pry tool then we can remove the loudspeaker with a pry tool. Heating the loudspeaker with a heat gun then we can separate the antenna.
17. Undo 2 screws shown as the picture below with a screwdriver, release 2 connectors shown as the picture below with a pry tool then we can remove the vibrator with a pry tool. Heating the vibrator with a heat gun then we can separate the flex cable easily with a tweezer.
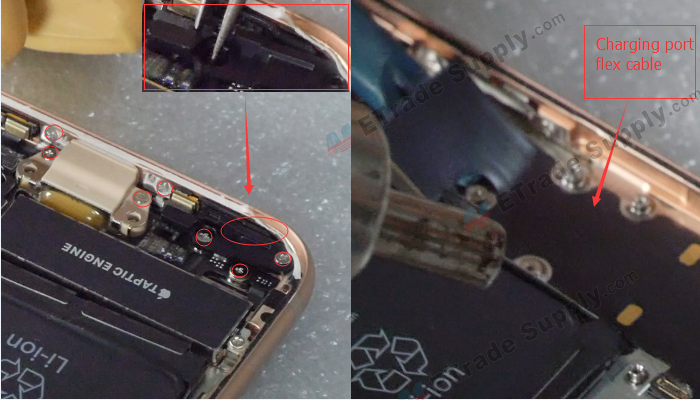
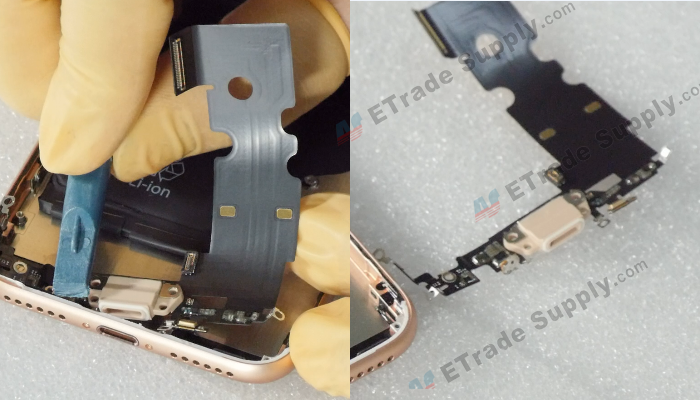
18. Undo 7 screws shown as the picture below with a screwdriver, remove the plastic cover with tweezers. Heating the charging board flex cable with a heat gun then we can remove the charging board with a pry tool.
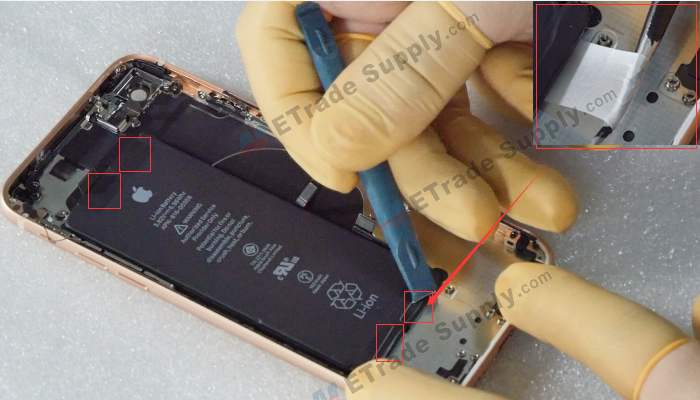
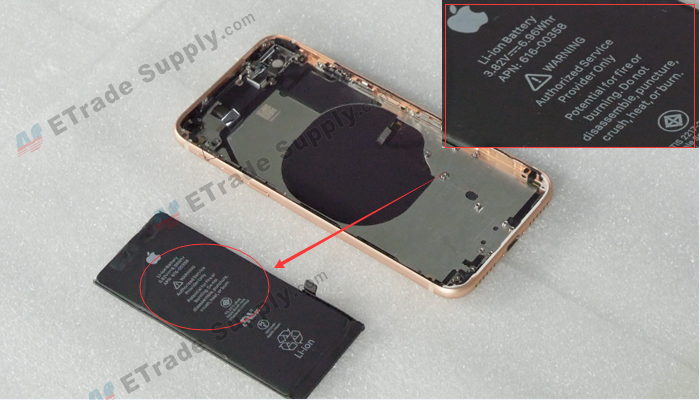
19. Roll out 4 battery glue shown as the picture below with tweezers then we can remove the battery easily. The iPhone 8 battery is 3.82V, 6.96Whr.
20. Undo 2 screws shown as the picture below with a screwdriver then we can remove the Bluetooth module. Undo the screw shown as the picture below with a screwdriver then we can remove the metal cover with tweezers.
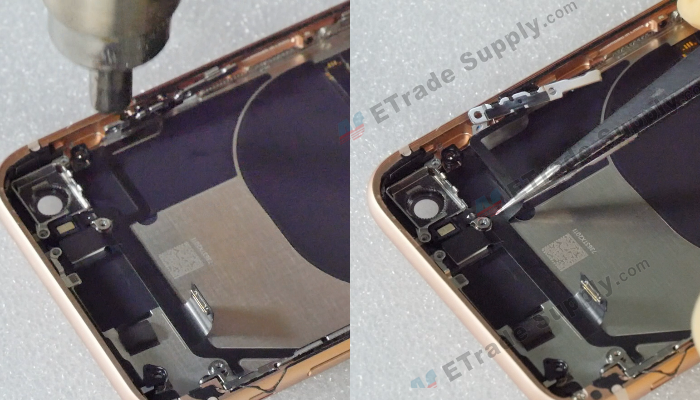
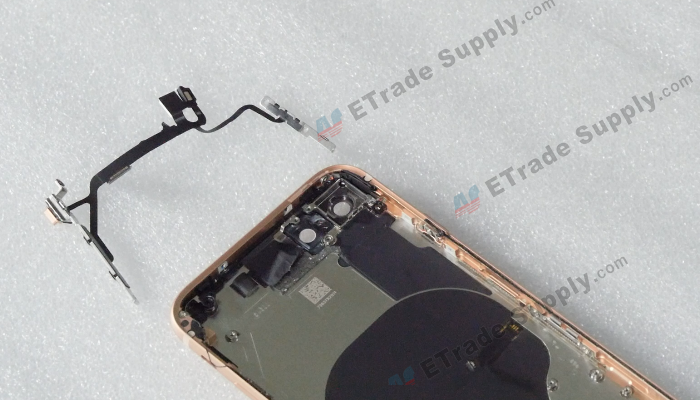
21. Undo 5 screws shown as the picture below with a screwdriver, heating the power button and volume button flex cable with a heat gun then we can remove it easily with tweezers.

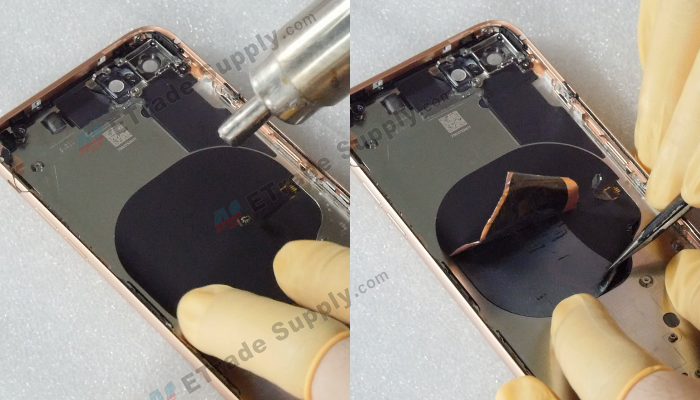
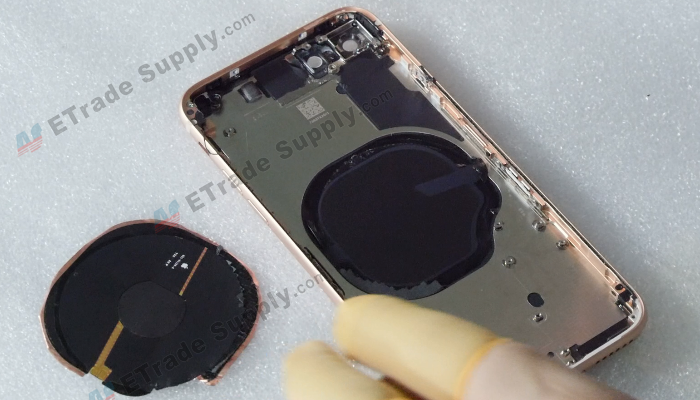
22. Heating the wireless charging coil with a heat gun then we can remove it with tweezers.
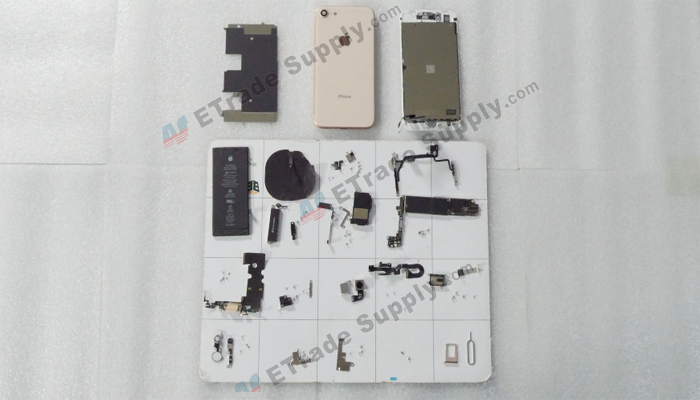
The teardown work is completed now and all parts are shown in the picture below.
Also, you can check out iPhone 8 teardown video here.
Any questions and suggestions about iPhone 8, please leave a message below.
You may also like:
- How to replace your iPhone 7 Plus battery
- How to Replace iPhone 7 Plus Screen Replacement
- iPhone X Tear-down/Disassembling for screen repair
- Is It Worth To Buy The iPhone X? Here Is My Opinion.
|
|

|
|
|
|
|
|---|


 IOS 17.4 official version pushed to block battery vulnerability
  Is the Chinese-made rear case for the iPhone 15 series going on the market?
  New products coming:USB to MFI Lightning Cable
  Big BUG of iPhone 15
  Successfully submitted!