


iPhone X Tear-down/Disassembling for Screen Replacement
BY kaye | 十一月 7th, 2017 | 2 | 17
Apple launched their 10th-anniversary edition iPhone X at Sep.12th and customers can receive their phones after Nov.3rd. Have you got your iPhone X now? Do you want to know what’s inside it? Now let's tear down it step by step and find out the difference from others.
Tools needed:
- Hot air gun
- Suction cup separator
- Phillips screwdriver
- Tri-point screwdriver
- Pentaloble screwdriver
- Tweezers
- Pry tools
- Ejection tool
Step 1. Turn off the phone and take out the SIM Card Tray.
Press the Volume down and power button to turn off the iPhone X which is different from others.
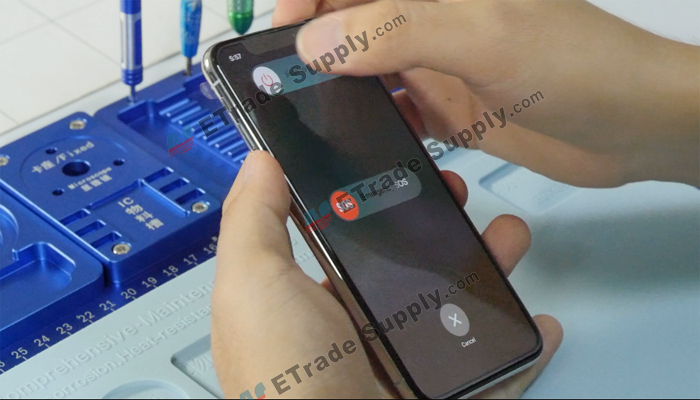
Take out the SIM Card tray with an ejection tool.
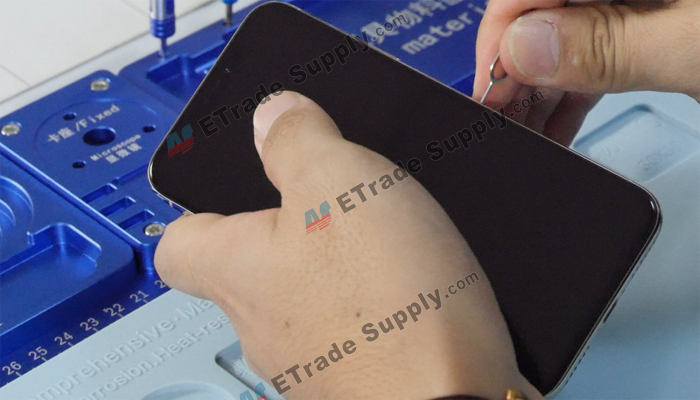
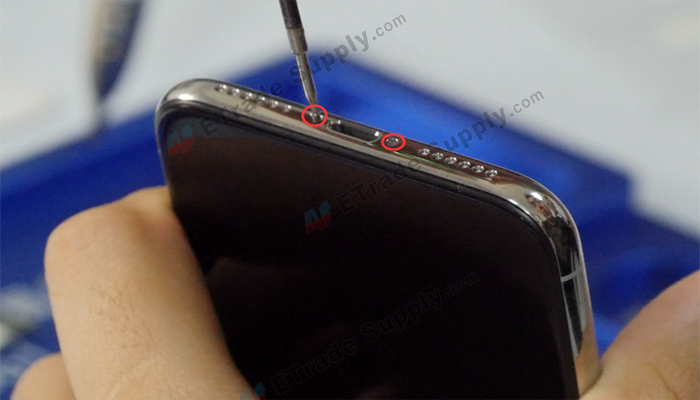
Step 2. Open the phone.
Undo 2 screws on the phone bottom with a Pentaloble screwdriver. The 2 screws are longer than before.
Heating the phone screen with a heat gun then we can gap the phone with a Suction cup separator. Inset a pry bar into the gap and slide around the phone screen edge.

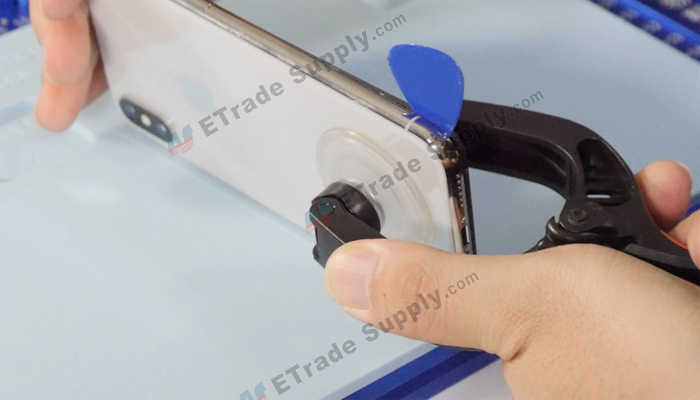
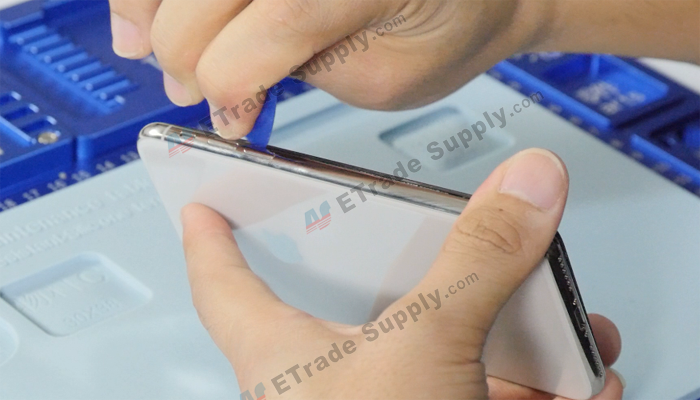
The phone can be opened like others iPhone.
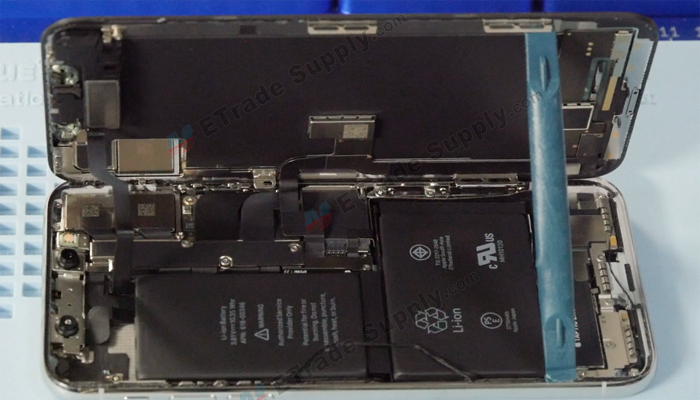
Step 3. Remove the iPhone X LCD screen.
Undo 5 screws shown in the picture below with a triangle screwdriver then take out the metal retaining plate.
Release the battery/LCD screen/digitizer/ear speaker connectors with a spudger.
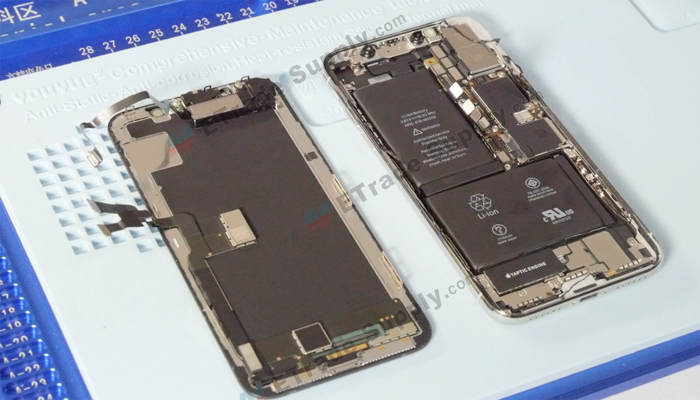
The screen was separated. The iPhone X display is a 5.8 inches Super AMOLED screen, it is different from before iPhones and there is only an ear speaker on the display.
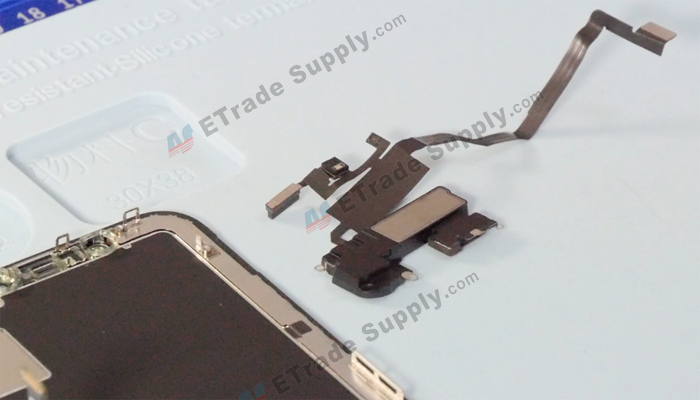
Step 4. Remove the ear speaker.
Undo 3 screws on the retaining plate with a triangle screwdriver then remove the plate. Heating the ear speaker with a heat gun will make it easier to remove the ear speaker with tweezers.

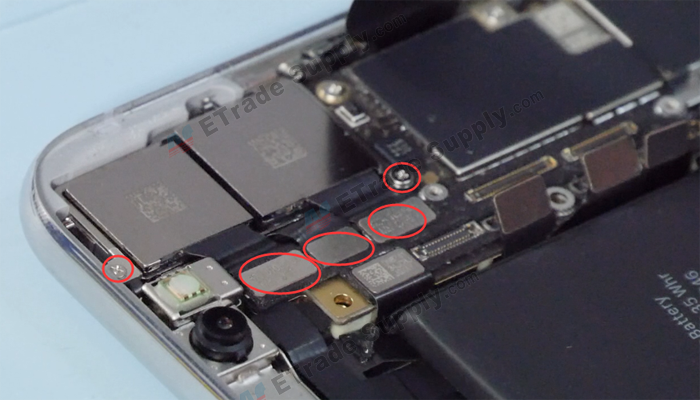
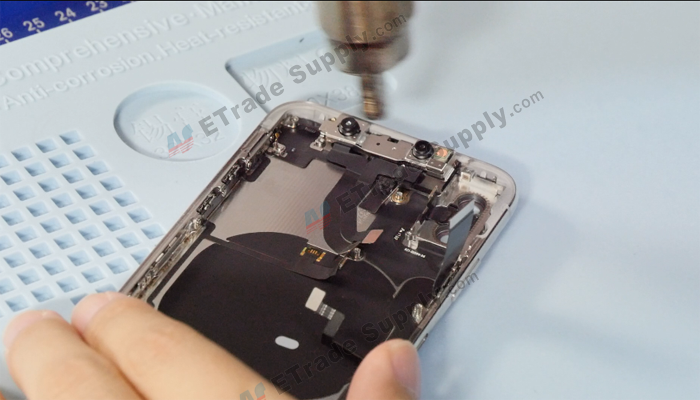
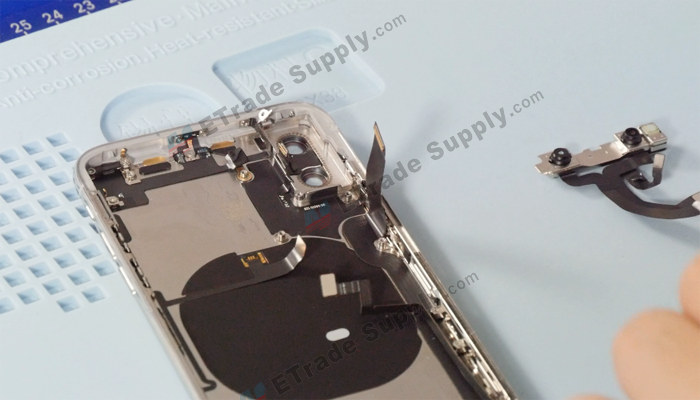
Step 5. Remove rear-facing cameras.
Undo 2 screws shown in the picture below with a triangle screwdriver, release the cameras/flashlight connectors with a spudger then we can take out the rear-facing cameras.
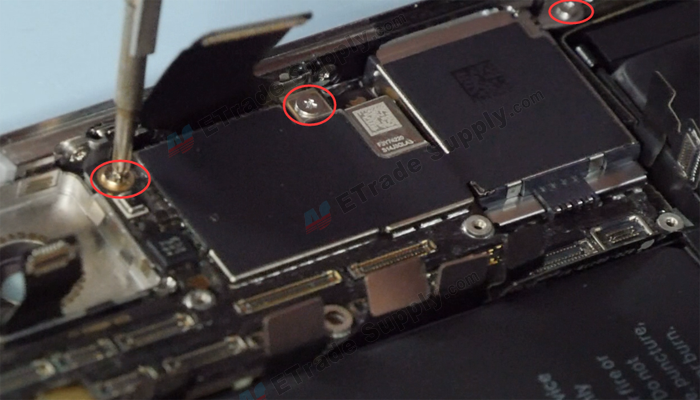
Step 6. Remove motherboard.
Release all connectors on the motherboard with a plastic spudger.
Undo 3 screws on the motherboard shown in the picture below with a triangle screwdriver then we can take out the motherboard. Unlike other iPhones, the iPhone X motherboard is made of 3 small boards.

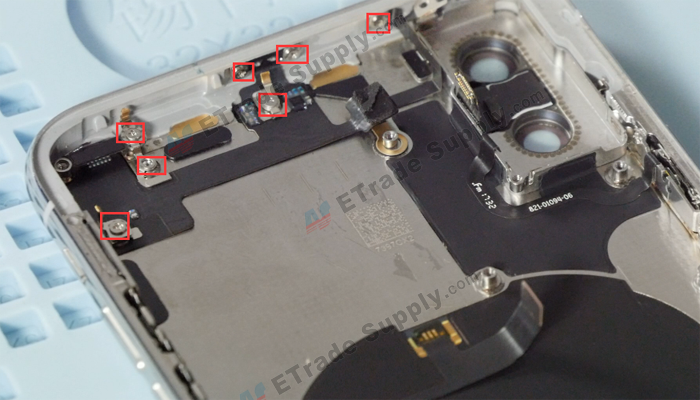
Step 7 Remove Loudspeaker and Taptic engine.
Remove 8 screws shown in the picture below with the Philip screwdriver/triangle screwdriver.
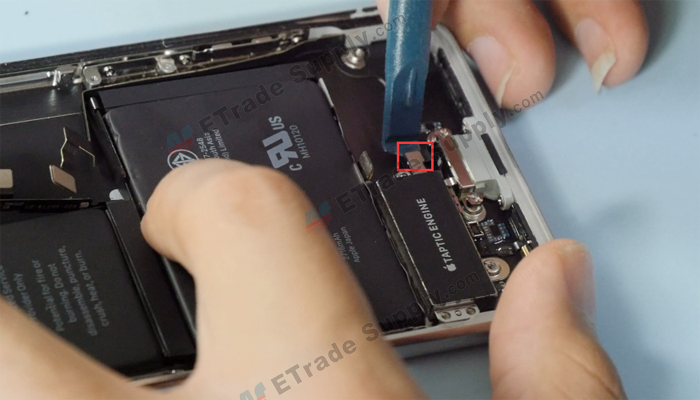
Release the connector with a spudger then we can remove the loudspeaker antenna flex cable.
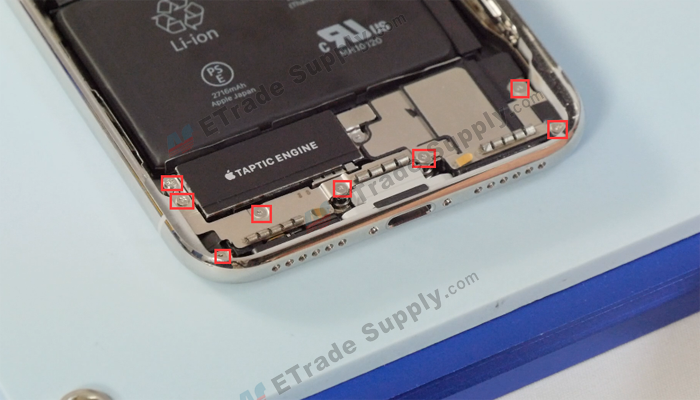
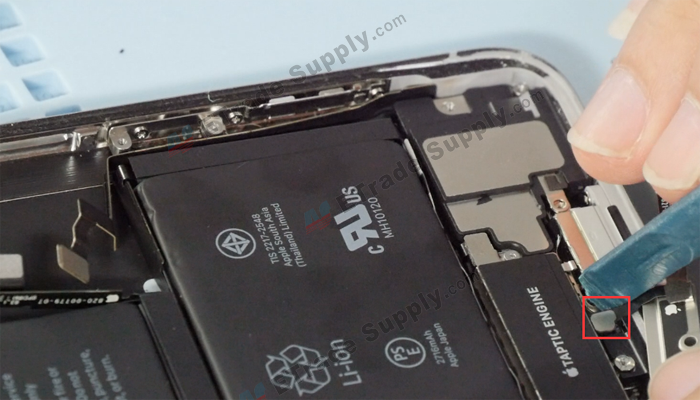

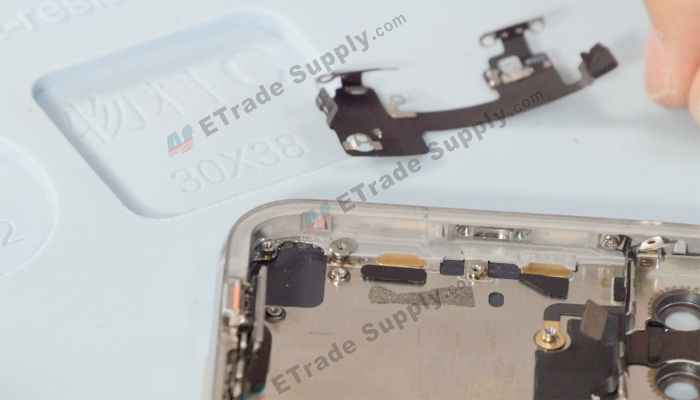
Undo 2 screws shown in the picture below with the triangle screwdriver/Philip screwdriver then we can take out the metal plate and the microphone retaining plastic. Release the loudspeaker connector then we can take out the loudspeaker and Taptic engine.

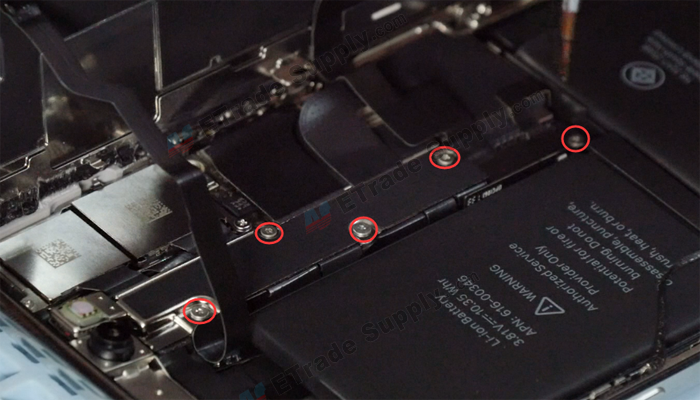
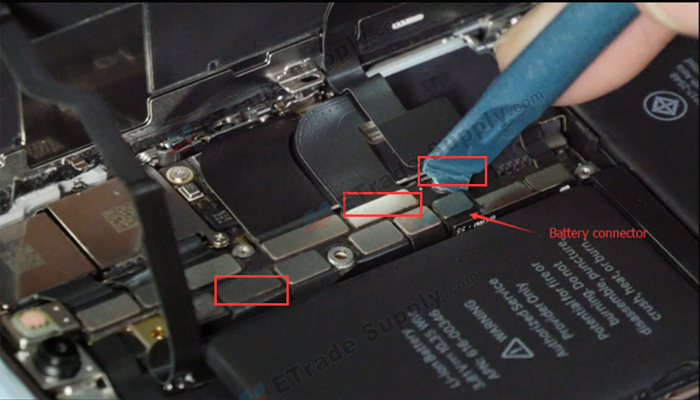
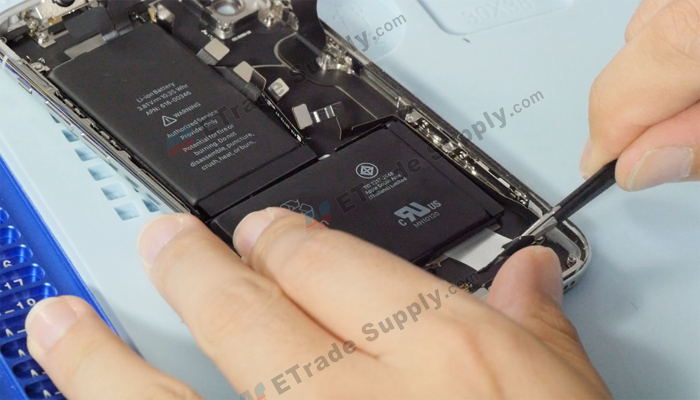
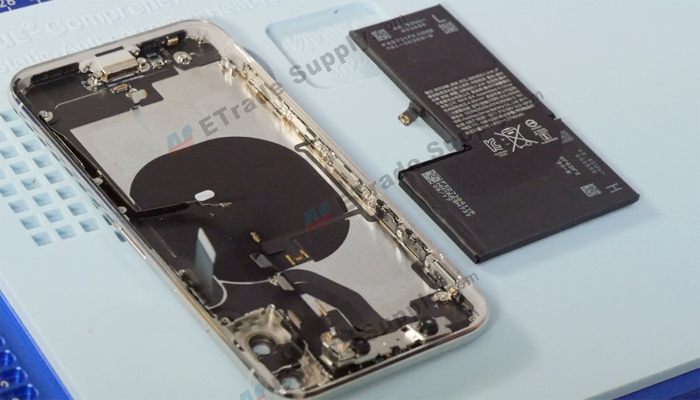
Step 8 Remove battery.
There are two batteries in the iPhone X and they are welded together like an L shape. The iPhone X battery is 2716 mAh which is much larger than iPhone 8, a little more than iPhone 8 Plus. The iPhone 8 battery is 1821 mAh and iPhone 8 plus is 2691 mAh.
Pulling out 4 battery adhesives with tweezers then we can remove the battery.
Step 9 Remove the front-facing camera.
The front-facing camera and Face ID are installed in the back housing, not like the iPhone 8 which is installed on the back of the LCD screen.
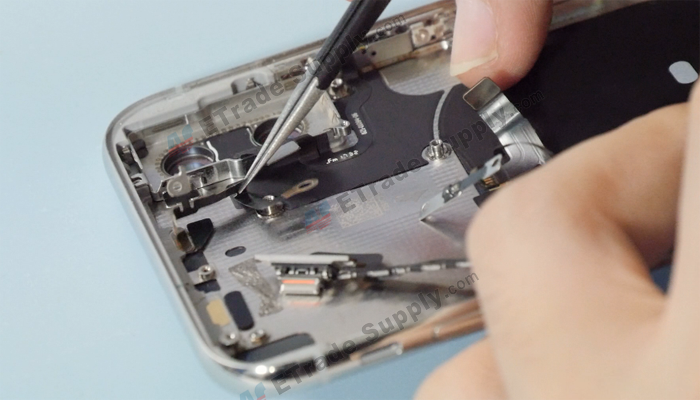
Heating the front-facing camera and Face ID flex cable with a heat gun will make it easier to remove it with a spudger.
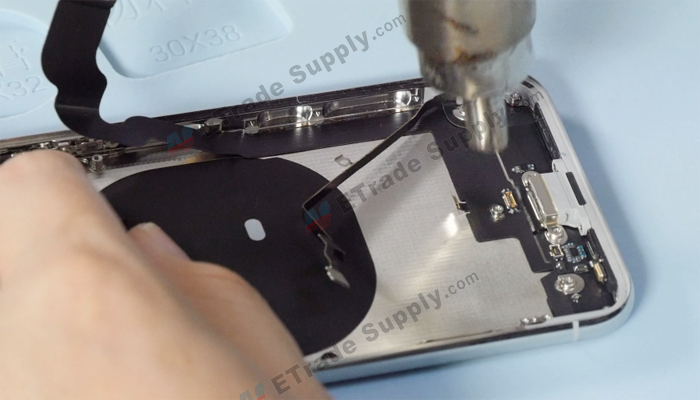
Step 10 Remove the charging port and antenna.
Remove 4 screws on the frame shown in the picture below with a Philip screwdriver then remove the metal retaining plate. Heating the charging port flex cable with a heat gun will make it easier to be removed with a spudger.


Step 11 Remove Wi-Fi antenna.
Undo 7 screws shown in the picture below with Philip screwdriver/triangle screwdriver, heating the flex cable with a heat gun then the Wi-Fi antenna and Bluetooth antenna can be removed easily.
Step 12 Remove power button flex cable.
Undo 3 screws on the frame shown in the picture below with a Philips screwdriver, heating the flex cable with a heat gun will make it easier to be removed with a pry tool. The flashlight cable and the power button cable are on the same flex cable. There is a rubber gasket under the flashlight cable.
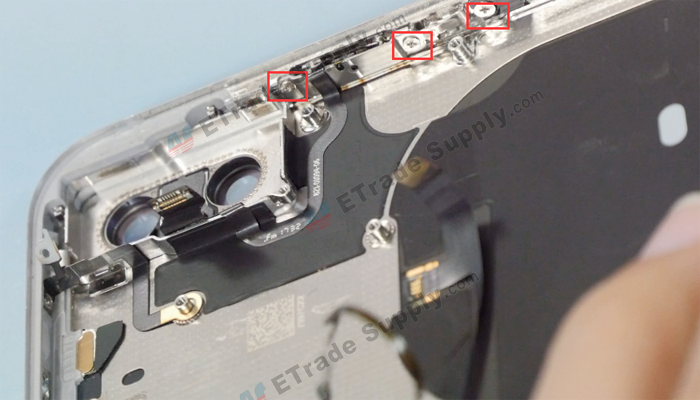
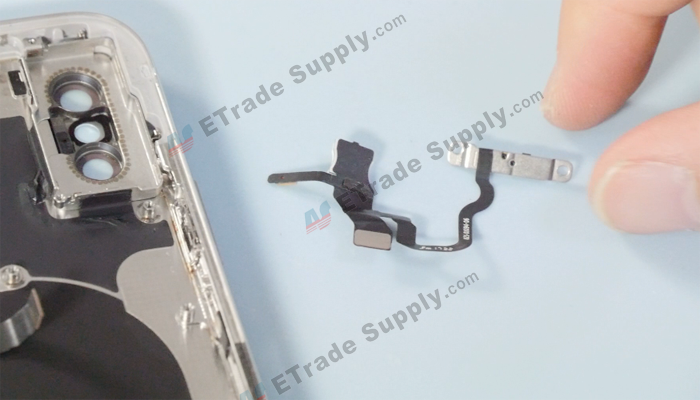
We don’t remove the wireless charging coil because it has a risk of damaging the wireless charge function. The volume flex cable is weld to the wireless charging flex cable, so we don’t disassemble it too.
iPhone X all parts here:
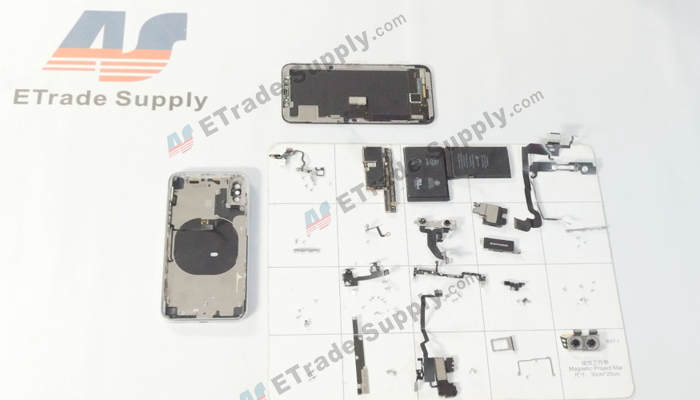
The iPhone X teardown tutorial is completed now and more details please watch our iPhone X teardown video.
Here is the iPhone X teardown video:
Any questions and suggestions about iPhone X, welcome to comment below.
You may also like:
- How to replace iPhone 8 screen, battery and charging port
- iPhone 7 Full Teardown for Screen, Battery, Charging Port Flex Replacement
- How To Disassemble/Tear Down/Take Apart iPhone 6S+
- How to Disassemble/Tear Down/Take Apart iPhone 6
- Does The iPhone X Worth To Buy Or Not?
|
|

|
|
|
|
|
|---|


