

 Loading...


- Compatible With: Samsung Galaxy S6 Series
-
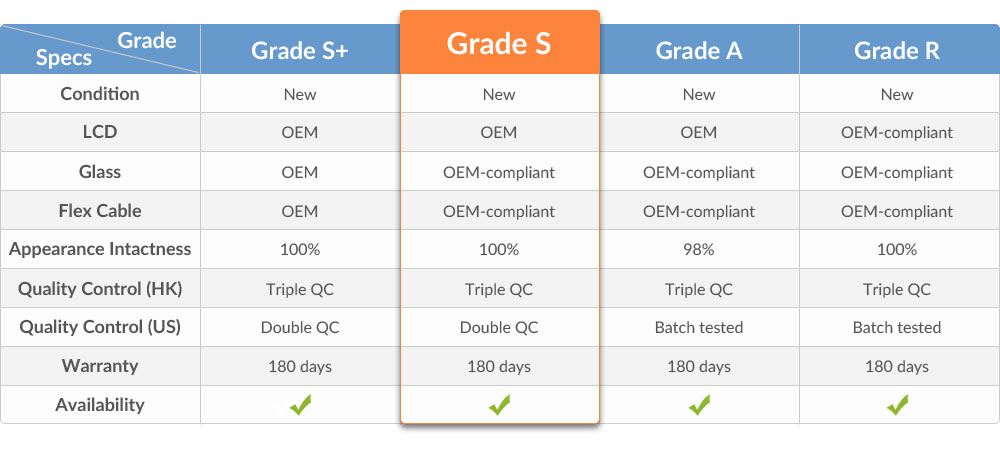
For Samsung Galaxy S6 SM-G920/G920A/G920P/G920R4/G920T/G920F/G920V LCD Screen and Digitizer Assembly Replacement - Gold - With Logo - Grade S
This item inludes these following Parts:
1. LCD Display;
2. Touch Screen.
This item does NOT include the front housing.
Notes: please test the functionality of this item before installation.
Specifications:
Color: Gold
Screen Size: 5.1 inches
Resolution: 1440 x 2560 pixels (~577 ppi pixel density)
Material: Super AMOLED capacitive touchscreen, 16M colors
Protective Material: Corning Gorilla Glass 4
Compatibility: Samsung Galaxy S6
Features:
This Galaxy S6 LCD assembly comes with the front screen housing.
This Galaxy S6 LCD and digitizer assembly is brand new and with high quality. we also provide the 100% original Galaxy S6 screen assembly replacement.
The Galaxy S6 LCD assembly is available in White and Sapphire. This is the Gold one
This screen replacement is compatible with all Samsung Galaxy S6 models.
How to Install / Tips:
Special repairing tools are required for assembling or disassembling, as the Galaxy S6 LCD display and digitizer are hermetically attached.
Handle the vulnerable and fragile flex cable ribbon carefully.
Please try to handle the repair or replacement work in a dry and dust free environment without direct sunlight.
The installation of any new part should be done by a qualified person. ETS is not responsible for any damage caused during installation.
Step 1: Take Out The SIM Card Tray.
Power off the Samsung Galaxy S6.
Use an ejector pin or tweezers to take out the SIM Card Tray.

Step 2: Take Apart The Battery Door.
Heat up the Samsung Galaxy S6 Battery Door.
Pull the battery cover up with a suction cup. Insert a case opening tool to broaden the gap.
Separate the battery door from the phone. (The battery door is stuck to the middle plate with some really strong adhesive. Handle gently and carefully! )

Step 3: Release The Rear Housing.
Undo the 13 screws in the rear housing.
Heat up the LCD Assembly.
Separate the rear housing from the LCD Assembly with the help of a suction cup tool and case opening tool.
Notice: be careful not to damage the wireless charging chip attached to the battery.


Step 4: Remove The Motherboard.
Pry up the LCD assembly connector, front facing camera connector, battery connector, ear speaker connector and home button flex ribbon connector.
Turn over the motherboard and disconnect the flex ribbon for the USB charging assembly.

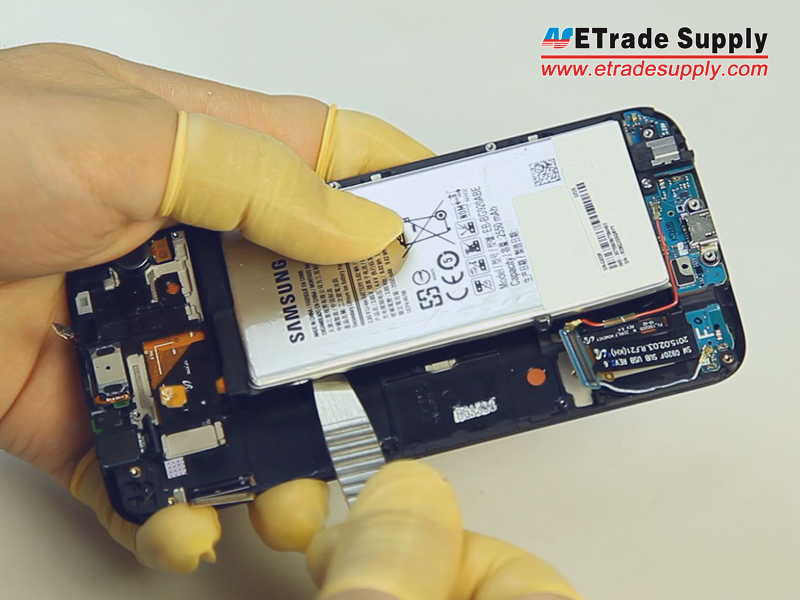
Step 5: Remove The Battery And Small Components.
Gently pry up the battery with a spudger tool.
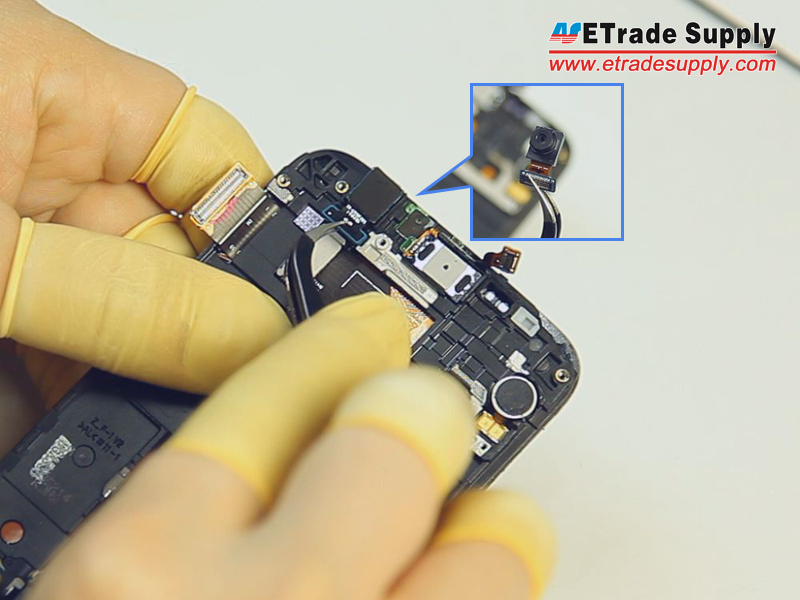
Remove the front facing camera.
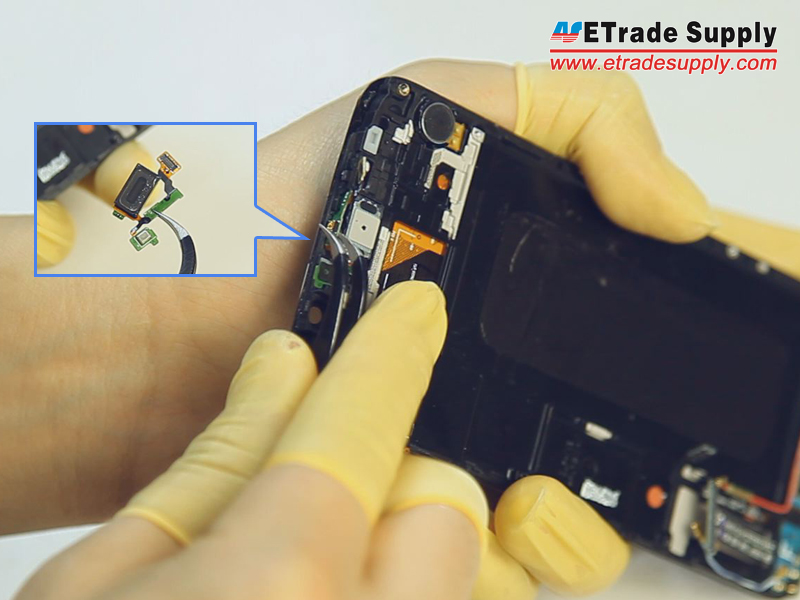
Remove the ear speaker. (Notice: be careful not to break the flex ribbon.)
Remove the vibrating motor.

Step 6: Release The Charging Port Assembly.
Remove the Bluetooth and Wi-Fi cables.
Undo the earphone jack screw. (Notice: the screw is different than the rear housing screws.)


Step 7: Remove The Front Housing.
Heat up the LCD Assembly to release the front housing.

Then you can assemble the new screen and the front housing with fresh adhesive.

-
Customer also bought


-
(Posted on 07/03/18)great quality and service