

 Loading...


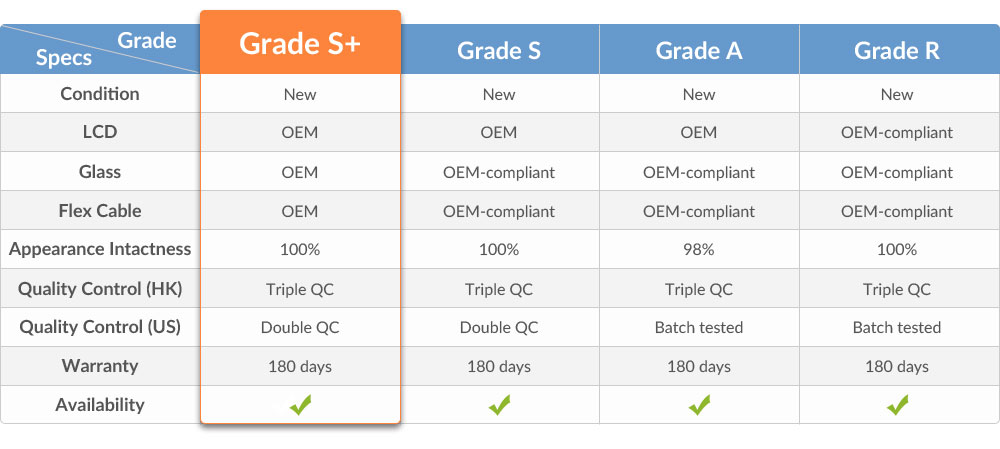
- Compatible With: D850, D851, D855, LS990
-
For LG G3 D850 LCD Screen and Digitizer Assembly with Front Housing Replacement - White - With logo - Grade S+
This item includes:
1.LCD Screen;
2.Digitizer Touch Screen;
3.Front Housing;
4.Front Facing Camera;
5.Rear Facing Camera;
6.Earphone Jack;
7.Vibrating Motor;
8.Ear Speaker
Notice: Please test the functionality of this item before installation.
Specifications:
Screen Size: 5.5 inches
Display Type: True HD-IPS + LCD capacitive touchscreen, 16M colors
Resolution: 1440 x 2560 pixels, 5.5 inches
Color:White
Connector Type: Buckle
Protective Material: Corning Gorilla Glass 3
Version: With logo
Compatibility: D850, D851, D855, LS990
Features:
This LG G3 LCD screen assembly with front housing is 100% original and new.
This LCD and digitizer with front frame for the LG G3 AT&T D850, do not confuse this with other versions, as the items are not compatible.
This LG G3’s digitizer supports multi-touch.
This LCD assembly is available in two colors: grey and white. This is the white one.
How to Install / Tips:
These parts are hermetically attached, special tooling is required for assembly or disassembly.
The flex cable is very sensitive and is easily damaged. Handle carefully.
The installation of the LG G3 screen assembly with front housing part should be done by a qualified person. ETS is not responsible for any damage caused during installation.
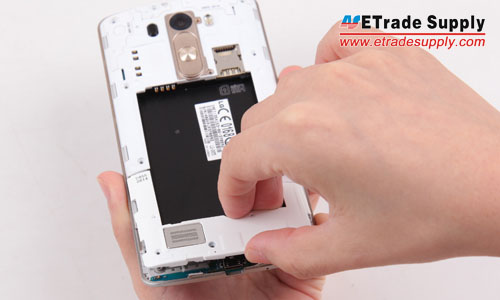
1. Power off the LG G3 and take out the battery door.

2. The LG G3 battery cover and LCD assembly with housing assembly are separated.
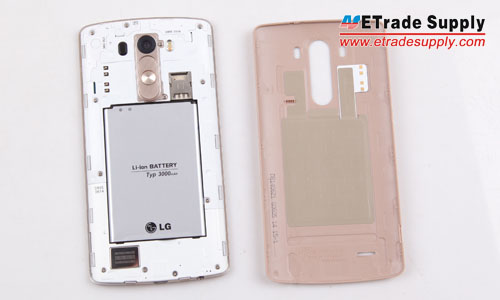
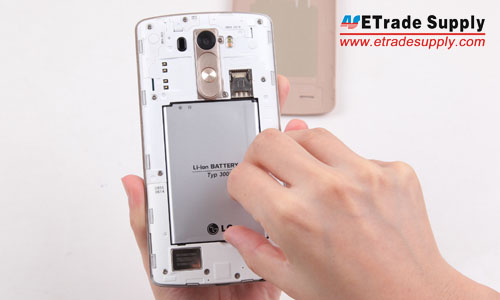
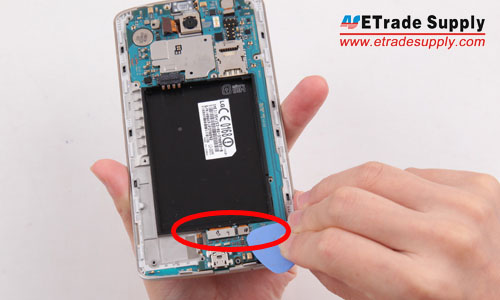
3. Take out the battery.
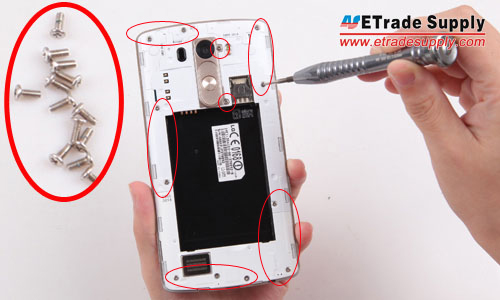
4. Undo the 13 screws. (Notice: there're 2 screws on the area of camera lens and power button.)
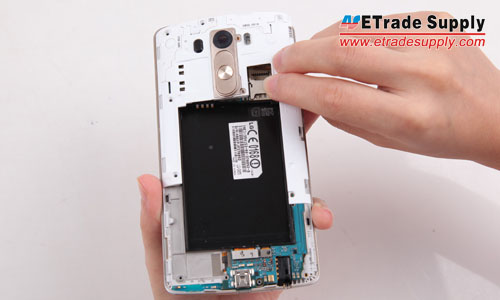
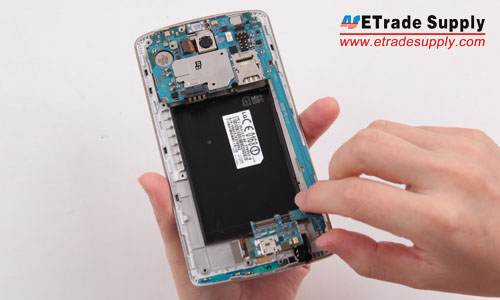
5. Take out the loud speaker assembly.
6. Take out the rear housing.
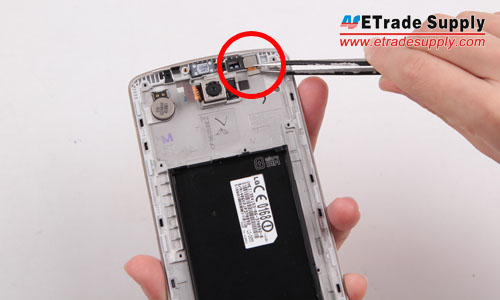
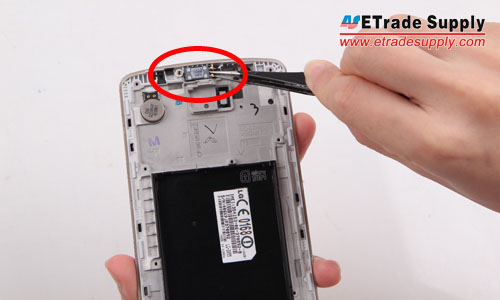
7. Pry up the front facing camera connector.
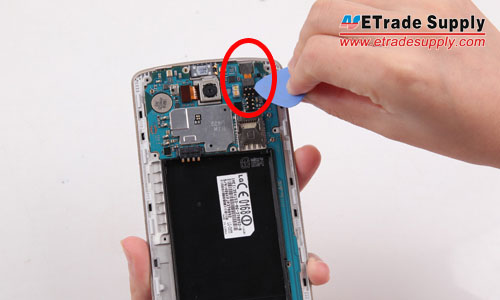
8. Pry up the rear facing camera connector.
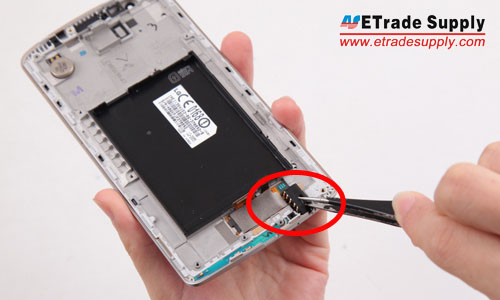
9. Pry up the LCD screen and digitizer connectors.
10. Take out the motherboard.
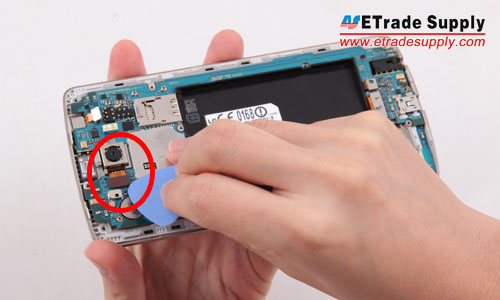
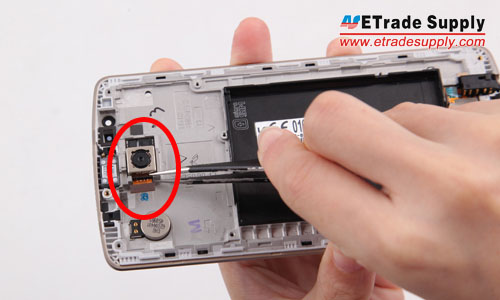
11. Take out the front facing camera. (Notice: be careful not to break the flex ribbon.)
12. Take out the back facing camera. (Notice: be careful not to destroy the flex ribbon.)
13. Take out the ear speaker.
14. Take out the earphone jack. (Notice: the earphone jack is cohered to the front housing, be careful!)
15. The LG G3 disassembly has been finished.


-
Customer also bought


-
(Posted on 11/20/15)Package arrived faster than expected, looks good, replaced it with no hassles. Fits perfectly to my LG G3.