


Sony Xperia Z2 Disassembly/Tear Down/Tear Apart
BY May | 八月 12th, 2014 | 0 | 1
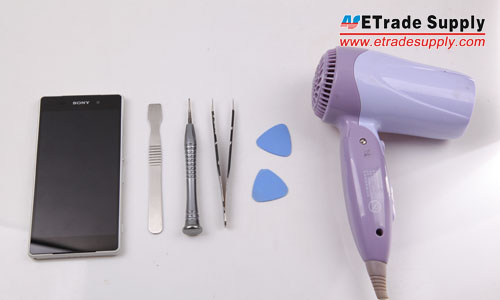
Tools Needed:
Heat Gun/Hair Dryer
Case Opening Tools
Tweezers
Phillips Screwdriver
Spudger Tool
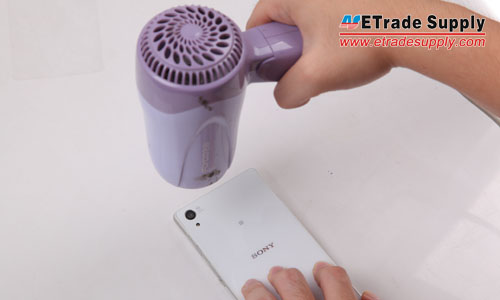
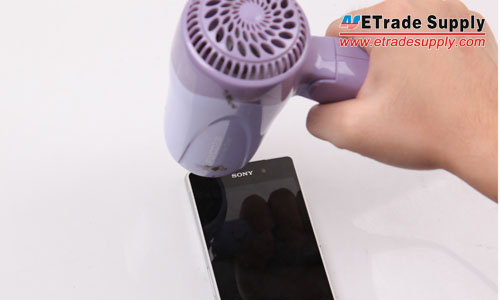
 1. Heat up the edges of back cover with hair dryer.
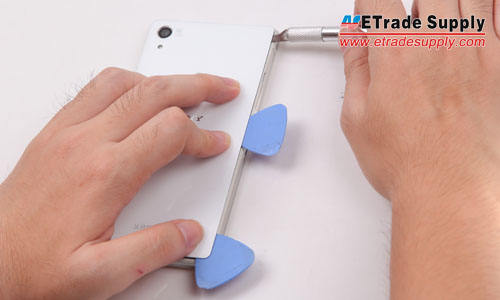
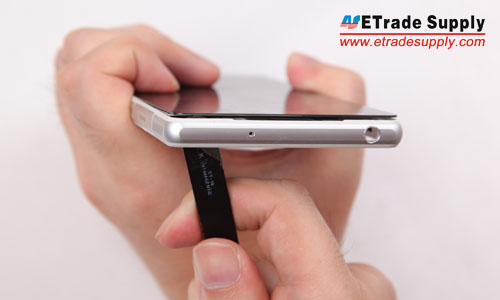
2. Pry up the back cover with spudger tool.
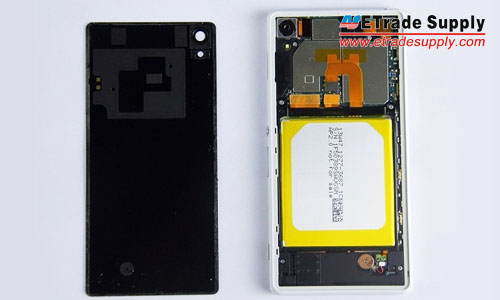
3. The back cover and LCD Assembly are separated.
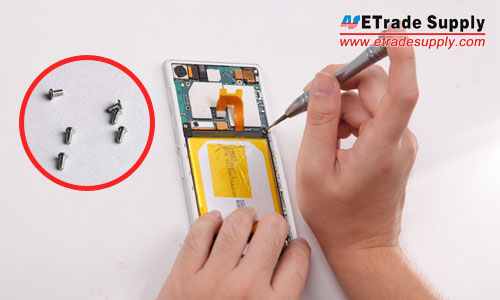
4. Undo the 6 screws to release the motherboard and loud speaker assembly.
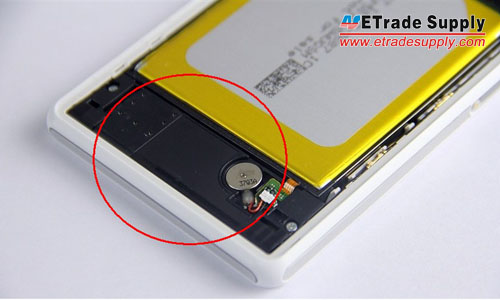
5. Pry up the vibrating motor, then take out the loud speaker assembly. (Notice: be careful not to damage the underneath flex ribbon.)
6. Pry up the battery flex connector, then pry up the battery gently. (Notice: be careful not to break the battery.)
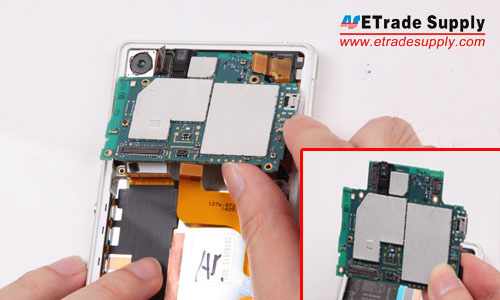
8. Take out the motherboard.
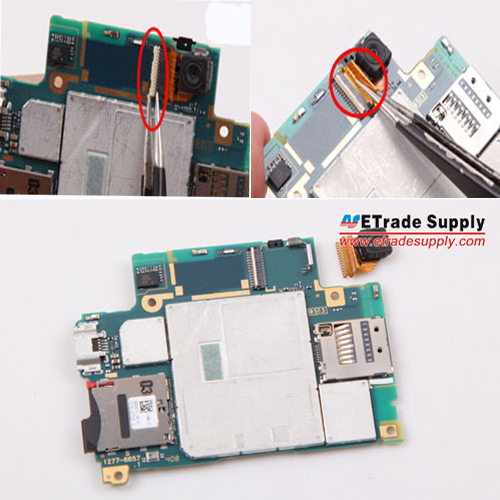
9. Pry up the front camera connector, then pull out the flex gently. (Notice: it’s very easy to snap the flex ribbon, be careful!)
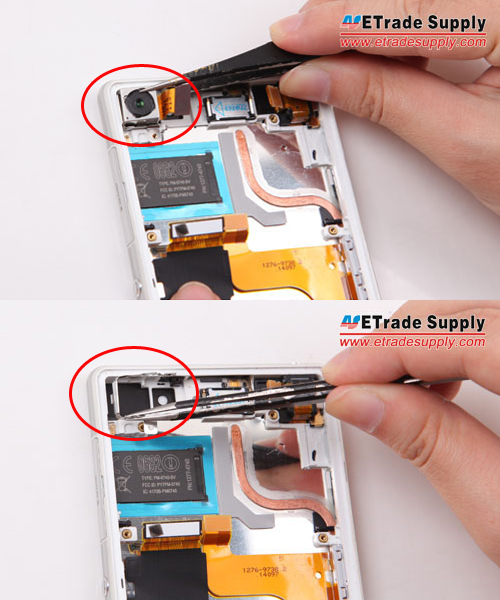
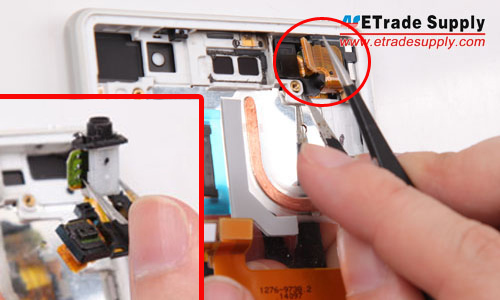
10. Take out the rear camera and camera retaining bracket.
11. Pry up the connector and take out the earphone jack module.
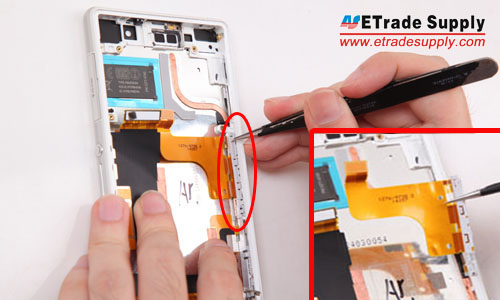
12. Loosen and take out the charging port flex cable ribbon.
13. Gently poke the antenna contacts.
14. Take out the side rail bracket.
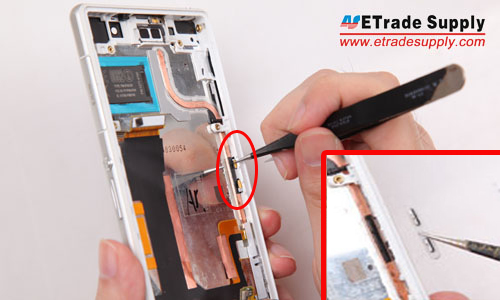
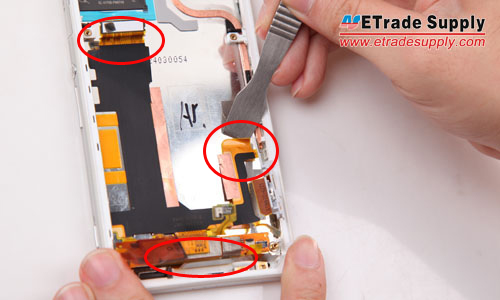
15. Pry up the three connectors to release the motherboard flex cable ribbon.
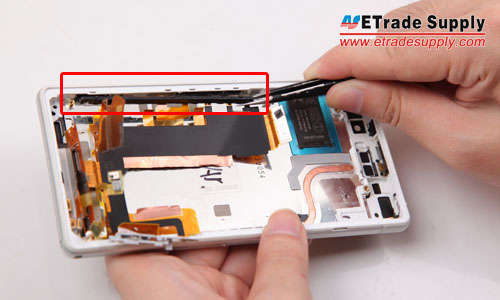
16. Take out the power button and camera button retaining bracket.
17. Heat up the edgaes of LCD Assembly.
18. Cautiously stab the back side of LCD Display with the other head of tweezers. (Notice: be cautious not to destroy the LCD screen.)
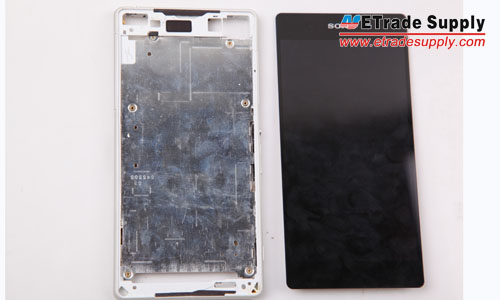
19. The front frame and LCD Assembly are separated.
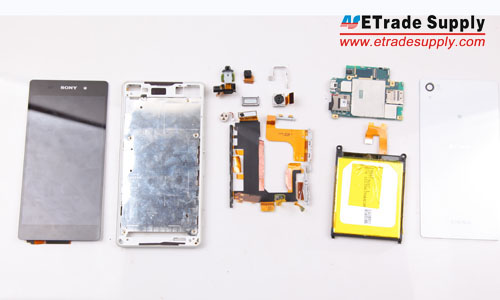
20. Finally, the Sony Xperia Z2 disassembly has been finished.
1. Heat up the edges of back cover with hair dryer.
2. Pry up the back cover with spudger tool.
3. The back cover and LCD Assembly are separated.
4. Undo the 6 screws to release the motherboard and loud speaker assembly.
5. Pry up the vibrating motor, then take out the loud speaker assembly. (Notice: be careful not to damage the underneath flex ribbon.)
6. Pry up the battery flex connector, then pry up the battery gently. (Notice: be careful not to break the battery.)
8. Take out the motherboard.
9. Pry up the front camera connector, then pull out the flex gently. (Notice: it’s very easy to snap the flex ribbon, be careful!)
10. Take out the rear camera and camera retaining bracket.
11. Pry up the connector and take out the earphone jack module.
12. Loosen and take out the charging port flex cable ribbon.
13. Gently poke the antenna contacts.
14. Take out the side rail bracket.
15. Pry up the three connectors to release the motherboard flex cable ribbon.
16. Take out the power button and camera button retaining bracket.
17. Heat up the edgaes of LCD Assembly.
18. Cautiously stab the back side of LCD Display with the other head of tweezers. (Notice: be cautious not to destroy the LCD screen.)
19. The front frame and LCD Assembly are separated.
20. Finally, the Sony Xperia Z2 disassembly has been finished.
1. Heat up the edges of back cover with hair dryer.
-
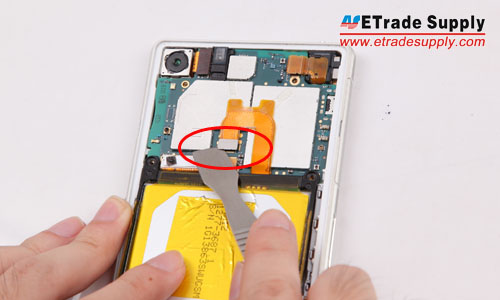
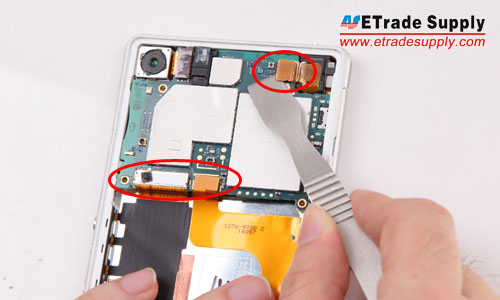
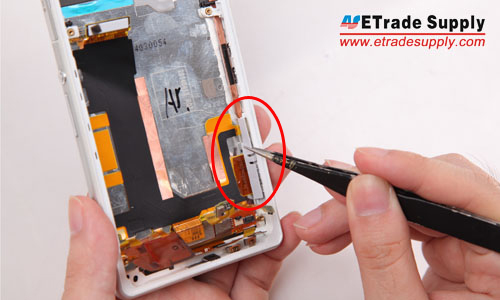
- 7. Pry up the three flex ribbon connectors on the motherboard.
Share:


 IOS 17.4 official version pushed to block battery vulnerability
  Is the Chinese-made rear case for the iPhone 15 series going on the market?
  New products coming:USB to MFI Lightning Cable
  Big BUG of iPhone 15
  Successfully submitted!