


How To Repair LG Nexus 4 Microphone By Replacing Charging Port Cable Ribbon
BY Junior | 六月 18th, 2013 | 4 | 1
Last week, one of my friends asked me for help as his LG Nexus 4 wasn’t working properly after having changed a Skinomi screen protector. The device ring normally, and I could hear his voice but people couldn’t hear me when made a call. I judge that the microphone wasn’t working properly because water form installing the Skinomi must have shorted out the connections of the Nexus 4’s charging port flex ribbon. So the phone needed a brand new charging port.
The following are the exact steps I took to change the LG Nexus 4 charging port flex ribbon.
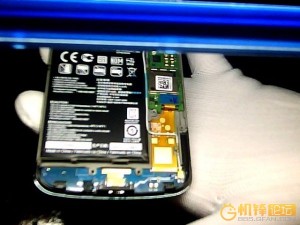
[caption id="attachment_3326" align="alignnone" width="300"] a brand new charging port[/caption]
[caption id="attachment_3327" align="alignnone" width="300"]
a brand new charging port[/caption]
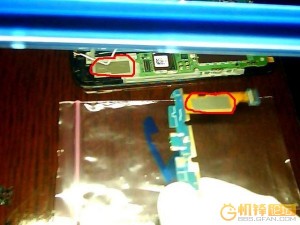
[caption id="attachment_3327" align="alignnone" width="300"] a brand new charging port-2[/caption]
Step One: Remove the sim-card slot
[caption id="attachment_3328" align="alignnone" width="300"]
a brand new charging port-2[/caption]
Step One: Remove the sim-card slot
[caption id="attachment_3328" align="alignnone" width="300"] Remove the sim-card slot[/caption]
Step Two: Remove two T5 screws which are on the bottom of the device.
[caption id="attachment_3329" align="alignnone" width="300"]
Remove the sim-card slot[/caption]
Step Two: Remove two T5 screws which are on the bottom of the device.
[caption id="attachment_3329" align="alignnone" width="300"] Remove two T5 screws[/caption]
Step Three: Pry the device open along the gap. Attention: Please do not damage the clips during this step.
[caption id="attachment_3330" align="alignnone" width="300"]
Remove two T5 screws[/caption]
Step Three: Pry the device open along the gap. Attention: Please do not damage the clips during this step.
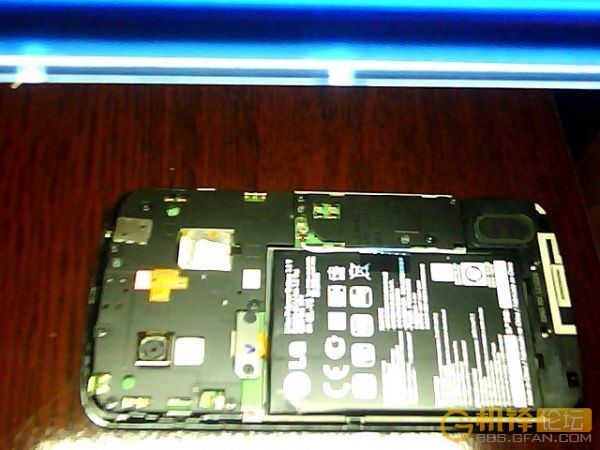
[caption id="attachment_3330" align="alignnone" width="300"]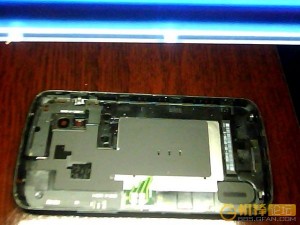 Pry the device open along the gap[/caption]
 Step Four: Remove the shield of the motherboard.
[caption id="attachment_3332" align="alignnone" width="300"]
Step Four: Remove the shield of the motherboard.
[caption id="attachment_3332" align="alignnone" width="300"] Remove the shield of the motherboard[/caption]
Step Five: Remove the microphone.
[caption id="attachment_3334" align="alignnone" width="300"]
Remove the shield of the motherboard[/caption]
Step Five: Remove the microphone.
[caption id="attachment_3334" align="alignnone" width="300"]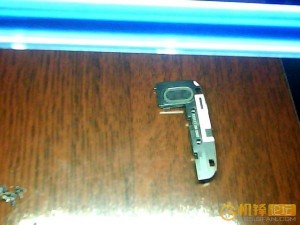 Remove the microphone[/caption]
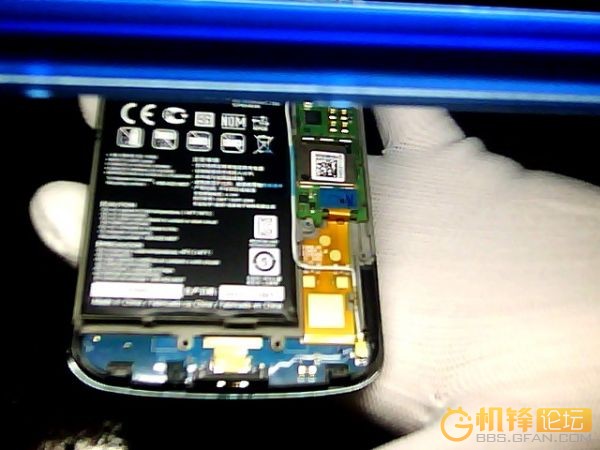
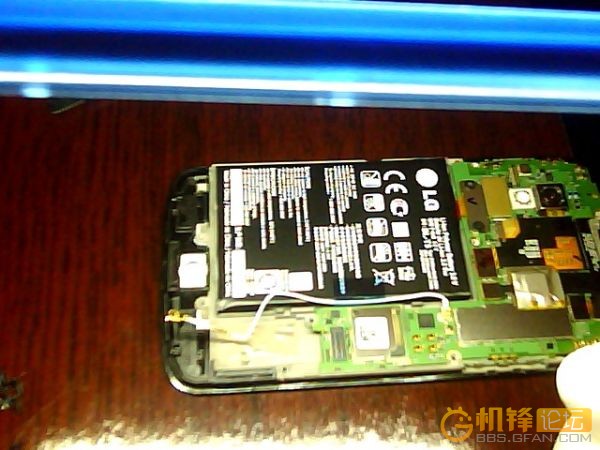
 Step Six: Remove the water damaged charging port flex ribbon.
[caption id="attachment_3337" align="alignnone" width="300"]
Step Six: Remove the water damaged charging port flex ribbon.
[caption id="attachment_3337" align="alignnone" width="300"] Remove the water damaged charging port flex ribbon[/caption]
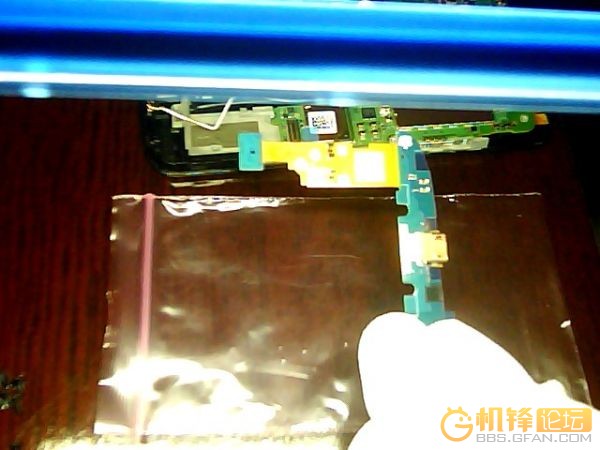
 Step Seven: Remove the double-sided tape which sticks on the surface of the brand new OEM charging port flex ribbon replacement.
[caption id="attachment_3340" align="alignnone" width="300"]
Step Seven: Remove the double-sided tape which sticks on the surface of the brand new OEM charging port flex ribbon replacement.
[caption id="attachment_3340" align="alignnone" width="300"]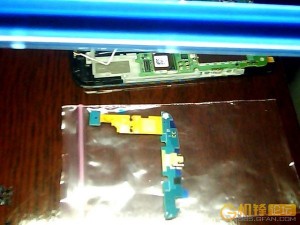 Remove the double-sided tape[/caption]
 Step Eight: Remove the protective film and then install this new Nexus 4 charging port flex ribbon.
[caption id="attachment_3343" align="alignnone" width="300"]
Step Eight: Remove the protective film and then install this new Nexus 4 charging port flex ribbon.
[caption id="attachment_3343" align="alignnone" width="300"]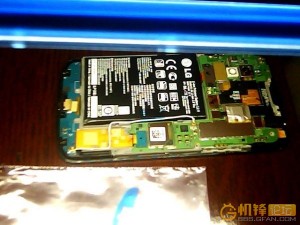 Remove the protective film and then install this new Nexus 4 charging port flex ribbon[/caption]
Step Nine: Install the loudspeaker.
[caption id="attachment_3345" align="alignnone" width="300"]
Remove the protective film and then install this new Nexus 4 charging port flex ribbon[/caption]
Step Nine: Install the loudspeaker.
[caption id="attachment_3345" align="alignnone" width="300"]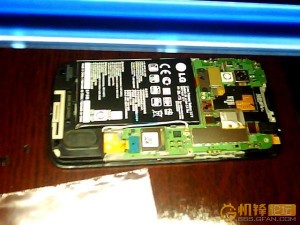 Install the loudspeaker[/caption]
Step Ten: Install the shield for the motherboard.
[caption id="attachment_3346" align="alignnone" width="300"]
Install the loudspeaker[/caption]
Step Ten: Install the shield for the motherboard.
[caption id="attachment_3346" align="alignnone" width="300"]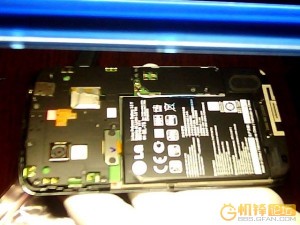 Install the shield for the motherboard[/caption]
Step Eleven: Install the battery door.
[caption id="attachment_3347" align="alignnone" width="300"]
Install the shield for the motherboard[/caption]
Step Eleven: Install the battery door.
[caption id="attachment_3347" align="alignnone" width="300"] Install the battery door[/caption]
Tools needed:
1. T5 Torx Screwdriver & 4mm Phillips screwdriver
2. 4mm Phillips screwdriver
[caption id="attachment_3348" align="alignnone" width="300"]
Install the battery door[/caption]
Tools needed:
1. T5 Torx Screwdriver & 4mm Phillips screwdriver
2. 4mm Phillips screwdriver
[caption id="attachment_3348" align="alignnone" width="300"] T5 Torx Screwdriver & 4mm Phillips screwdriver[/caption]
3. Plastic opening tool
[caption id="attachment_3349" align="alignnone" width="300"]
T5 Torx Screwdriver & 4mm Phillips screwdriver[/caption]
3. Plastic opening tool
[caption id="attachment_3349" align="alignnone" width="300"] Plastic opening tool[/caption]
On the whole, the replacement process was a great success. Because of a rough opening during step three, a clip on front housing broke and now there’s a gap between the battery door and the front housing. You’d better use a plastic opening tool if you attempt to open your Nexus 4.If your nexus is broken and you want to try the steps above to fix it yourself the tools and parts can be found at etradesupply.com:
1.Nexus 4 Charging Flex Cable Ribbon:
https://www.etradesupply.com/oem-lg-nexus-4-e960-charging-port-flex-cable-ribbon.html
2.Case Opening Tool:
https://www.etradesupply.com/case-opening-tool-double-head.html
https://www.etradesupply.com/case-opening-tool-for-cell-phone-triangle-thin.html
3.T5 Torx Screwdriver & 4mm Phillips screwdriver:
https://www.etradesupply.com/case-opening-tool-for-cell-phone-px-335c.html
Plastic opening tool[/caption]
On the whole, the replacement process was a great success. Because of a rough opening during step three, a clip on front housing broke and now there’s a gap between the battery door and the front housing. You’d better use a plastic opening tool if you attempt to open your Nexus 4.If your nexus is broken and you want to try the steps above to fix it yourself the tools and parts can be found at etradesupply.com:
1.Nexus 4 Charging Flex Cable Ribbon:
https://www.etradesupply.com/oem-lg-nexus-4-e960-charging-port-flex-cable-ribbon.html
2.Case Opening Tool:
https://www.etradesupply.com/case-opening-tool-double-head.html
https://www.etradesupply.com/case-opening-tool-for-cell-phone-triangle-thin.html
3.T5 Torx Screwdriver & 4mm Phillips screwdriver:
https://www.etradesupply.com/case-opening-tool-for-cell-phone-px-335c.html
 a brand new charging port[/caption]
[caption id="attachment_3327" align="alignnone" width="300"]
a brand new charging port[/caption]
[caption id="attachment_3327" align="alignnone" width="300"] a brand new charging port-2[/caption]
Step One: Remove the sim-card slot
[caption id="attachment_3328" align="alignnone" width="300"]
a brand new charging port-2[/caption]
Step One: Remove the sim-card slot
[caption id="attachment_3328" align="alignnone" width="300"] Remove the sim-card slot[/caption]
Step Two: Remove two T5 screws which are on the bottom of the device.
[caption id="attachment_3329" align="alignnone" width="300"]
Remove the sim-card slot[/caption]
Step Two: Remove two T5 screws which are on the bottom of the device.
[caption id="attachment_3329" align="alignnone" width="300"] Remove two T5 screws[/caption]
Step Three: Pry the device open along the gap. Attention: Please do not damage the clips during this step.
[caption id="attachment_3330" align="alignnone" width="300"]
Remove two T5 screws[/caption]
Step Three: Pry the device open along the gap. Attention: Please do not damage the clips during this step.
[caption id="attachment_3330" align="alignnone" width="300"]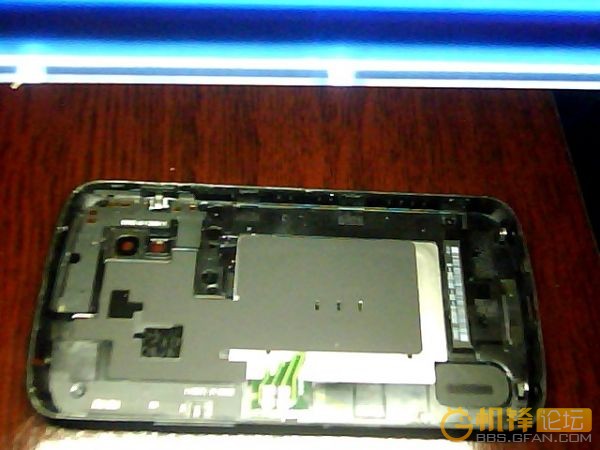 Pry the device open along the gap[/caption]
 Step Four: Remove the shield of the motherboard.
[caption id="attachment_3332" align="alignnone" width="300"]
Step Four: Remove the shield of the motherboard.
[caption id="attachment_3332" align="alignnone" width="300"]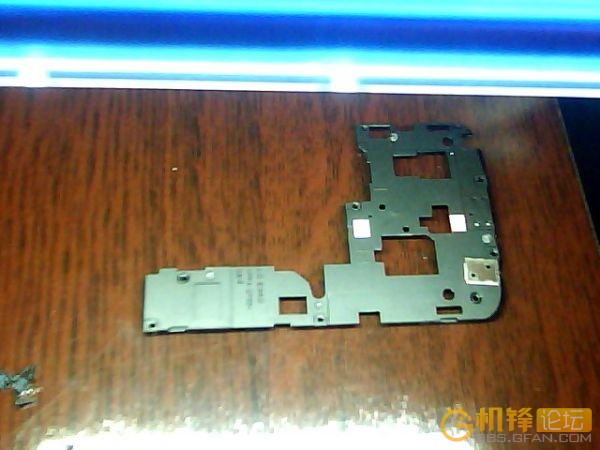 Remove the shield of the motherboard[/caption]
Step Five: Remove the microphone.
[caption id="attachment_3334" align="alignnone" width="300"]
Remove the shield of the motherboard[/caption]
Step Five: Remove the microphone.
[caption id="attachment_3334" align="alignnone" width="300"]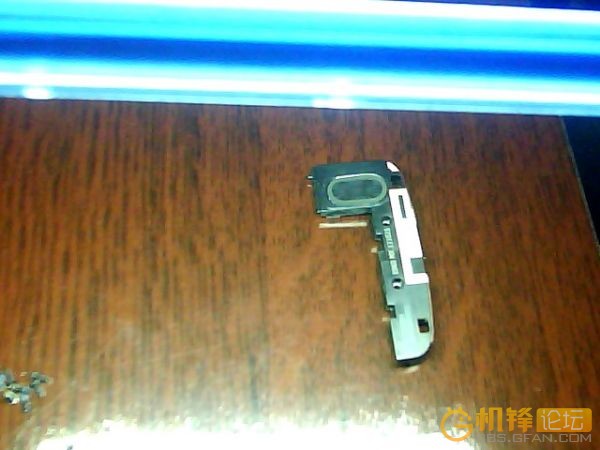 Remove the microphone[/caption]
 Step Six: Remove the water damaged charging port flex ribbon.
[caption id="attachment_3337" align="alignnone" width="300"]
Step Six: Remove the water damaged charging port flex ribbon.
[caption id="attachment_3337" align="alignnone" width="300"]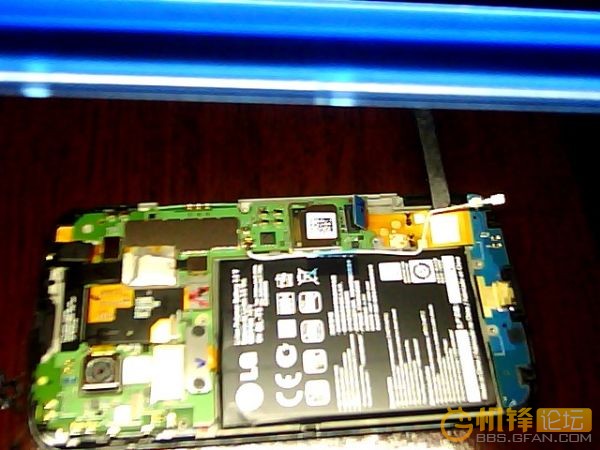 Remove the water damaged charging port flex ribbon[/caption]
 Step Seven: Remove the double-sided tape which sticks on the surface of the brand new OEM charging port flex ribbon replacement.
[caption id="attachment_3340" align="alignnone" width="300"]
Step Seven: Remove the double-sided tape which sticks on the surface of the brand new OEM charging port flex ribbon replacement.
[caption id="attachment_3340" align="alignnone" width="300"] Remove the double-sided tape[/caption]
 Step Eight: Remove the protective film and then install this new Nexus 4 charging port flex ribbon.
[caption id="attachment_3343" align="alignnone" width="300"]
Step Eight: Remove the protective film and then install this new Nexus 4 charging port flex ribbon.
[caption id="attachment_3343" align="alignnone" width="300"]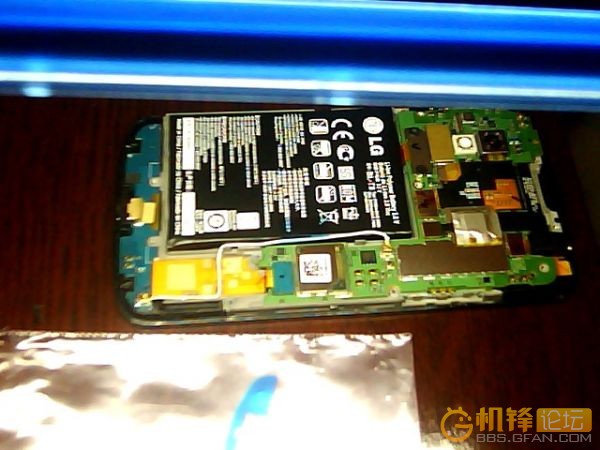 Remove the protective film and then install this new Nexus 4 charging port flex ribbon[/caption]
Step Nine: Install the loudspeaker.
[caption id="attachment_3345" align="alignnone" width="300"]
Remove the protective film and then install this new Nexus 4 charging port flex ribbon[/caption]
Step Nine: Install the loudspeaker.
[caption id="attachment_3345" align="alignnone" width="300"] Install the loudspeaker[/caption]
Step Ten: Install the shield for the motherboard.
[caption id="attachment_3346" align="alignnone" width="300"]
Install the loudspeaker[/caption]
Step Ten: Install the shield for the motherboard.
[caption id="attachment_3346" align="alignnone" width="300"]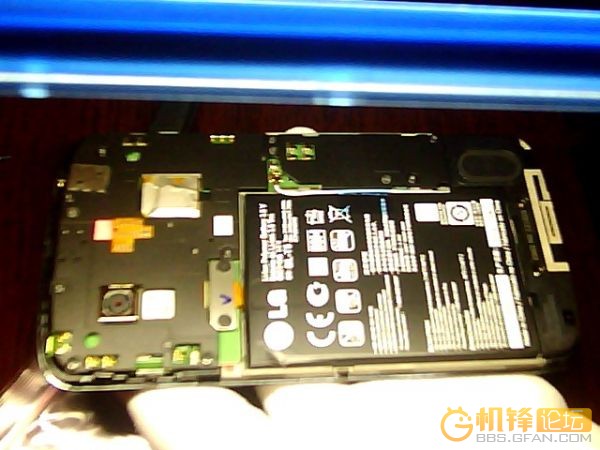 Install the shield for the motherboard[/caption]
Step Eleven: Install the battery door.
[caption id="attachment_3347" align="alignnone" width="300"]
Install the shield for the motherboard[/caption]
Step Eleven: Install the battery door.
[caption id="attachment_3347" align="alignnone" width="300"] Install the battery door[/caption]
Tools needed:
1. T5 Torx Screwdriver & 4mm Phillips screwdriver
2. 4mm Phillips screwdriver
[caption id="attachment_3348" align="alignnone" width="300"]
Install the battery door[/caption]
Tools needed:
1. T5 Torx Screwdriver & 4mm Phillips screwdriver
2. 4mm Phillips screwdriver
[caption id="attachment_3348" align="alignnone" width="300"] T5 Torx Screwdriver & 4mm Phillips screwdriver[/caption]
3. Plastic opening tool
[caption id="attachment_3349" align="alignnone" width="300"]
T5 Torx Screwdriver & 4mm Phillips screwdriver[/caption]
3. Plastic opening tool
[caption id="attachment_3349" align="alignnone" width="300"]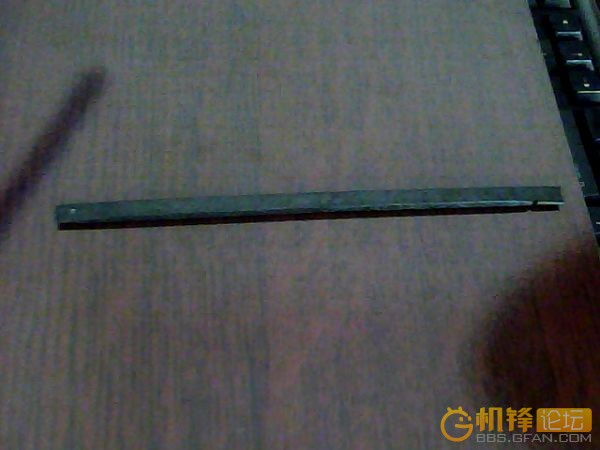 Plastic opening tool[/caption]
On the whole, the replacement process was a great success. Because of a rough opening during step three, a clip on front housing broke and now there’s a gap between the battery door and the front housing. You’d better use a plastic opening tool if you attempt to open your Nexus 4.If your nexus is broken and you want to try the steps above to fix it yourself the tools and parts can be found at etradesupply.com:
1.Nexus 4 Charging Flex Cable Ribbon:
https://www.etradesupply.com/oem-lg-nexus-4-e960-charging-port-flex-cable-ribbon.html
2.Case Opening Tool:
https://www.etradesupply.com/case-opening-tool-double-head.html
https://www.etradesupply.com/case-opening-tool-for-cell-phone-triangle-thin.html
3.T5 Torx Screwdriver & 4mm Phillips screwdriver:
https://www.etradesupply.com/case-opening-tool-for-cell-phone-px-335c.html
Plastic opening tool[/caption]
On the whole, the replacement process was a great success. Because of a rough opening during step three, a clip on front housing broke and now there’s a gap between the battery door and the front housing. You’d better use a plastic opening tool if you attempt to open your Nexus 4.If your nexus is broken and you want to try the steps above to fix it yourself the tools and parts can be found at etradesupply.com:
1.Nexus 4 Charging Flex Cable Ribbon:
https://www.etradesupply.com/oem-lg-nexus-4-e960-charging-port-flex-cable-ribbon.html
2.Case Opening Tool:
https://www.etradesupply.com/case-opening-tool-double-head.html
https://www.etradesupply.com/case-opening-tool-for-cell-phone-triangle-thin.html
3.T5 Torx Screwdriver & 4mm Phillips screwdriver:
https://www.etradesupply.com/case-opening-tool-for-cell-phone-px-335c.html
Share:


 IOS 17.4 official version pushed to block battery vulnerability
  Is the Chinese-made rear case for the iPhone 15 series going on the market?
  New products coming:USB to MFI Lightning Cable
  Big BUG of iPhone 15
  Successfully submitted!
Works perfectly, I have a new microphone working in like 15/20min!
Excellent tutorial, I would also recommend to remove the screws carefully, because if you have it damaged, it would be very difficult to remove it again…
So glad that it helps, thanks for reading and your suggestion. 😀
Thank you!! Used it to fix my phone, much appreciated…
Thanks for posting this! My phone went through the wash the other day and somehow came out completely undamaged except for the microphone.
I’m going to try and repair it myself following the steps you provided. I simply have one question. How can I ensure (or try my hardest) not to break one of the clips? Do you remember where on the phone the clips were so that I can be cautious?
Thank you again!