


iPhone 5 Disassembly Tutorial
BY yuki | 七月 20th, 2013 | 3 | 5
Although people are taught to take careful of beloved electronic devices, they have always dropped cellphones to floor, left their handsets on the table and have them cracked by strong objects, or slipped the smartphones out when put them into pocket or purse. It is common that iPhone 5 accompanies with cracked screens problems. So it is not surprising for Apple repair shops to handle iPhone smashed screen problems.
When iPhone 5 users damaged their devices, there is an option for them to get the phone repaired. However, Apple consumers feel discouraged, for Apple only offers a one-year warranty. Once users run out of the warranty, they will be charged of much money, such as $149 by bringing damaged iPhone 5 to Apple store or Apple repair center. In addition, iPhone 5 screen repairs charge more than $100 in certain repair stores. If you are enthusiastic with manual job, and looking for economic solution, this is your best choice: purchase necessary Apple iPhone 5 parts and follow the tutorial to do the iPhone 5 repair work.

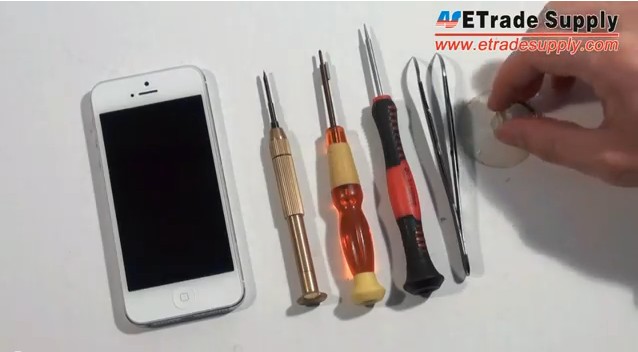
Tools needed
1) Sucking Disc
2) Tweezers
5) Straight Screwdriver
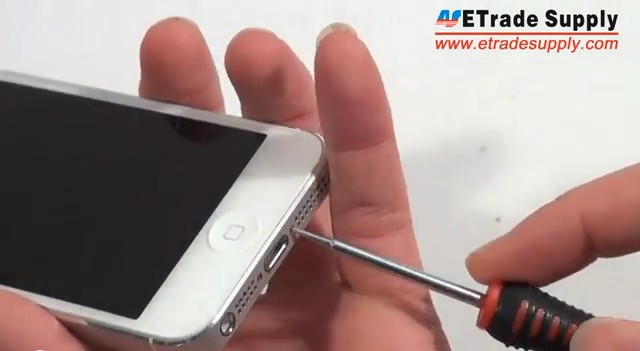
1. Use Pentalobe Screwdriver to release 2 screws.
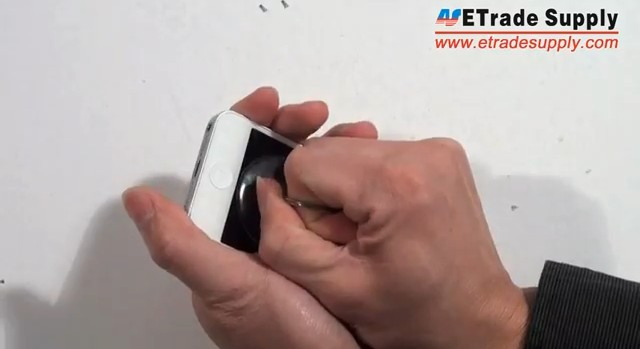
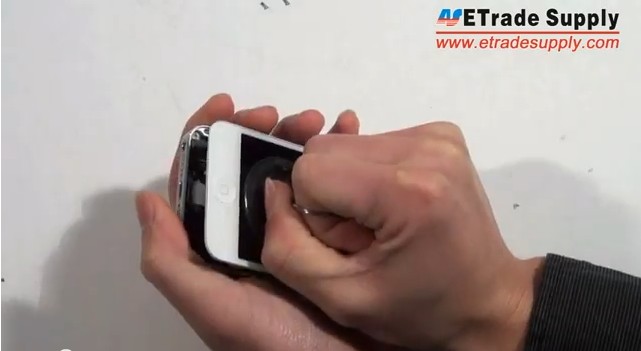
2. Press the Sucking Disc on the digitizer assembly, carefully pull it up.
3. Use Small Phillips Screwdriver to remove 3 screws.
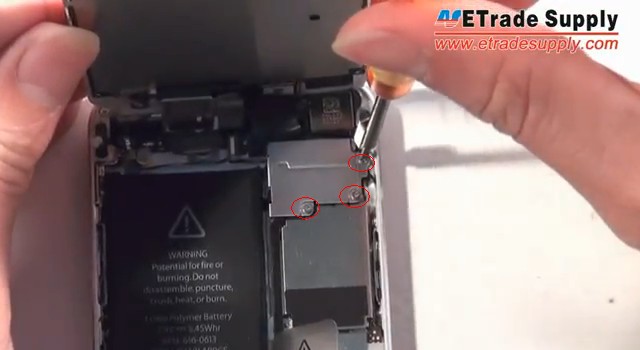
4. Use a pair of Tweezers to pick up the metal shield then disconnect 3 connectors
5. Use Small Phillips Screwdriver to remove 3 screws then for the 2 metal shields.
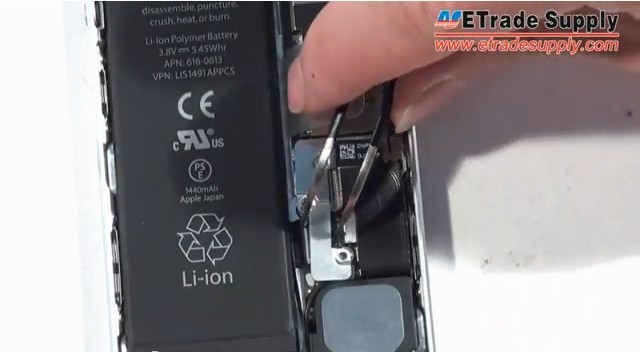
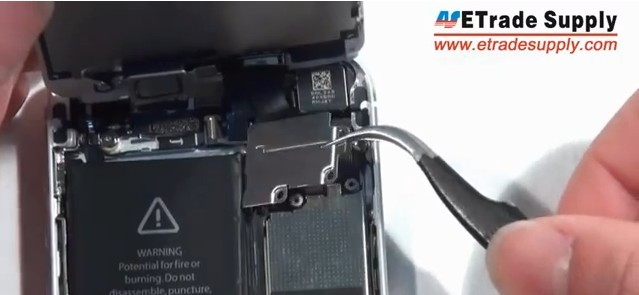
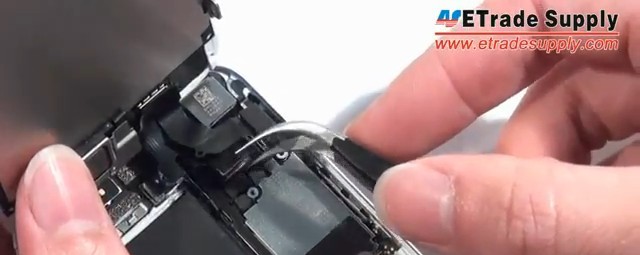
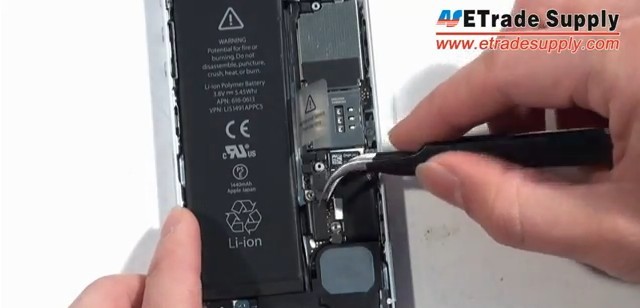
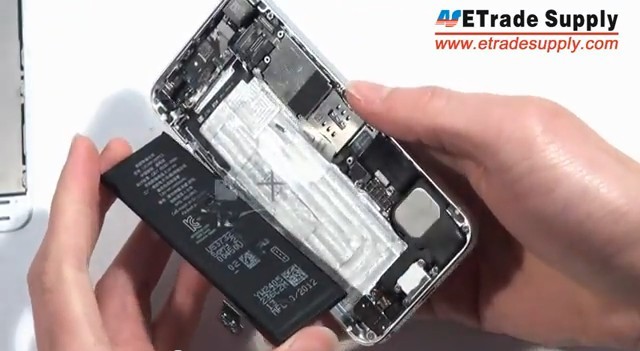
6. Disconnect the battery connector then remove the battery.
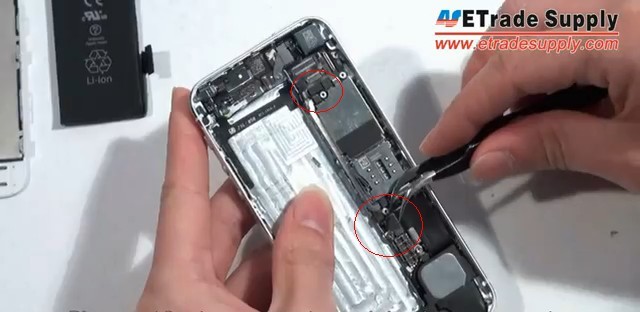
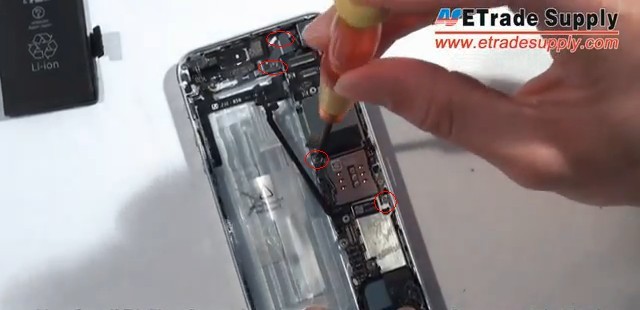
7. Disconnect 2 antenna connectors and charging port connector.
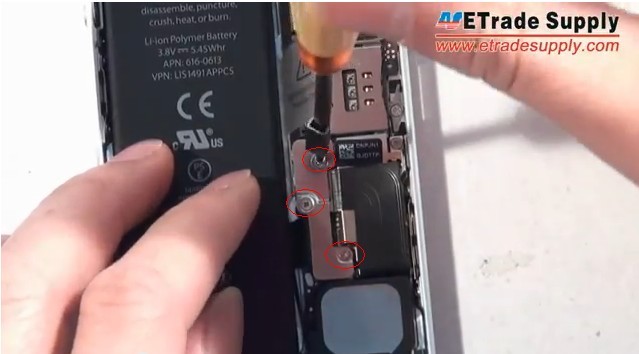
8. Use Small Phillips Screwdriver to remove 4 screws then a metal shield.
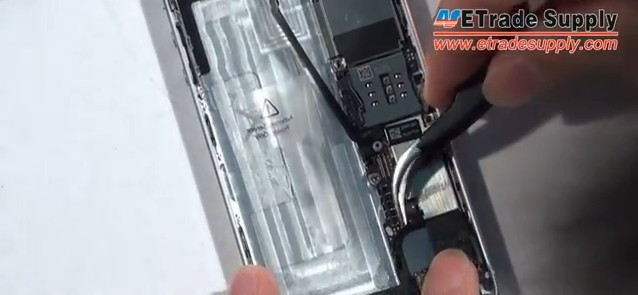
9. Disconnect another antenna connector then use Straight Screwdriver to remove 3 screws.
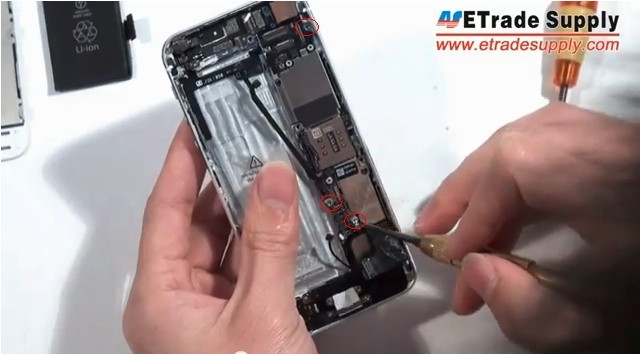
10. Use Small Phillips Screwdriver to release 2 screws on the top of the rear housing.
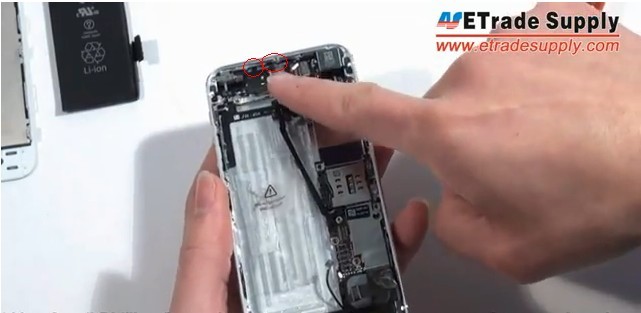
11. Turn over the motherboard assembly then disconnect a connector to release it.
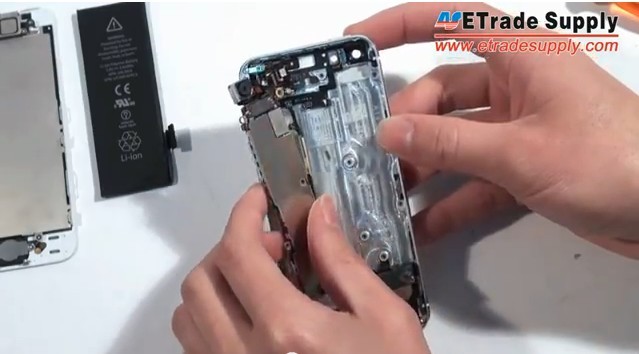
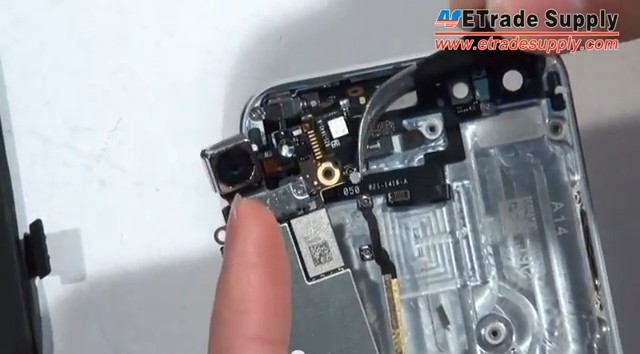
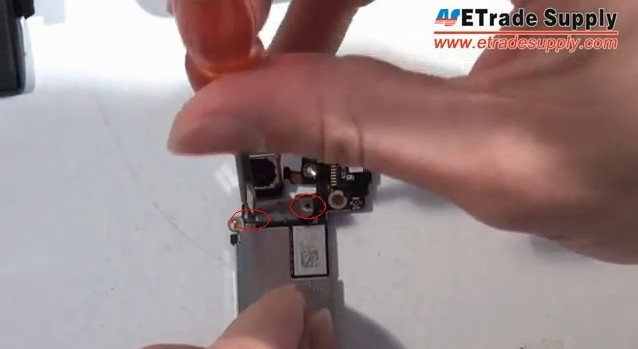
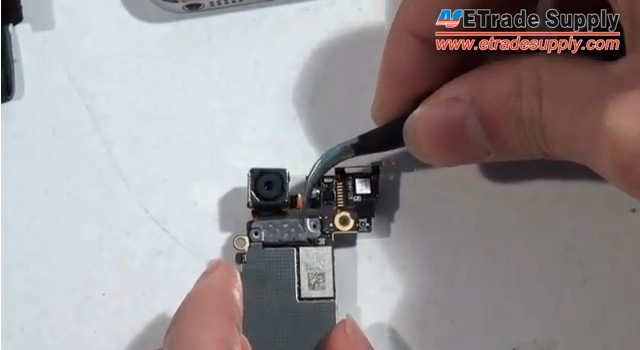
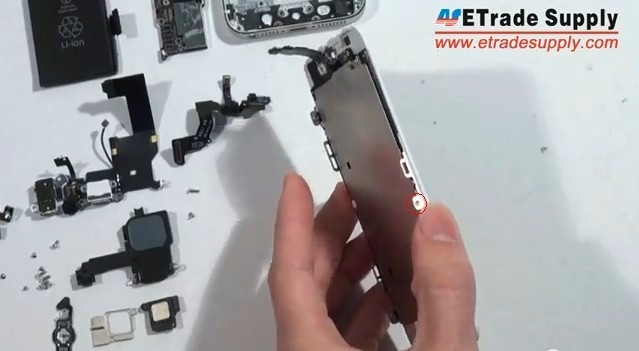
12. Use Small Phillips Screwdriver to remove 2 screws and a metal shield then release the rear facing camera.
13. Use Small Phillips Screwdriver to remove 7 screws.
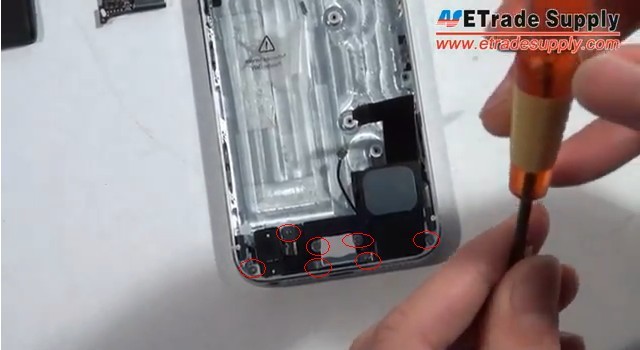
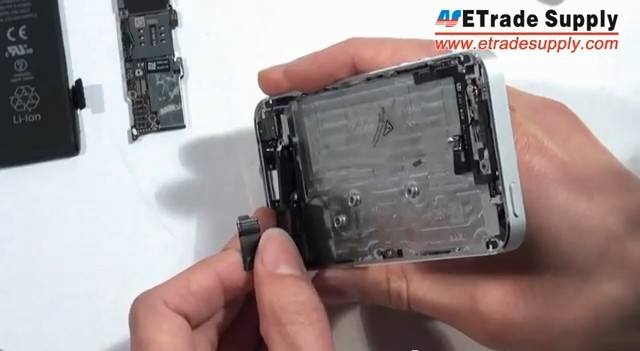
14. Remove the charging port assembly.
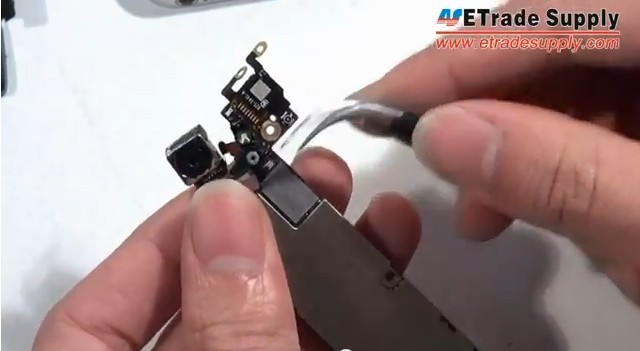
15. Use Tweezers to separate the charging port flex cable and loud speaker.
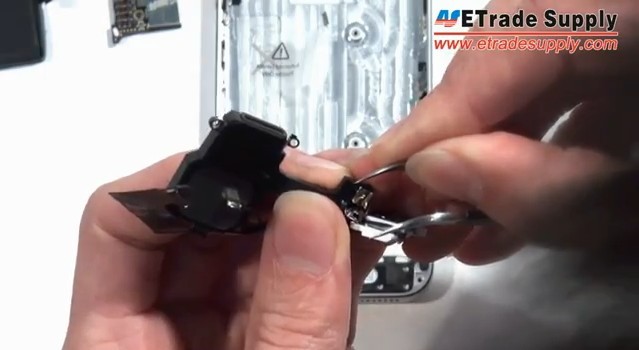
16. Use Small Phillips Screwdriver to remove 2 screws and a metal shield then the home button can be released.
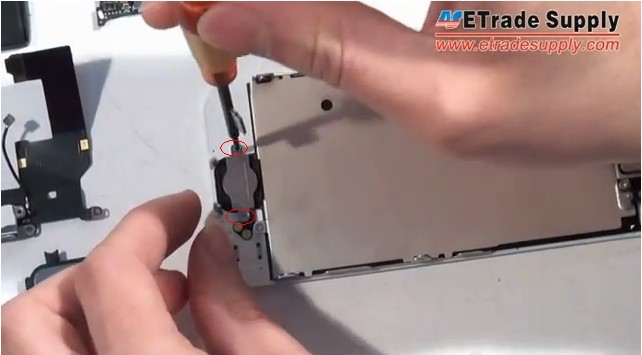
17. Use Small Phillips Screwdriver to remove 2 screws, the metal shield and ear phone can be released.
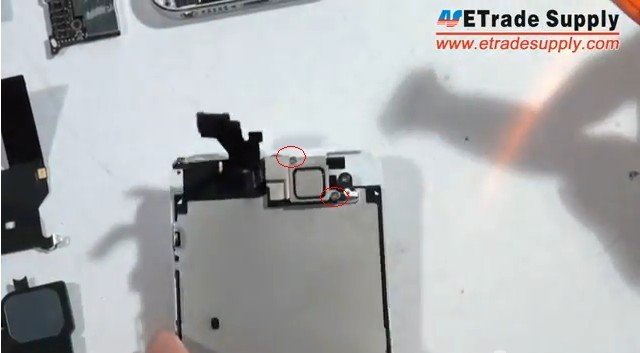
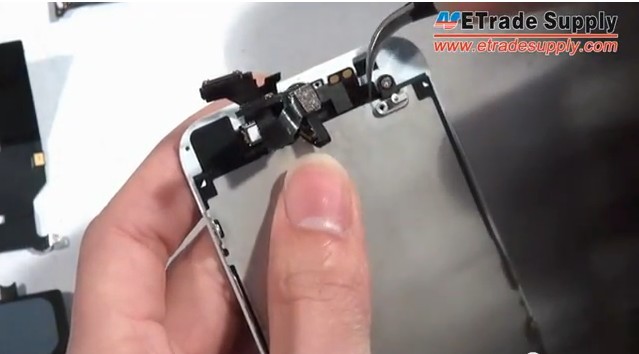
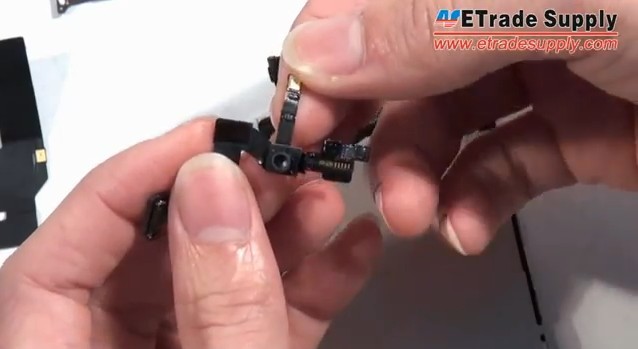
18. Remove the front facing camera with sensor flex cable ribbon.
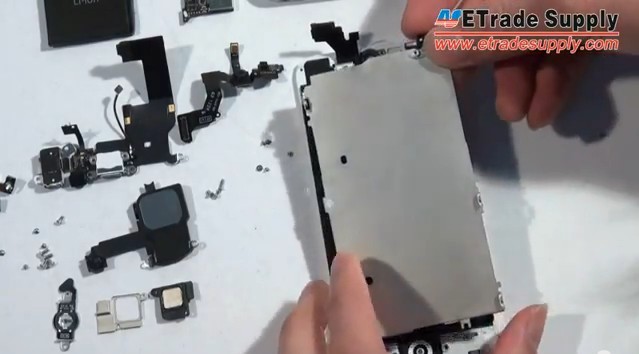
19. Remove 6 screws then the LCD heat shield can be removed.
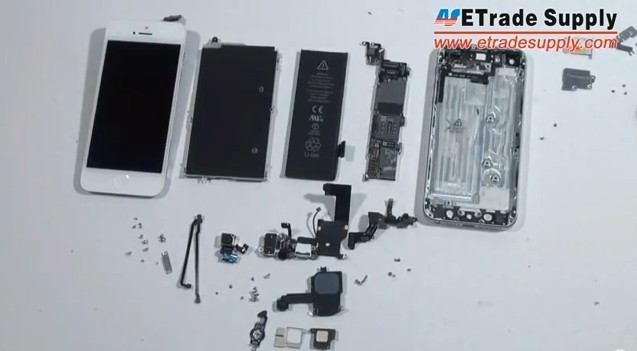
20. iPhone 5 Tear Down Parts
Click to learn iPhone 5 Take Apart Video and follow it step by step.


 IOS 17.4 official version pushed to block battery vulnerability
  Is the Chinese-made rear case for the iPhone 15 series going on the market?
  New products coming:USB to MFI Lightning Cable
  Big BUG of iPhone 15
  Successfully submitted!
my iphone 5 is not powering on. even when i put it on charge it displays nothing on screen
touch and glass remove required
It’s help to repair the phone.