


How to Replace Your Broken iPad Air 2 Screens within 10 Minutes
BY Davi | 十二月 18th, 2014 | 10 | 13
iPad Air 2 is the thinnest but most powerful iPad ever which means much lesser room has been left for the inner parts. Will that cause it more difficult to be fixed? As a tablet with a 9.7 inches screen, the most possible damage is breaking the screen accidently. Let Apple to replace your broken iPad air 2 screen will cost you as high as $379, which is twice as much as a 10 minutes DIY screen replacement (Buy the iPad air 2 LCD and digitizer screen assembly here ). Here we will walk you through a step by step iPad air 2 screen replacement guide and hope this could help.
Tools Needed:
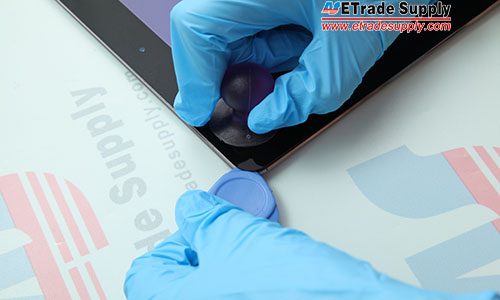
1. Heated the iPad air 2 screen edge up to melt the adhesive for 3 minutes, then pry up the screen with the suction cup and case opening tool. (If your screen shattered badly, please use a plastic adhesive tape to cover it in order not to make any further damage.)
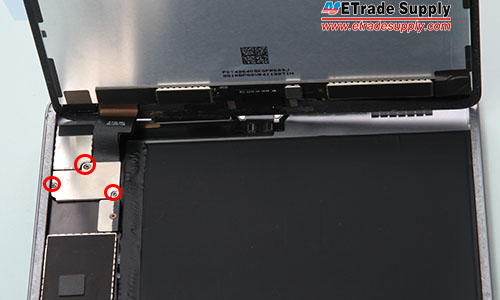
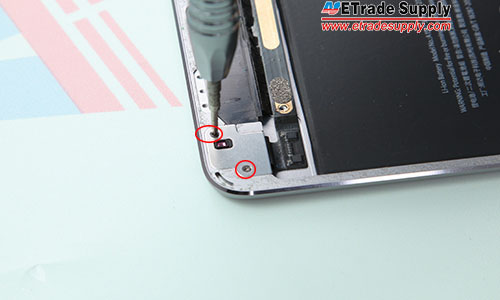
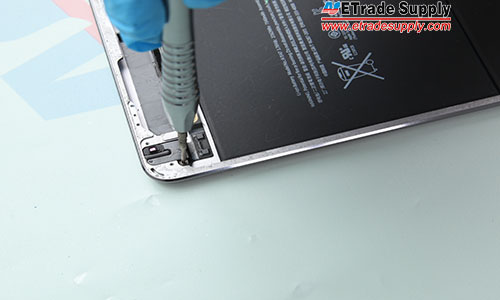
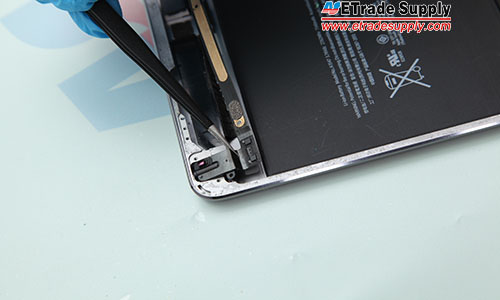
2. After the iPad air 2 screen assembly has been opened, undo 3 screws and remove the metal bracket covering the flex cables.
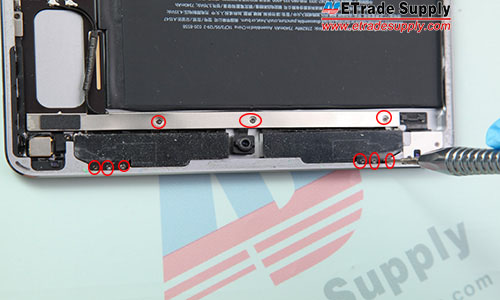
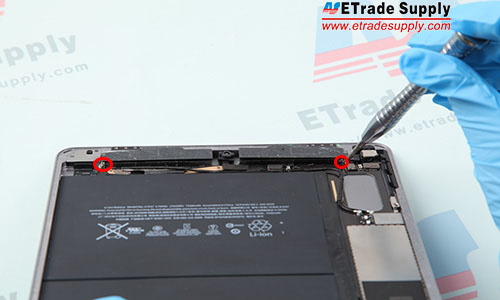
3. Undo 6 screws holding the antenna module and 3 screws in the metal bar.
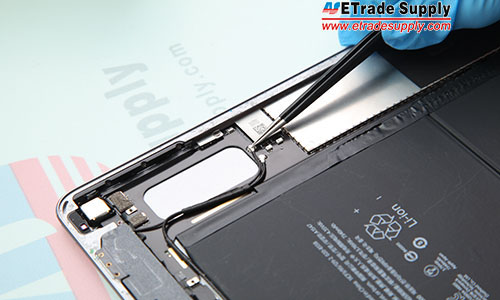
4. Peel off the adhesive and undo the screw under the adhesive.
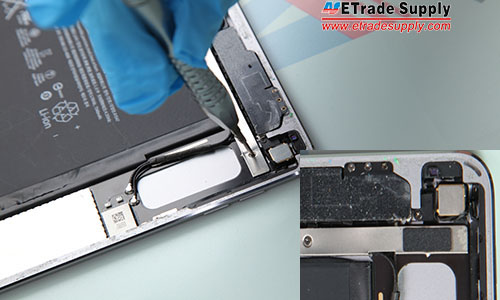
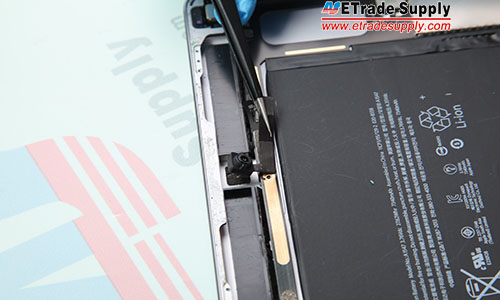
5. Undo 2 screws inside the bracket.
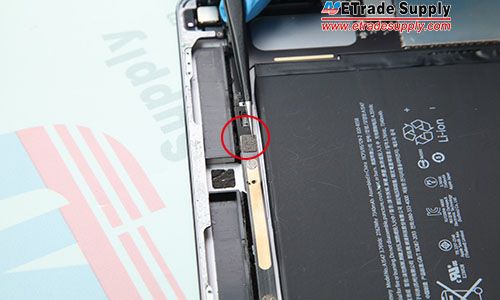
6. Disconnect the antenna, then remove the antenna module.
7. Disconnect the front facing camera flex cable and remove the front facing camera.
8. Disconnect the headphone jack flex cable.
9. Undo 2 screws in the headphone jack bracket.
10. Undo the screw under the bracket.
11.Remove the headphone jack flex cable assembly.
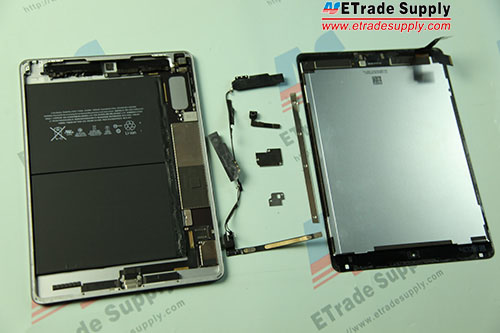
Because the mother board is stuck to the back housing by strong adhesive, it’s high risk to remove the motherboard and special tools and skills are needed. We don’t recommend people to tear down the part by himself (herself). So does the battery.


 IOS 17.4 official version pushed to block battery vulnerability
  Is the Chinese-made rear case for the iPhone 15 series going on the market?
  New products coming:USB to MFI Lightning Cable
  Big BUG of iPhone 15
  Successfully submitted!
Hi to the community,
Is it possible to buy the replacement part (touchscreen/digitizer) and then follow steps 1-2? It looks like that’s all that’s needed, right? Why would I need to disconnect antenna, etc? Also, the instructional sort of ends abruptly–what do i do after all those screws have been removed??
Hi,you’re right, if you only need to replacement the screen display then the steps after step 2 is unnecessary,after you remove the screen assembly you need to remove the home button to your new display. and we do the other steps only to show people how easy the other parts can be removed,sorry to cause you misunderstanding.
Hi Kaye, if I buy your digitiser glass only and manage to separate the old damaged glass from the LCD, what glue do I use to put the new glass back on the LCD etc?
Hi, James,you can choose to replace the digitizer glass only, but it needs very professional skills to do this job, the digitizer glass and LCD are pressing together by professional machine, and normal adhesives can’t make it, and it can be hardly done by DIY repair work so, we recommend you to replace the whole LCD and digitizer assembly together.
Why are you pulling the antenna out? and/or even mentioning the taking the motherboard out? Every step after 2 is unnecessary, and will probably do more harm than good with your baity title to those who don’t know better. Best to stick with parts, and leave the instructionals to others.
This is a very misleading article. I repair devices for a living and I can guarantee you this will take longer then 10 minutes. I highly recommend you do not try and separate the digitizer from the LCD panel. Most likely you will break your LCD panel and need to replace the whole assembly.
If you find a shop stupid enough to shoulder the risk for half the value of the replacement part I suggest you take advantage.
Hi, nice guide but I was wondering how would I glue everything back together? Do I need some special glue? Also what tool do you use to heat up the screen edge?
Hello Pali, you can use 3M adhesive tape instead. As for the heating tooling, we’re using a heat gun. Hope it helps 🙂
I was was told by two repair shops that the glass, digitizer, and the LCD must be replaced together on the “Ipad air 2”!
Is this correct?
If so how much?
If not, why are the repair shops misinformed?
Hello Jerry, not all right.
The digitizer and LCD can be separately replaced, but it’s time-consuming and very easier to destroy the other parts, also it requires strong skills and professional tool machines. Repair shops are not misguding you, they choose to replace the whole LCD assembly as it’s less risky and more feasible.
The LCD and Digitizer assembly costs about $220, while the digitizer costs about $72. You may check more replacement part details here:
http://www.etradesupply.com/apple/ipad/apple-ipad-air-2.html