


How to Replace A Samsung Galaxy S6 Screen in 7 Steps
BY Davi | 四月 18th, 2015 | 5 | 4

Most of you have already seen our full tear down of Samsung's Galaxy S6, but here we'll teach you how to replace the Galaxy S6's screen in 7 steps. Samsung's Galaxy S6 and S6 Edge both use Gorilla Glass 4 for their screens. Gorilla Glass 4 is reported as the hardest Corning glass ever, and should be able to keep the screen from breaking in most situations, but accidents still happen. Keep in mind we recommend any repairs should be done by a quailified/experienced person otherwise more damaged maybe caused to the device. If you are that individual or are confident in your ability, then this guide is for you.
Tools Needed:
- ● A Pair of Tweezers
- ● PH00 Philips Screwdriver
- ● Case Opening Tool
- ● Heat Gun or Hairdrier
- ● Suction Cup
- ● A Spudger (Optional)
Step 1: Take Out The SIM Card Tray.
● Power off the Samsung Galaxy S6.
● Use an ejector pin or tweezers to take out the SIM Card Tray.

Step 2: Take Apart The Battery Door.
● Heat up the Samsung Galaxy S6 Battery Door.
● Pull the battery cover up with a suction cup. Insert a case opening tool to broaden the gap.
● Separate the battery door from the phone. (The battery door is stuck to the middle plate with some really strong adhesive. Handle gently and carefully! )

Step 3: Release The Rear Housing.
● Undo the 13 screws in the rear housing.
● Heat up the LCD Assembly.
● Separate the rear housing from the LCD Assembly with the help of a suction cup tool and case opening tool.
● Notice: be careful not to damage the wireless charging chip attached to the battery.


Step 4: Remove The Motherboard.
● Pry up the LCD assembly connector, front facing camera connector, battery connector, ear speaker connector and home button flex ribbon connector.
● Turn over the motherboard and disconnect the flex ribbon for the USB charging assembly.

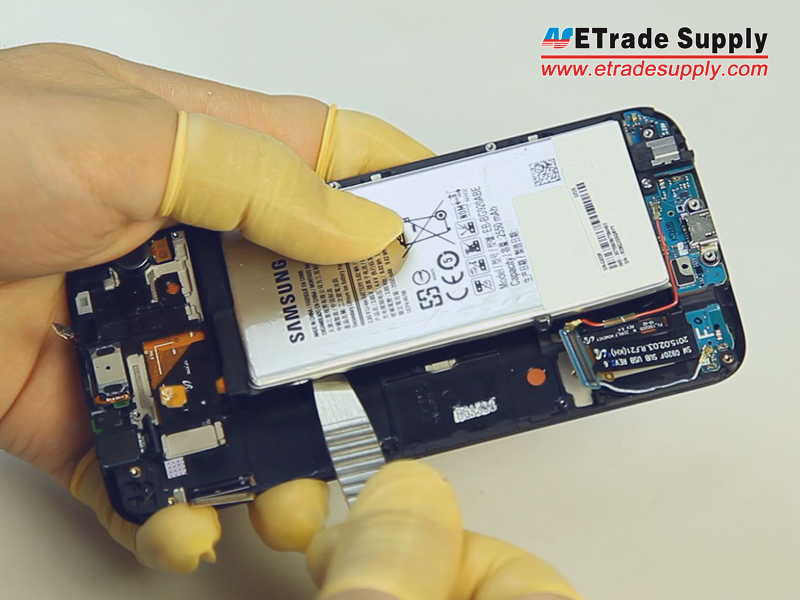
Step 5: Remove The Battery And Small Components.
● Gently pry up the battery with a spudger tool.
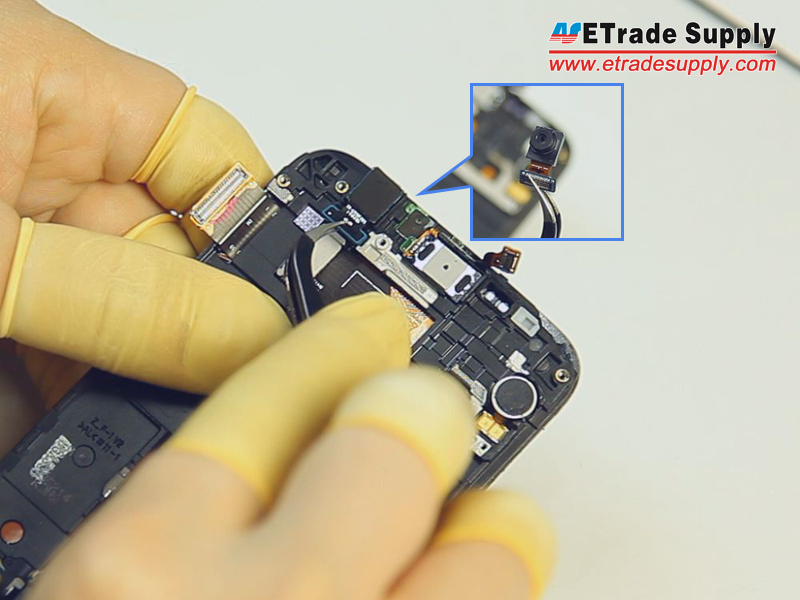
● Remove the front facing camera.
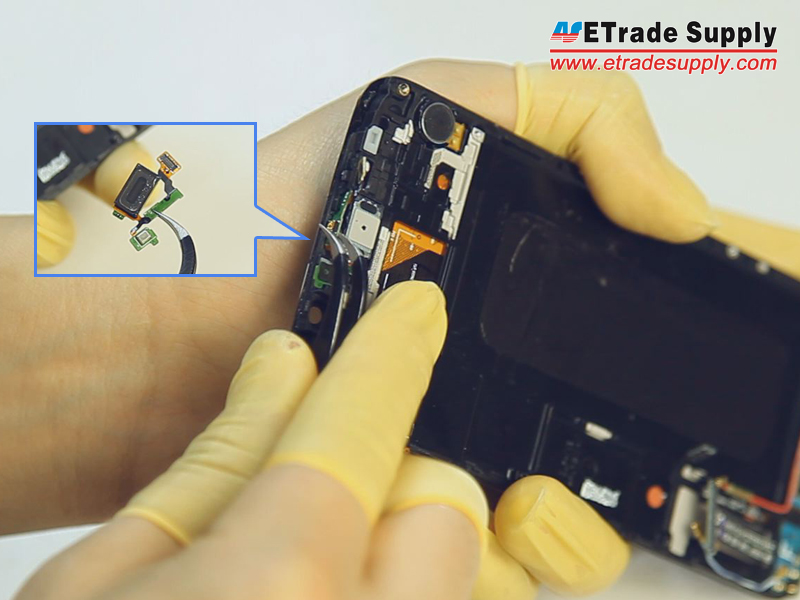
● Remove the ear speaker. (Notice: be careful not to break the flex ribbon.)
● Remove the vibrating motor.

Step 6: Release The Charging Port Assembly.
● Remove the Bluetooth and Wi-Fi cables.
● Undo the earphone jack screw. (Notice: the screw is different than the rear housing screws.)


Step 7: Remove The Front Housing.
● Heat up the LCD Assembly to release the front housing.

Then you can assemble the new screen and the front housing with a fresh adhesive. Just reverse the steps to get the phone back together. Good luck!
If you have any questions leave them in the comments below we’ll reply to you ASAP, or you can contact us by email: service@etradesupply.com
|
|

|
|
|
|
|
|---|


 IOS 17.4 official version pushed to block battery vulnerability
  Is the Chinese-made rear case for the iPhone 15 series going on the market?
  New products coming:USB to MFI Lightning Cable
  Big BUG of iPhone 15
  Successfully submitted!
HI, QUESTION DOES THE GALAXY S6 LCD AND DIGITIZER ONE ITEM?
Hi,they are different items,but they are assembled together.
Add a comment… how can I use to repair my gorilla glass who will do it me Am in Ghana
Hi
are we replace just broken front glass in Samsung s6
Thanks
Hi Silvester, no, the tutorial is about how to replace the LCD and digitizer assembly. Replace a broken glass would be much more complicated.