How to Repair a Broken HTC One M8 Screen
BY yuki | 五月 30th, 2014 | 13 | 9
Although HTC One M8 is said to be a well-built smartphone, the HTC's latest sprout, its owners still suffer from component breaks, such as cracked M8 screen, broken battery, malfunctioning camera and other parts etc. When you broke the HTC One M8 screen, you can carry out HTC One screen repair yourself to save money. Here we walk you through detailed steps for replacing a cracked HTC One M8 display. ETrade Supply is always the first to get the best and cheap HTC One M8 Replacement Parts and Components.
Besides repairing cracked HTC One M8 screen, you also can repair these broken HTC One M8 parts after you go through this M8 screen repair tutorial:
• Replace a cracked or shattered HTC One M8 rear housing
• Fix a broken HTC M8 front facing camera and dual rear facing camera
• Repair a malfunctioned HTC One M8 charging port PCB board
• Fix a damaged HTC One M8 top and bottom cover
• Repair problematic HTC One M8 loudspeaker or ear speaker
• Replace a damaged HTC One M8 battery
Tools You Need to Fix Broken HTC One M8 Screen Assembly
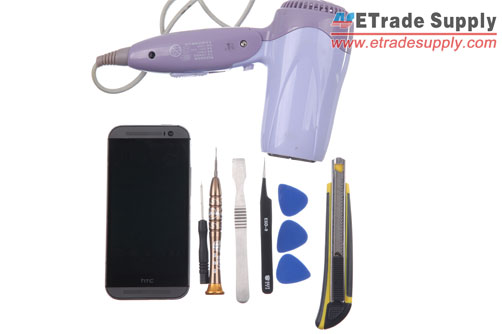
• Hair Dryer
• Spudger Tool
• Tweezers
• Several Case Opening Tools
• Cutter Knife
• Small Phillips Screwdriver and T5 Screwdriver
Product: a new HTC One M8 LCD Screen and Digitizer Assembly with Front Housing
Steps to Replace Cracked or Shatterd HTC One M8 Screen
Step 1: Power off the HTC One M8.
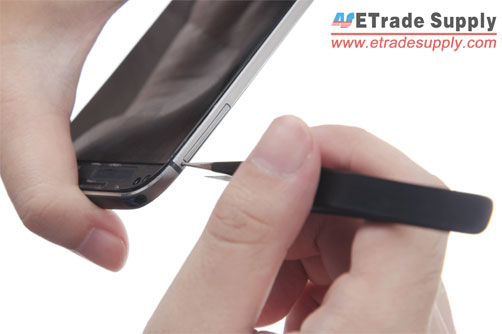
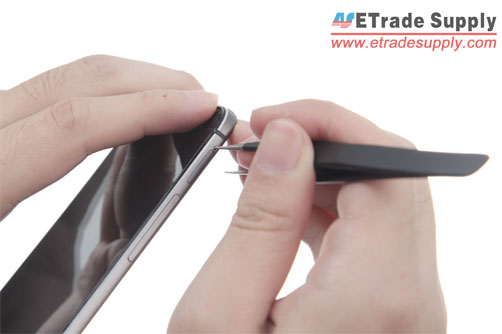
Step 2: Remove the M8 SIM card tray and SD card tray.
Note: If you have plugged in the SIM card and SD card, please remember to remove them with a HTC One M8 eject tool or tweezers.
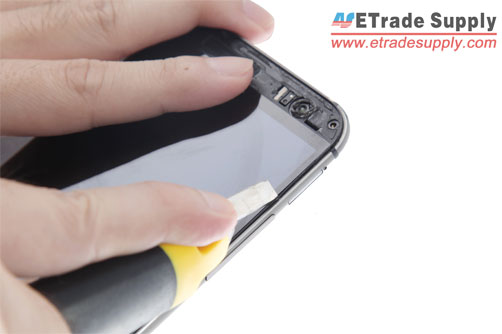
Step 3: Heat up both the top and bottom cover on HTC One M8 front side for several minutes.
Note: You can use hair dryer or heat gun to heat up the HTC One M8 top and bottom cover which are held in place by adhesive.
Step 4: Dig the spudger in the stream of M8 top and bottom cover.
Note: When the glue is softened, you can dig the spudger in the stream of the upper and bottom cover on HTC One M8 to pry them up.
HTC One M8 top and bottom cover replacement: You can replace new HTC One M8 top and bottom cover after removing broken one at this step.
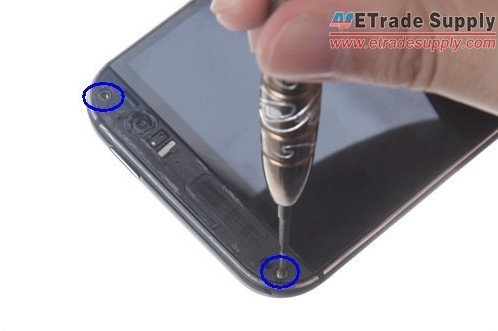
Step 5: Unscrew two screws underneath the top cover.
Note: Use T5 screwdriver to remove the two screws.
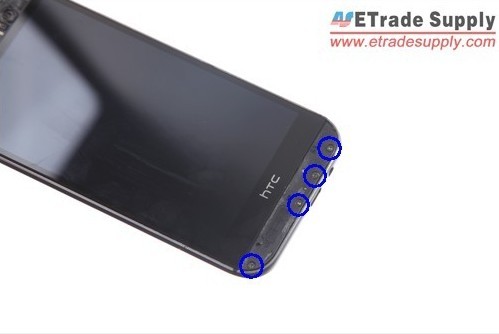
Step 6: Undo four screws underneath the bottom cover.
Note: Use small Phillip screwdriver to remove the four screws.
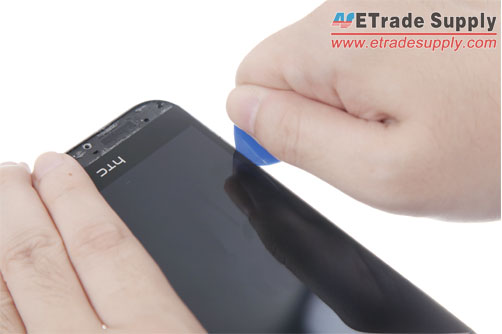
Step 7: Separate the M8 screen assembly from rear housing.
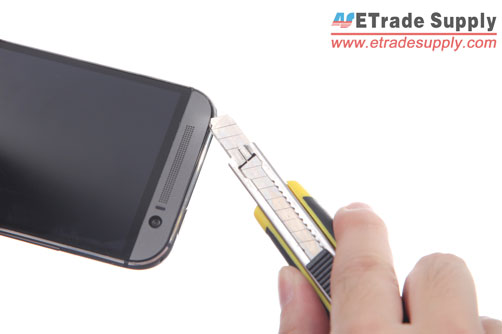
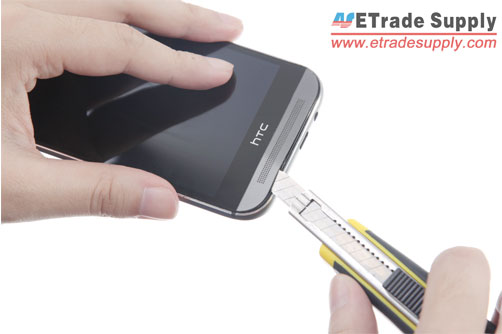
Note: Strip down the M8 screen assembly with the cutter knife and then use several case opening tools to separate them. Handle carefully when you use the cutter knife to avoid any damage on the HTC One M8 screen and rear housing.
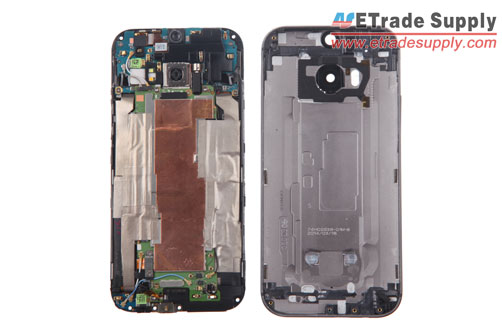
Step 8: The M8 LCD screen assembly and rear housing are separated.
HTC One M8 rear housing replacement: It is easy to replace a broken HTC One M8 rear housing after you disassemble the M8 LCD assembly and back housing at this step.
Step 9: Undo five screws holding M8 mainboard in place.
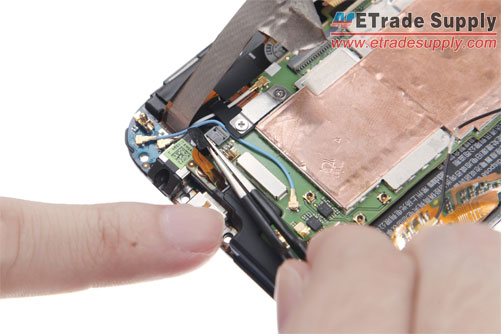
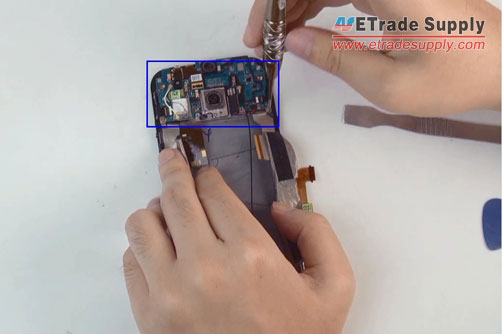
Step 10: Disconnect the black and blue antennas on M8 mainboard with tweezers.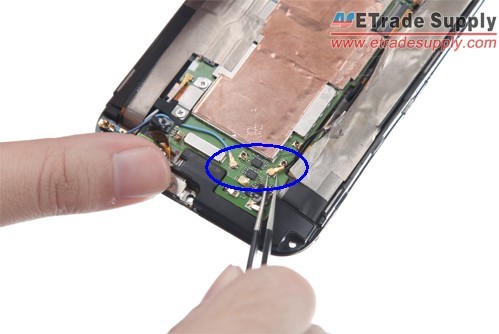
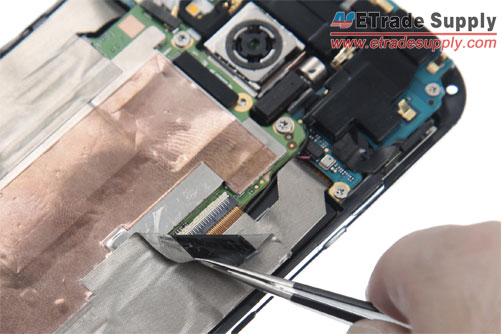
Step 11: Use tweezers to peel off the tape on the right part.
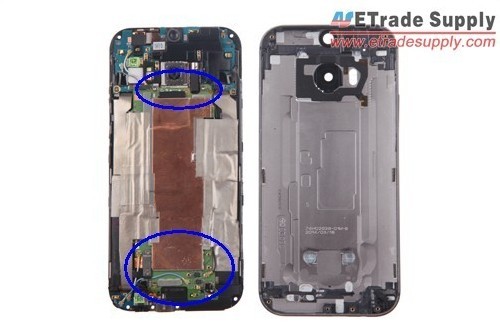
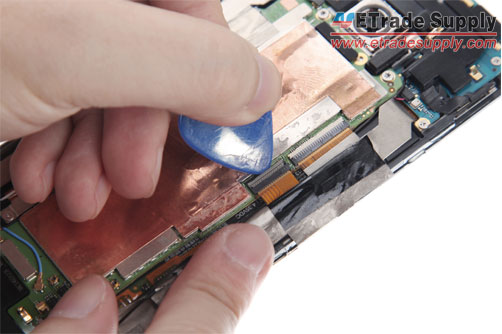
Step 12: Disconnect the two flex cable ribbons on HTC One M8 with case opening tool.
Note: Pull out the cable ribbons after the disconnection with tweezers.
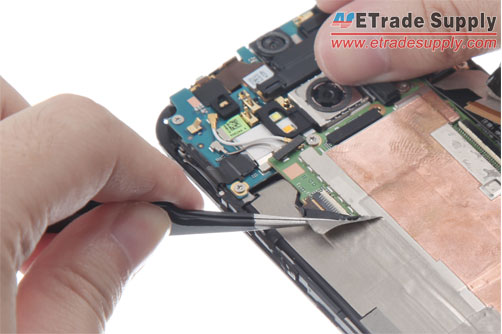
Step 13: Peel off the tape on the left part.
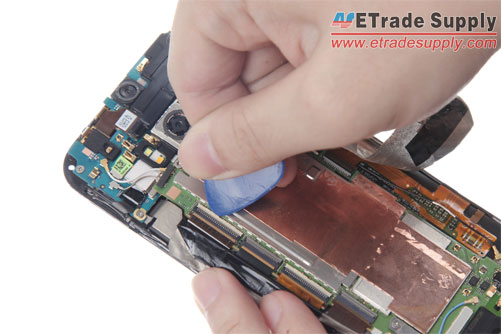
Step 14: Use case opening tool disconnect the four HTC One M8 flex cable ribbons.
Note: Pull out the flex cables after the disconnection with tweezers.
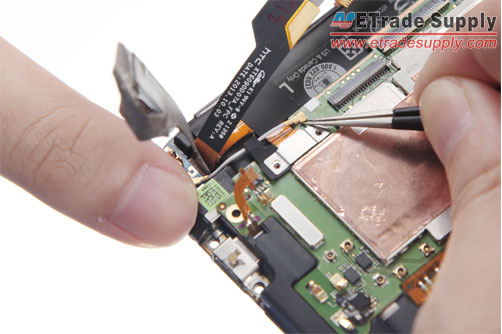
Step 15: Disconnect the loud speaker flex cable.
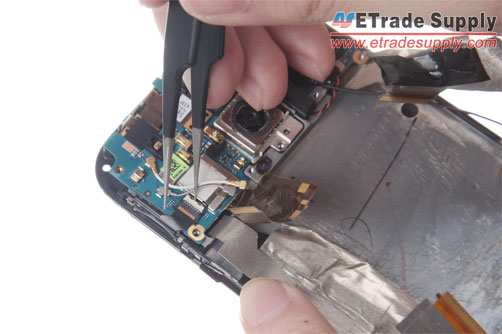
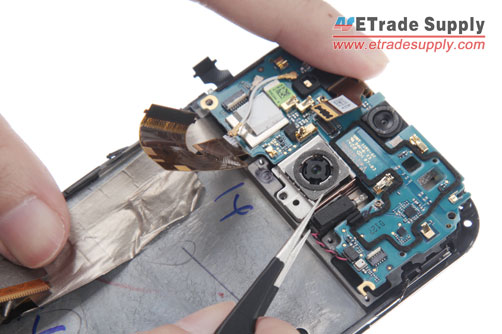
Step 16:Disconnect the two white antennas on M8 mainboard with tweezers.
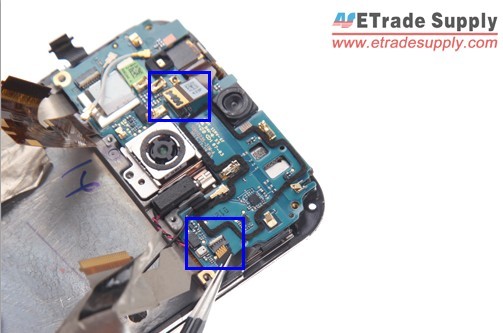
Step 17:Disconnect another white antennas on M8 mainboard bottom part.
Step 18: Remove the HTC M8 motherboard.
Note: After disconnect all flex cable ribbons, you can remove the M8 logic board with the spudge tool.
HTC One M8 motherboard replacement: You can replace a new M8 logic board at this step.
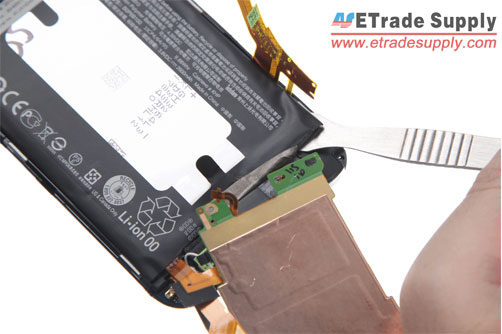
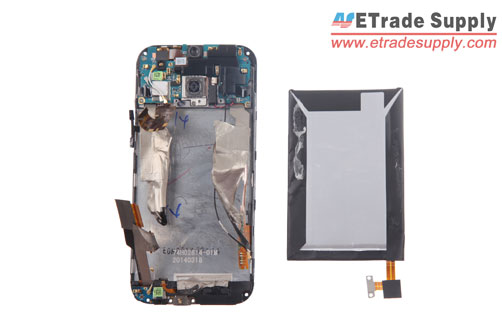
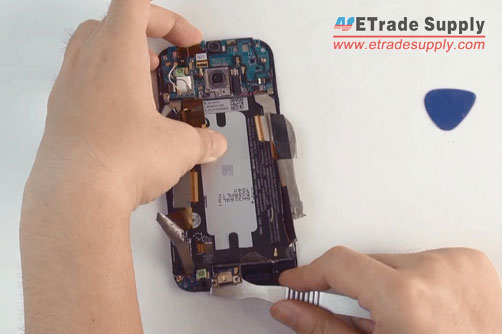
Step 19: Strip down the M8 battery with spudge tool.
HTC One M8 battery replacement: You can replace a new M8 battery replacement part at this step.
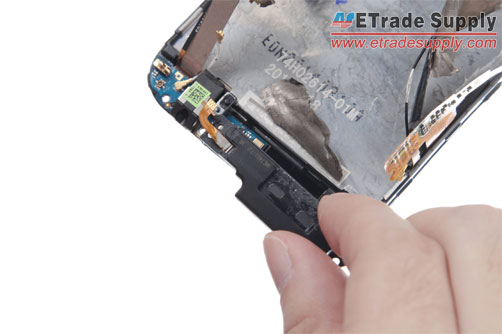
Step 20: Disassemble the M8 loud speaker assembly.
HTC One M8 loud speaker assembly replacement: If the M8 loud speaker is malfunctioned, you can replace a new one at this step.
Step 21: Peel off HTC One M8 internal top cover with tweezers.
Step 22: Use spudger tool to peel off the M8 charging port PCB board.
HTC One M8 charging port PCB board replacement: You can fix broken M8 charging port by replacing it at this step.
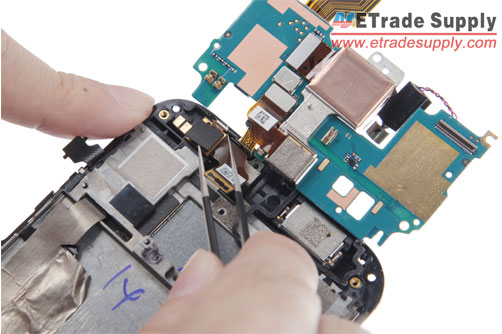
Step 23: Undo five screws securing the motherboard flex cable ribbon.
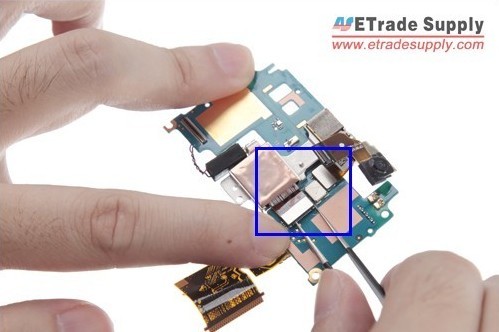
Step 24: Disconnect the connector on M8 motherboard flex cable ribbon.
Step 25: Strip down the two connectors with tweezers.
Step 26: Release the HTC One M8 vibrating motor with tweezers.
Step 27: Use spudger tool to peel off the M8 motherboard flex cable ribbon.
HTC One M8 motherboard flex cable ribbon replacement: You can fix broken M8 charging port by replacing it at this step.
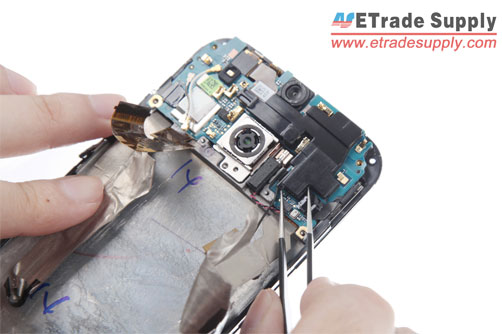
Step 28: Disconnect the M8 dual rear facing camera and peel it off the board.
Note: The HTC One M8 big rear facing camera and small rear facing camera are combined.
HTC One M8 rear facing camera replacement: You can replace a new M8 dual rear facing camera or only replace the big or small camera after separate them.
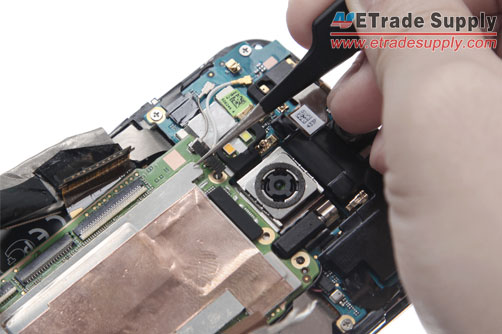
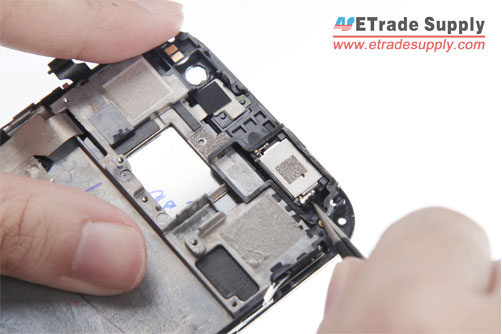
Step 29: Remove the HTC One M8 ear speaker with tweezers.
Step 30: The HTC One M8 screen assembly with front housing is released.
HTC One M8 screen assembly replacement: Now you can take a new M8 screen assembly with front housing and replace the broken one, then assemble all M8 parts in reversal steps.
To sum up, a damaged HTC One M8 screen or display assembly can't be replaced without going through the whole device disassembly. However, when you know how to repair broken M8 screen, you also can accomplish other broken M8 parts replacement: M8 rear housing, battery, loudspeaker, charging port, top and bottom cover, dual rear facing camera and motherboard.
Here is the HTC One M8 Disassembly Video for Screen and Parts Repair for your reference.






 IOS 17.4 official version pushed to block battery vulnerability
  Is the Chinese-made rear case for the iPhone 15 series going on the market?
  New products coming:USB to MFI Lightning Cable
  Big BUG of iPhone 15
  Successfully submitted!
It does suck that there isnt an easier way to replace the screen but if you have the right tools its really not hard at all. This was my second phone tear down and having the right tools made this easy. The pictures in the instructions had extra radio wires that mine didn’t have, other then that instructions where spot on. I advise you just move at a slow pace and examine everything multiple times before processing. While the instructions are correct they didn’t explain the best techniques to use to complete the task but hey, those are trade secretes. Use caution when peeling the tape back as you will be reusing it. Goodluck!
Hi James, thank you for your suggestion, we will do better in future.
i have htc m8 when i close the back cover the earpiece goes off but when i remove the back cover it functions .plz help
Hi, may be the installation of speaker is not good, when close the back cover, it was pressed to other position or pressed the flex cable. May this can help you.
I, as an electronics student, advise you not to do this unless you really know what u r doing. There are too many risks with damaging the inner parts. So, itd be easier to just pay a proffessional
Hi.i had replacment lcd but the phone working withe black screen
Any ideas
Thank you
Hi, you mean the touch function is well and just black screen? have you checked whether the display connector connected well to motherboard?
I tried to replace a battery, but am having this same issue. (The battery did not take, so I’ve reinstalled the original battery.) Touch works correctly, but the screen is dark. I’ve tried a replacement lcd, complete with its flex cables, but the replacement screen had the same issues. Everything is connected, as far as I can tell.
JS, restart your phone to have a try or clean the screen connectors then try again.
Why in god’s name would they make the one part that degrades with time or can suddenly fail the last and most difficult item to reach. I miss the simplicity of my old galaxy SII, pop the back and swap in a fresh battery. If you work on the road and spend a lot of time away from your vehicle you need to NOT depend on always having a power source.
It wasn’t that bad, but the video leaves out some of the connections that you need to remove before being able to pull out the second board. The ear speaker was hard to remove and got damaged, so I have to get a new one. Other then that, it just takes some time.
You took the words right out of my mouth. I am amazed to see that it is not only screwed down but glued as well. The first step should say don’t even bother attempting this on your own. I don’t see how you can do it without alot of headache and alot of time invested. Not to mention the real good chance of you breaking something on the inner workings of the phone itself. It might be easier and cheaper in the long run to just pay a professional to fix. Atleast you know that it will get done right and work when your finished. I’d hate to go through all that just to have it not work in the end
Jesus Christ. I have changed iPhone 4s screen and that was hard, this looks borderline impossible.