iPad 3 Screen Replacement Repair Guide
BY alina | January 15th, 2014 | 0 | 1
Cracked the screen on your iPad 3 and have no idea what to do with it? Then this iPad 3 screen replacement repair guide could give you a hand. If your iPad 3 screen displays well but doesn’t response when you touch it, you need to replace the front touch panel, namely the digitizer touch screen. But if the touch screen is responsive but can’t display normally, like showing dead pixels, color spots or bleeding, then the LCD screen is broken. You can follow the instructions below to learn how to replace these two parts. Please be noted the DIY repair will void the warranty of your iPad 3. ETrade Supply is always your prime choice to get the iPad 3 replacement parts. Please choose the correct version, because some replacement parts for Wi-Fi version and Cellular version are not compatible.
Tools and parts needed for replacing a cracked screen on the iPad 3
Tweezers
Safe Opening Pry Tool
Small Phillips Screwdriver
Sucking Disc
Relieving Tool
Heat Drier
New iPad 3 LCD screen replacement
New iPad 3 digitizer touch screen replacement
Step 1
Power the iPad 3 off. Stick the sucking disc on the screen.
Step 2
Use heat drier to loosen the adhesive under the screen.
Step 3
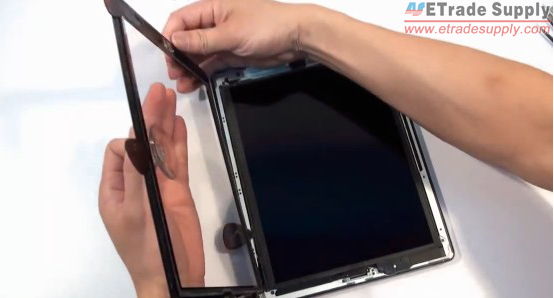
Use safe opening pry tool and sucking disc to release the digitizer.
NOTE: Be careful not to break the cable ribbons at the bottom left corner and near home button.
Step 4
Use small Phillips screwdriver to remove 4 screws.
Step 5
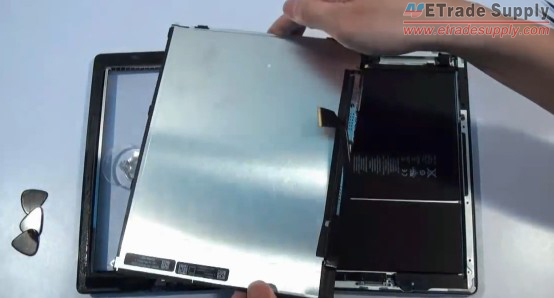
Turn over the LCD screen.
Step 6
Disconnect the connector to remove the LCD screen.
If you only have to replace the damaged iPad 3 LCD screen, now you can install the new iPad 3 LCD without removing the digitizer by following the steps above in reverse order. But if you have to replace the iPad 3 digitizer touch screen, you need to continue to follow the steps below.
Step 7
Use tweezers to peel off the two pieces of tape covering the digitizer connectors.
Step 8
Disconnect the connectors to remove the digitizer touch screen. If the new iPad 3 digitizer you get doesn’t come with the home button, you have to transfer the home button from the old digitizer to the new one. Then replace the cracked iPad 3 digitizer with a new one according to the above tutorial in reverse order.
You can watch the complete step-by-step iPad 3 disassembly video for more detailed information.
RECOMMENDED PARTS
-
 For Apple iPhone X OLED Screen and Digitizer Assembly with Frame Replacement - Black - Grade S+
-
 For Apple iPhone 8 Plus LCD Screen and Digitizer Assembly with Frame Replacement - Black - Grade S+
-
 For Apple iPhone 7 Plus LCD Screen and Digitizer Assembly with Frame Replacement - Black - Grade S+
-
 For Apple iPhone 6S Plus LCD Screen and Digitizer Assembly with Frame Replacement - Black - Grade S+


 IOS 17.4 official version pushed to block battery vulnerability
  Is the Chinese-made rear case for the iPhone 15 series going on the market?
  New products coming:USB to MFI Lightning Cable
  Big BUG of iPhone 15
  Successfully submitted!