iPad mini take apart/tear down/disassembly video(First Half)
2015-04-25 09:23:38 | Views:5591
Follow this guide to repair your broken iPad mini and save more! ETradeSupply wish all of you a Happy New Year

ETradeSupply Super Protective Packaging
2014-10-21 04:01:44 | Views:5642
This video shows what strick process ETradeSupply applied to ensure all products being safely delivered to our customers.
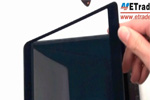
ipad 3 Take Apart/Tear Down/Disassembly/How to repair
2015-04-15 03:34:57 | Views:9010
This is is a video about how to take apart the iPad 3 into digitizer, LCD screen, battery and housing.
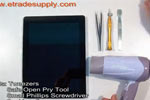
Steps:
1. Use Safe Open Pry Tool and Sucking disc to open the ipad 3 digitizer.
2. Turn over and remove the ipad 3 LCD screen.
3. Disconnect the connectors and remove the ipad 3 digitizer.
4. Remove the front facing camera, microphone, Audio PCB Board, rear camera and mother board in sequence.
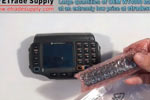
HTC Status/ChaCha Take Apart/ Tear Down/ Disassembly Video
2012-12-29 10:28:53 | Views:1956
Follow the guide of video to fix your HTC Status/ChaCha and save more!
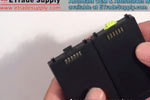
Symbol MC3000 OEM & Aftermarket Battery Comparison
2012-11-16 02:08:05 | Views:1189
Symbol MC3000 OEM & Aftermarket Battery Comparison
Motorola WT4000 Battery Installation Test
2012-11-16 02:01:59 | Views:1082
Motorola WT4000 Battery Installation Test
Motorola Droid Razr XT912/910 tear down video
2012-11-15 04:21:32 | Views:4205
1. Remove the camera glass lens 2. Remove the battery door 3. Separate the motherboard and LCD assembly

HTC Incredible 4G LTE Disassembly Tutorials
2012-11-15 04:21:16 | Views:2138
1. First of all, remove the battery door, battery and SIM card tray. 2. Undo a screw to release the USB port metal shield. 3.Remove the front camera, rear camera and camera flash.
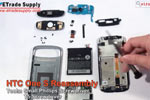
HTC One S Reassembly Tutorials
2012-11-15 04:21:02 | Views:1749
1. Install the side keys and internal bottom cover 2. Install the front and rear camera on the motherboard and cover it with anti-static tape 3. Assemble the conversation sensor and put the motherboard on LCD assembly
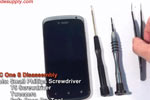
HTC One S Disassembly Tutorial
2012-11-15 04:20:51 | Views:3403
1. Remove the bottom cover with the help of Safe Open Pry Tool 2. Release the rear housing 3. Disconnect the battery connector and release the motherboard


 Loading...