

 Loading...
- Home »
- Sony »
- All Models »
- Sony Xperia Z2 »


- Compatible With: Sony Xperia Z2 Global Version, it is not compatible with the verizon version
-
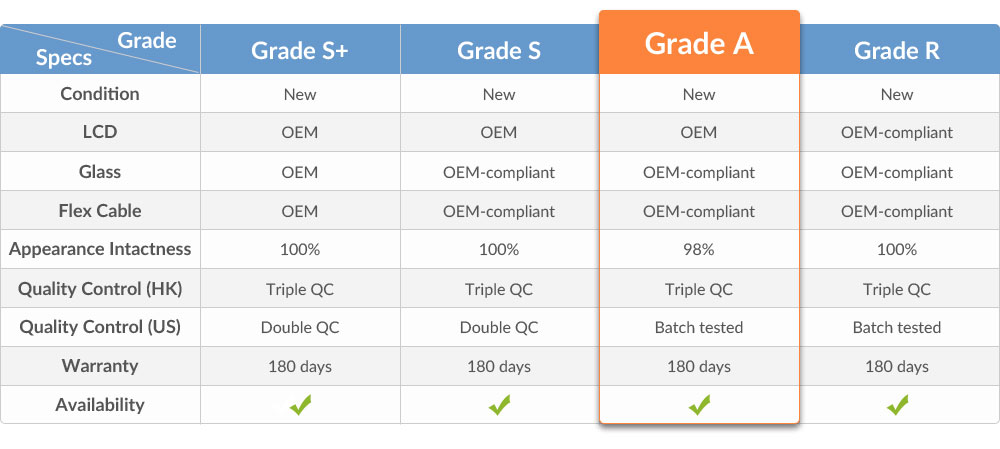
For Sony Xperia Z2 LCD Screen and Digitizer Assembly Replacement - Black - With Logo- Grade A
This item includes the following parts:
1. LCD Screen;
2. Digitizer Touch Screen.
Notes: Please test the functionality of this item before installation.
Specifications:
Color: Black
Screen Size: 5.2inches
Display Type: IPS LCD capacitive touchscreen, 16M colors
Resolution: 1080 x1920 pixels, 424 ppi pixel density
Multi-touch: Yes, up to 10 fingers
Compatibility: Sony Xperia Z2
Features:
This Sony Xperia Z2 LCD Screen Assembly is branded with logo on the top, please note.
This item is black, please note.
This LCD Digitizer for Xperia Z2 is slight cosmetic imperfections, but it is fully functional.
This replacement LCD Screen and Digitizer Assembly is compatible with Sony Xperia Z2.
How to Install / Tips:
These parts are hermetically attached, special tooling is required for assembly or disassembly.
Be sure to choose the right color and version before placing an order.
Please try to handle the repair or replacement work in a dry and dust free environment without direct sunlight.
The installation of any new part should be done by a qualified person. ETS is not responsible for any damage caused during installation.
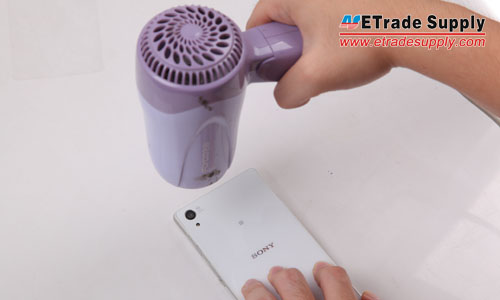
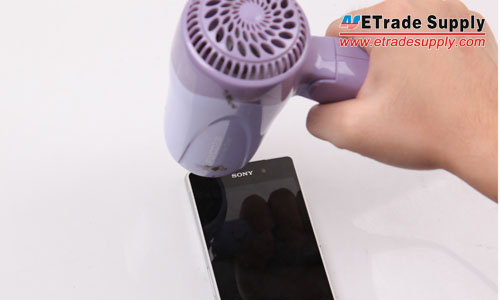
1. Heat up the edges of back cover with hair dryer.
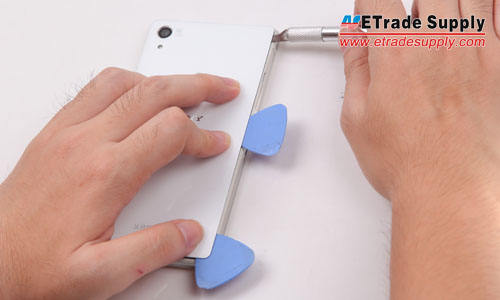
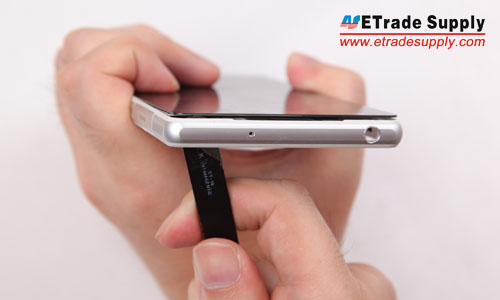
2. Pry up the back cover with spudger tool.
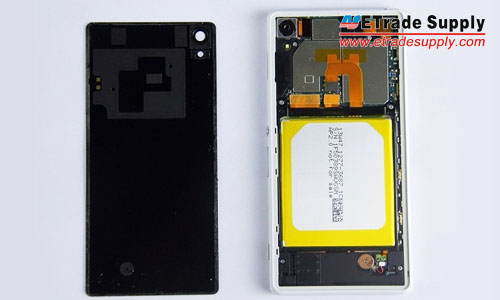
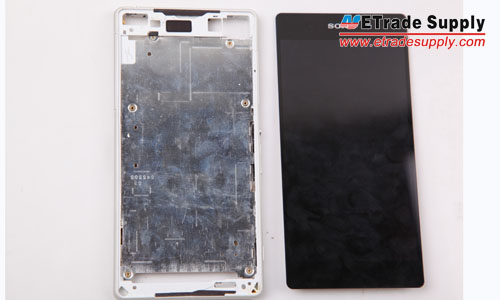
3. The back cover and LCD Assembly are separated.
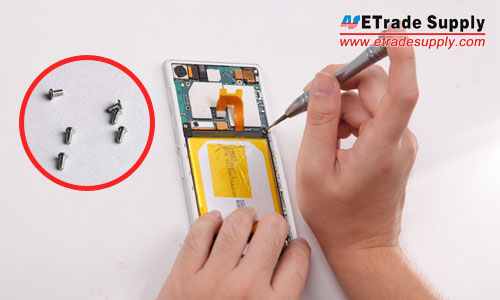
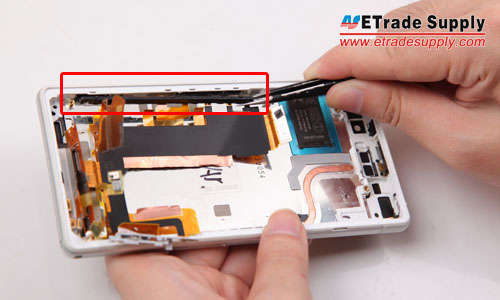
4. Undo the 6 screws to release the motherboard and loud speaker assembly.
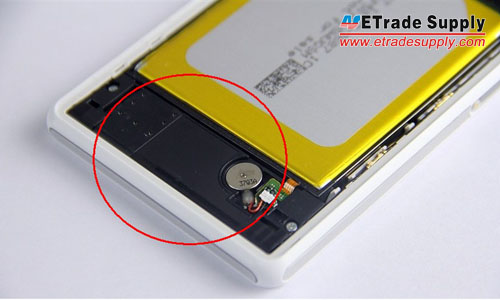
5. Pry up the vibrating motor, then take out the loud speaker assembly. (Notice: be careful not to damage the underneath flex ribbon.)
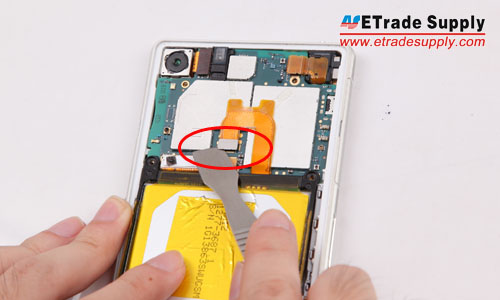
6. Pry up the battery flex connector, then pry up the battery gently. (Notice: be careful not to break the battery.)
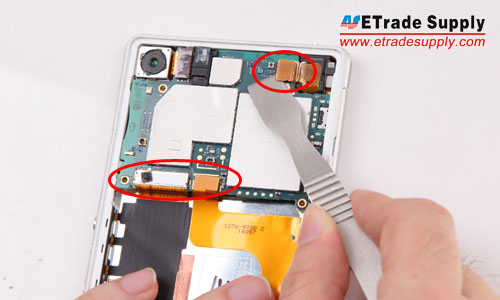
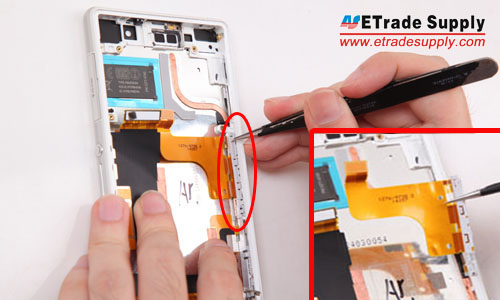
7. Pry up the three flex ribbon connectors on the motherboard.
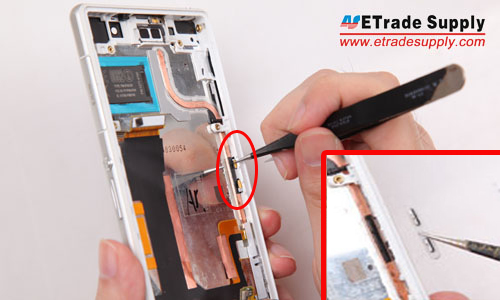
8. Take out the motherboard.
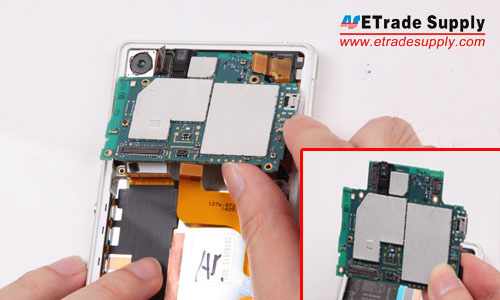
9. Pry up the front camera connector, then pull out the flex gently. (Notice: it’s very easy to snap the flex ribbon, be careful!)
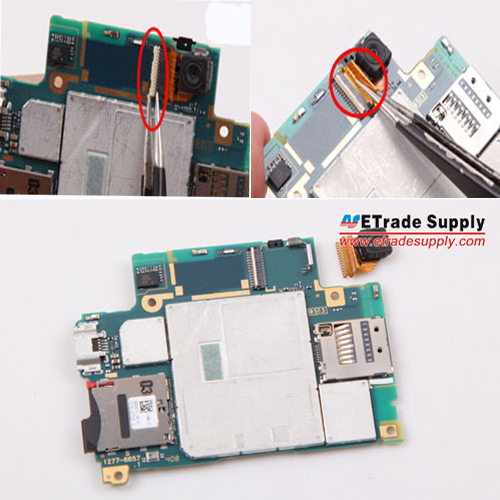
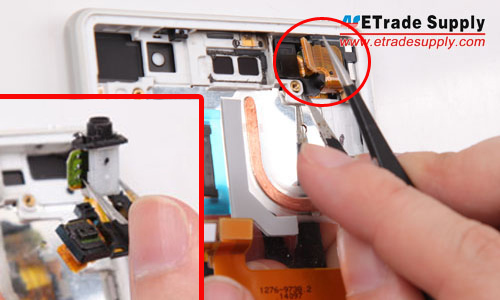
10. Take out the rear camera and camera retaining bracket.
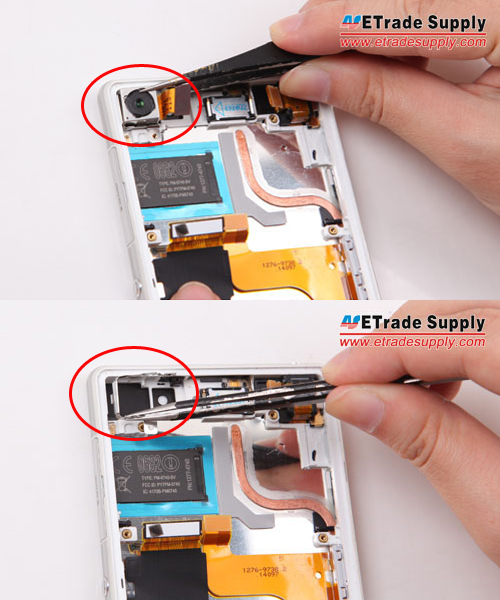
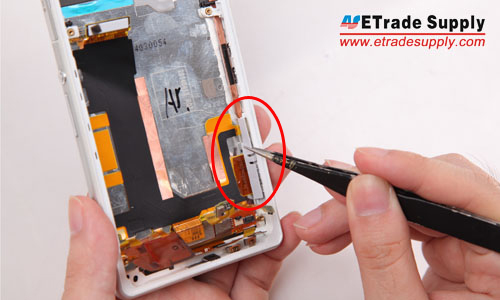
11. Pry up the connector and take out the earphone jack module.
12. Loosen and take out the charging port flex cable ribbon.
13. Gently poke the antenna contacts.
14. Take out the side rail bracket.
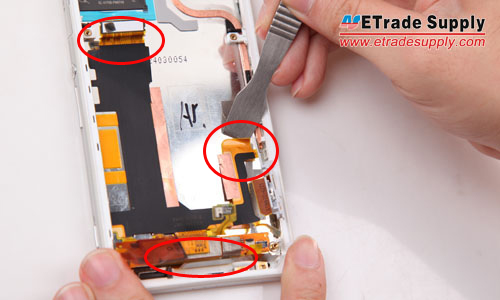
15. Pry up the three connectors to release the motherboard flex cable ribbon.
16. Take out the power button and camera button retaining bracket.
17. Heat up the edgaes of LCD Assembly.
18. Cautiously stab the back side of LCD Display with the other head of tweezers. (Notice: be cautious not to destroy the LCD screen.)
19. The front frame and LCD Assembly are separated.


-
(Posted on 07/23/16)Good