

 Loading...
![]()


- Compatible With: Samsung Galaxy S7 Series
-
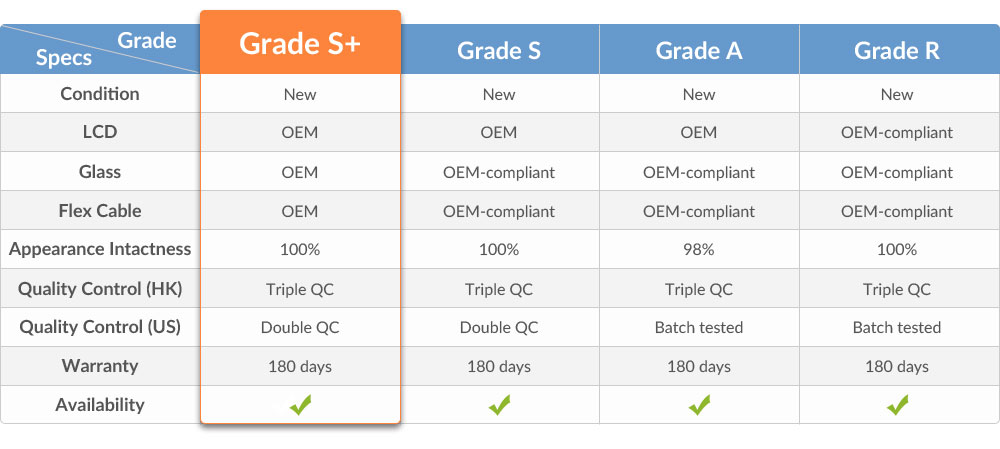
For Samsung Galaxy S7 G930/G930F/G930A/G930V/G930P/G930T/G930R4/G930W8 LCD Screen and Digitizer Assembly Replacement - White - With Logo - Grade S+
This item includes the following parts:
1. LCD Screen.
2. Digitizer Touch Screen.
This item does NOT include the front housing.
Notes: please test the functionality of this item before installation.
Specifications:
Color: White
Version: With Logo
Screen Size: 5.1 inches
Resolution: 1440 x 2560 pixels, 577 ppi pixel density
Material: AMOLED capacitive touchscreen, 16M colors
Protective Material: Corning Gorilla Glass 4
Compatibility: Samsung Galaxy S7
Features:
This Galaxy S7 LCD assembly does NOT include the frame or front housing adhesive.
This Galaxy S7 LCD and digitizer assembly is a brand new original replacement.
The Galaxy S7 LCD assembly is available in differnt colors and versions, this is the white one branded with logo.
This screen replacement is compatible with all Samsung Galaxy S7 models.
How to Install / Tips:
Special repairing tools are required for assembling or disassembling, as the Galaxy S7 LCD display and digitizer are hermetically attached.
The waterproof function will lose once the Galaxy S7 LCD assembly was replaced.
Handle the vulnerable and fragile flex cable ribbon carefully.
Please try to handle the repair or replacement work in a dry and dust free environment without direct sunlight.
The installation of any new part should be done by a qualified person. ETS is not responsible for any damage caused during installation.
Tools Needed:
Heat Gun/Hot Plate Machine
Metal Spudger/iSesamo Tool
Plastic Spudger/Prying Tool
Small Phillips Screwdriver
Guitar Picks/Playing Cards
Tweezers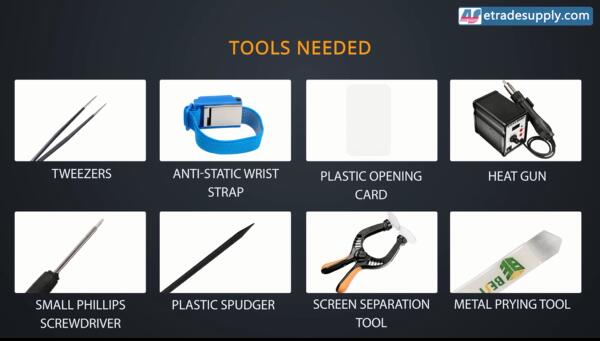
1. Power off the device and remove the Galaxy S7 SIM card tray.
Once you remove the SIM card tray, you'll find it's wearing a waterproof adhesive.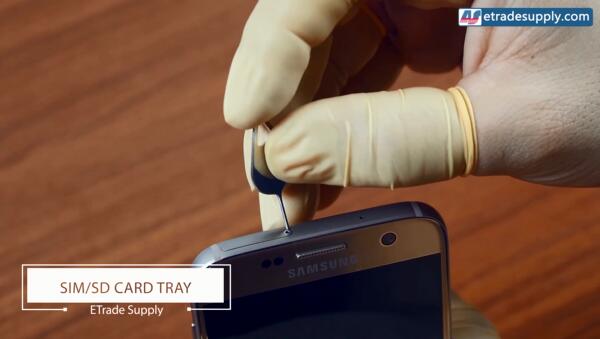
2. Remove the Galaxy S7 back cover.
Heat up along the sides of Galaxy S7 for 1~2 minutes, the back cover is glued to the rear housing with waterproof adhesive, which is pretty sticky. Pay your patience on this step and make sure the Galaxy S7 back cover adhesive is nicely warm and loosen.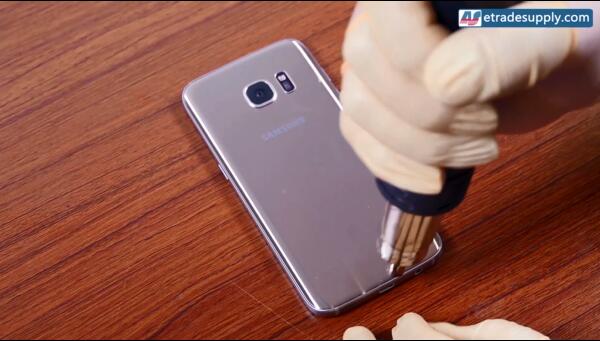
Pop up the back cover a little bit with the help of a screen separator tool, carefuly insert the plastic tip into the back cover and and run it along the edges of Galaxy S7 back cover. The adhesive is easily cooled down, you'll need to heat it up back and forth before releasing the back cover. Likewise, be patient.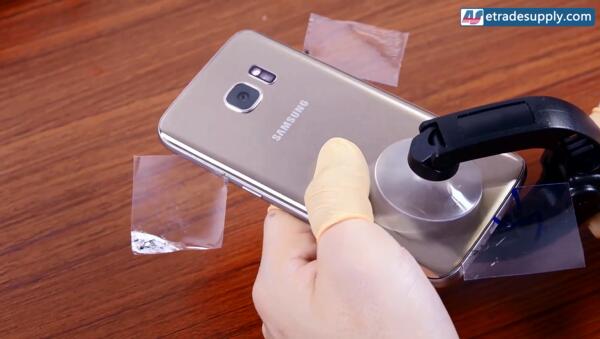
Now the Galaxy S7 back cover was pulled out from a large portion of strong adhesive as you can see from the below picture, also avoid to hurt the fingerprint sensor in the middle of rear housing while you're heating.
3. Release the Galaxy S7 rear housing set.
Undo the 12 long screws in the rear housing. These screws are in the same size, no worries to mix them up. Use a pair of tweezers to pick up the screws if they're still stuck in the holes.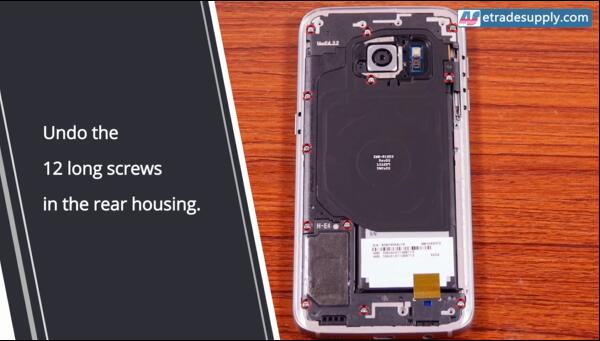
Remove the Galaxy S7 wireless charging chip and antenna module, be careful not to damage this vulnerable part.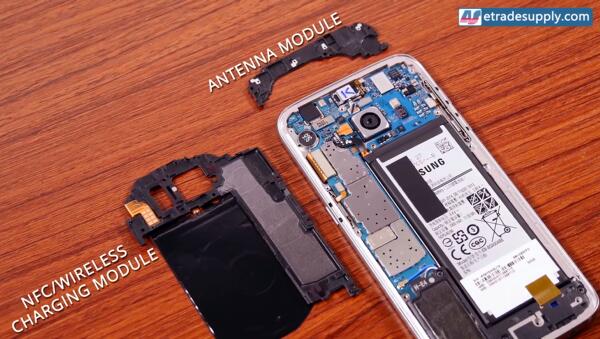
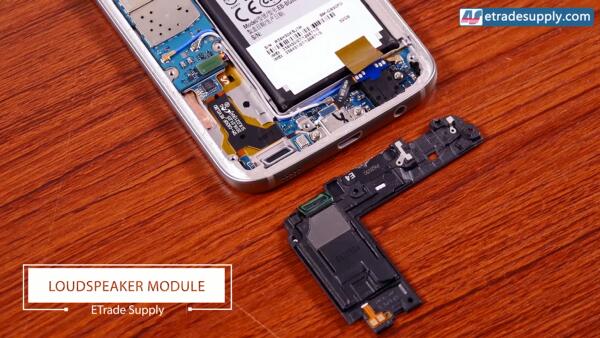
Peel off the yellow tape and then remove the Galaxy S7 loudspeaker assembly.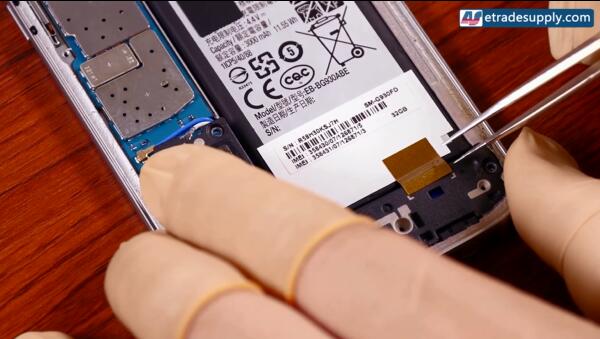
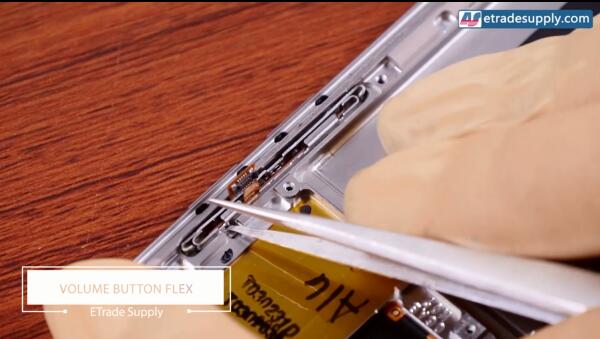
4. Pry up the connectors shown in below to release the Galaxy S7 motherboard.
The connetors include: 3 antenna cable connectors, volume button flex connector, power button flex connector, home button flex connector, front facing camera connector, rear facing camera connector, LCD assembly connector, battery flex connector and ear speaker flex connector.

5. Release the Galaxy S7 front housing small parts.
Heat up to soften waterproof adhesive under the Galaxy S7 ear speaker before removing it.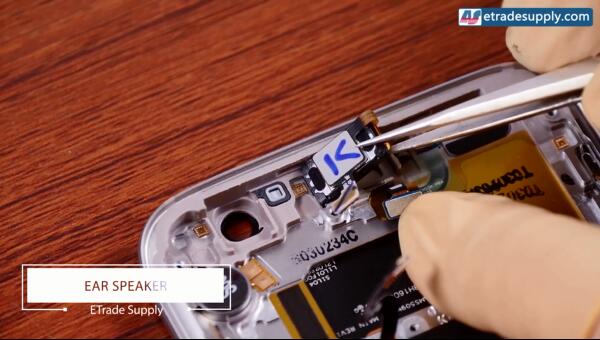
Also, heat up and remove the Galaxy S7 proximity sensor module, where you can also see the water damage detector sticker.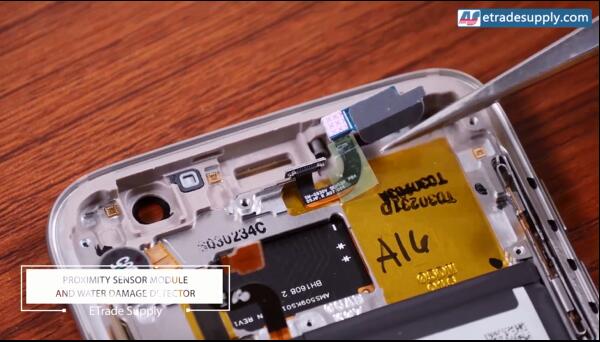
Likewise, heat up to release the Galaxy S7 vibrating motor.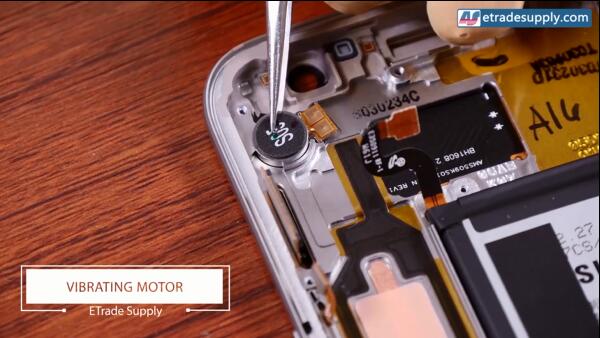
6. Pry up to release the two Galaxy S7 RF signal cables.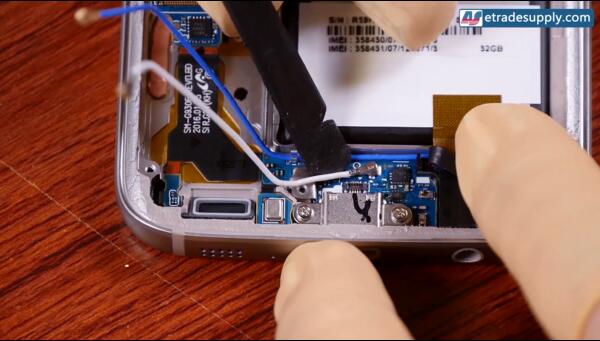
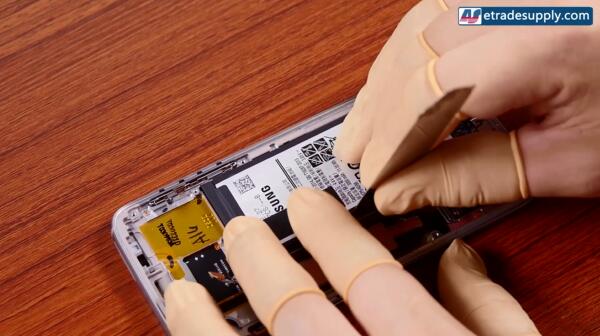
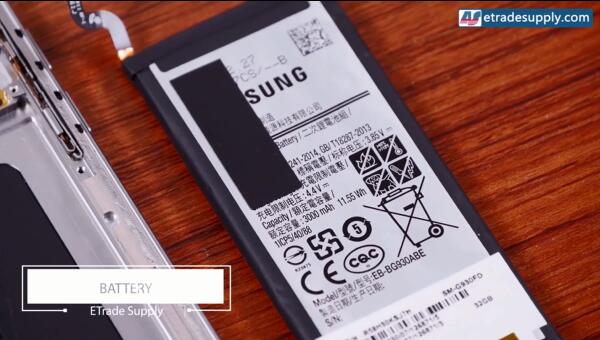
7. Release the Galaxy S7 battery.
Heat up to soften the Galaxy S7 battery adhesive, wedge the metal spudger under the battery and pry it back and forth, you may also need a plastic playing card and a plastic spudger to help to remove the battery. The battery is glued to the front housing with strong adhesive in square, that's why the battery is stucking so well.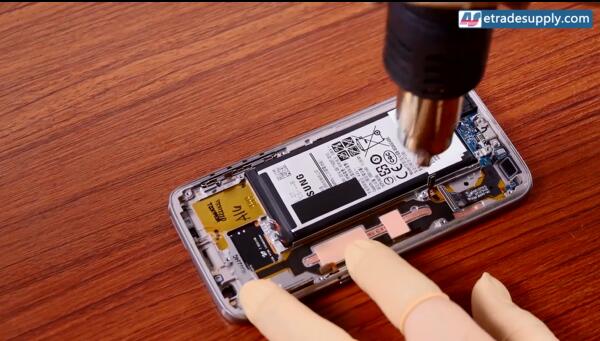
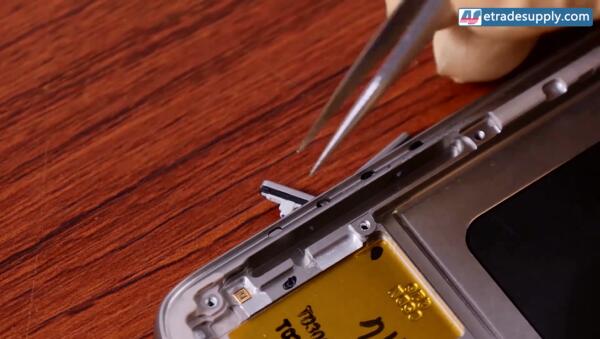
8. Remove the Galaxy S7 side key flex cable ribbons and side keys.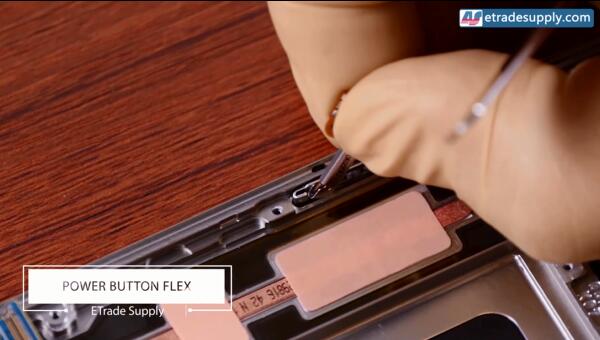

9. Remove the Galaxy S7 earphone jack.
Undo the 3 screws that holding the earphone jack and charging port in place.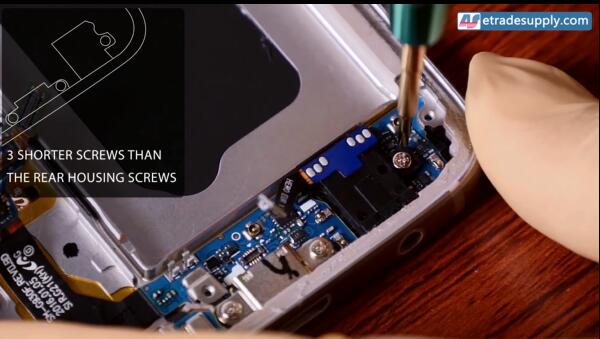
Pry up to release the earphone jack.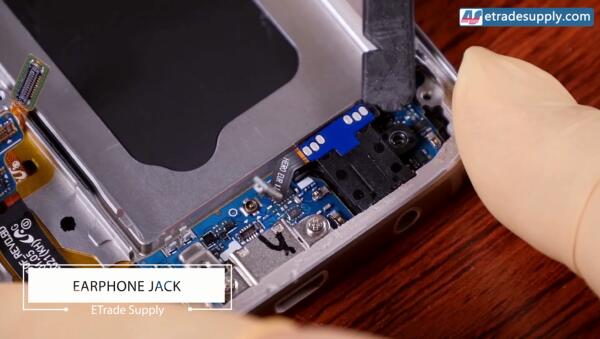
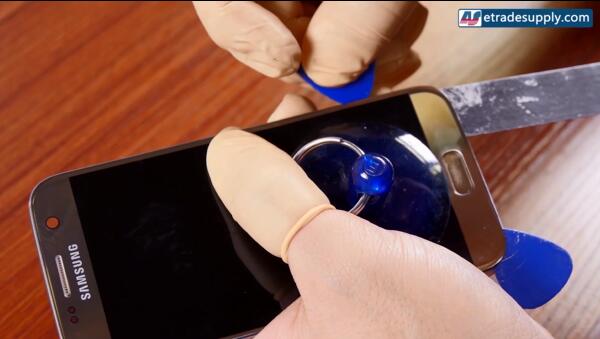
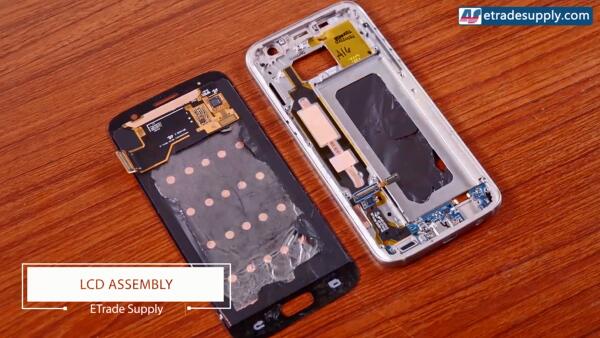
10. Release the Galaxy S7 LCD and digitizer assembly.
Heat up around the edges of Galaxy S7, pull it up until a gap shows up, wedge the metal spudger tip in between and then run the guitar picks to release the Galaxy S7 LCD and digitizer assembly from front housing.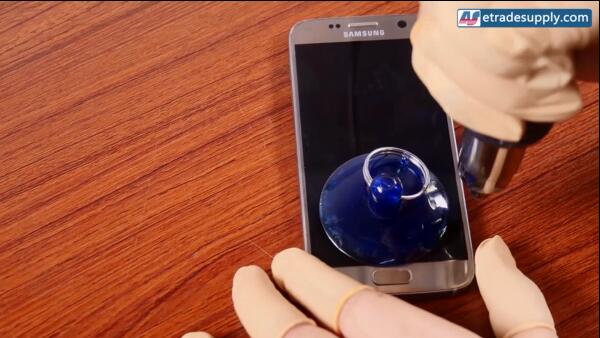
11. Pry up to release the Galaxy S7 home button with flex cable ribbon.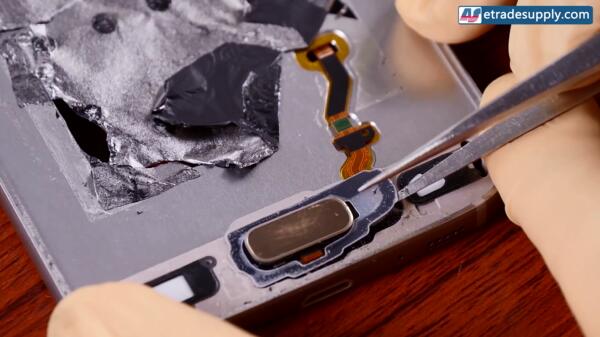
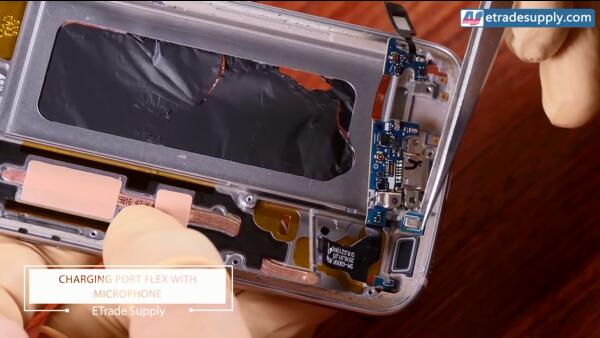
12. Release the Galaxy S7 charging port flex cable ribbon with microphone.
Heat up to soften the adhesive under the navigator light, then pry it up, turn back to pry up the charging port flex cable ribbon assembly.
Now the Galaxy S7 disassembly was finished.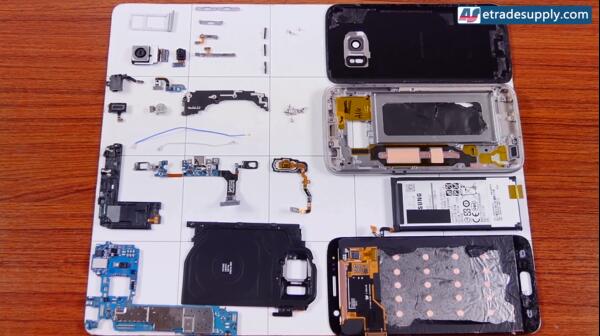

-
Customer also bought


