

 Loading...


- Compatible With: SM-N910, SM-N910A, SM-N910V, SM-N910P, SM-N910R4, SM-N910T, SM-N910F, SM-N910H
-
For Samsung Galaxy Note 4 Series Home Button with Flex Cable Ribbon Replacement - Black - Grade S+
Features:
This Samsung Galaxy Note 4 Home Button replacement includes the Home Button and Flex Cable Ribbon.
The Galaxy Note 4 Home Button features a fingerprint scanner.
This Galaxy Note 4 Home Button with Flex is brand new but and original replacement.
This Note 4 Home Button with Flex Ribbon is available in black, white, gray and pink, this is the black one.
This Home Button with Flex is compatible with Galaxy Note 4 for any version.
How to Install / Tips:
The fingerprint records should be recorded again after reassembling a new Note 4 Home Button.
Please try to handle the repair or replacement work in a dry and dust free environment without direct sunlight.
Special tooling is required when disassembling and reassembling the Note 4 Home Button.
The installation of any new parts should be done by a qualified person. ETS is not responsible for any damage caused during installation.
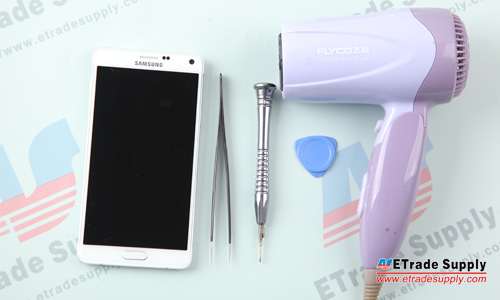
Samsung Galaxy Note 4 Home Button Disassembly Tutorial Guide
1. Hairdryer/Heat Gun;
4. Tweezers.
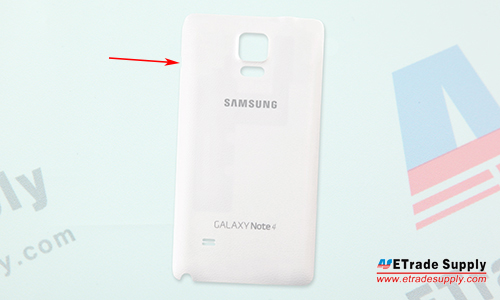
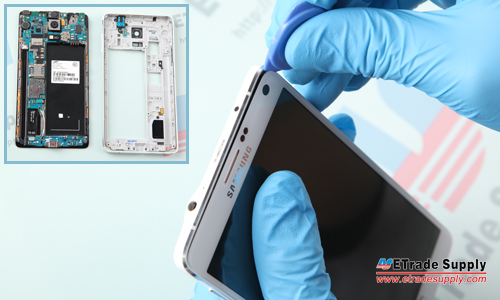
1. Remove the Galaxy Note 4 Battery Door.
Power off the device;
Pull out the S Pen stylus;
Pull the battery door out through the small gap between the power button and the battery door.
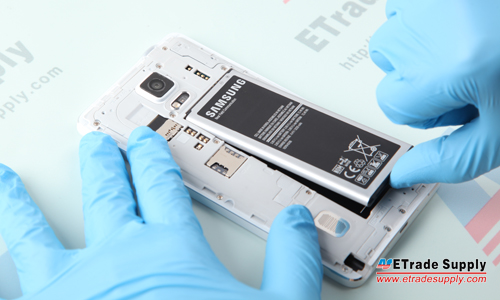
2. Remove the Galaxy Note 4 Battery.
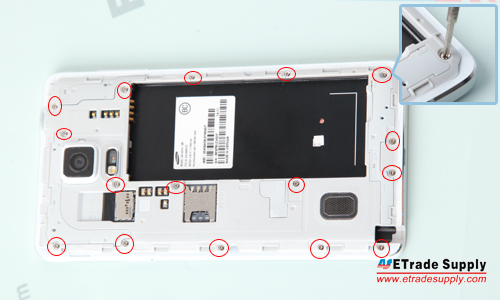
3. Remove the Galaxy Note 4 Rear Housing.
Undo the 16 screws in the rear housing;
Insert the case opening tool to take off the rear housing.
(Notice: The loudspeaker assembly is located in the rear housing and difficult to remove.)
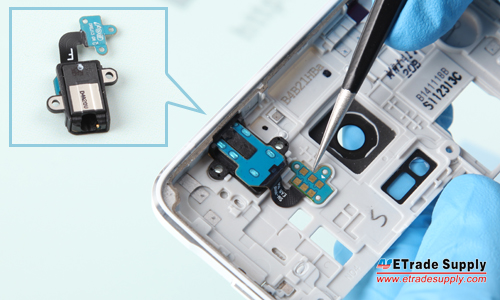
4. Remove the Galaxy Note 4 Rear Housing Small Parts.
Remove the Earphone Jack.
Remove the Power Button and Volume Button.
(Notice: The loudspeaker assembly is located in the rear housing and difficult to remove.)
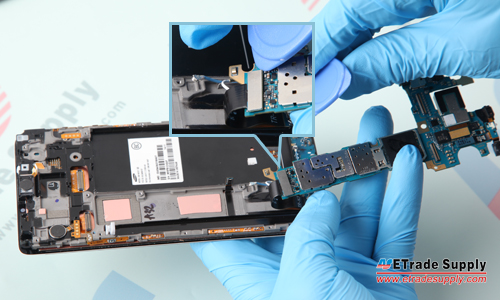
5. Remove the Galaxy Note 4 Motherboard.
Pry up the 4 connectors;
Undo the screw;
Remove the upper portion of main board and pry up the connector.
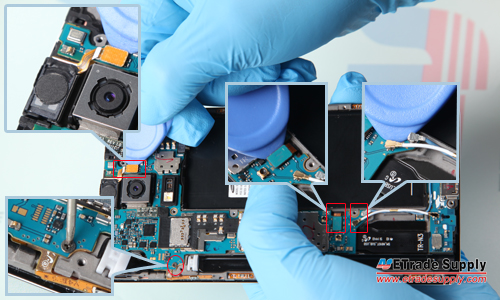
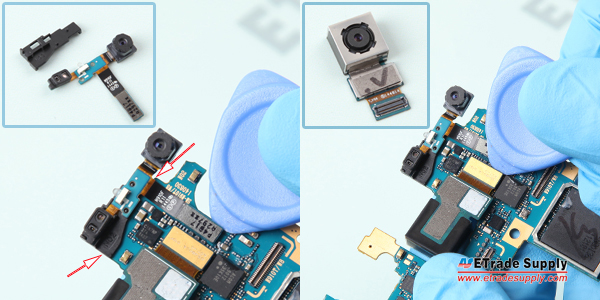
6. Remove the Galaxy Note Cameras.
Pry up the front facing camera connector;
Pry up the front camera retaining bracket;
Pry up the connector to remove the back facing camera.
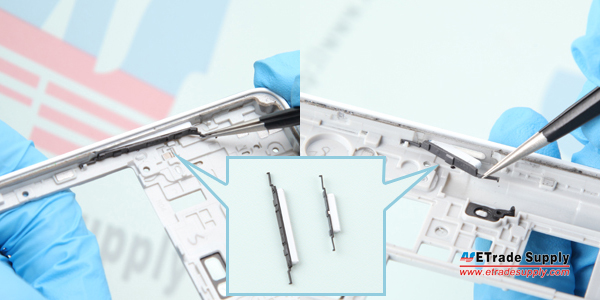
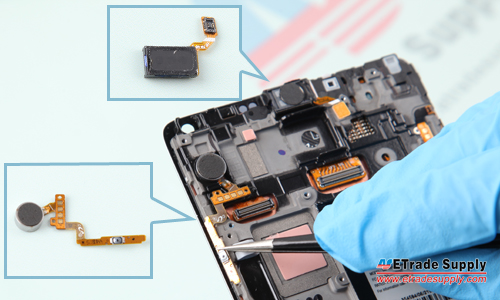
7 Remove the Galaxy Note 4 Small Parts.
Remove the vibrating motor with power button flex;
Remove the ear speaker with flex;
Remove the volume button flex;
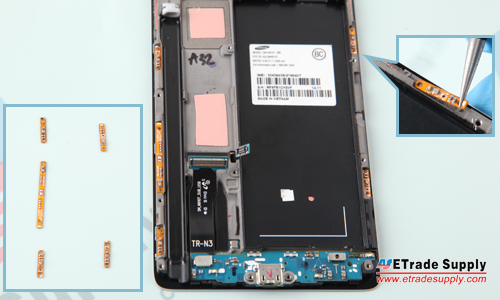
Remove the 5 antenna chips.
(Notice: The 5 signal chips are different in shape, be careful not to place them in the wrong position when reassembling.)
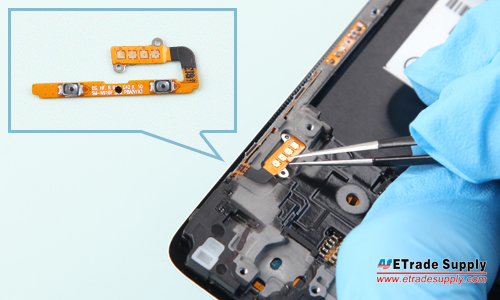
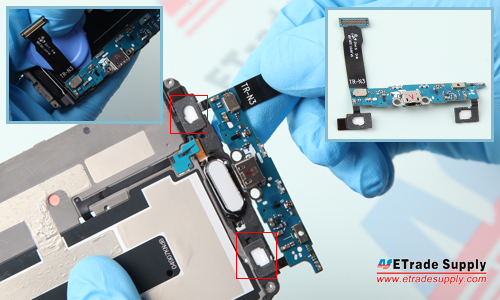
8. Remove the Galaxy Note 4 Charging Port Assembly.
Pry up the 2 connectors;
Undo the screw;
Pry up the charging port assembly and then pry up the two connectors.

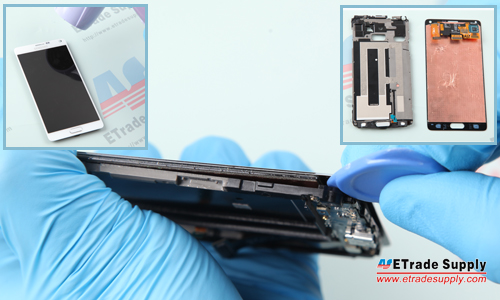
9. Remove the Galaxy Note 4 Middle Plate.
Heat up the LCD and Digitizer assembly for 2 minutes to soften the adhesive;
Insert the case opening tool to remove the middle plate.
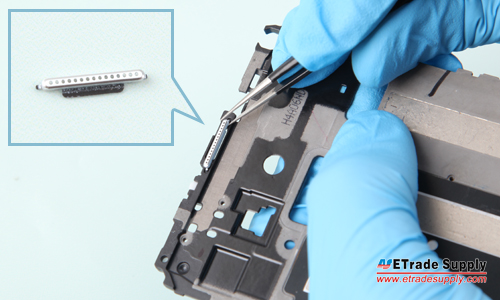
10. Remove the Galaxy Note 4 Middle Plate Small Parts.
Remove the Ear Speaker Mesh Cover;
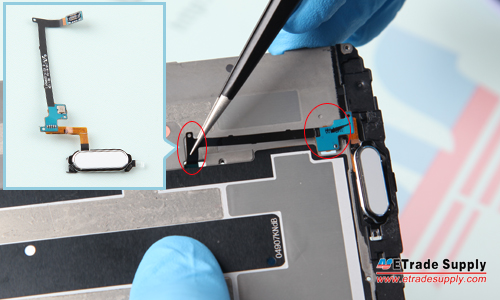
Pry up the connector and pull out the home button flex ribbon.

-
Customer also bought


 - Grade S+")


