

 Loading...
- Home »
- Apple »
- iPad »
- Apple iPad Mini 3 »


- Compatible With: iPad Mini 3
-
For Apple iPad Mini 3 Battery Replacement - Grade S+
Specifications:
Battery Type: Non-removable Li ion Polymer Battery
Capacity: 6470 mAh, 3.8V
Internet Use Time: Up to 10 hours
Music Listening Time: Up to 10 hours
Features:
This Apple iPad Mini 3 Battery is brand new and original .
This replacement battery compatible with Apple iPad Mini 3 all models.
It is used to replace the unresponsive battery or the battery that can not be fully charged for your Apple iPad Mini 3.
What circumstances do you need to replace the battery?
The phone drains fast
Phone or battery overheated
Cliff-like power drop
Battery volume indication error
Battery swollen
How to Install/Tips:
Special repairing tools are required for assembling or disassembling.
The replacement of this Apple iPad Mini 3 Battery replacement needs professional skills. You need to disassemble your cellphone, so please be very careful not to damage the item and your cellphone.
Please read the instructions before using the Apple iPad Mini 3 Battery. It may explode if damaged or exposed in fire. Do not disassemble the battery. Do not short-circuit the battery. Do not throw the battery into fire or water.
Step 1. Please cover the shattered iPad mini 3 screen with transparent adhesive tape, which will protect your fingers from the tiny glass during the repair work.
Step 2. Shut off your iPad mini 3 before disassembly. (It may cause short circuit while your power is on during the repair work)
Disassembly Tutorial:
1.Use the hair drier/heat gun to heat the iPad mini 3 edge up for 5 minutes to melt the adhesive. (Starts from the front part; both the glass and the metal back plate will be heated up, so please be careful when touching them)

2.Use the suction cup to pry up the panel a little bit and then insert a plastic opening tool to separate the digitizer from the rest part. (Much strength can be used here because the glass are adhered to the frame tightly)
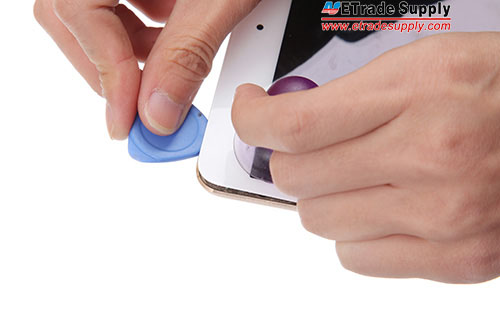
3.Use the suction cup and opening tool to slide across the edges and pry up the panel slowly and carefully.
4.Open the panel and undo the 4 screws in the LCD.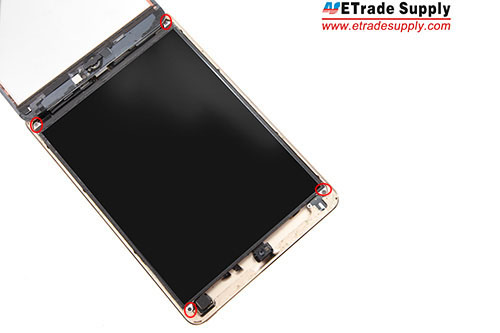
5.Remove 7 screws in the metal bracket.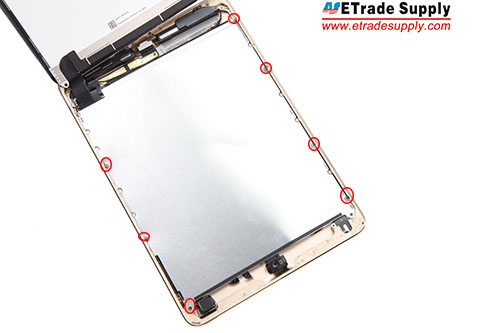
6.Remove 4 screws in the mental bracket and 1 screw in the motherboard.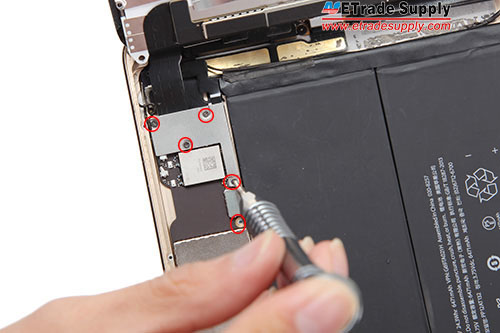
7.Remove the metal bracket and disconnect 4 flex cables connecting to the logic board. The digitizer, LCD screen and metal plate are now removed from the rear housing assembly. If you are trying to replace the broken iPad mini 3 digitizer, by here is what you all need to do.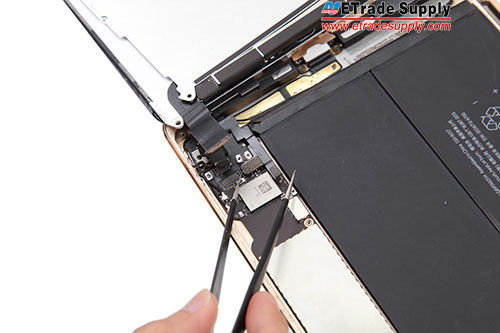
8.Pry up the 2 antennas connecting to the logic board.
9.Remove 3 screws in the left bracket.
10.Remove 4 screws in the right bracket.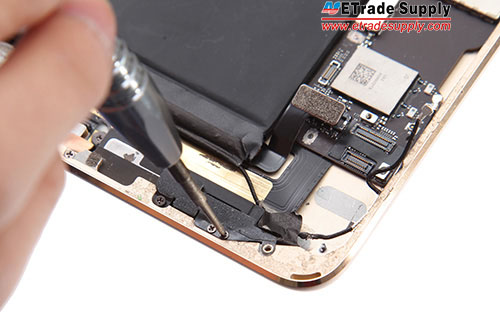
11.Remove 6 screws in the charging port.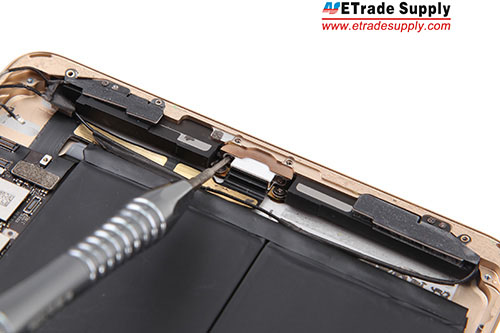
12.Remove the louder speaker modules in the bottom.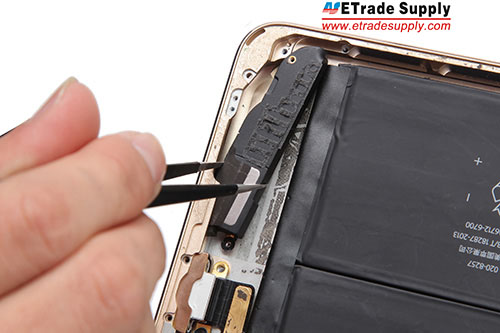
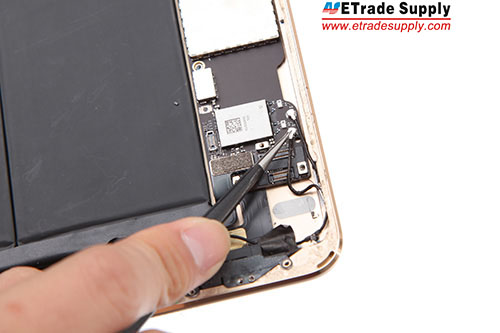
13.Disconnect 4 flex cables connecting to mother board and remove the front facing camera. (Notice: the front facing camera is fixed on the back housing by adhesive. The front facing camera flex cable is clipped in. Handle carefully and gently.)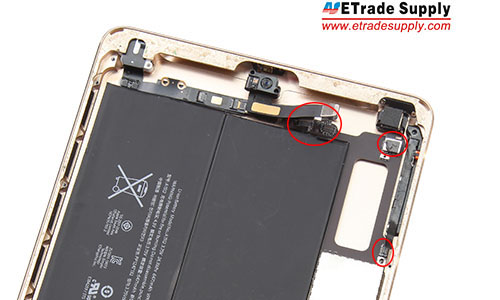
14.Disconnect the sensor flex cable to the mother board.(Notice: the flex cable is clipped to the earphone jack flex cable.)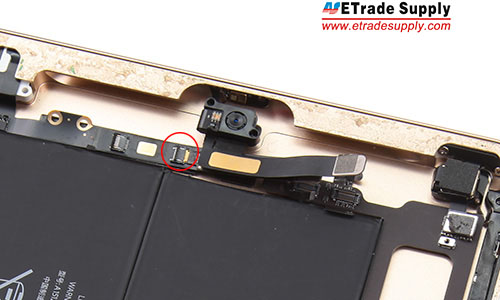
15.Pull out the charging port.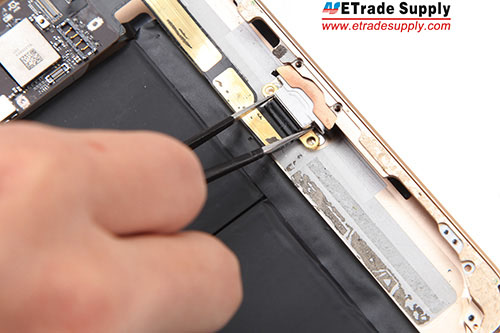
16.Remove the mother board.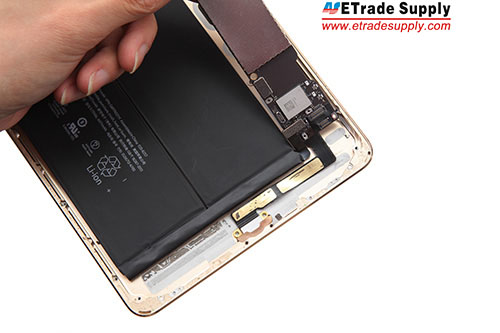
17.Pull out the earphone jack flex cable.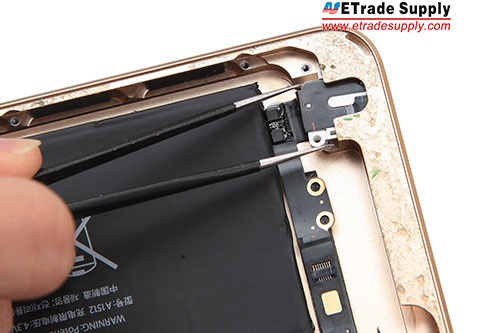
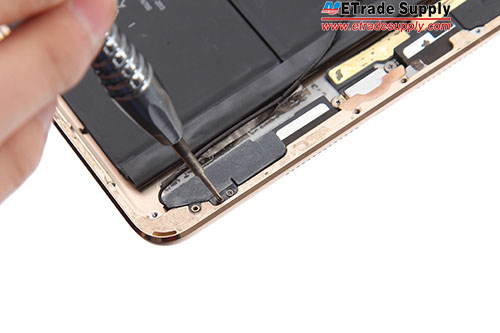
18.Undo 2 screws in the side key bracket.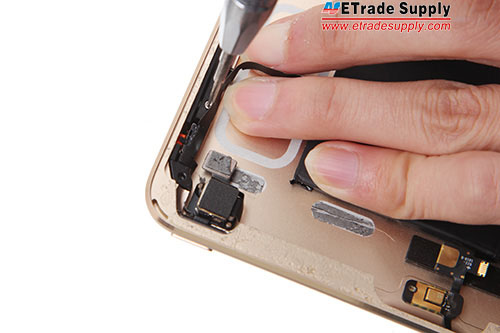
19.Undo 2 screws in the power button bracket.
20.Remove the side key and power button. (Because the battery is fixed on the back housing tightly by strong adhesive. We do not recommend to remove it yourself.)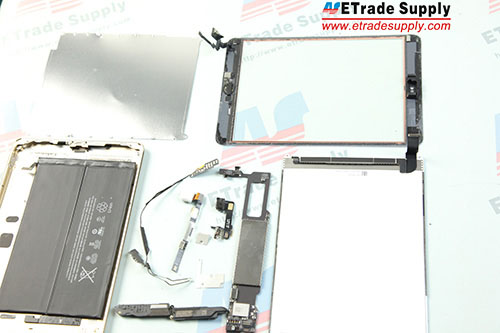

-
Customer also bought

 - Grade S+")


