How to Replace the iPad Pro Home Button-Step by Step Guide
BY ETrade Supply | 十一月 18th, 2015 | 0 | 1
Just like the iPad mini 4 and iPad air 2, the brand new iPad Pro does have the fingerprint scanner to make your life easier. However, accidents do happen. When the screen cracked, in order to keep the function of the Touch ID, you have to take out the original one and then transfer it to the new screen. While for iPad Pro, the structure of the home button is different from other Apple devices. Want to know the differences? Let’s take a closer look at it.
Tools Needed:
- Heat Gun
- Tweezers
Step 1. Follow our screen replacement guide to take out the iPad Pro screen with home button.
Step 2. Peel off the black adhesive tape covering the home button flex cable connector.
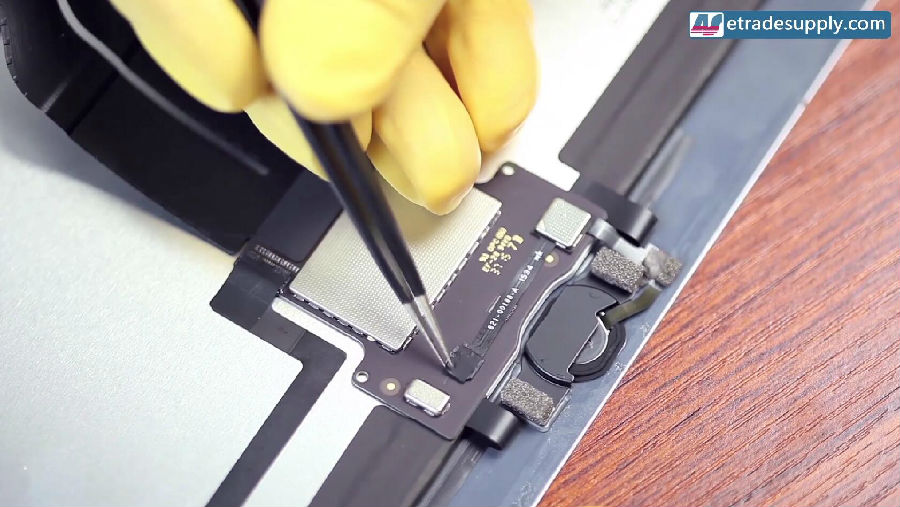
Step 3. Disconnect the home button flex cable connector, then pull it out.
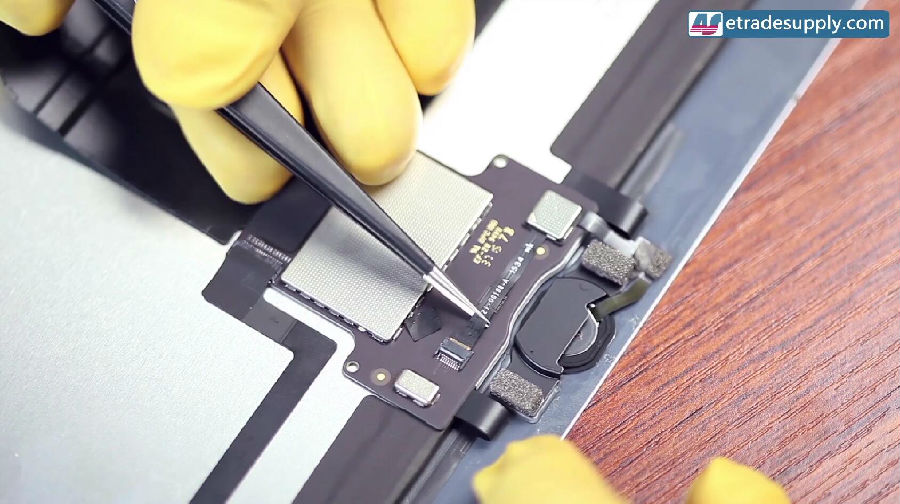
Step 4. Apply proper heat to the Touch ID IC to loose it.
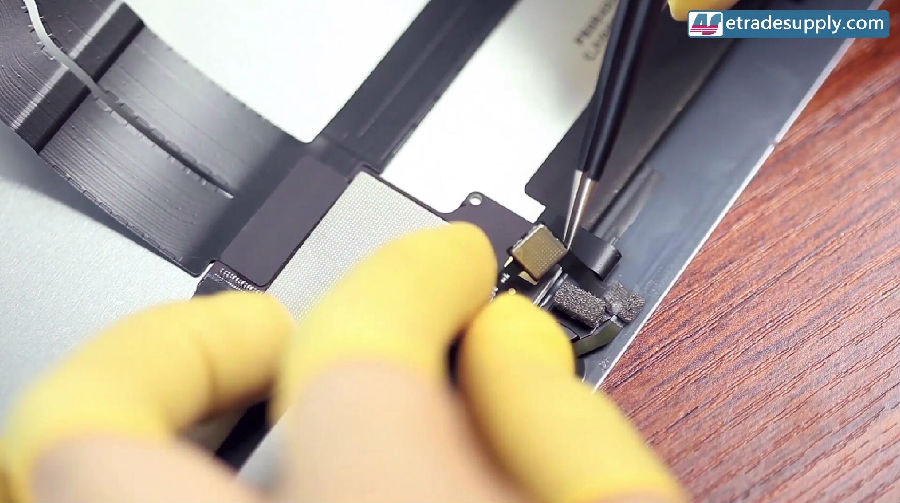
Step 5. Heat up the Hot Melt Glue around the corners of home button retaining bracket.
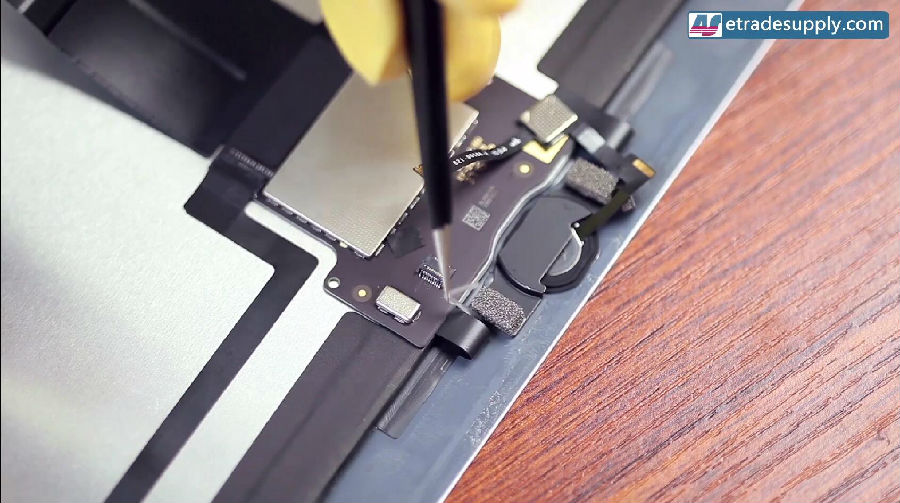
Step 6. Apply enough heat to loose home button retaining bracket.
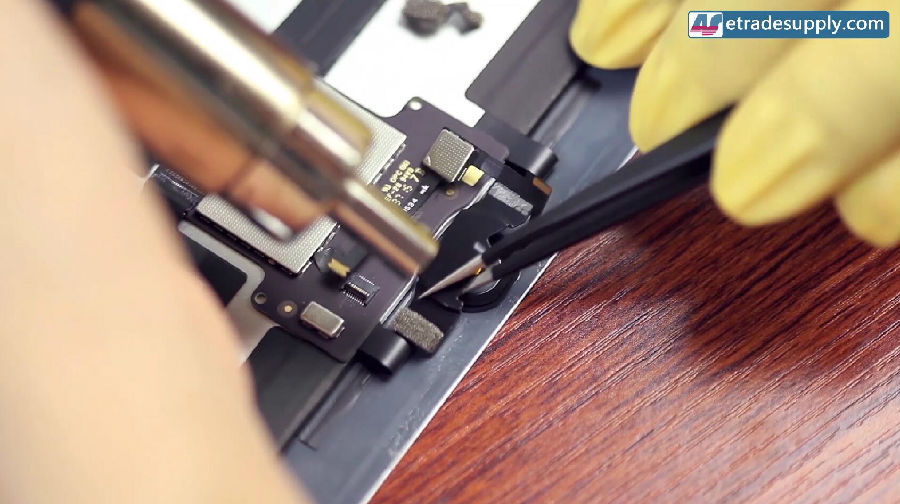
Step 7. Take out the home button.
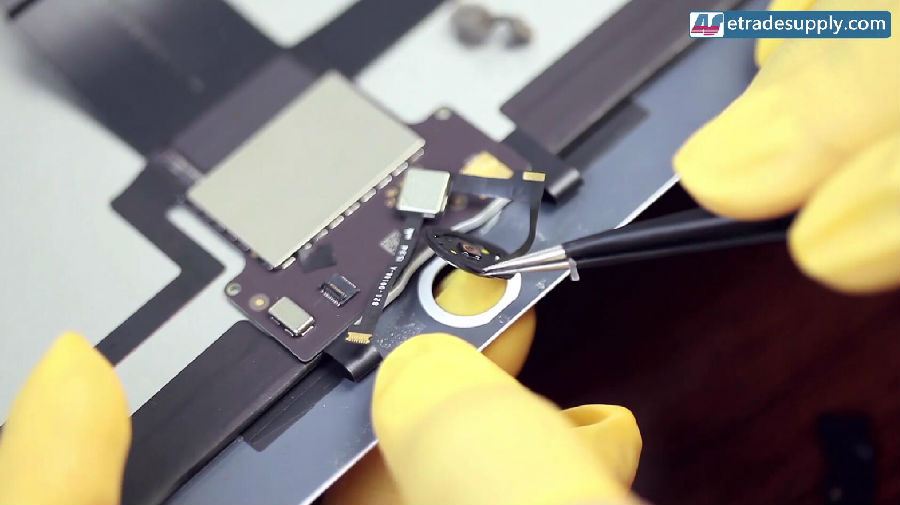
Step 8. Transfer the home button to the brand new screen follow the steps vise versa.
If you have any questions regarding how to replace the iPad Pro home button, feel free to leave a comment below!
You may also like:
- How to Tear Down the iPad Pro 9.7 for Screen Replacement
- 3 Tips and Tricks for how to use your iPad 2018
- How to Disassemble iPad Pro For Screen Replacement
- How to Disassemble the iPad Mini 4 for Screen Replacement
|
|

|

|

|

|

|
|---|


