


Huawei Mate 9 Teardown to Repair LCD screen and Battery
BY kaye | 一月 10th, 2017 | 2 | 4
Released in December 2016, this big Huawei Mate 9 comes with a 5.9-inch screen, Android 7.0 with EMUI 5.0, the new Kirin 960 processor and powered by 4000mAh battery, which also impressed us with its handsome appearance. And now we're going to disassemble this big phone, the rear housing, LCD screen, battery, loudspeaker and other small components.
Repair tools needed:
Heat Gun or Hair Dryer
Step 1 Remove Rear Housing
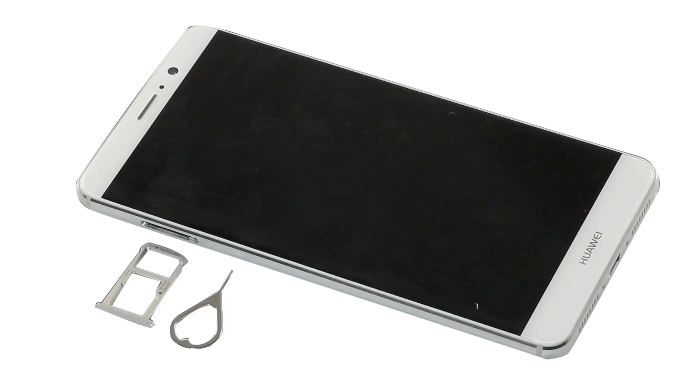
First we need to power off the phone and take out SIM card like always.
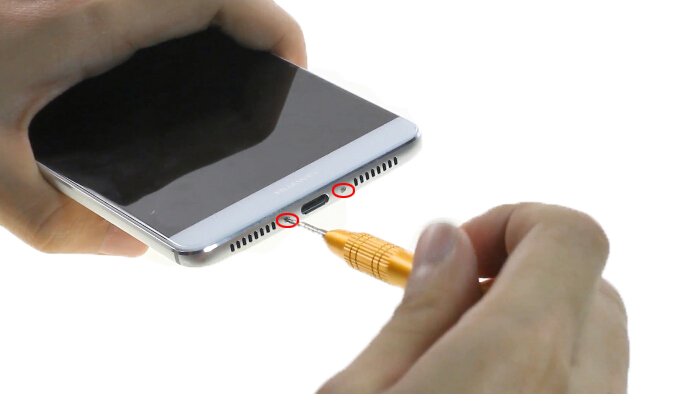
Then undo 2 T2 Torx screws at the bottom.
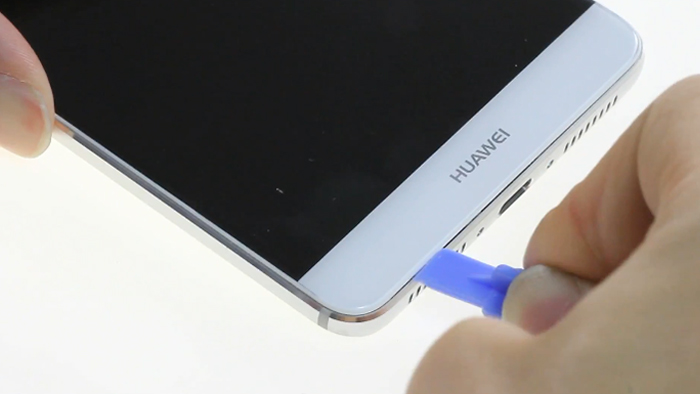
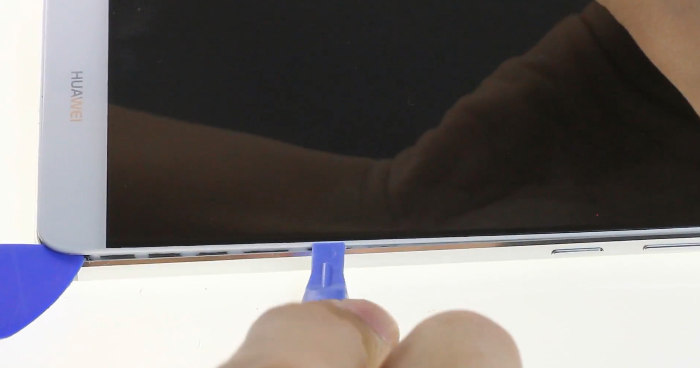
Use a heat gun or hair dryer to heat up the screen for a while and then use a small guitar pick to loosen and pry up the screen.
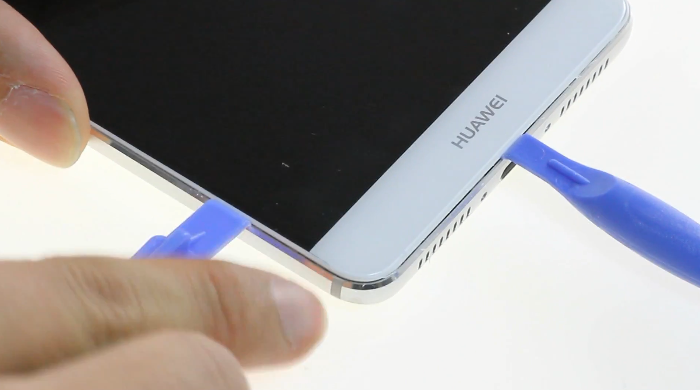
Once the screen edges are all pried up, then gently remove the rear housing away.

Be careful, there is still connector linked to the motherboard. Disconnect it.
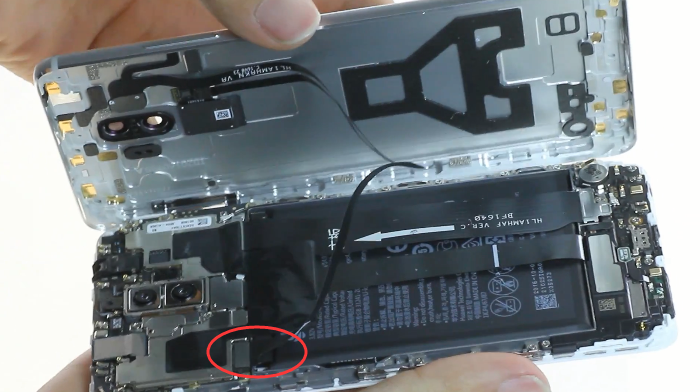
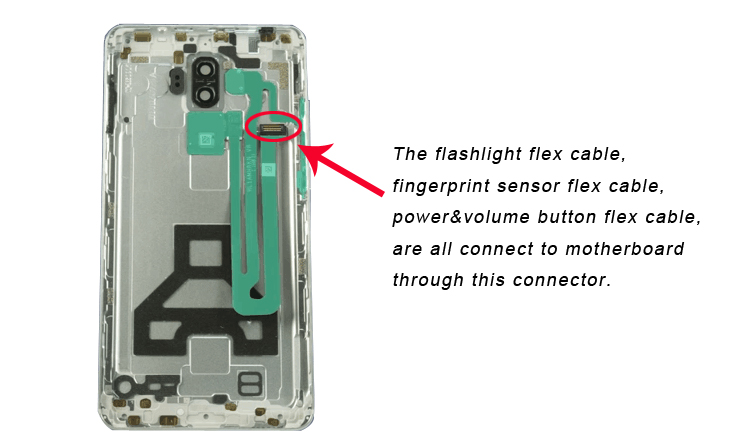
Look at the rear housing, the flashlight flex cable, fingerprint sensor flex cable and power & volume button flex cable are all connected together.
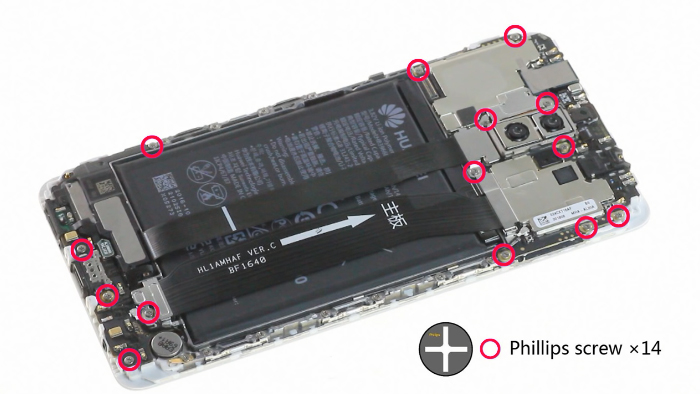
Step 2 Remove Motherboard
Peel off the black tape adhesives.
Then undo these 14 Phillips screws.
Remove metal brackets which covering these connectors.
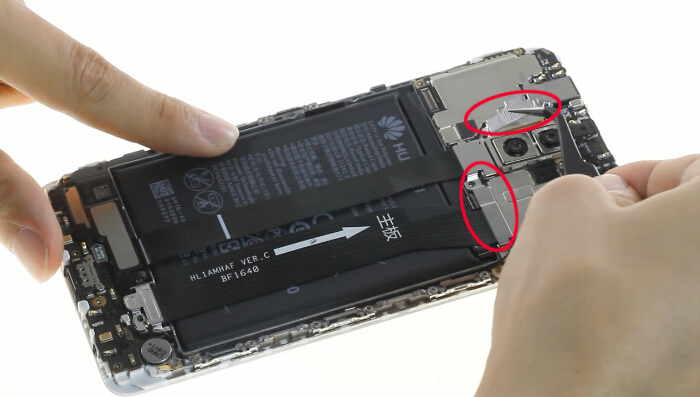
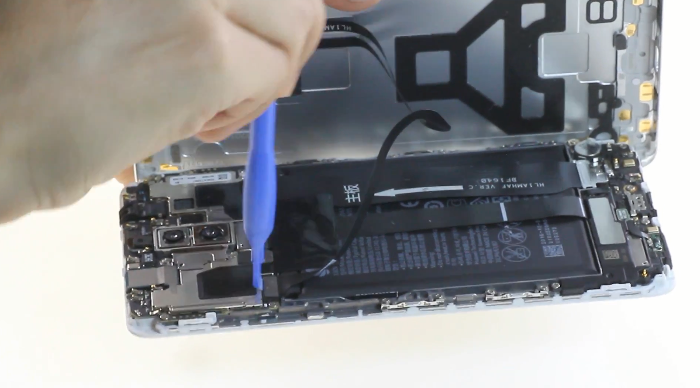
Then you can disconnect all the connectors and the signal cable connected to motherboard.
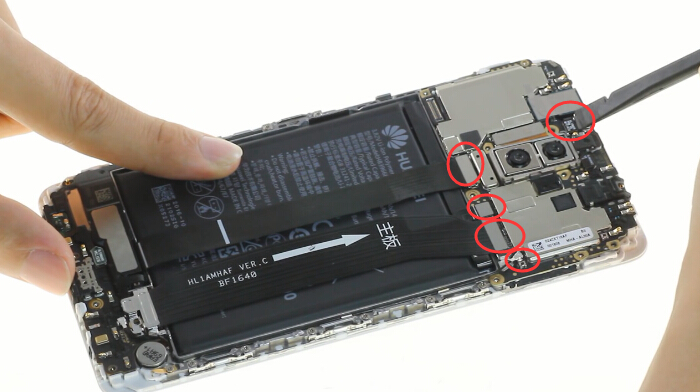
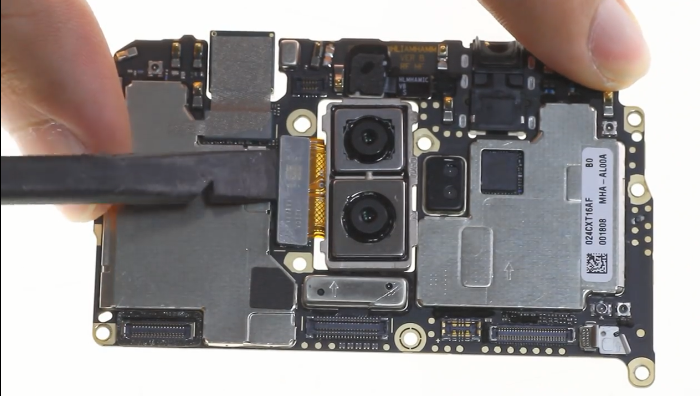
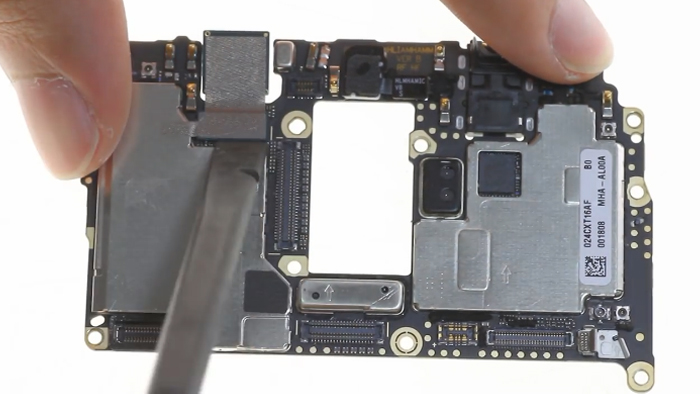
After that you can pry up motherboard, which comes with the Huawei Mate 9 rear dual-camera and selfie camera.
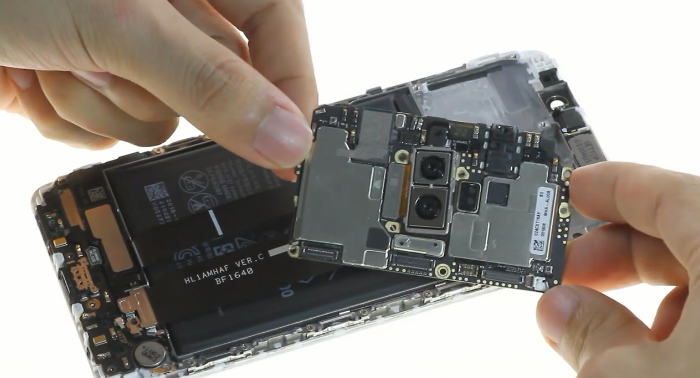
Then we now remove the cameras from the motherboard.
Step 3 Remove Samll Components
First we remove loudspeaker.
Remove metal cover bracket and release the following connectors and signal cable.
Then we can remove loudspeaker, use a tweezer gently pry up the loudspeaker, there are stickers underneath. Be careful not to scratch the speaker.
By the way, the small vibrator nearby can be removed at the same time.
moving to upside, we have light sensor flex cable and ear speaker to be dealt with.
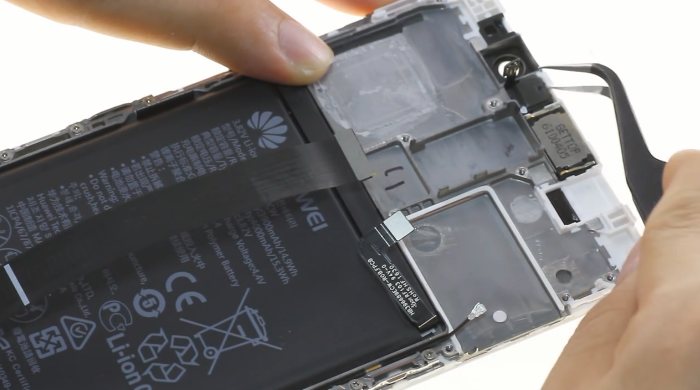
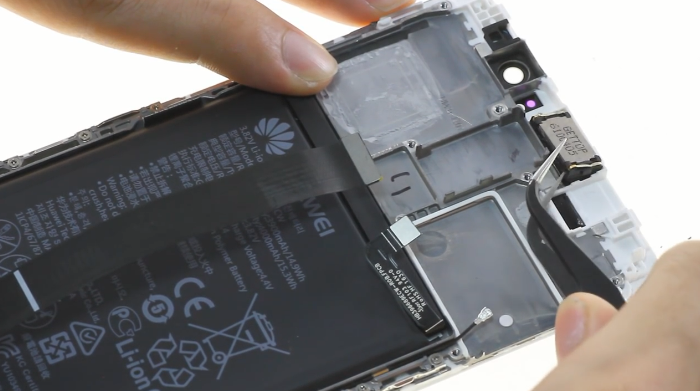
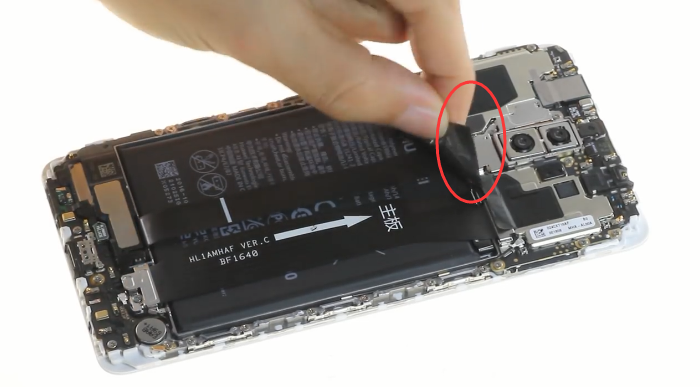
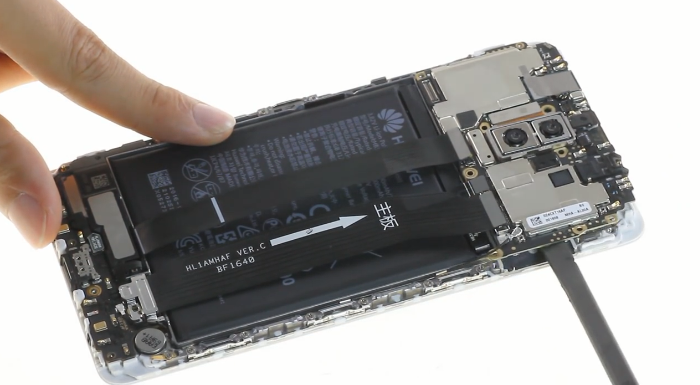
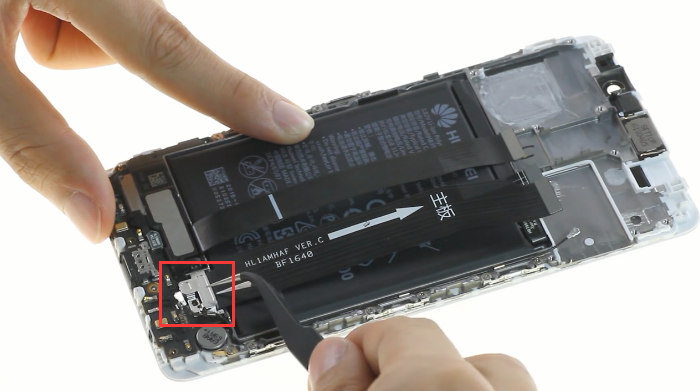
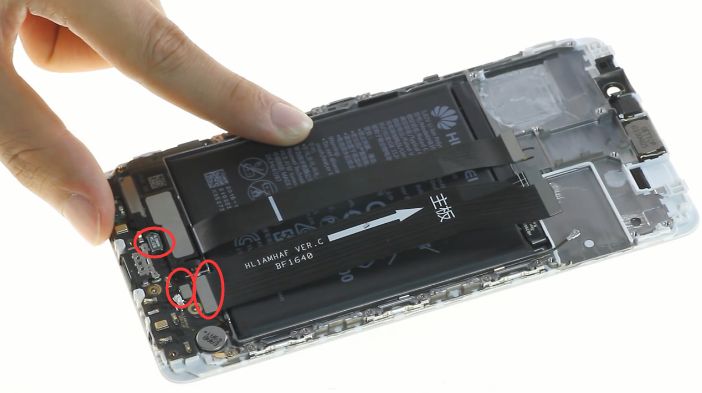
Step 4 Remove Huawei Mate 9 Battery
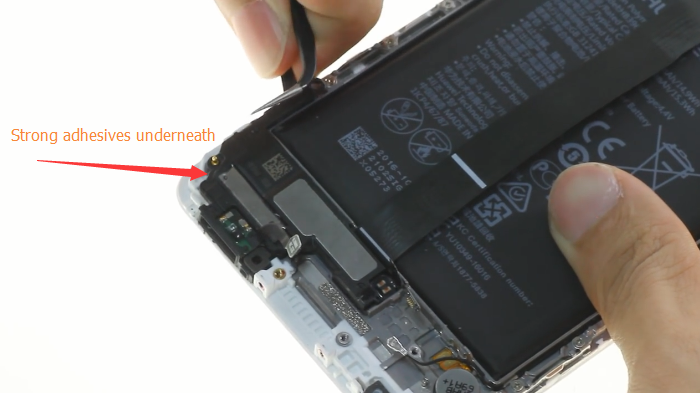
Since all the small parts are removed, it's convenient to take out battery now. All we need to do is to pull out the battery stickers underneath, here we may need the help of a tweezers.
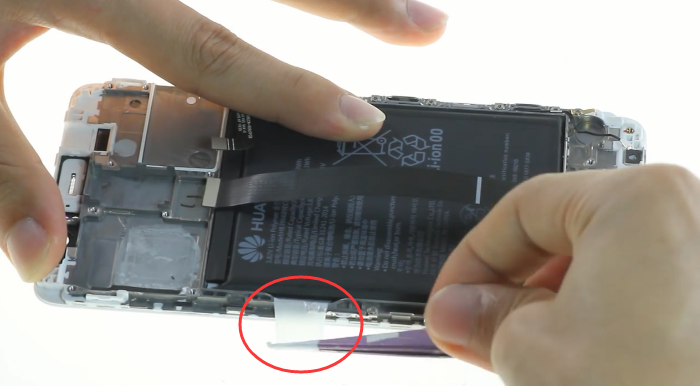
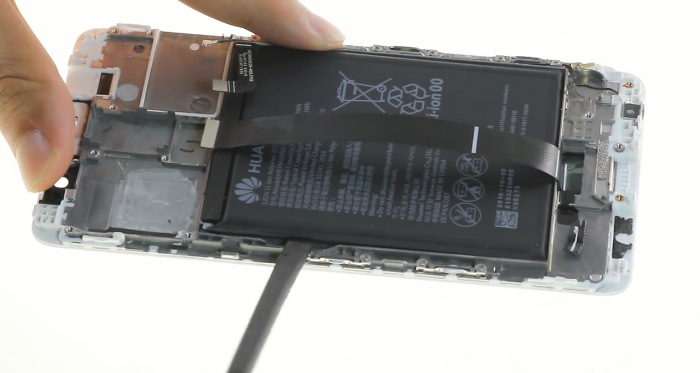
Then gently pry up the battery by a plastic spudger, be careful not to damage the battery.
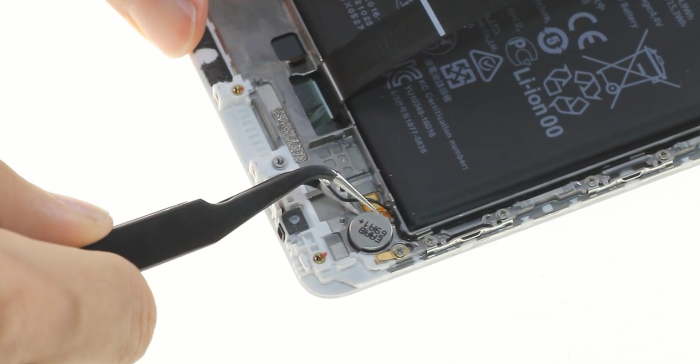
Now we just leave the LCD screen assembly with front housing together. Since the LCD screen and the front housing is being assembled so tightly, it's different to separate them apart, so if you are not that familiar with the repair work, you'd better replace them together.
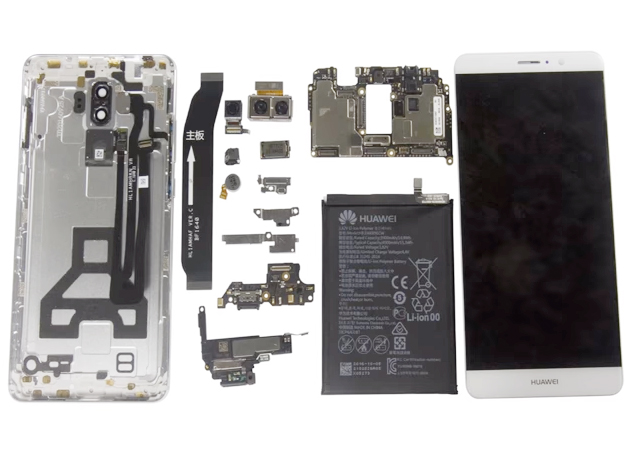
So here is the teardown of Huawei Mate 9, welcome any thoughts and suggestions!
You may also like:
|
|

|
|
|
|
|
|---|


 IOS 17.4 official version pushed to block battery vulnerability
  Is the Chinese-made rear case for the iPhone 15 series going on the market?
  New products coming:USB to MFI Lightning Cable
  Big BUG of iPhone 15
  Successfully submitted!
Hi, For step 4, after pulled d battery sticker, should put back a new battery sticker? Thanks!
Hi Mike, if you can buy the battery sticker, you can put it back, if you can’t get the sticker, you can also don’t put back it.