


How to Tear down the Huawei P9 for Screen, Battery, Camera Replacement
BY May | 四月 27th, 2016 | 0 | 1
The Huawei P9 is widely known because of its LEICA co-engineered dual lenses, enabling you to capture more high quality and amazing photos and videos. How did Huawei put these stunning cameras into P9 without compromising on the handset’s sleek and compact style? Let’s tear the Huawei P9 down and have a look.
Tools Needed:
Step 1 power off the phone and take out the SIM card tray. 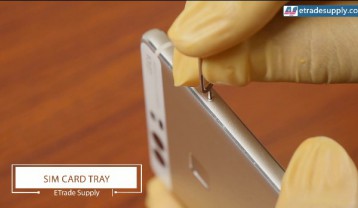

Step 2 Remove the rear housing
First thing we need to do is to undo the 2 screws through Pentalobe Screwdriver at the bottom of the phone. 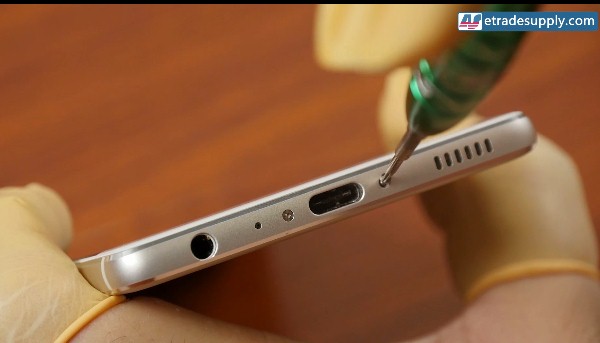
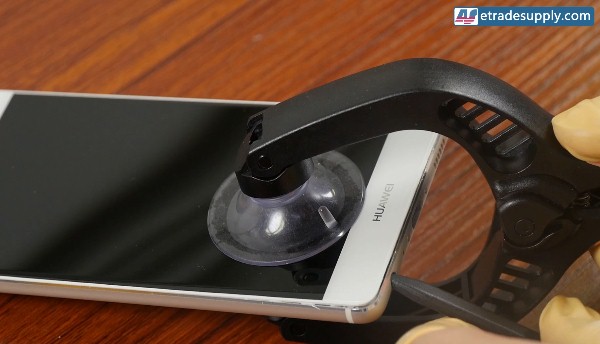
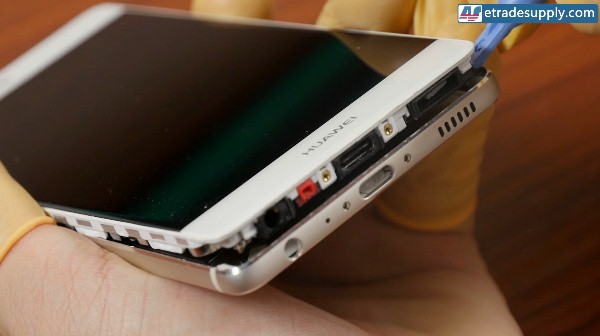
After that, we’re going to separate the front screen assembly and rear housing through the screen separation tool, here you may need the spudger for help to prop up the front screen assembly through the headphone jack hole.
Gently pull up the Huawei P9 LCD assembly until a small gap shows up, insert a spudger tip in between and run it back and forth to release the rear housing. The LCD assembly and rear housing are connected by clips. Be careful not to scratch the back housing or the screen edges. 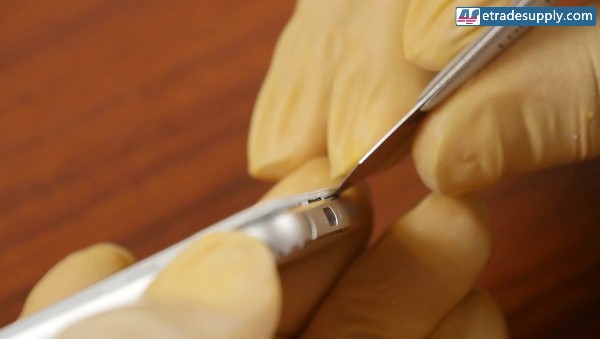
Remove the front screen assembly. 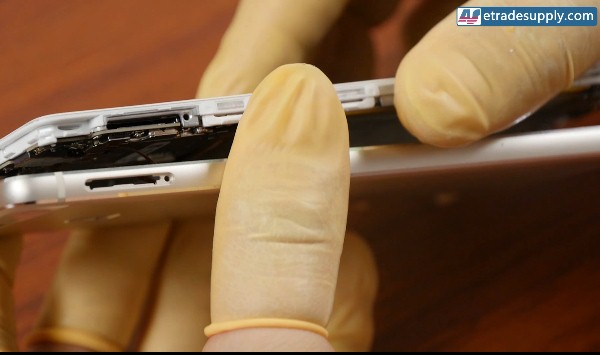 Take your time here, because the fingerprint sensor flex cable is still connected to the motherboard, disconnect it!
 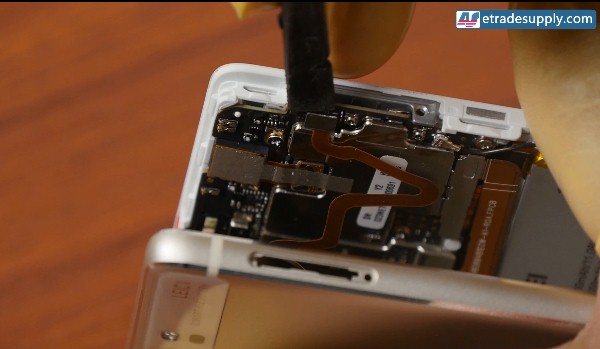 There, we’ve separated the rear housing!
Step 3 Remove mother board
Disconnect the signal cable first. 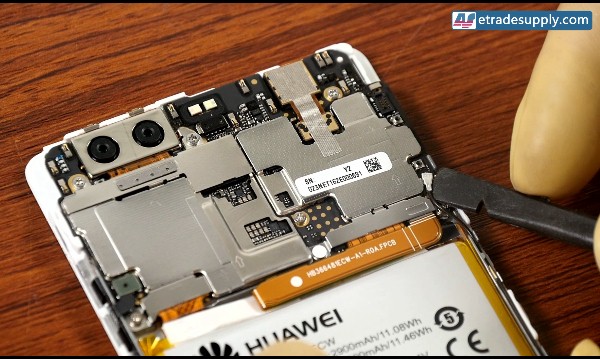 Undo 7 long Phillips screws in the mother board.
 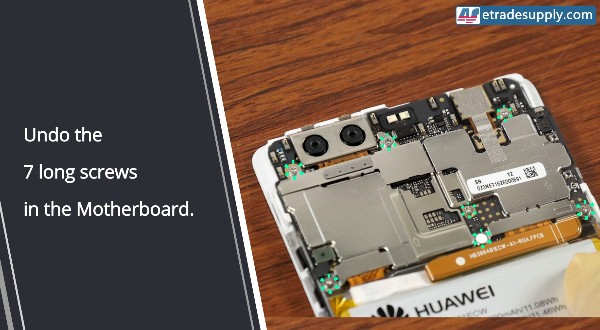 Disconnect the flex ribbon connectors as shown in below.
 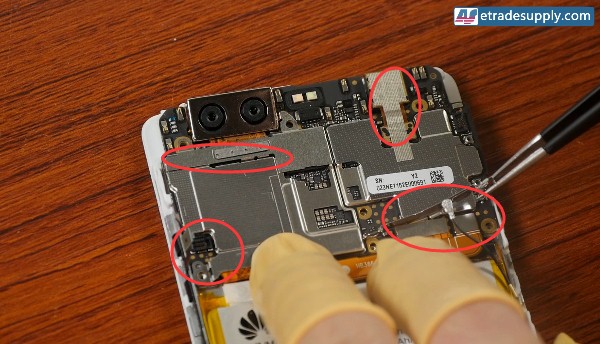 Then we can remove motherboard now.
 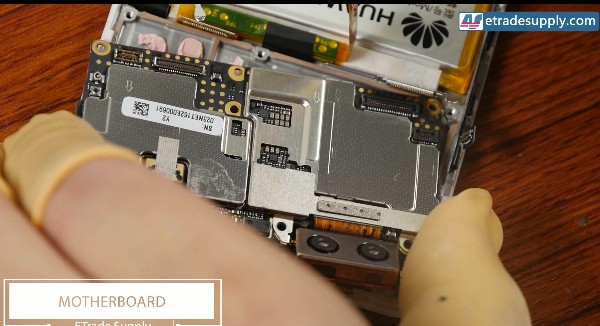 On the motherboard, we now take out the amazing Leica Double back camera module.
 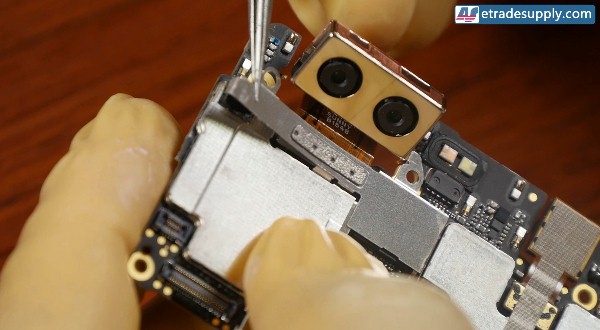 Disconnect the camera connector, then the rear camera can be removed.
 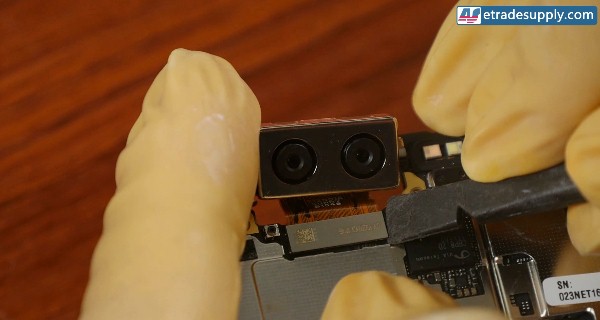 Let’s have a deeper look at this Leica camera.
 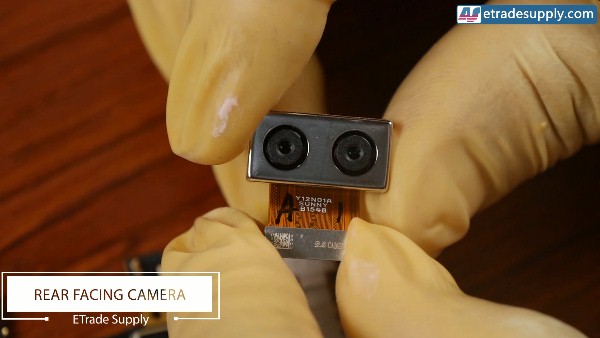 Next, the front facing camera, just release the camera connector.
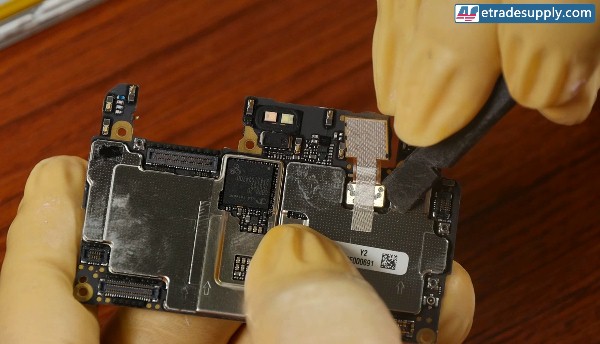
Step 4 Remove charging port, loudspeaker module and vibrator
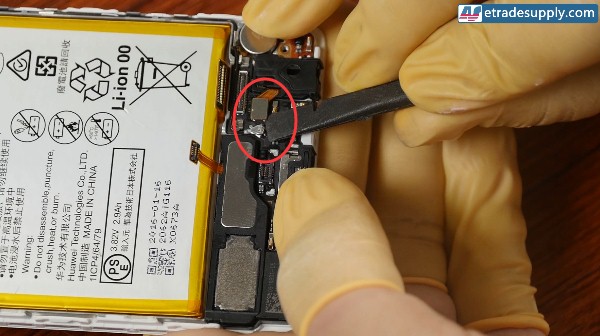
Disconnect the battery flex cable connector first. 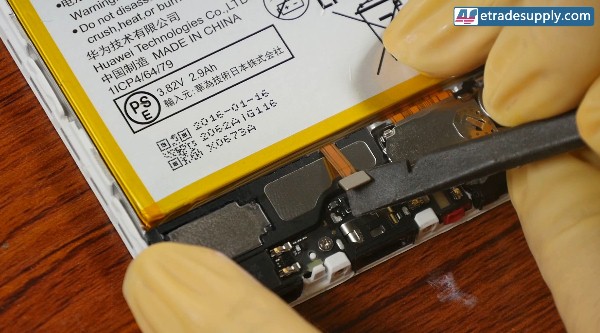 Undo 3 Phillips screws at the bottom.
 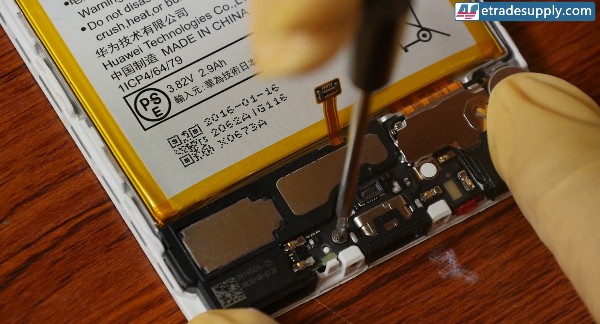 Remove the metal bracket which covering the screen flex cable.
 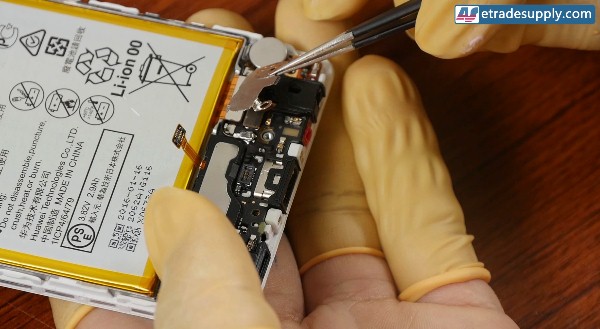 Disconnect the screen, signal cable and vibrating motor connector.
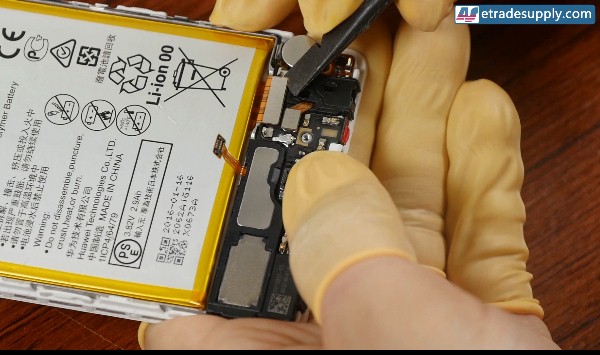
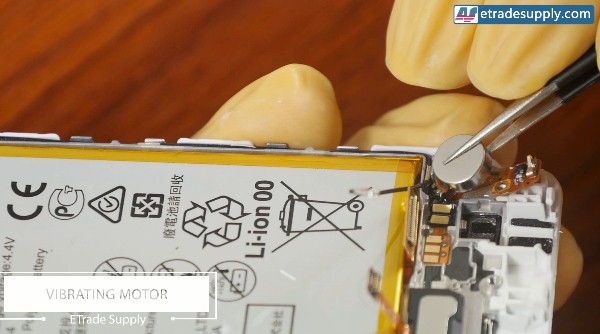
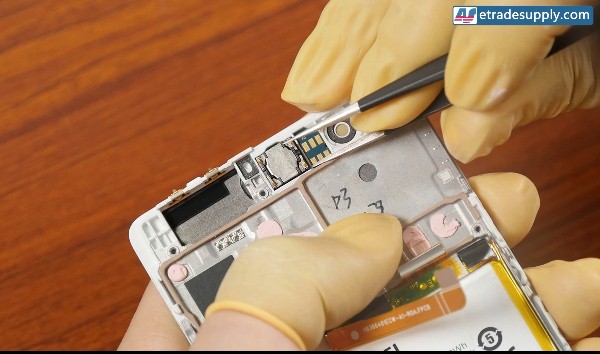
Now the charging port can be removed easily. 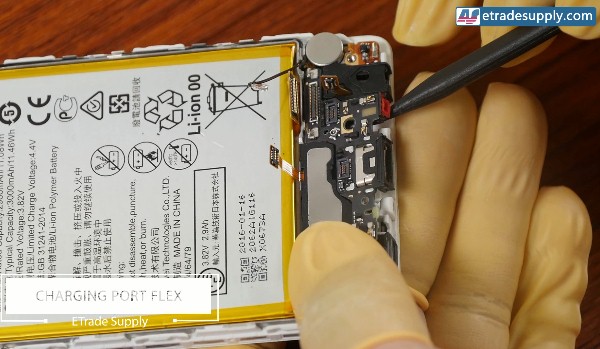 By the way, vibrating motor and earphone jack can be removed at the same time, easy piece.
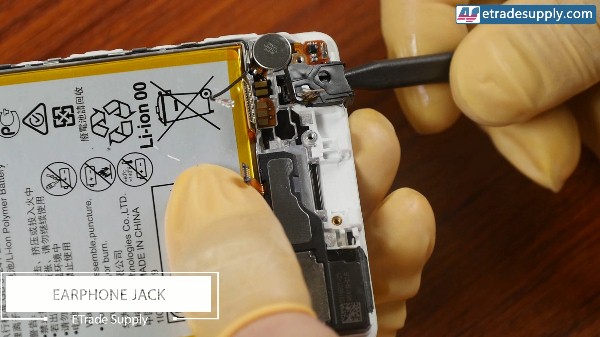
Then let’ s turn to the loudspeaker module. 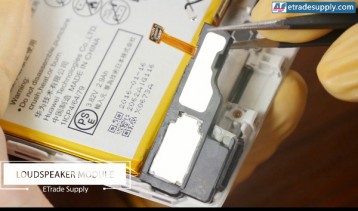 Step 5 Disassemble the front screen assembly.

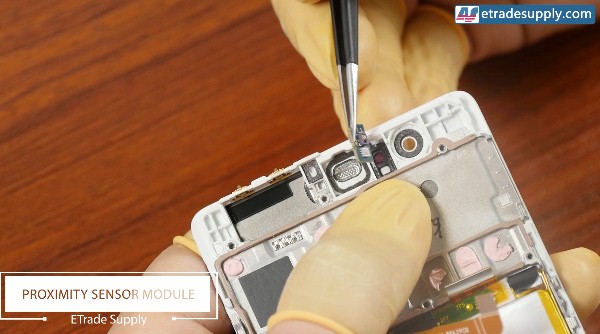
First we’re aiming at the power & volume button flex, which is sticked tightly to the front frame. 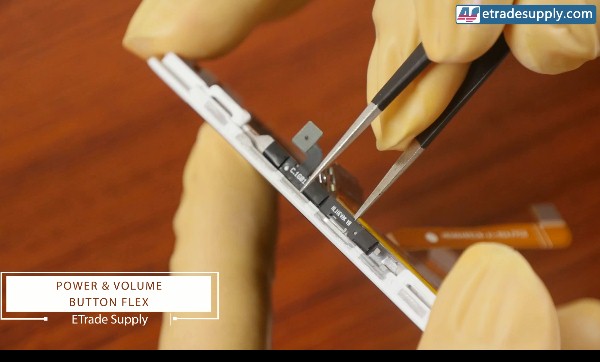 Next, the ear speaker and the proximity sensor module, apply a little heat would make the work easier.
 Step 6 Remove battery
Finally, we are coming to the battery, be careful here. We need to pull out the easy-to-pull sticker, which is easy to get broken, do not pull it too high. 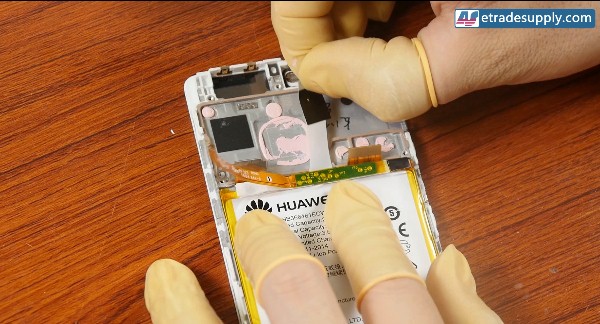
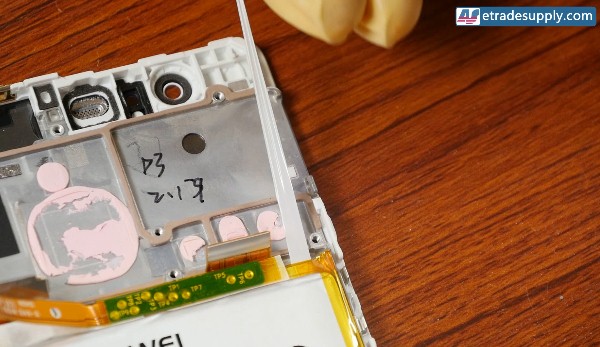 After that we can pry up the battery.
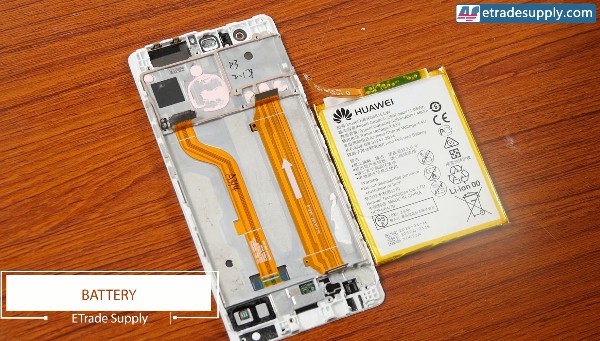
 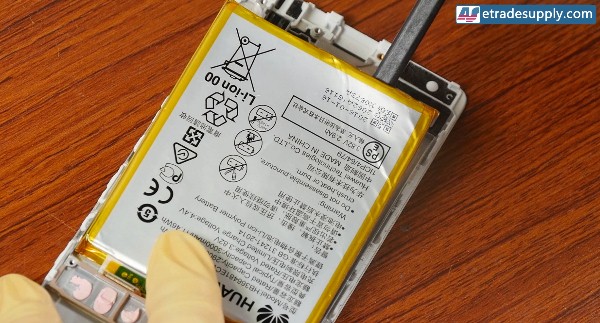 Then we left the LCD screen assembly only. Cause separating the front frame is a tough job for most people, we suggest you to replace the whole screen assembly with frame if your screen is broken.
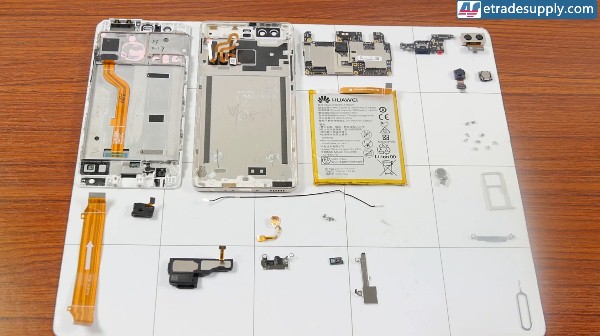
 All right, above is the whole teardown job for the Huawei P9.
 If you guys have any thoughts about this phone or any other ideas, leave a comment below to let us know. we’re looking forward to seeing your interaction with us!
You may also like:
- Huawei P9 reassembly
- How To Teardown Huawei Mate 9 To Replace Screen And Battery
- How to Replace the Huawei Honor 8 Broken Screen
|
|

|
|
|
|
|
|---|


