How to Fix the iPhone 11 New Replaced Display Non-Genuine Display Warning Issue
BY kaye | August 11th, 2020 | 2 | 10
Most of our repair shop customers complain that a newly replaced iPhone screen will show with the warning of non-genuine. No matter what types of displays, OEM original new or LCD screen, this warning makes the confusion and awkwardness to their customers. Here we would like to share a technique and a simple trick on how to erase the warning.
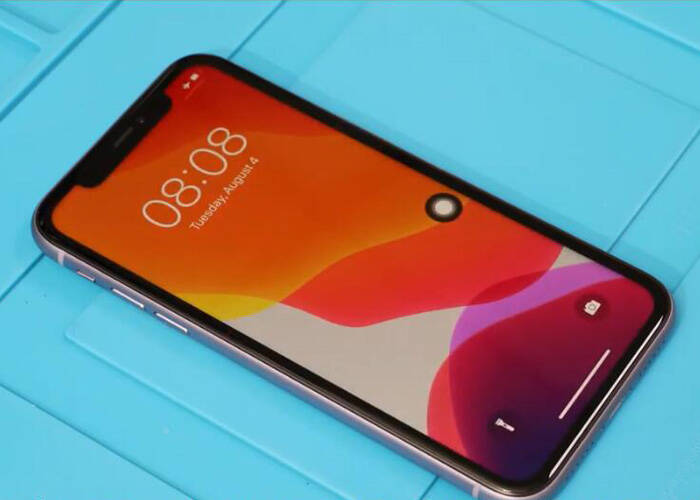
The new replaced original new iPhone display screen
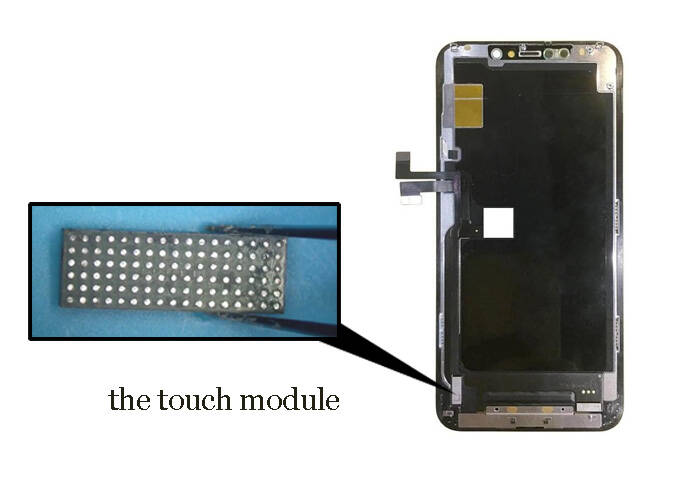
The pop-up warning shows that unable to verify this iPhone has a genuine Apple display on the screen no matter the original display or aftermarket display because the iPhone display screen replacement requires the manipulation of Apple authority technicians with Apple’s original parts and tools. There is a touch module on the display flex which contains the iPhone 11 system data. When we connect a new replaced display and power on the phone, the touch module data and the iPhone system cannot match. That’s why the warning pop-up on the screen. We need to replace the touch module to the new display screen. Let’s take steps on it:
1. Tear down the phone and grind new display touch module
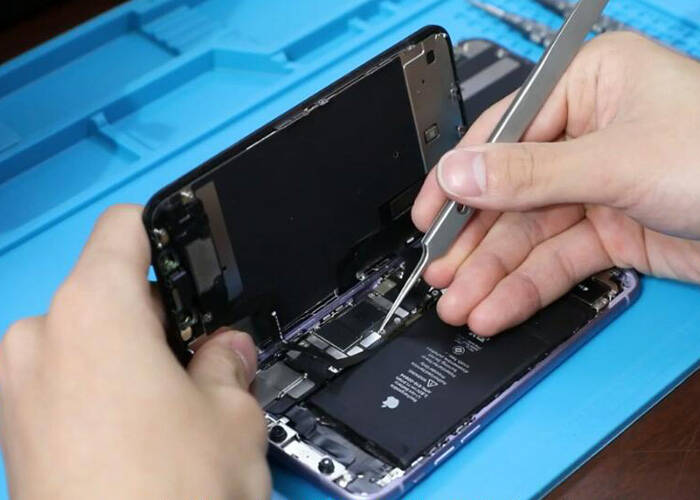
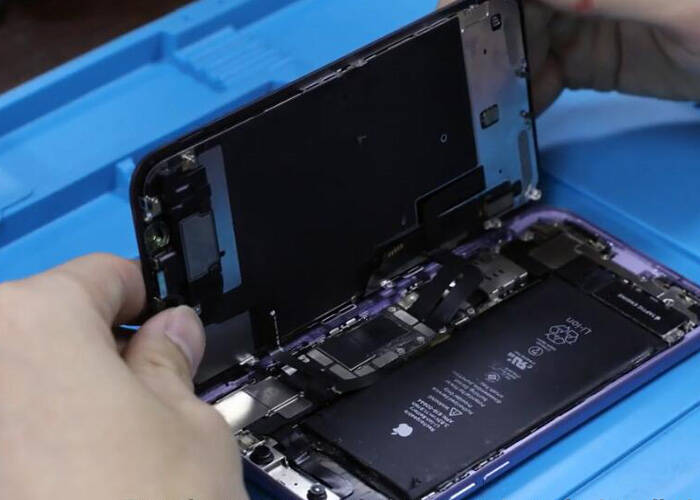
1.1 Power off the phone and tear down the original display screen
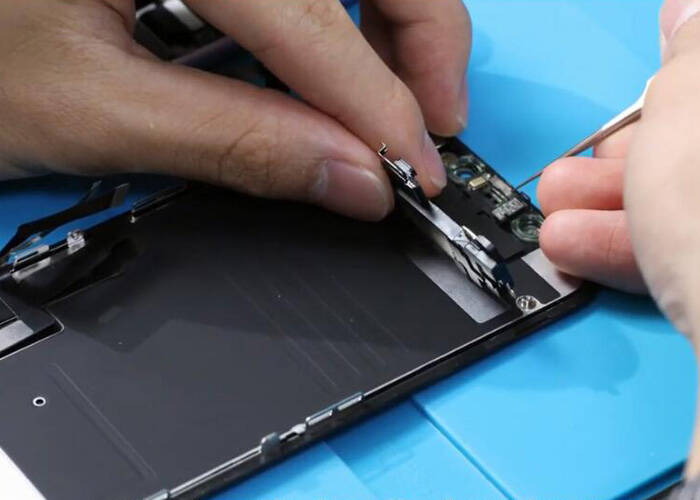
1.2 Replace the face ID module from the original display to the new iPhone display
1.3 Place the new iPhone display on the table, with the touch module on the upside
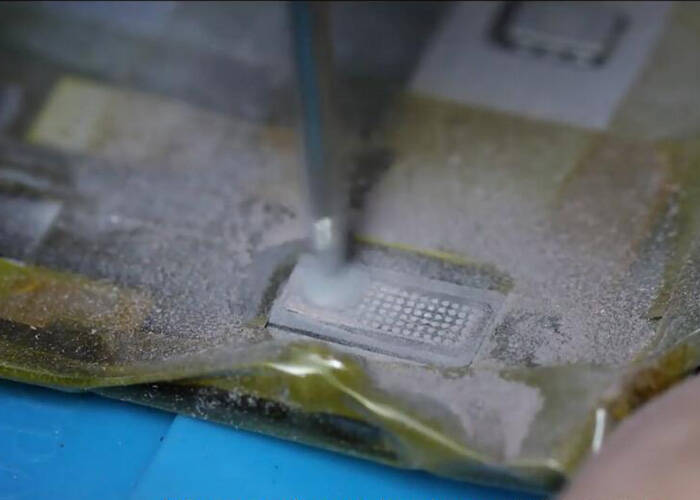
1.4 Use the special machine to grind the module and clear the module after it is completed
1.5 Clean out the black adhesive from the module with solder flux and solder wick and heat up with hot air gun
2. Separate the touch module from the original display and solder the module to the new display
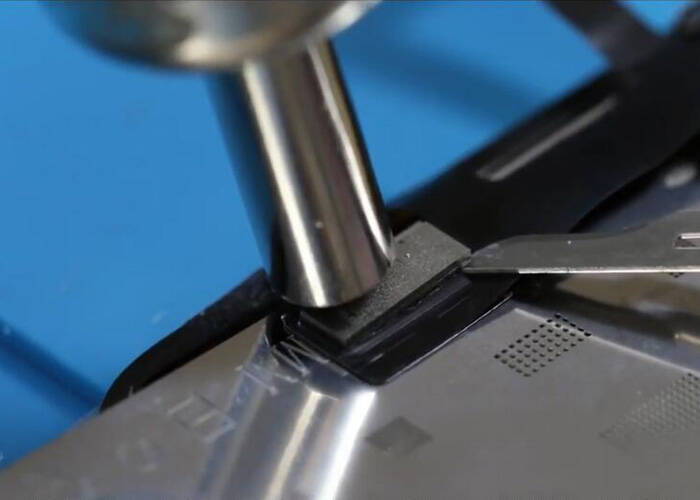
2.1 Tear down the touch module from the original display, use hot air gun to blow and steel tool to pry carefully
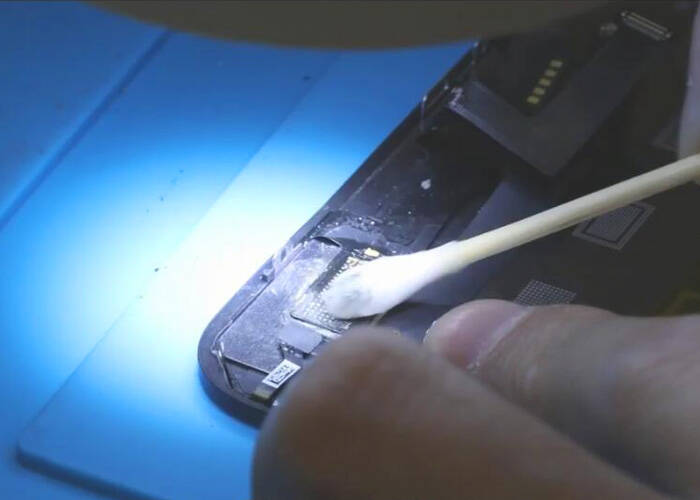
2.2 Clear out the black adhesive on the module, use solder past to reball the touch module by smearing the solder on the stencil and heating with hot air gun blowing
2.3 Solder the module onto the new display, applying some solder flux on the module and heating with hot air gun
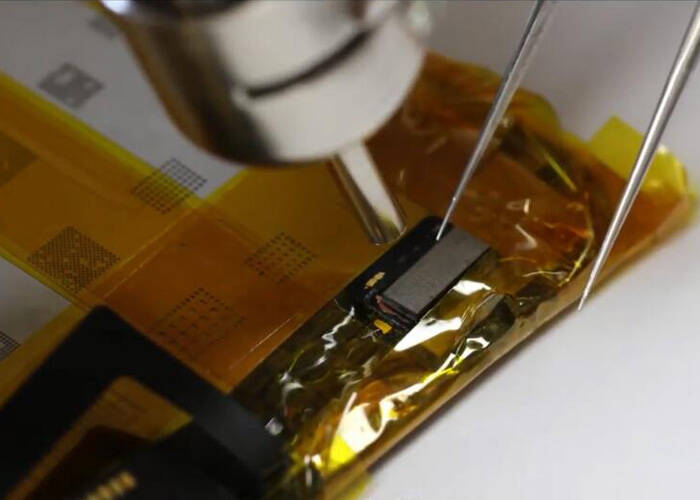
2.4 Connect the display into the iPhone after the touch module is cold down. Test the new display function
2.5 The pop-up non-genuine warning disappear, all the display functions are normal. The whole procedure completed successfully.
The aftermarket iPhone display screen
As to the aftermarket iPhone display, such as iPhone 11 LCD display screen, the touch module is different from the original display. It is impossible to proceed with the same steps above. Anyway, without tearing down the iPhone, there is still a trick we can do to make the pop-up warning disappear on the new display for a month.
1. Switch off Wifi and Bluetooth, turn on the Airplane mode
2. Go to Setting >> Date & Time, adjust the Time Zone to one month later.
3. Power off and then restart the phone, swipe and clear off the warning
4. Go to Setting >> General >> Date & Time to turn on set Automatically
5. Turn off Airplane mode and switch on Wifi and Bluetooth
6. Power off and then restart the iPhone, the pop-up non-genuine warning disappears
As a final notice, in the end, the whole steps on section one are complicated. It is manipulated under the hands of the professional technician. It does not work if we try it on our iPhone without special tools and professional guidance. Besides, you may also check some iPhone 11 replacement parts on Etrade Supply. Here we provide all kinds of iPhone parts for repair. Contact us if you are interested.
Articles you may also be interested:
How to Upgrade the iPhone X Memory From 64G to 256G
How to Fix iPhone 11 Pro Volume Buttons Not Working Problem?
How to Teardown iPhone 11 for Display Screen Replacement
RECOMMENDED PARTS
- For Apple iPhone 11 LCD Screen and Digitizer Assembly with Frame Replacement - Black - Grade S+
- For Apple iPhone 11 Pro LCD Screen and Digitizer Assembly with Frame Replacement - Black - Grade S+
- For Apple iphone 11 Pro Max LCD Screen and Digitizer Assembly with Frame Replacement - Black - Grade S+
- For Apple iPhone X OLED Screen and Digitizer Assembly with Frame Replacement - Black - Grade S+
POPULAR ARTICLE
- How to Upgrade the iPhone X Memory From 64G to 256G
- How to Fix iPhone 11 Pro Volume Buttons Not Working Problem?
- 3 Steps for iPhone 11 Back Rear Camera Replacement
- How to Teardown iPhone 11 for Display Screen Replacement
- iPhone X Water Damage Repair Guide (Still Work in 2019)
- How Much Does It Cost To Replace An iPhone XS Display?
- iPhone X Explosion: 7 Small But Important Things To Note
- 7 Ways To Fix Your iPad Not Charging In 2018
- iPhone 7 Screen Replacement | iPhone 7 Repair
- Which Parts of iPhone X and iPhone XS Are Exchangeable?
- iPhone X, XS, XS Max, and XR Battery Comparison
- How To Fix iPhone XS/XS Max, And XR Bluetooth Connection Issue
- Apple Will Fix the iPhone 8/8 Plus/X Auto Brightness Issue in iOS 12
- iPhone got exploded too?! How to protect your phone from battery explosion
- HTC 10 DIY Teardown for screen, charging port, battery replacement
- 6 Quick Tips To Distinguish Between Real And Fake iPhone SE
- Analysis on: Are China made LCDs for iPhone 5S Compatible with iPhone SE?
- How to Replace the Galaxy S7, S7 Edge Battery Replacement
- How to Disassemble the Galaxy S7 LCD Assembly to Replace Screen, Charging Port and Home Button
- How to Repair Samsung Galaxy S7 Edge Cracked Screen
- How to Tear Down/Disassemble the Galaxy S7 for Screen Replacement
- How to Fix Phone Gets Hot and Battery Drains Fast
- Xperia Z5 Premium USB Charging Port Replacement Tutorial
- How to Replace Your Broken Sony Xperia Z5 Premium Screen Step by Step Guide
- 15 Tips to Improve Your Galaxy Note 5’s Battery Life
- How To Replace A Cracked Motorola Droid Turbo 2 Screen
- How To Fix iPhone 6S Auto Shutdown When It Still Has Battery?
- How To Replace A HTC One A9 Cracked Screen
- How to Distinguish the Fake Apple Earpod from the Real One
- How to Replace the LG V10 Screen in 5 Steps
- How To Solder/Replace A Samsung Galaxy or iPhone Charging Port
- The Cost of Repairing a Cracked Galaxy S6, S6 Edge Screen
- How To Fix Cracked Xperia Z5 For Screen Replacement
- What’s Need to Be Prepared As a Startup Cell Phone Repair Shop
- *Update* The Root of Differences among Copy iPhone LCDs: Structure
- Important Info: Pay Attention To Defective Recycled iPhone LCDs
- How to Replace Galaxy Note 5, S6 Edge Plus Battery
- Are The Flood of New High Copy iPhone LCD Screens as Good as The OEM Ones?
- iPhone 6+ and iPhone 6S+ Screen Comparison Report
- How to Recover Photos and Data with Broken Screens
- How To Identify Different LG G4 Model Numbers
- How to Fix Cracked iPhone 6S for Screen Replacement
- Cost of Repairing a Damaged Screen on the LG G4
- How To Fix LG G4 Digitizer Touch Screen Issue
- As a Newbie, What You Should Know About Jailbreaking
- How To Tear Down/Disassemble Galaxy S6 Edge Plus For Screen Replacement
- 90% Of People Don’t Know These Cellphone Battery Information
- Insider Tips to Save Your Water-damaged Device
- How to Set Up ETrade Supply’s Adhesive Dispenser Robot
- Top 10 iPhone 6 Problems and Solutions
- How To Fix Vertical Lines On An iPhone Screen After Replacement
- How to Replace Sony Xperia Z3+ Screen/Screen Replacement Guide
- How To Disassemble/Tear Down Sony Xperia Z3+
- How to Assemble Small Parts on iPhone 6 LCD Screen Assembly
- Reasons Behind & Solutions for iPhone 6 Frame and LCD Separation Issues
- How to Replace The LG G4 Charging Port
- How to Replace the Cracking LG G4 Screen in 10 Minutes
- How To Replace An Oneplus One Cracked Screen
- iPhone 5 LCD Screen Assembly Small Parts List
- How to Replace the HTC One M9 Charging Port
- How to Replace HTC M9 LCD Screen Assembly
- Top 5 Most Common iPhone 6 Issues You May Come Across
- How To Tear Down The Samsung Galaxy S6 In 10 Steps
- The Cost Of Repairing A Cracked Nexus 6 Screen
- How To Repair A Nexus 6 Cracked Screen
- How To Disassemble Nexus 6 In 10 Steps
- The Cost Of Repairing A Broken iPhone 6 Screen
- Five Minutes Work to Replace Your iPhone 6 Plus Broken Screen
- How to Repair a Cracked Samsung Galaxy S5 Screen
Really? “You can fix the ingenuine Display Error by… replacing the screen.” Wow
Display