How to Teardown iPhone 11 for Display Screen Replacement
BY kaye | 十月 15th, 2019 | 0 | 1
Tools required:
Screwdrivers - Pentalobe, Phillips, Y-type,
tweezers,
steel spatula,
spudger,
suction cup,
triangle plastic pry tool,
ultra-thin sheet
Step 1: Separate the old iPhone 11 display screen
1.1 Get all the tools and the new screen ready, power off the device
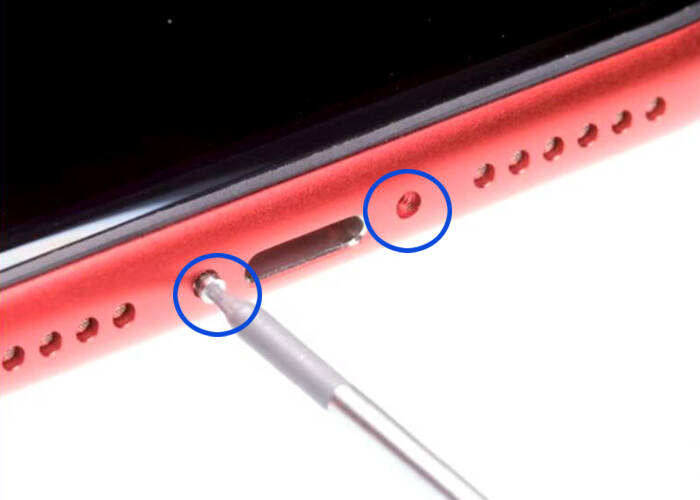
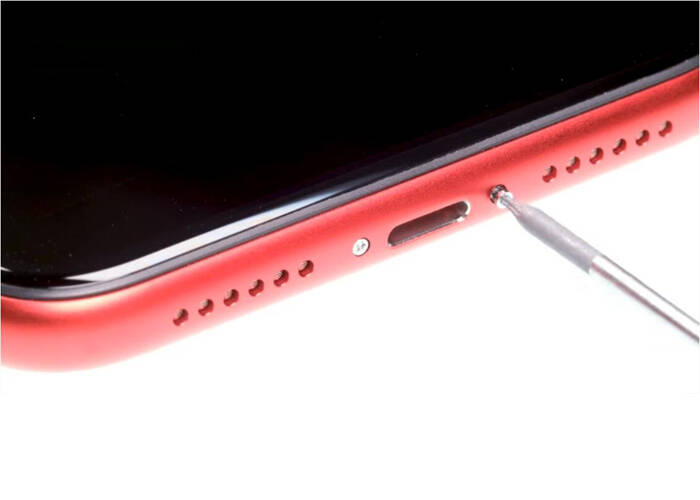
1.2 Loosen the two pentalobe screws on the bottom
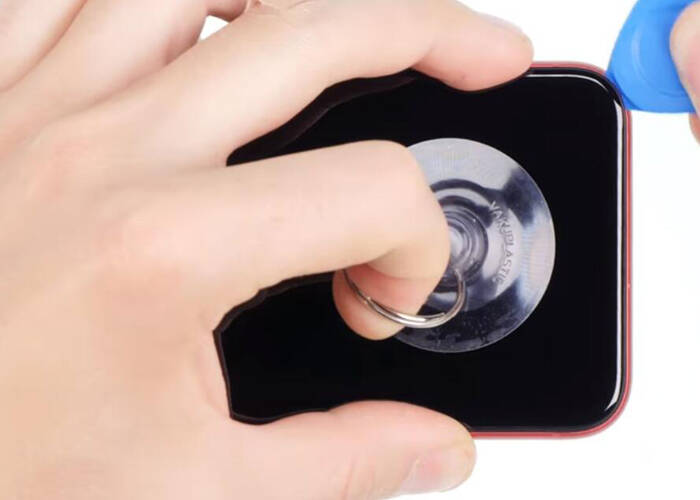
1.3 Separate the screen with a triangle plastic pry tool and a suction cup, use an ultra-thin sheet to insert in the gap gently, 60 ℃ hot gun blowing around the edge beforehand for easy separating but do not overheat the device
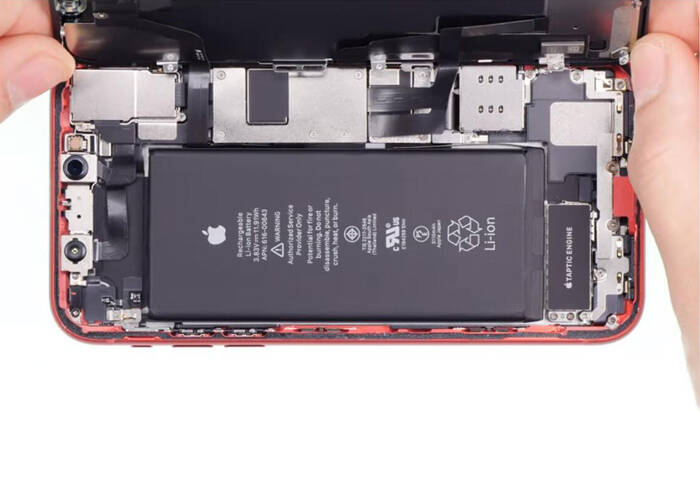
1.4 Pry up the display with a steel spatula, use a stable object like a box next to the iPhone to hold the display in case of slipping away and break the flex
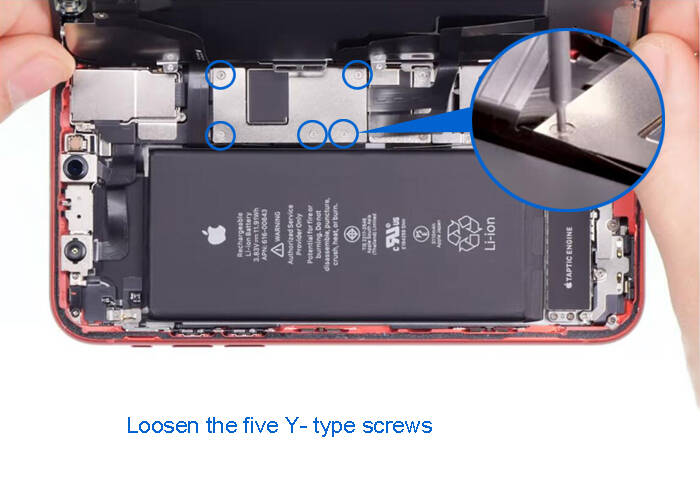
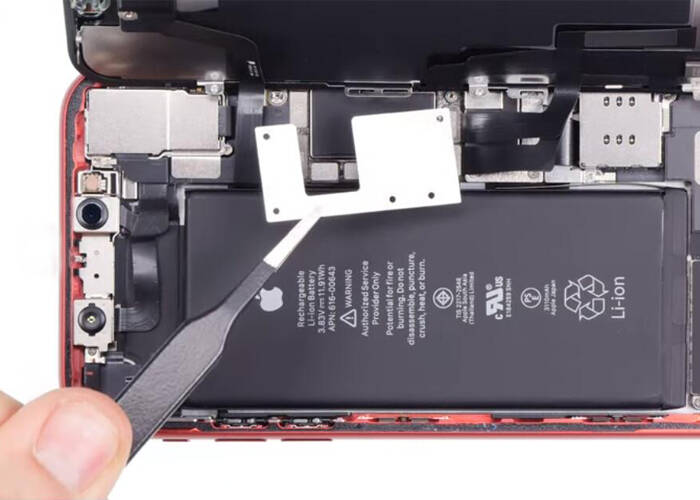
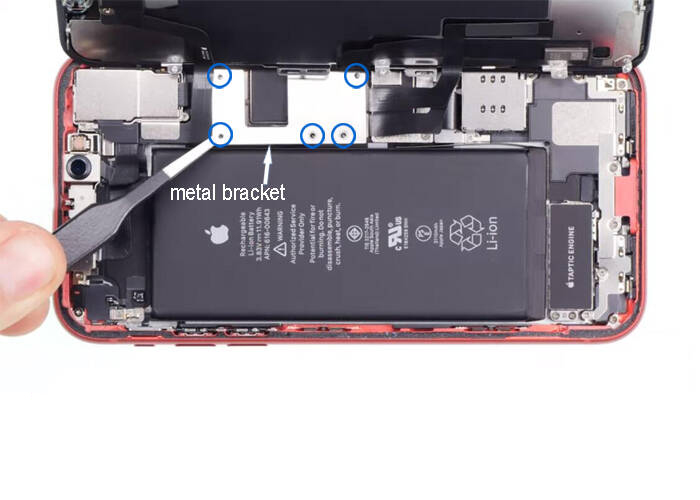
1.5 Loosen the 5 Y-type screws and remove the metal plate carefully with tweezers
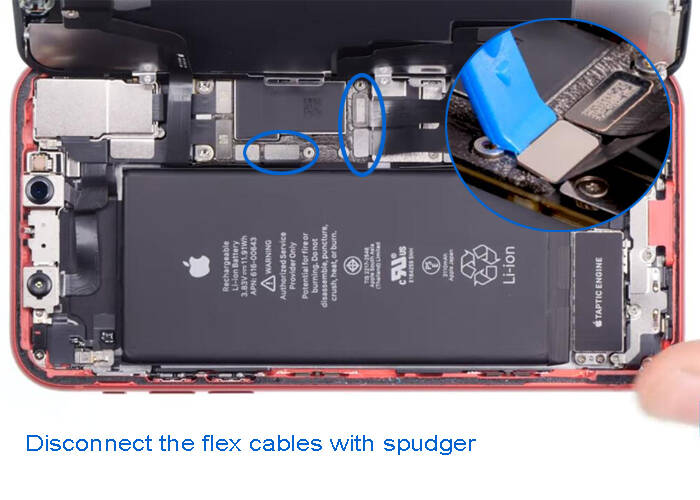
1.6 Disconnect the display screen flex cables with a spudger and separate the old screen
Step 2: Transfer the earpiece and the rear panel from the old screen to the new display screen
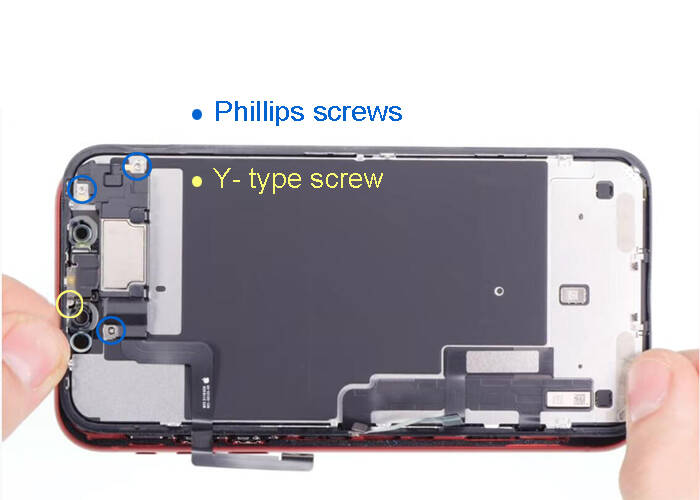
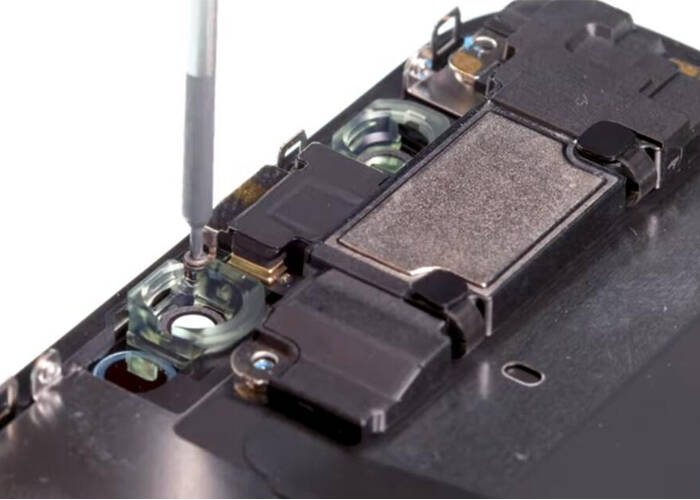
2.1 Loosen this the Y-type screws and three Phillips screws on the earpiece
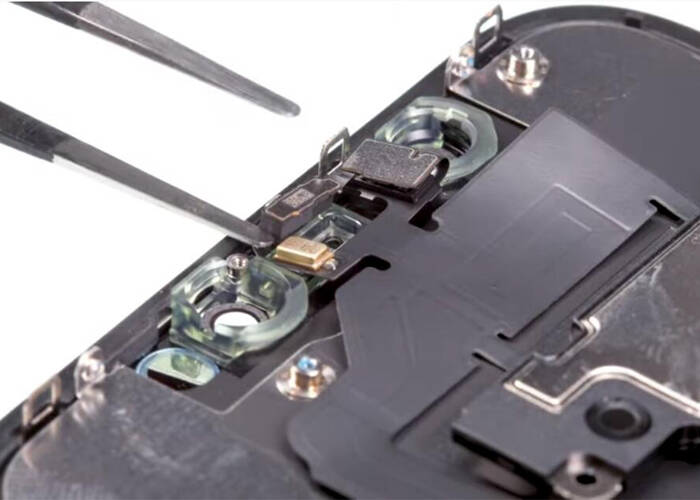
2.2 Flip the earpiece to the side, then remove the small metal bracket from the ambient light sensor
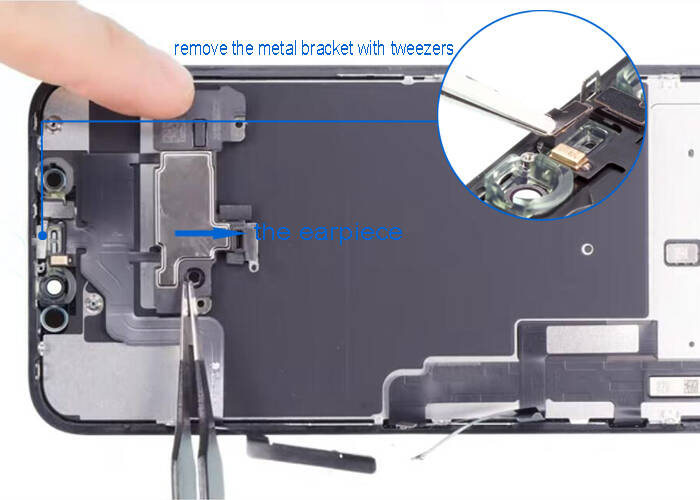
2.3 Disconnect the earpiece flex cable carefully with tweezers, hot gun blowing because it is slightly glued here. Particularly careful on this cable because it would cause the face ID not working if it is damaged.
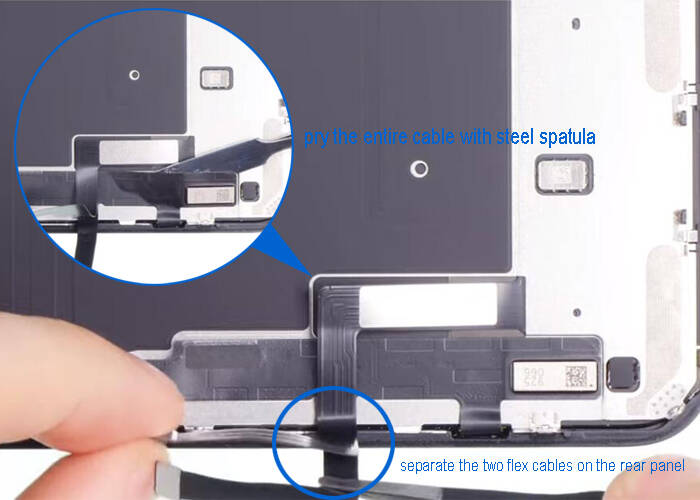
2.4 Separate the two flex cables on the rear panel, use hot air gun blow for easy separation, and then use steel spatula to pry the entire cable carefully
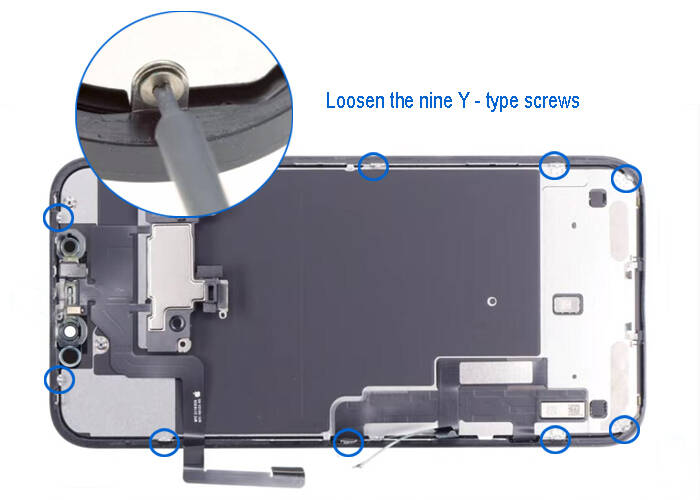
2.5 Loosen the 9 Y-type screws, lift the whole plate with steel spatula when it is loose, hot gun blowing it if it is glued tight
Step 3: Attach the rear panel and reassemble the new screen
3.1 Attach the rear panel to the new screen, make sure it fits right in the position everywhere, and then glue the flex cables on the rear panel
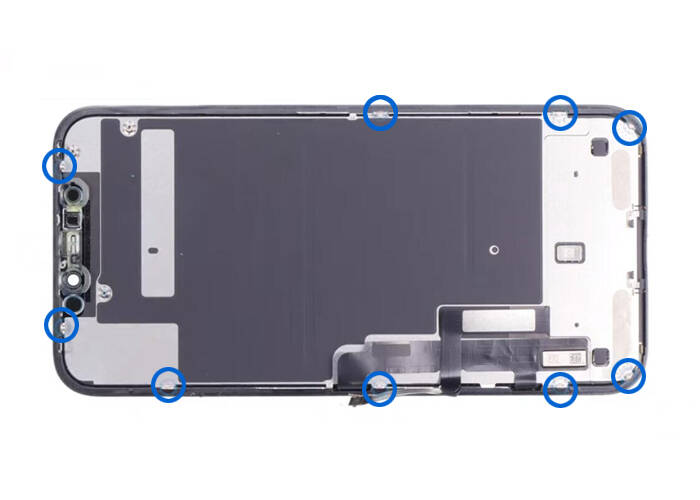
3.2 Screw the nine Y-type screws on the edge to fix the rear panel
3.3 Insert the sensor cable, press the sensors and make them sit, place the small metal bracket back
3.4 Flip the earpiece back to the right place, screws back the Y-type screw and the three Philips screws to fix the earpiece
3.5 For the protection of the internal parts from the dust and splash's sake, it is recommended to use a new frame sticker attached around the edge. Same frame sticker refers to for iPhone 7 frame adhesive replacement in our store
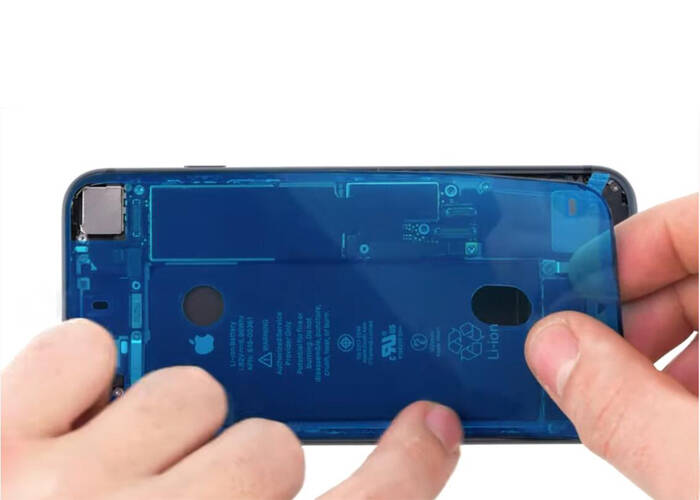
3.6 Connect the three new display screen flex cables, hold the screen steady and make sure it is in the right place
3.7 Recover the metal bracket back and screw the five Y-type screws back
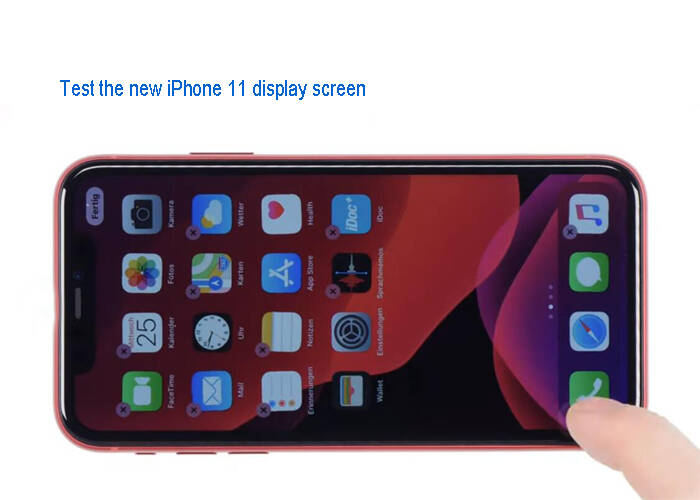
3.8 Test the working condition of the new display, such as the touch sensitiveness, the proximity sensor, the earpiece, etc. If some of these are not working, check the sitting positions of the connectors and the flex cables
3.9 Power off the device and install the new display, make sure the new screen is sitting right in the place on the frame and then press the edge and each corner to seal the gap
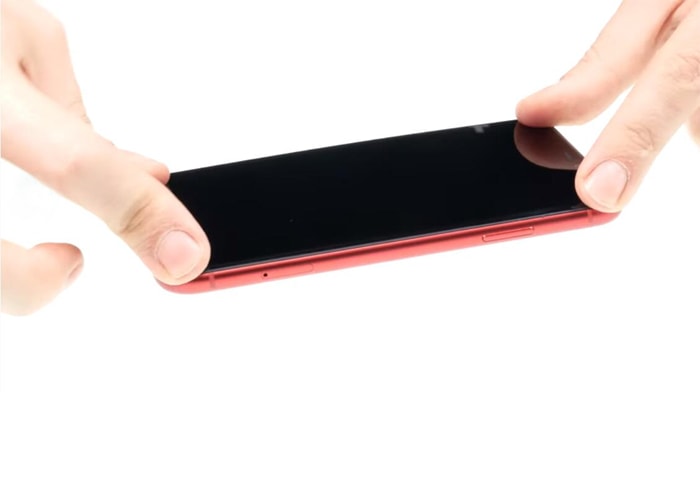
3.10 Screws back the two pentalobe screws on the bottom, all process is done
Noted: All the procedures above are under the hands of the professional repairman, we suggest you go to the Apple authority service center if you are not confident about yourself. Besides, your iPhone 11 will be not waterproof after it is tear down. You should consider it before you replace the display screen.
Check the iPhone 11 replacement parts like:
For iPhone 11 LCD screen and digitizer assembly with frame replacement


