How to Modify iPhone XR/XS from Single-SIM Card to Dual-SIM Card?
BY kaye | 四月 23rd, 2019 | 2 | 1
We all expect more functions iPhone XR or XS do for us. If the single SIM card iPhone can't meet your daily requirement, a dual SIM card iPhone XS/XR will be a great convenience for our life. Want to know how to do? ETrade Supply brings the following steps to you.
-
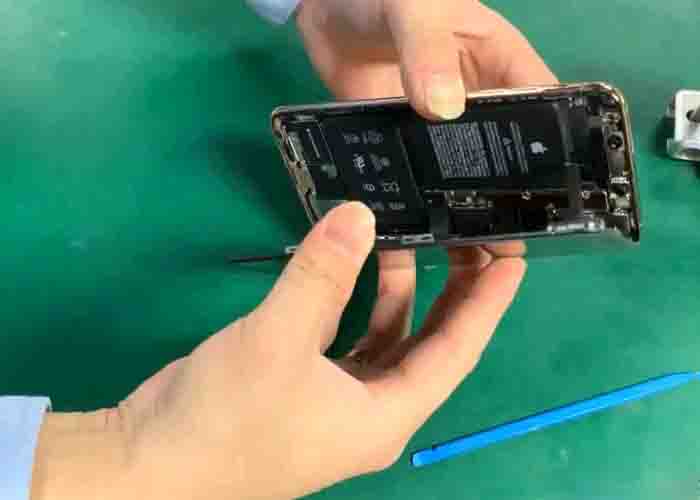
1. Teardown your iPhone and take out the motherboard
The first step, of course, is iPhone teardown, details refer to our presentation video of iPhone X teardown. Take out the motherboard with tweezers carefully, the same process has been mentioned on the previous blog of iPhone 6/6s storage upgrade. You may check this out.
-
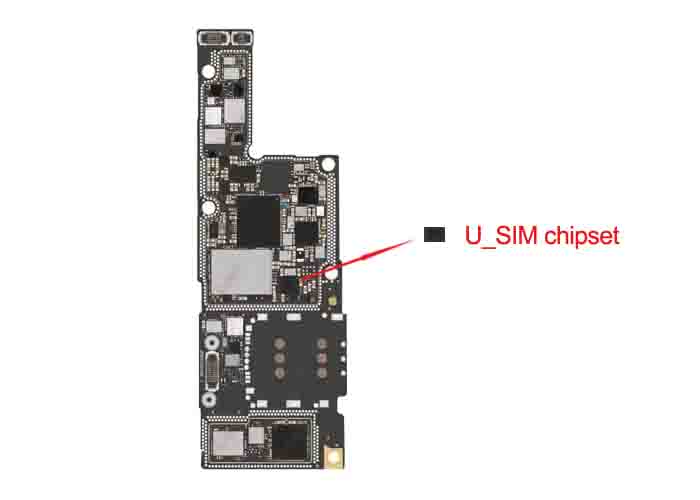
2. Separate the motherboard and detach the U_SIM chipset
After the iPhone XR/XS display screen assembly is torn down and separated, take out the motherboard and put it on the platform. Separate the motherboard by prying carefully with a razor blade when heated. Detach the U_SIM chipset by hot air gun blowing, this is a piece of a small cube on the motherboard just like the picture showed below. Don’t forget to paste a heat-resistant tape around the chip in case of damage to other elements.
-
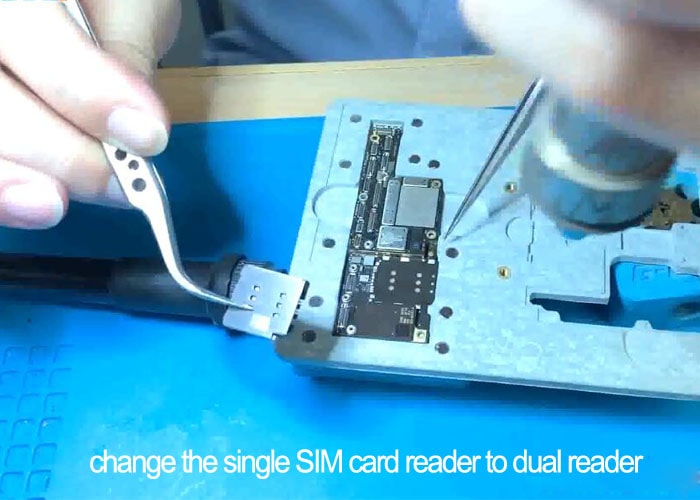
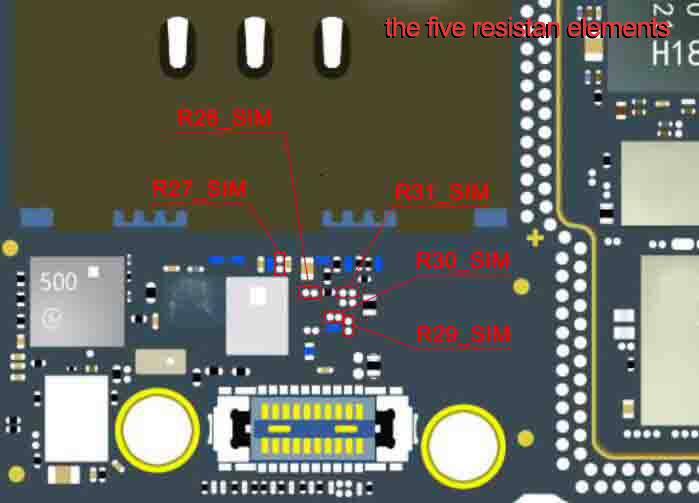
3. Change the single-SIM card reader to dual-SIM card tray and solder the five resistors
When the motherboard is separated, you may see there are many resistant elements on it. The thing we need to do is to solder five resistors on the motherboard as the picture showed below. Before we do this, we have to remove the single-SIM card reader from the motherboard and solder the dual-SIM card reader on it. We use tweezers to remove the card reader by hot air gun blowing. Clean the black adhesive from the board and then solder the five resistors on the motherboard. Clean the board again.
-
4. Install the motherboard and display screen back
When the previous step is completed, it is time to install the motherboard back to the phone. Firstly, solder the two separated layers together when heated on the platform, and then install the motherboard back. Connect the display screen flexes and the battery, install the LCD display assembly screen and seal up the phone. The same process refers to the previous blog of iPhone 6/6s storage upgrade.
-
5. Test the phone, modification done
The final step is to test your iPhone SIM signals. First of all, we place the two SIM cards on the card tray. The two SIM cards stick together with the sensing surface side by side against the card tray. When the two SIM cards are inserted, turn on the iPhone and check the signal area. You may see there are two mobile signals on the screen. Try to make phone calls via the two SIM numbers to see if it is working. This is easy.
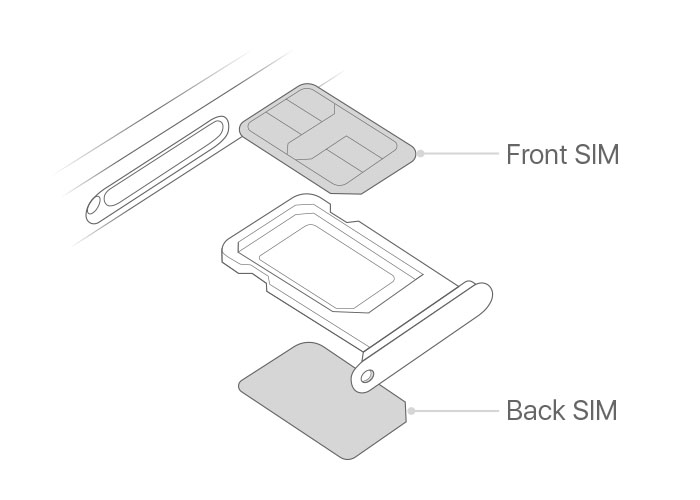
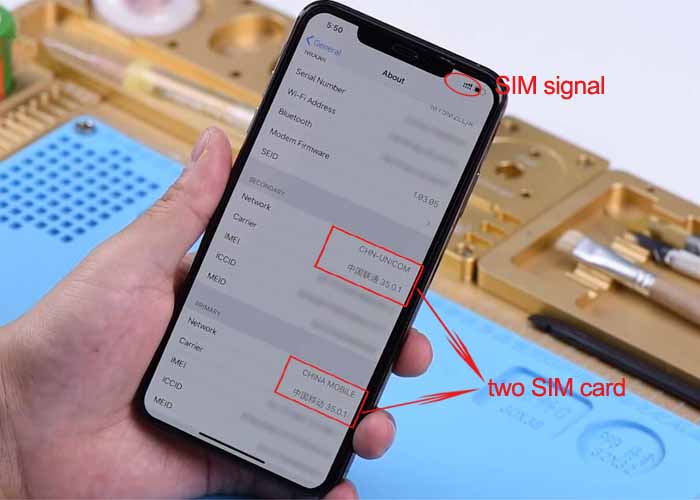
Judging from the steps above, it is not complicated for iPhone XR/XS single-SIM card to dual-SIM modification. We have to notice that the whole processing craft is taken on the hands of the professional technician with special equipment. We suggest you go to an authorized repair center for consultation if you are interested. Anyway, Etrade Supply is here for your phone repair technique support. We have iPhone XR/XS replacement parts in stock like LCD display screen assembly, iPhone XR SIM card tray repalcement, replacement battery and so on. Please contact us on service@etradesupply.com if you are interested.


