


12 Points You Need to Do When You Get Your New Purchase iPhone XR
BY kaye | 八月 13th, 2019 | 0 | 1
When you unbox your new purchase iPhone XR, just hold you exciting mode because there are things you should do first. For example, you need to get familiar with the iOS 12 system. Besides, you need to know how to manage your Applications. Here we would like to talk about 12 things we should do if we get our new purchase iPhone XR. Maybe you will skip most of these tips, we still hope these could be helpful to most iPhone users.
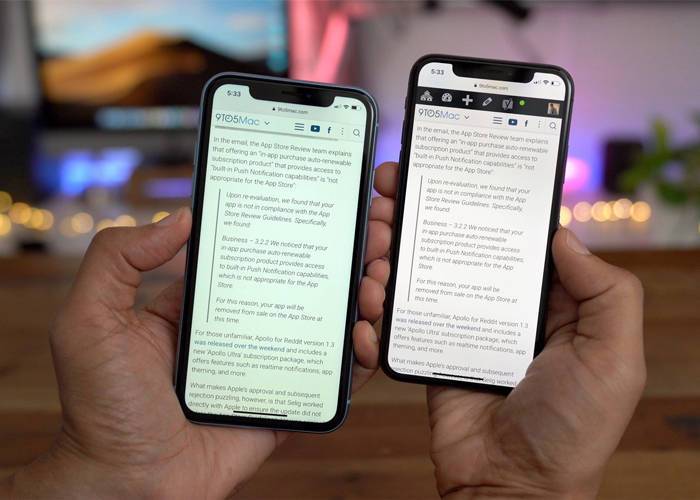
1. Believe your iPhone XR screen is not as bad as people see it
This is the very first thing you should do. Don’t believe your iPhone XR is as bad as people make it out to be. You can see it by comparing the iPhone X OLED display screen or iPhone XS Max display, your iPhone XR display is no big difference with these devices. So next time you can show it to your friends that it is meaningless to compare iPhone XR screen with other models and think it is not as good as them.
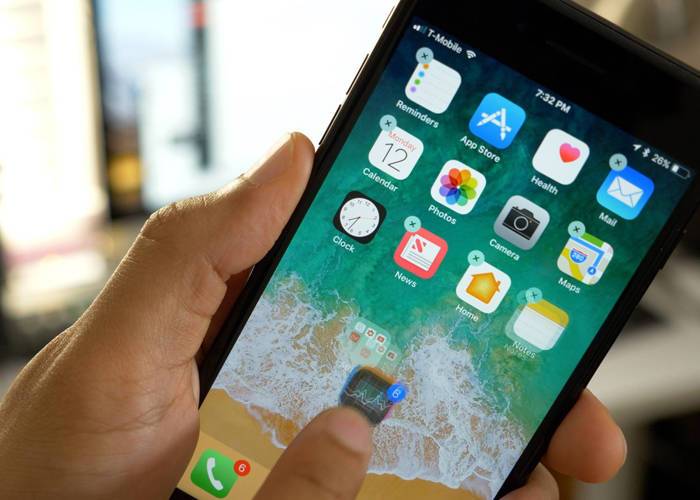
2. Get familiar gesture controls on your new iPhone XR
When you first get your new iPhone XR, you might probably not know how to gesture control the device because there is no home bottom on the screen. You will find it very quick and fluent to switch from the home screen to Applications only by flipping up or down. For example, you can swipe up from the bottom to get to the home screen from any applications. The siding on the bottom bar can make you go in and out of the Apps very quickly. You can get access to the control center by swiping down from the top-right screen, and go to notification center by swipe down from the middle. Quick press the side button and volume up rocker at the same time will enable you to take a screenshot. Pretty easy.
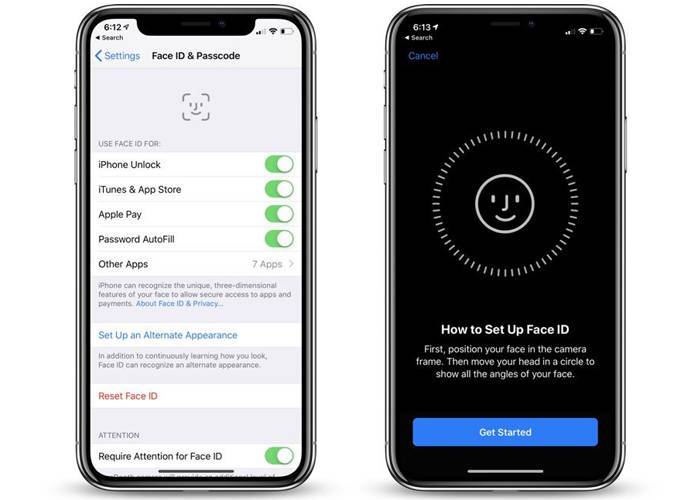
3. Setup your face ID
The first thing you would consider about is your iPhone’s security, so that’s why you should set up your face ID as the first process. Go to Settings >> Face ID and passcode, put on your passcode if you have one and then use your face ID on all the progress like iPhone Unlock, Apple Pay, especially for Password Autofill. More specifics about Face ID setting you may google it on the internet or search the tutorial videos on YouTube. You may also check this on our previous blog article about tips of iPhone Face ID recognition system.
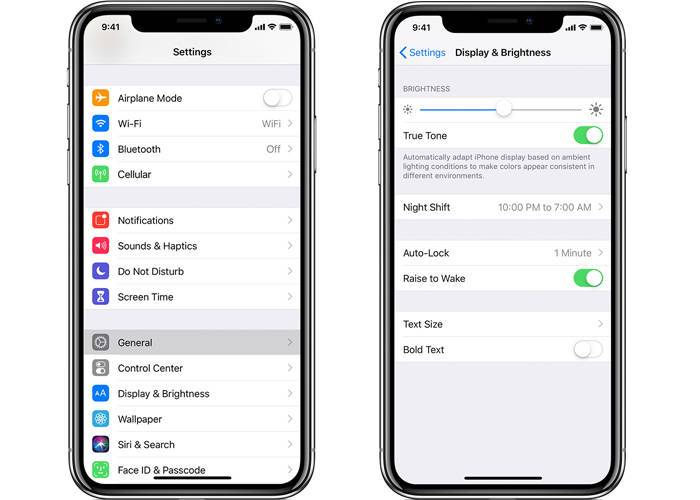
4. Adjust your display settings
You can turn on Ture Tone of your iPhone to make the screen looked comfortable. Access to Settings >> display & brightness >> True Tone. You may also toggle on night shift to automatically adjust your phone screen’s color temperature with the external environment. Sometimes you may forget to unlock the screen and it is easy to drain your phone battery, Auto-Lock setting may help you on this issue. Furthermore, you may go to Settings >> General >> Display Accommodation >> Auto-Brightness to set up your phone screen’s auto-brightness or change the brightness by yourself if you like. It’s a personal preference.
5. Disabled the unnecessary settings for battery life sake
If you want your new iPhone XR battery last longer, you need to decide which setting is enabled or disabled. For example, turn off Ring and Silent vibration on Sounds & Haptics may be a way to save your battery life. Besides, you could always enable Low Power Mode on battery setting to save power, and this is also my suggestion to all our iPhone users.
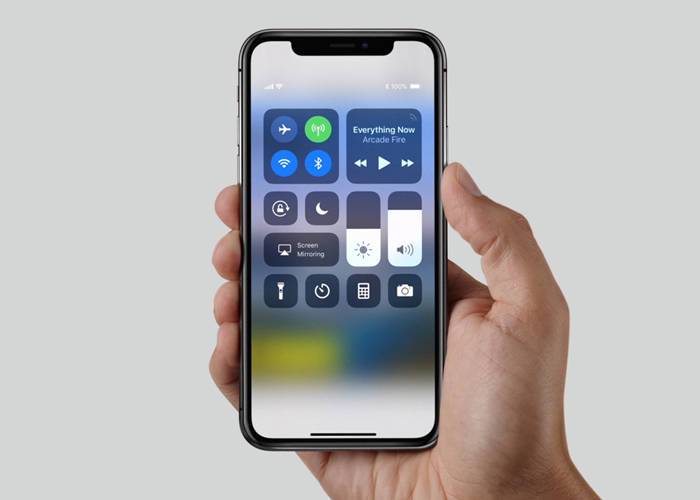
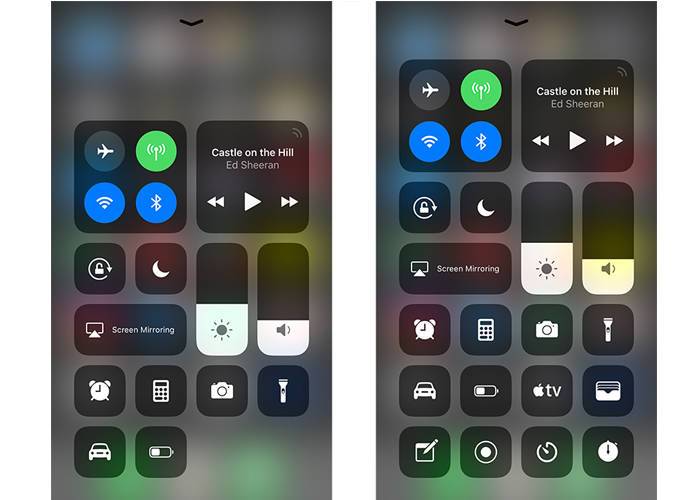
6. Customize the control center
Swipe down from the top screen to get to the control center. There you can see five icons by default on the control center. You can customize the control center as you like. Go to Settings >> Control Center >> Customize controls. You can add or move around the controls here simply by tapping on, holding and moving. You can wipe down on the screen to see the control icons pop up on the control center very quickly.
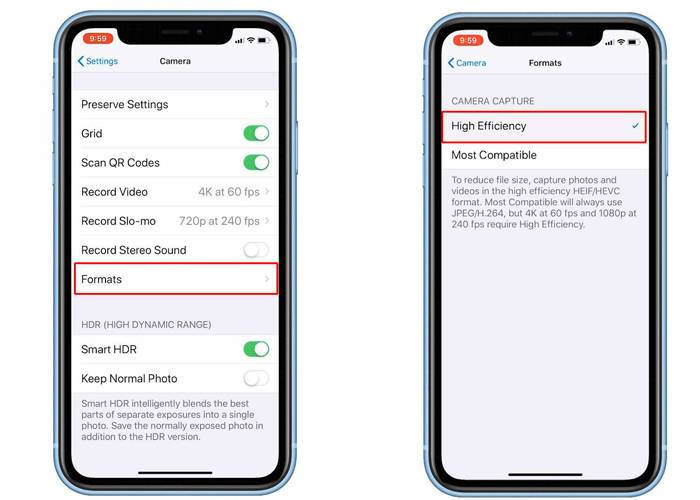
7. Setup you most suitable format on Setting
Go to Settings >> Camera >> Formats, you may consider using high efficiency or most compatible as opposite select. Select High Efficiency if you want to take lots of photos or videos and need to save space. Make sure all the setting is on for camera setting like the smart HDR, and select 4K for recording video as a recommendation. Test out the camera efficiency for photo shooting or camera recording. You iPhone XR features of 12 MP rare camera and it is pretty awesome for selfie portrait shooting.
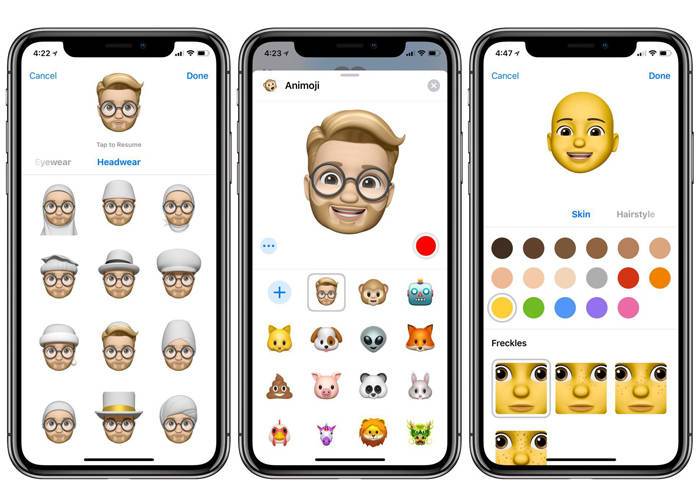
8. Create your emoji
Let’s move to the next tip for emoji creation on your iPhone XR. Go to message texting and tap on the little monkey on the keyboard, you will go to a splash screen about emoji set. You can create your style emoji by selecting skin color, hairstyle, eyebrows, and lips. You can record and text message with your created emoji and animoji as well. It is very cool and interesting.
9. Install your applications and customize your home screen
You can download and install the Apps you want in the App store. You can also customize the applications on your home screen as well. Tap and hold the icons on the screen you can move the applications and rearrange the place. Pull down one icon and select others you can move it into folders. Drag one and move it on the top of the other, you may create a folder. It is very easy.
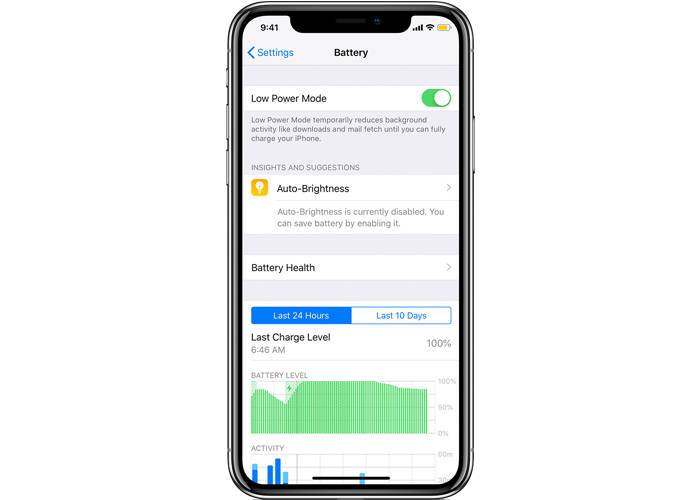
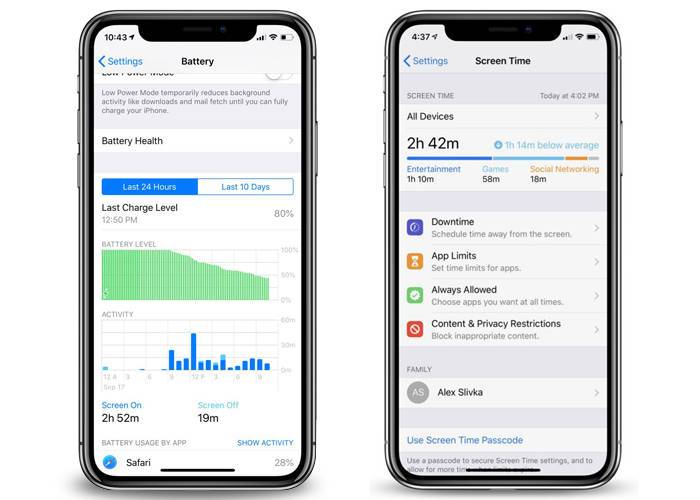
10. Get familiar with the screen time and battery charts inside of settings
Go to Settings and tap on Battery, you will see there is a battery chart showed where all our battery is being used. It will also show you where you are spending the most time on your phone, what applications take up most of the battery life over 24 hours in the last 10 days. You can also check your phone battery health here. If you go to screen time, you can also see where you spend the most time on your phone. You will find it very useful with the time you are using your iPhone XR.
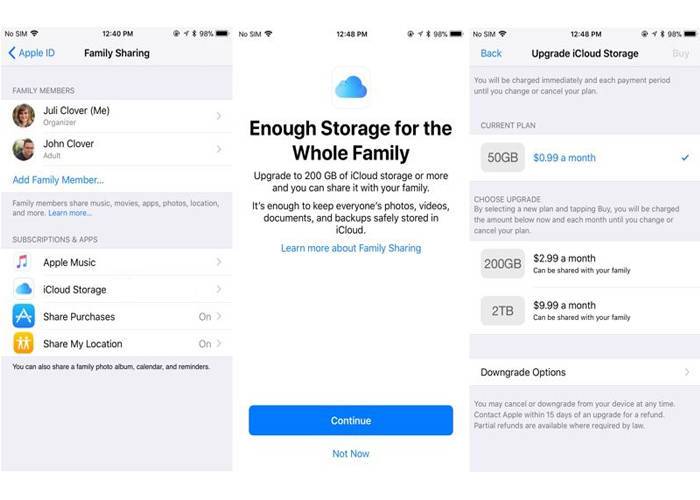
11. Consider purchase iCloud storage
When you use your iPhone for a time, you will need more space to store your photos and videos. It is cheap and you will need extra space for your mobile device. Go to Settings and tap on the top where shows your name, you will go to iCloud manage storage. Tap Upgrade iCloud storage and you can see the price marked with the storage there for selection. We suggest you purchase iCloud storage if you take photos a lot because it is cheap and value.
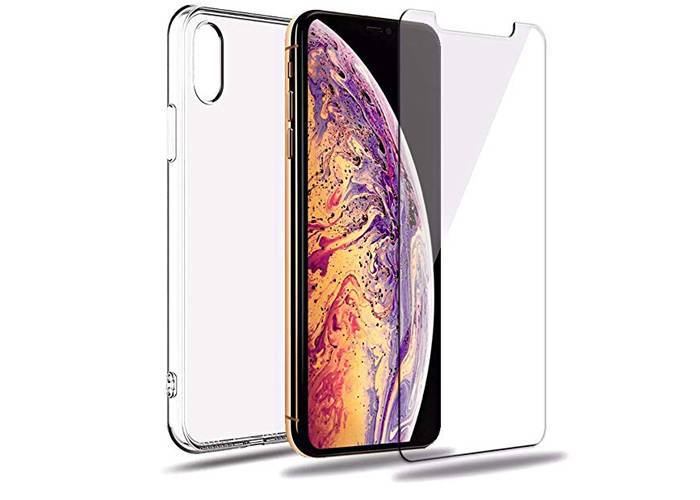
12. Purchase a phone case and screen protector
There are lots of great looking cases for iPhone XR on sale online. Using a screen protector is necessary because this will protect your iPhone screen from scratching and damage. Using a case can also make a great external look to your iPhone if you don’t like the original color.
Your iPhone XR is far more interesting than you ever knew, as long as you keep digging. As to fresh iPhone XR or iPhone users, the 12 things concluded above would be helpful. With the time you are using your iPhone, we suggest you learn something about the maintenance knowledge and some replacement parts as well. There are iPhone XR replacement parts like iPhone XR LCD replacement screen in our online shop. You may leave comments below or contact us if you have any problems on using your new iPhone XR, we are glad to help.


