

 Loading...
![]()


- Compatible With: SM-N910, SM-N910A, SM-N910V, SM-N910P, SM-N910R4, SM-N910T, SM-N910F, SM-N910H
-
For Samsung Galaxy Note 4 Samsung-N910 LCD screen and Digitizer Assembly Replacement - White - With Logo - Grade A
This item includes the following parts:
1. LCD Screen;
2. Digitizer Touch Screen;
3. Stylus Sensor Film.
This item does not include the Front Housing.
Notice:Please test the functionality of this item before installation!
Specifications:
Screen Size: 5.7 inches
Resolution: 1440 x 2560 pixels (515 ppi)
Display Type: Super AMOLED capacitive touchscreen, 16M colors
Connector Type: Buckle
Version: With Samsung Logo
Features:
This item includes the LCD Screen, Digitizer Touch Screen, and Stylus Sensor Film already attached.
This Samsung Galaxy Note 4 LCD Screen and Digitizer Assembly is available in two colors: Black and White.
How to Install/Tips:
Please make sure you have chosen the right version before placing order.
This part is tightly assembled with other parts, special tooling is required for assembly.
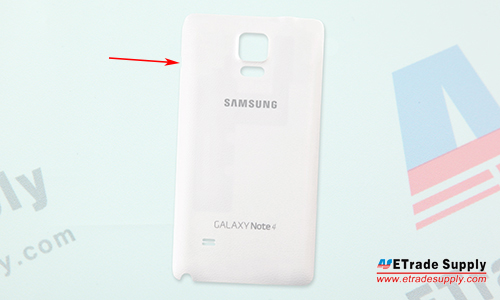
The installation of any new part should be done by a qualified person. ETS is not responsible for any damage caused during installation.1. Remove the Galaxy Note 4 Battery Door.
Power off the device;
Pull out the S Pen stylus;
Pull the battery door out through the small gap between the power button and the battery door.
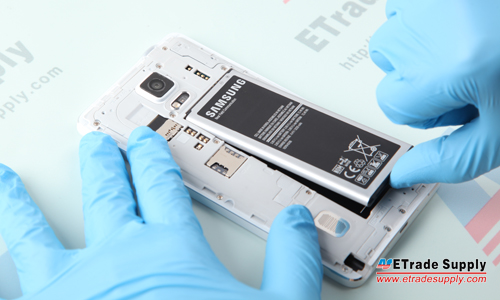
2. Remove the Galaxy Note 4 Battery.
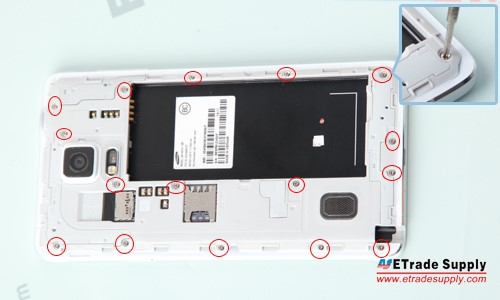
3. Remove the Galaxy Note 4 Rear Housing.
Undo the 16 screws in the rear housing;
Insert the case opening tool to take out the rear housing.
Notice: The loudspeaker assembly is located in the rear housing and difficult to remove.

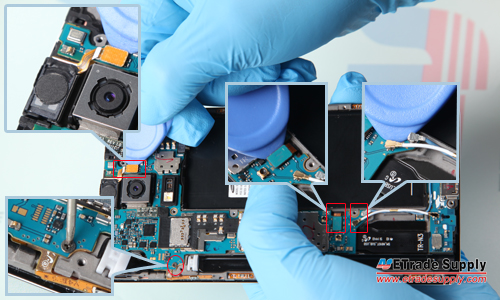
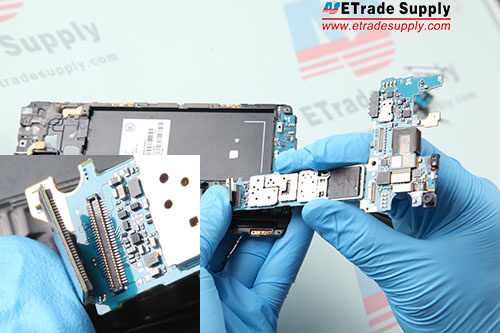
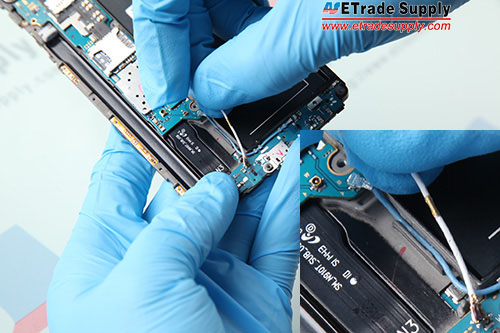
4. Remove the Galaxy Note 4 Motherboard.
Pry up the 4 connectors;
Undo the screw;
Remove the upper portion of main board and pry up the connector.
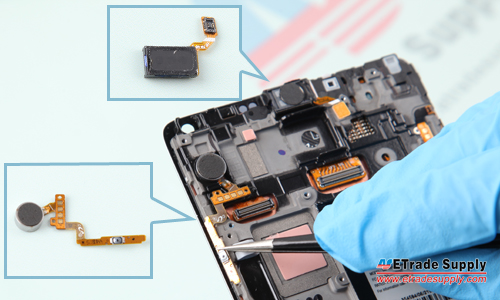
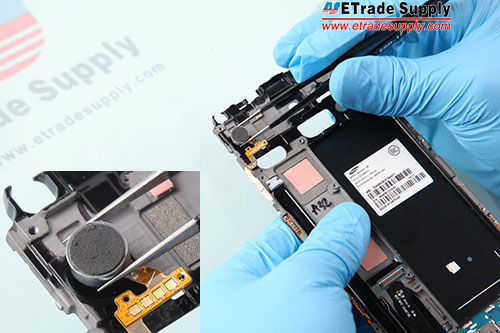
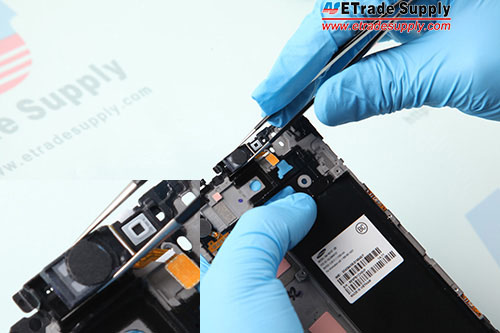
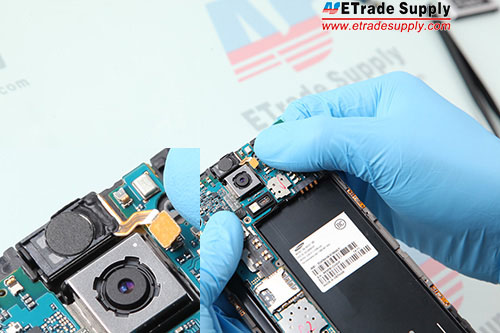
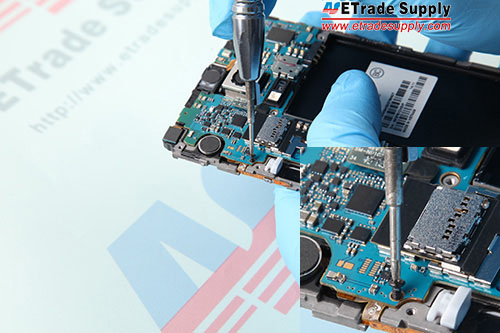
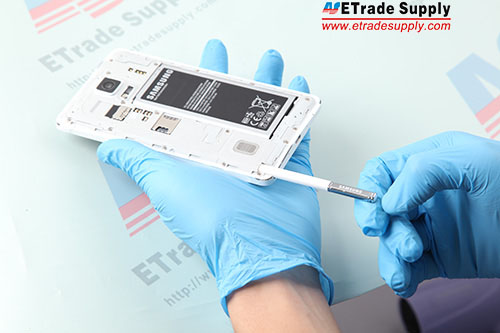
5. Remove the Galaxy Note 4 Small Parts.
Remove the vibrating motor with power button flex;
Remove the ear speaker with flex;
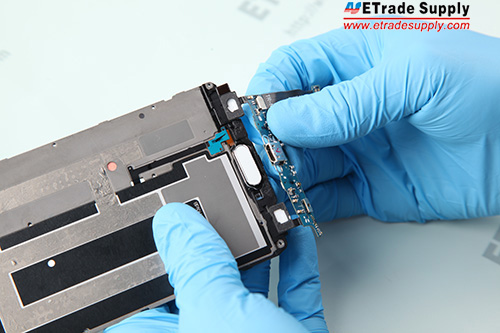
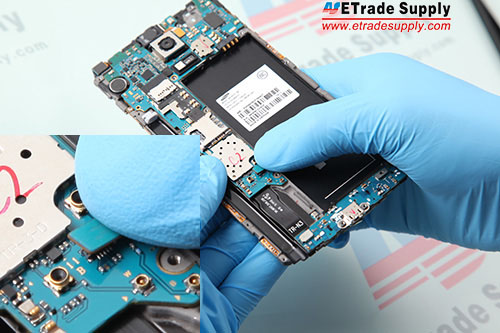
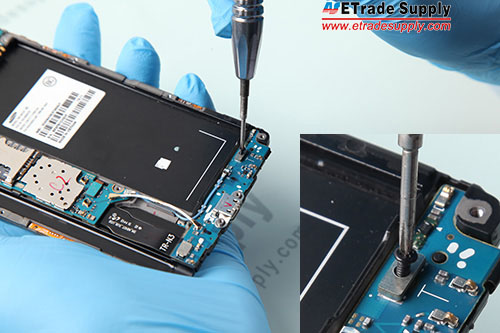
6. Remove the Galaxy Note 4 Charging Port Assembly.
Pry up the 2 connectors;
Undo the screw;
Pry up the charging port assembly and then pry up the two connectors.

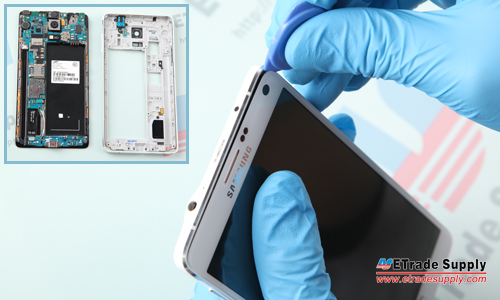
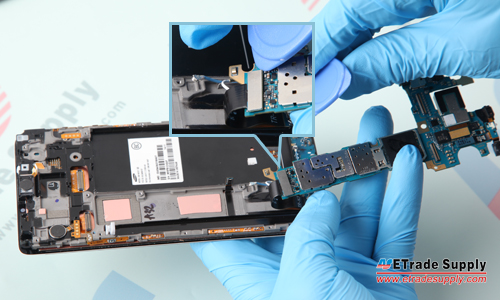
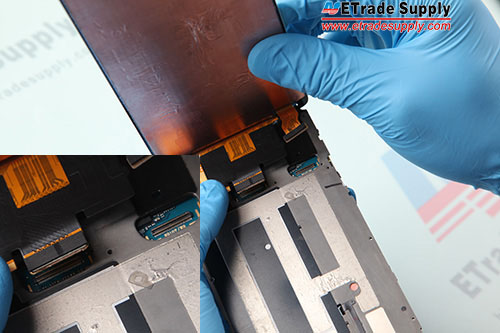
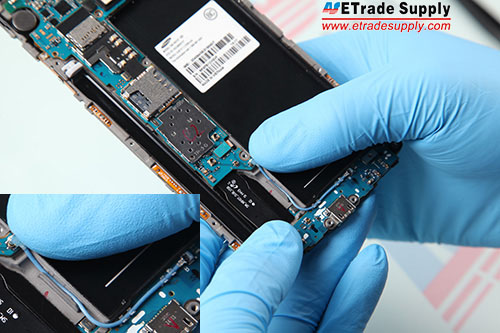
7. Remove the Galaxy Note 4 Middle Plate.
Heat up the LCD and Digitizer assembly for 2 minutes to soften the adhesive;
Insert the case opening tool to remove the middle plate.
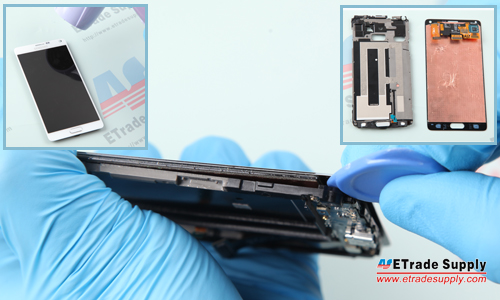
Notice: At this step, you have torn down the broken LCD screen and digitizer assembly, then you can replace a BRAND NEW Samsung Galaxy Note 4 LCD screen and digitizer assembly.
8. Adhere Samsung Galaxy Note 4 front housing adhesive to the middle plate, then connect the LCD screen flex cable and digitizer flex cable to the mother board.
9. Insert the vibrating motor with power button flex in the slot.
10. Put the ear speaker with flex into the slot.
11. Put the mother board in the slot and connect the Galaxy Note 4 Charging Port Assembly to the mother board.
12. Connect the ear speaker with flex cable to mother board.
13. Connect the home button flex ribbon to the mother board.
14. Connect 2 antennas to mother board.
15. Fasten 1 screw in the charging port assembly.
16. Fasten 1 screw in the mother board.
17. Cover the rear housing and fasten 16 screws in the rear housing.
18. Put the battery in and insert the stylus to the rear housing.
19. Cover the battery door, then you have replaced the Samsung Galaxy Note 4 LCD screen and digitizer assembly.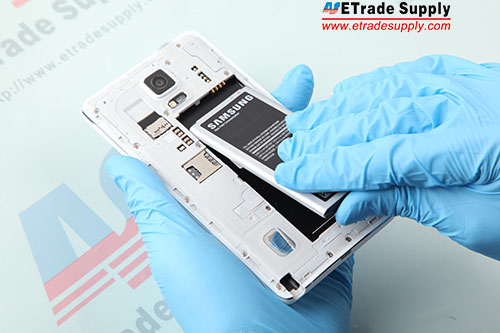

-
Customer also bought


-
(Posted on 12/20/16)its been a week since i last got your quality product and its working very well..i hope it wont give me problems
[ ETS Answer ] Thank you for your feedback and supporting!