- Compatible With: Galaxy S7 Edge SM-G935V (Verizon),Galaxy S7 Edge SM-G935A (AT&T),Galaxy S7 Edge SM-G935T (T-Mobile),Galaxy S7 Edge SM-G935P (Sprint),Galaxy S7 Edge SM-G935R (US Cellular),Galaxy S7 Edge SM-G935F (International)
-
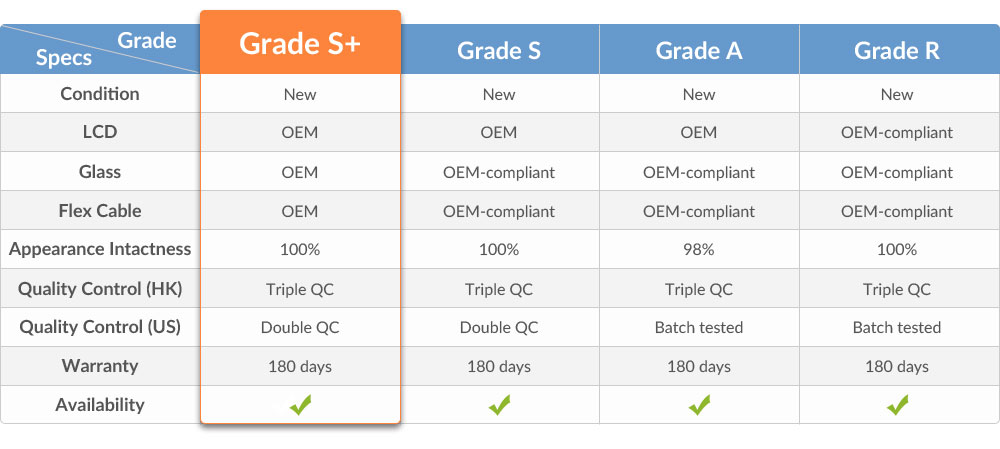
For Samsung Galaxy S7 Edge G935/G935F/G935A/G935V/G935P/G935T/G935R4/G935W8 LCD and Digitizer Assembly Replacement - Black - With Logo - Grade S+
This item inludes these following Parts:
1. LCD Display;
2. Touch Screen;
This item does NOT include the front housing.
Note: Please test the functionality before installation.
Specification:
Colors: Black
Screen Size: 5.5 inches
Resolution: 1440 x 2560 pixels (~534 ppi pixel density)
Protection: Corning Gorilla Glass 4
Compatible with: Samsung Galaxy S7 EdgeFeatures:
1. This Galaxy S7 Edge screen assembly is rand new and original.
2. This screen repalcement is compatible with Samsung Galaxy S7 Edge Series.
3. This screen repalcement for galaxy s7 edge is available in black, silver and gold. This is the black one.
4. This complete LCD with digitizer here includes the LCD screen display, digitizer touch screen.
5. It is used to replace your damaged/shattered/broken LCD with digitizer for Samsung Galaxy S7 Edge Series while the LCD screen shows pictures with spots or lines which greatly affect your screen viewing, or the digitizer lose sensitivity so that you fails to execute your order.How to Install / Tips:
1. Please choose the right part before placing an order.
2. Special repairing tools are required for assembling or disassembling, as the Samsung Galaxy S7 Edge Series LCD and Digitizer Assembly is hermetically attached.
3. Handle the vulnerable and fragile flex cable ribbon carefully.
4. Please try to handle the repair or replacement work in a dry and dust free environment without direct sunlight.
5. The installation of any new part should be done by a qualified person. ETS is not responsible for any damage caused during installation.Step 1.
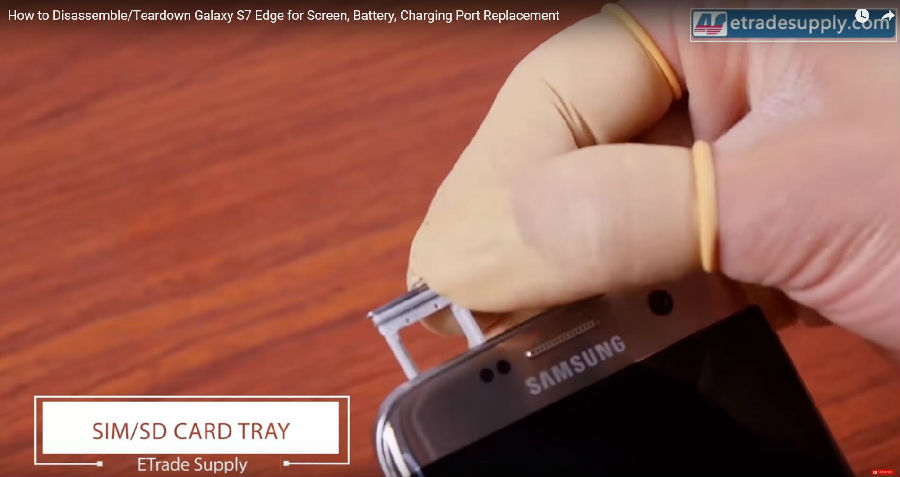
Shut down the Samsung Galaxy S7 Edge then remove the SIM card tray.
 Step 2.
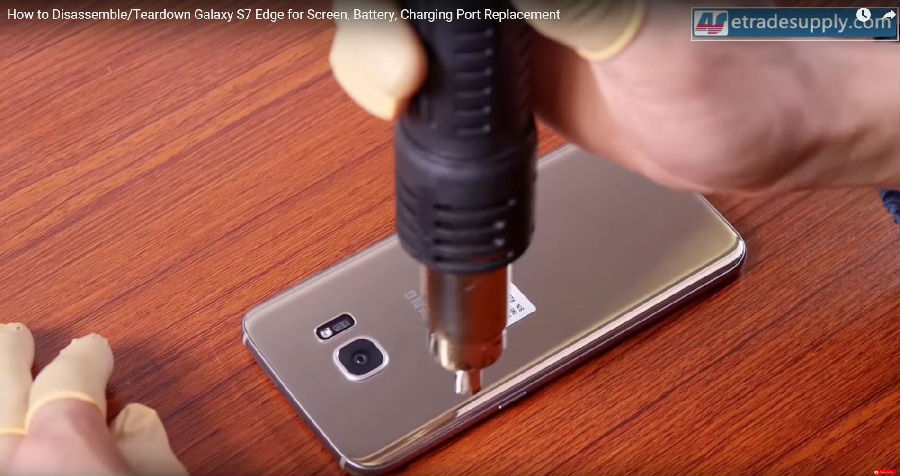
Heat up the back the S7 edge(until it’s too hot to touch).
 Step 3.
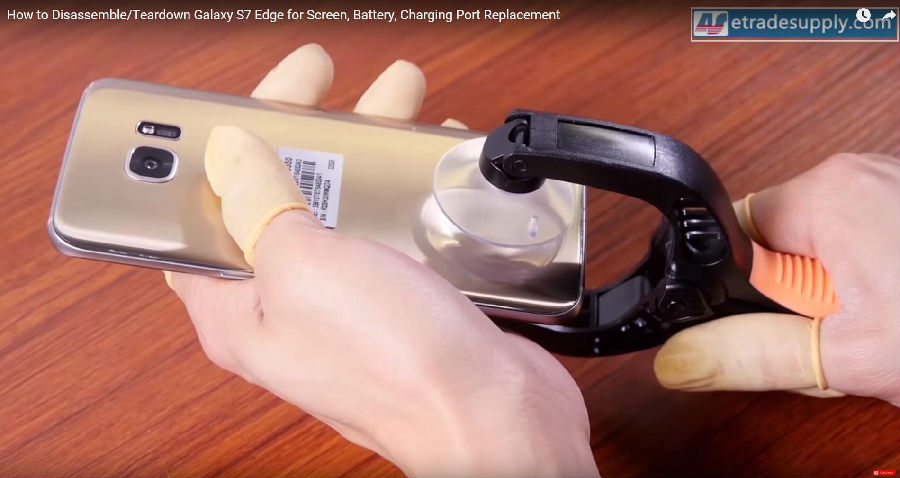
Apply the suction cup to the back cover of the S7 edge, be careful not to scratch the rear camera glass lens.
 Step 4.
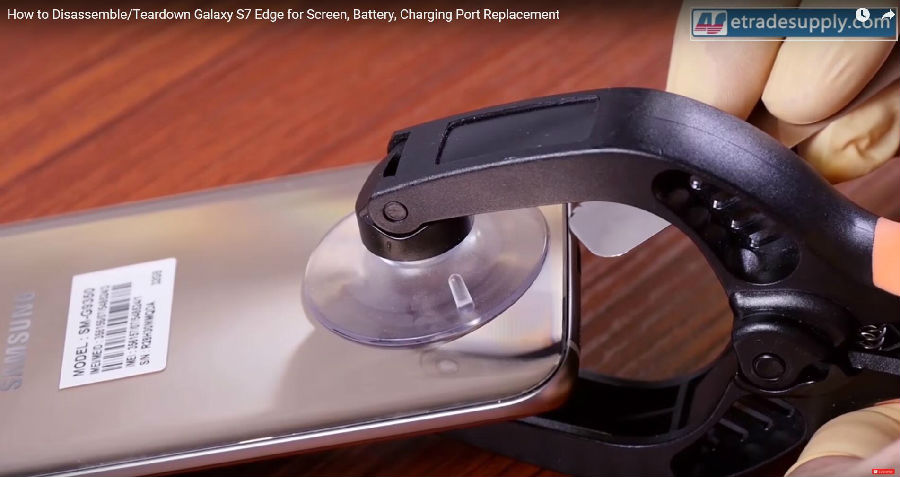
Pry the edge of the S7 edge back cover a little bit to insert the thin metal spudger.
 Step 5.
Slide away the metal spudger a little bit then insert some business cards/playing cards to do the rest.
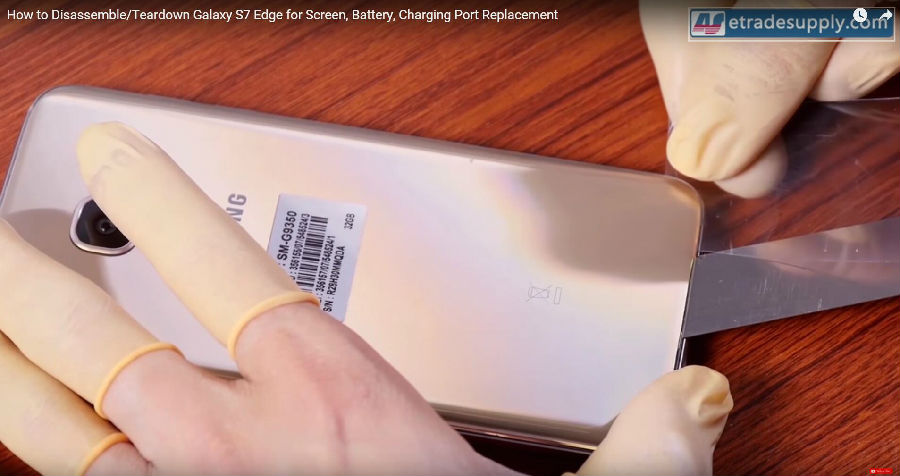 Step 6.
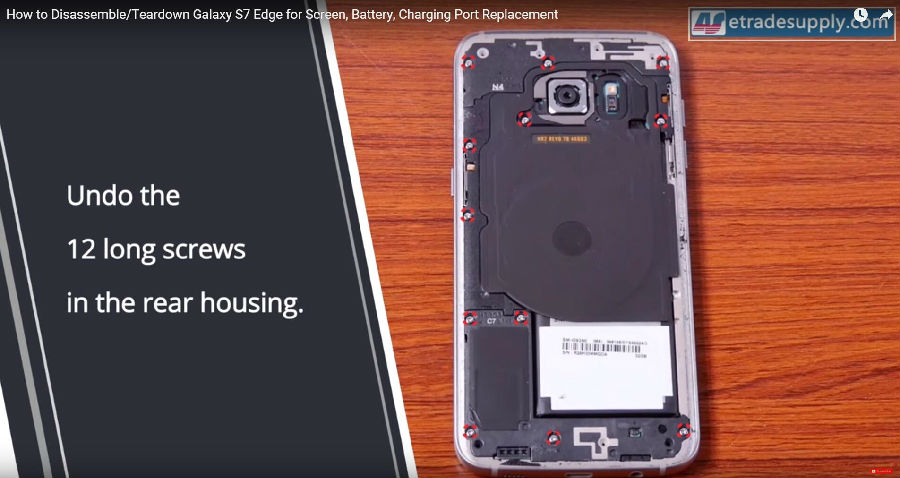
Once the back cover has been released, undo the 12 Phillips screws holding the rear housing.
 Step 7.
Use the plastic separation tool to separate the top plastic bracket then remove the wireless charging pad.
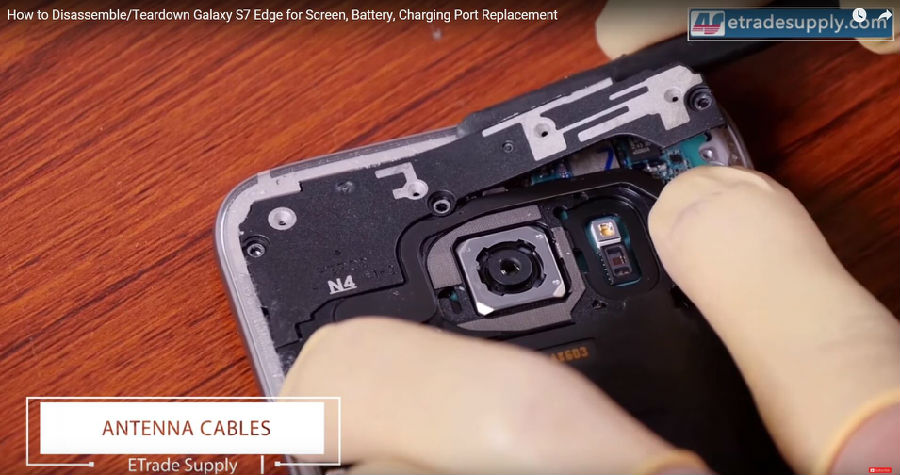
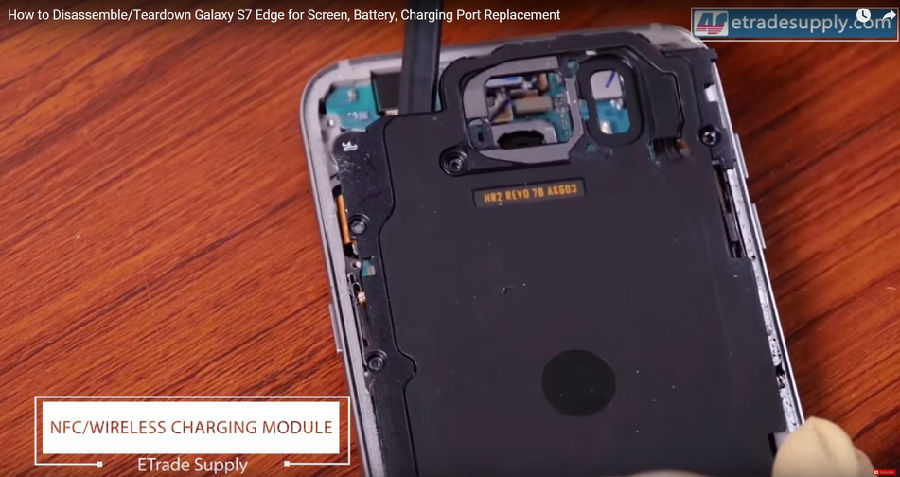
Step 8.
Disconnect the battery cable, power cable, display cable and the volume button cable.
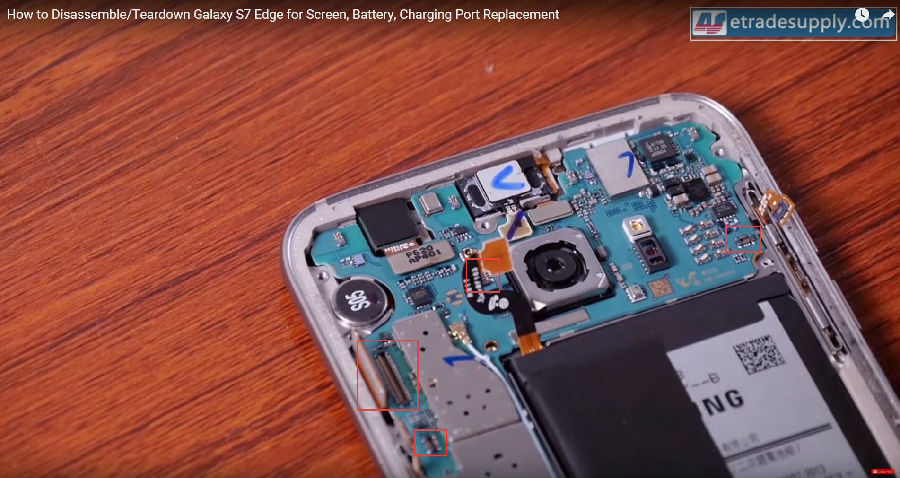 Step 9.
Use a pair of tweezers to remove the loud speaker module.
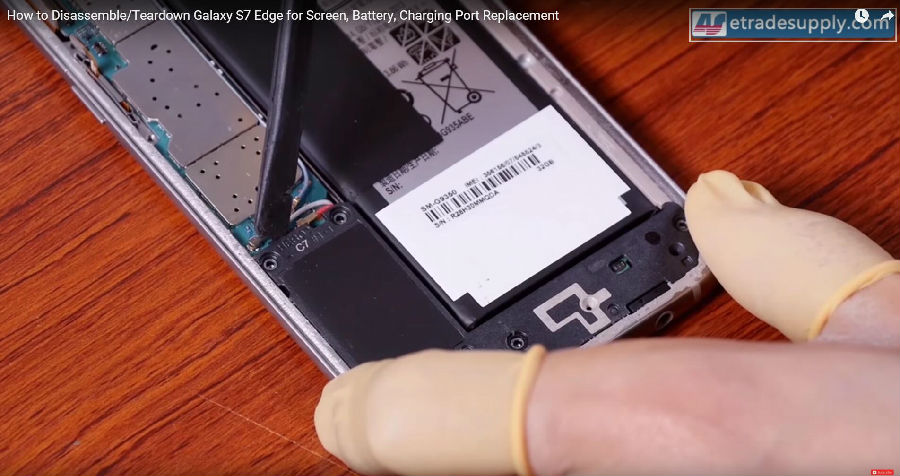 Step 10.
Pop off all the antenna cables and the fingerprint scanner cable.
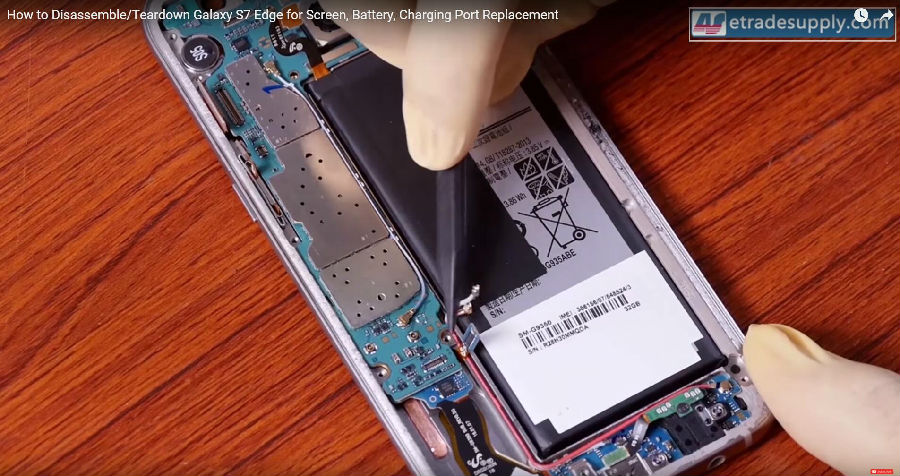 Step 11.
Disconnect the earphone connector, front facing camera connector and the proximity and light sensor connector.
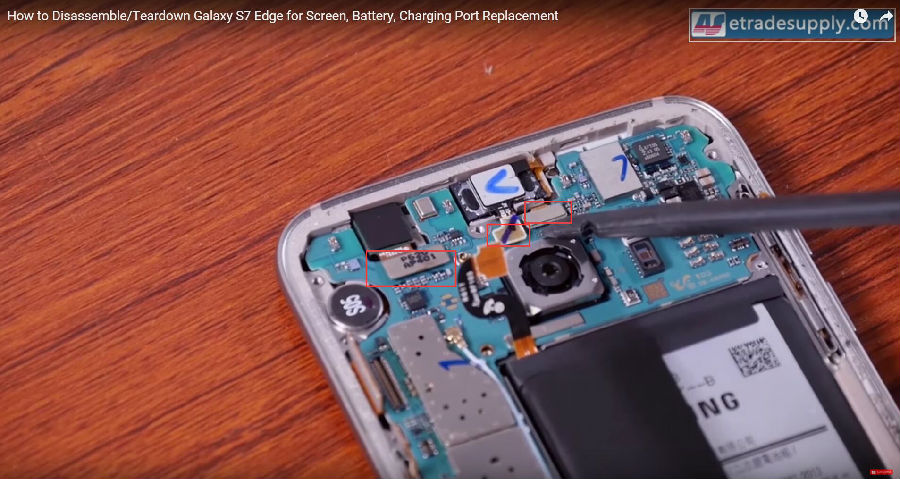 Step 12.
Lift up the motherboard then disconnect the charging port connector.
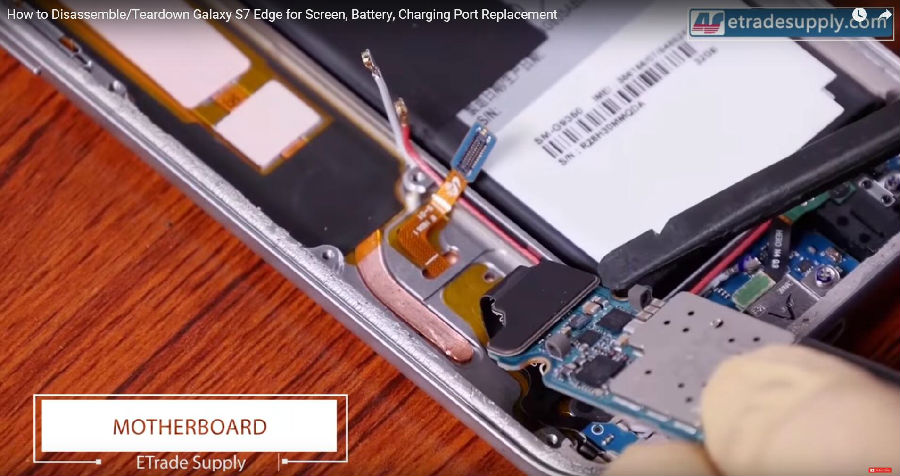 Step 13.
Disconnect and remove the rear facing camera.
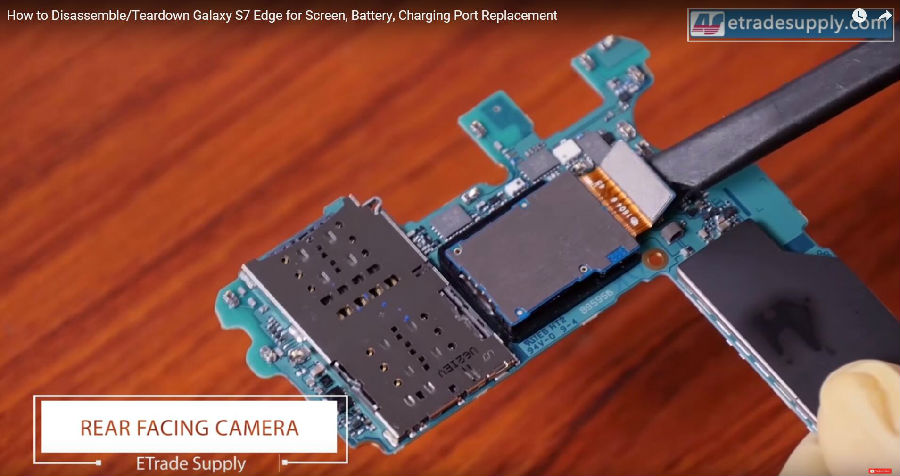 Step 14.
Heat up to the adhesive underneath the battery, then use the metal spudger to lift it up (slowly and carefully).
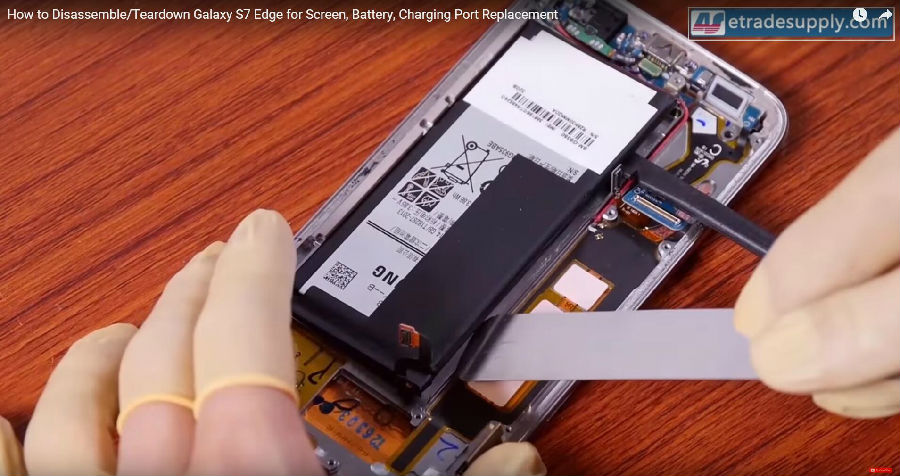 Step 15.
Undo 3 screws holding the charging port then take out the headphone jack.
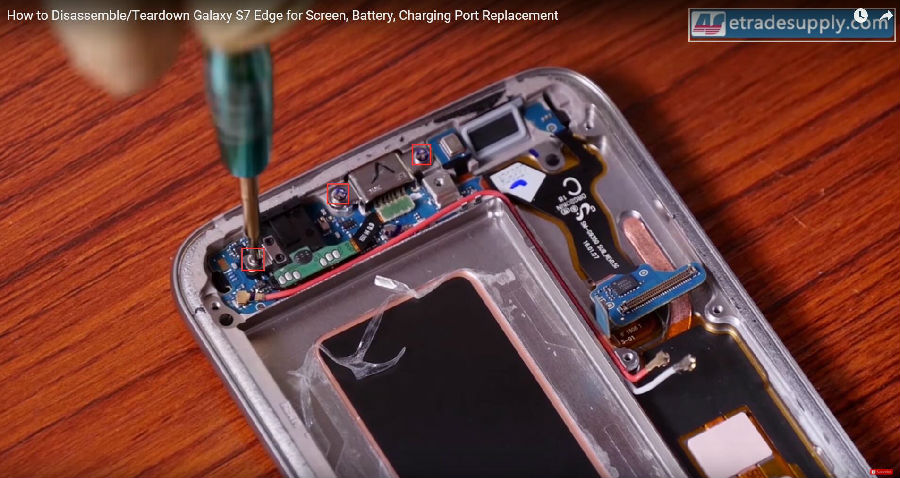
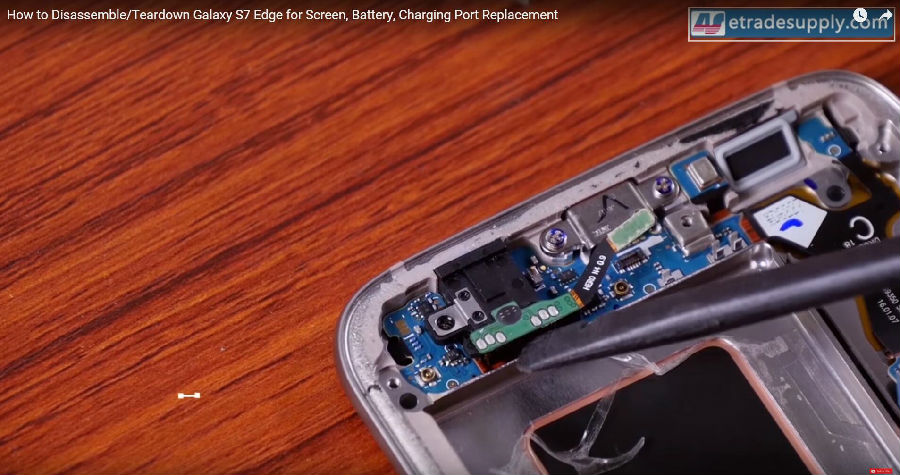
Step 16. Use the cotton swab to withstand the proximity and light sensor hole, then apply some heat around the top front glass panel.
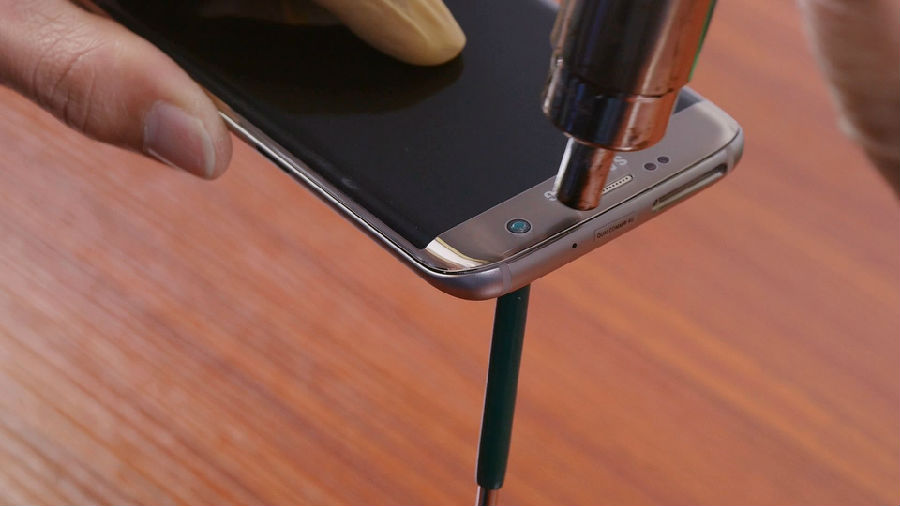 Step 17.
VERY gently press the screen assembly a little bit to leave a gap between the screen and the front housing, then very slowly insert the thin metal separation tool (don't insert it too deep, when the top of the separation tool reaches the hole, that's far enough).
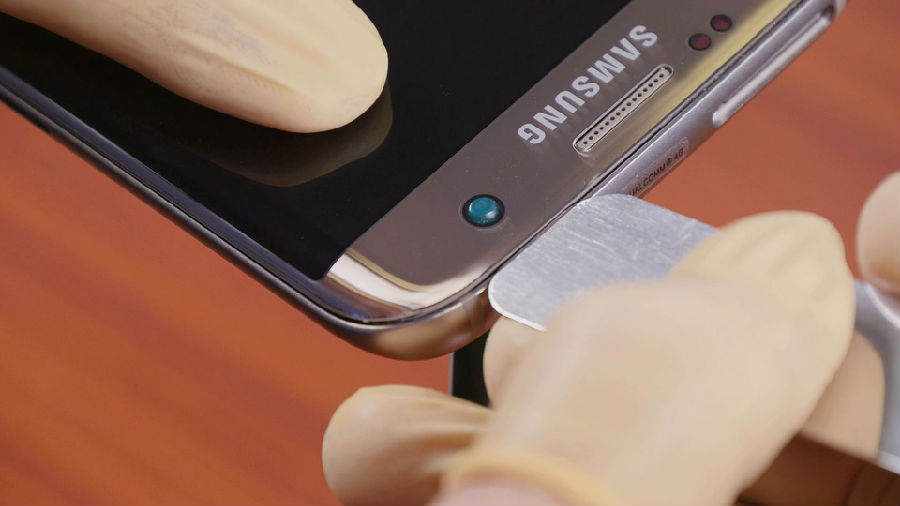
Step 18.
Insert a thin plastic film/business cards/playing cards from the gap you created just now, then slowly and gently slide it through the edge.
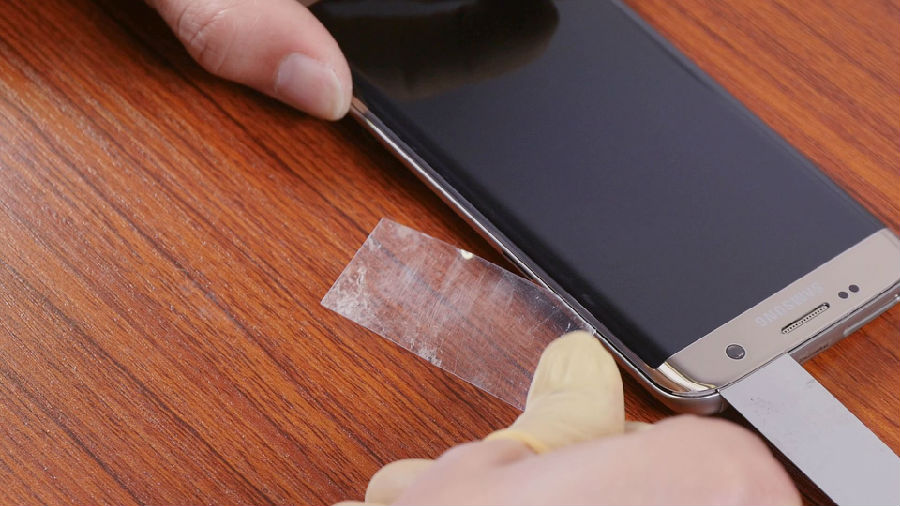
Step 19.
Use a soft/plastic tool (we used our fingernails LOL) to withstand the open gap (Keep the angle of the gap, DON'T widen it too big).
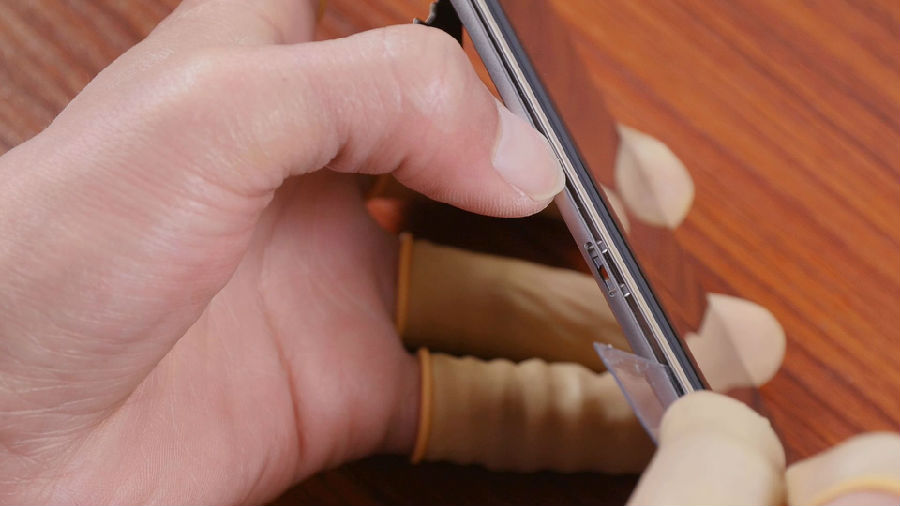
Step 20.
Use a pair of tweezers to drag out the black adhesive around the edges little by little, two sides alternately (Apply heat to the edge when it's cooled down).
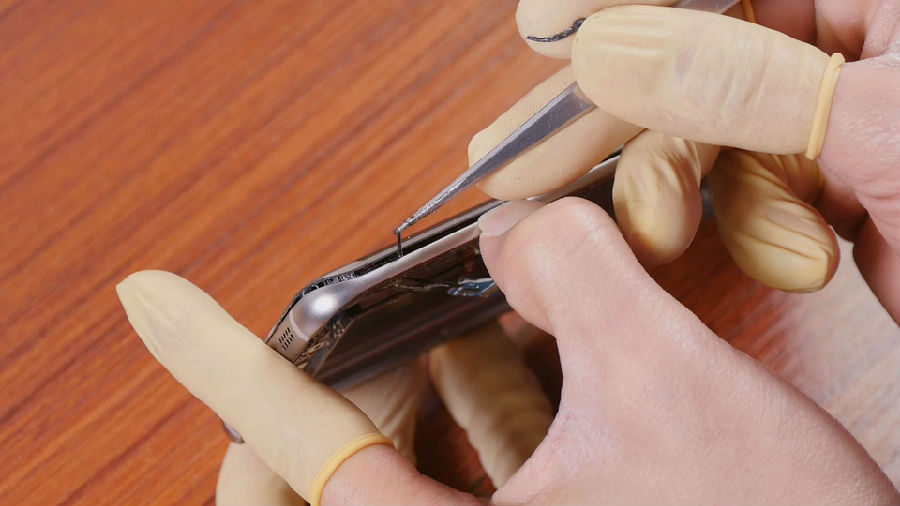
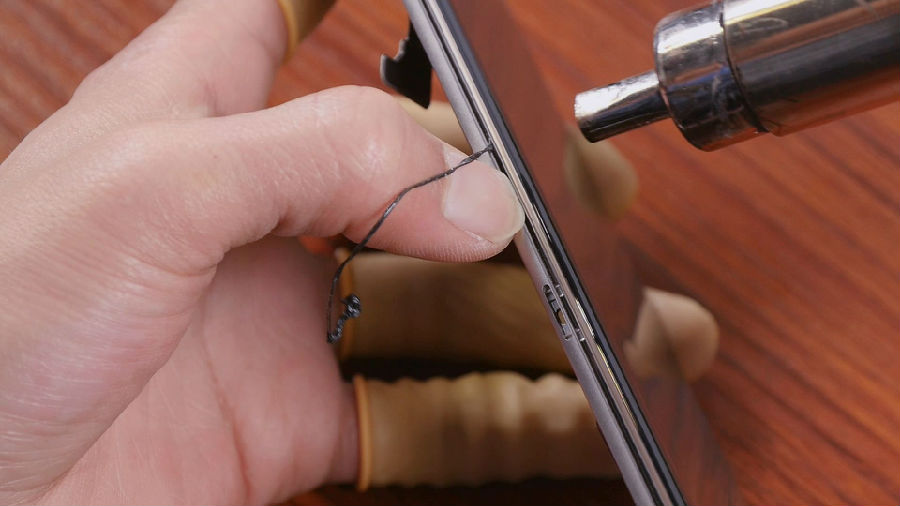
Step 21.
After all the adhesive has been cleared, carefully open up the screen from one side.
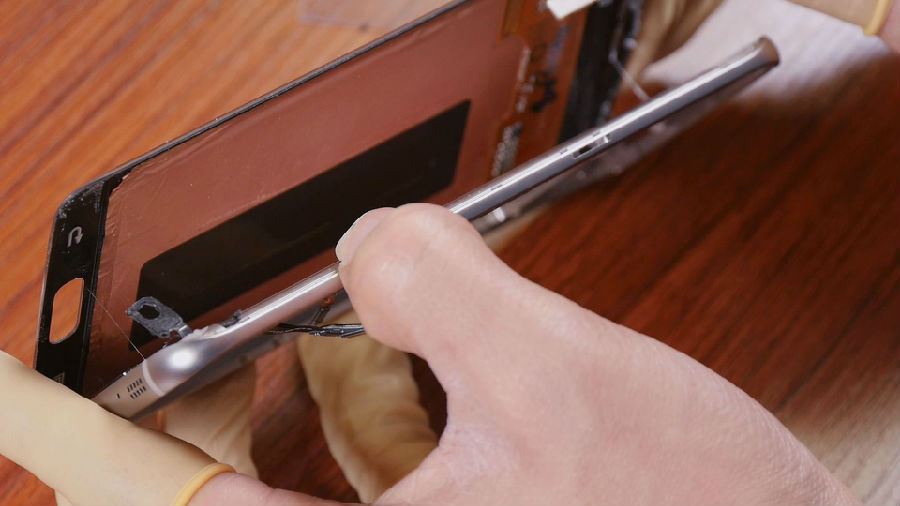
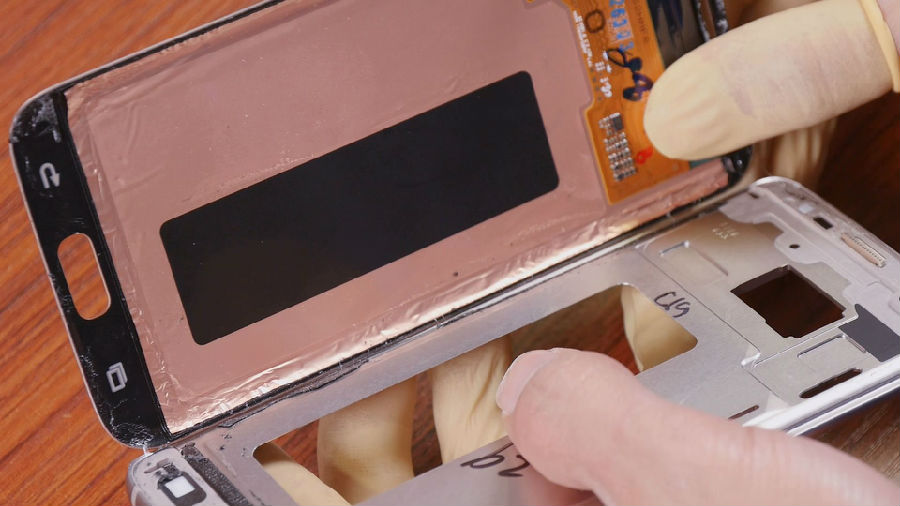
Step 22.
Test the new screen works or not before the installation.
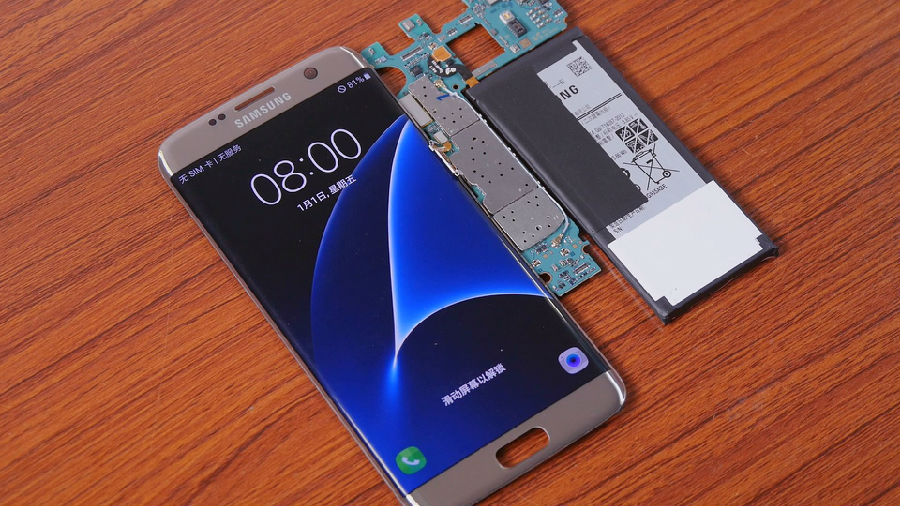
Step 23.
Apply the 3M adhsive around the edges of the front housing, then reassemble the screen.
Step 24.
Put the head phone jack back again.
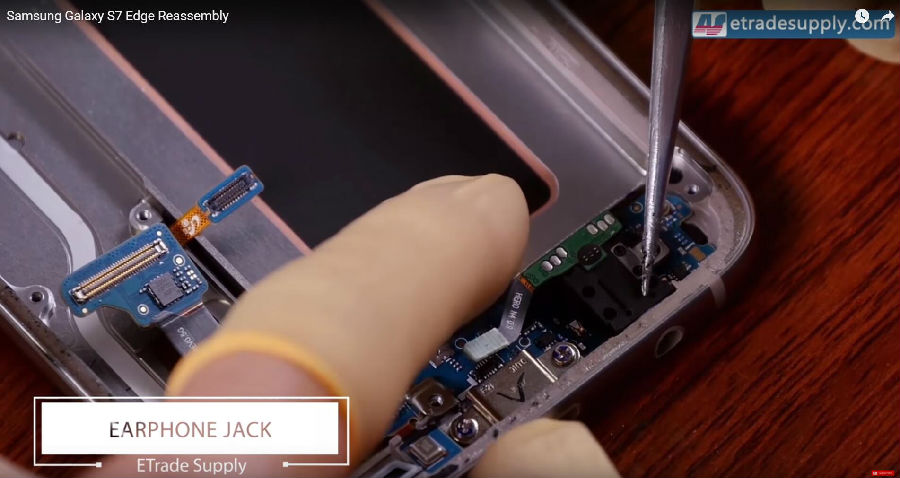 Step 25.
Reconnect the rear facing camera.
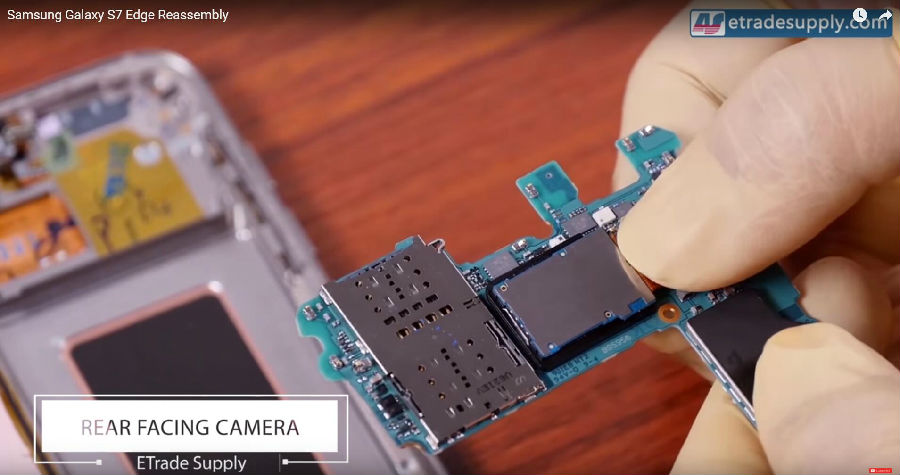
Step 26.
Reconnect the motherboard with the charging port then put it back into the position (avoid those cables and connectors).
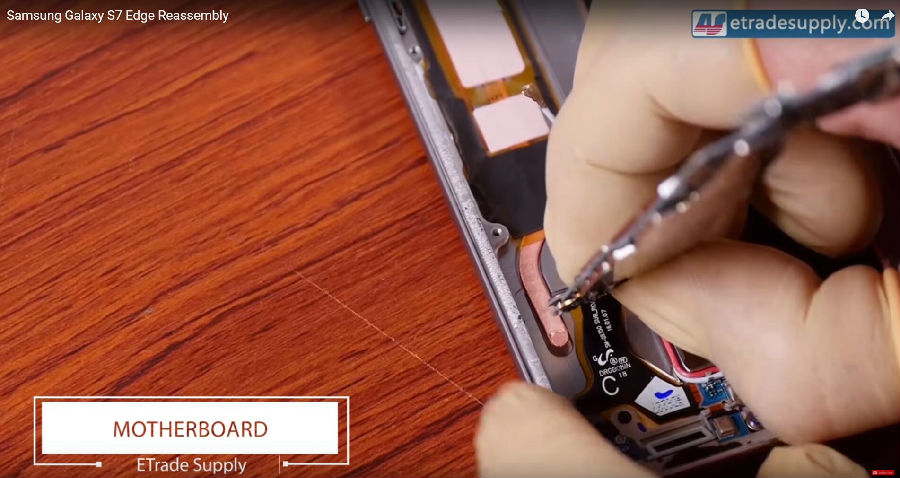 Step 27.
Reconnect the power cable, display cable, earphone connector, proximity and light sensor connector and the volume button cable.
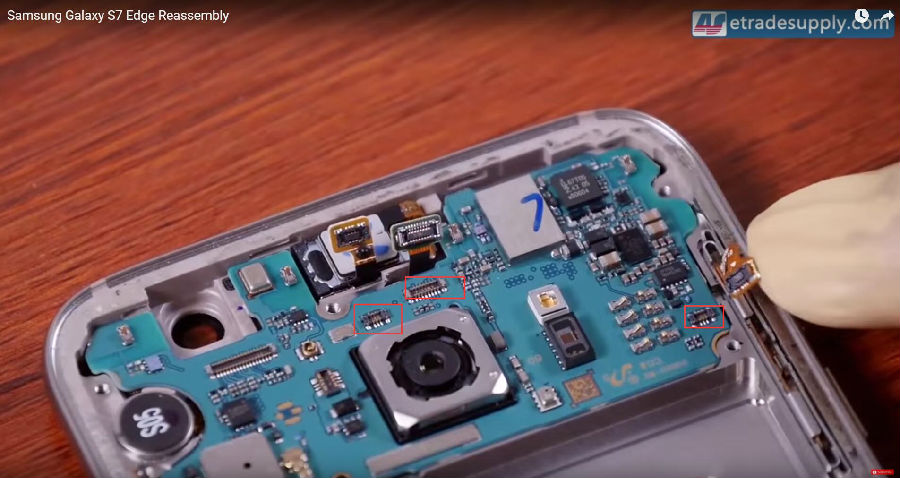
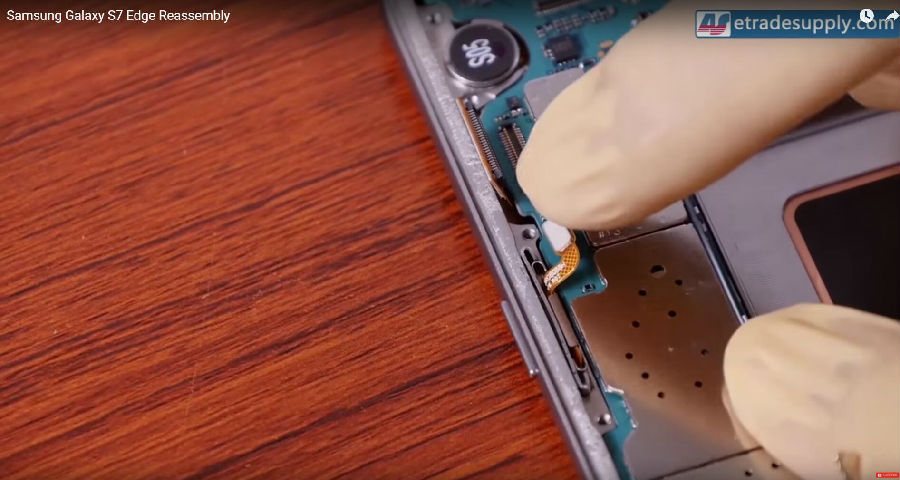
Step 28.
Reconnect the fingerprint scanner connector and 2 antenna connectors.
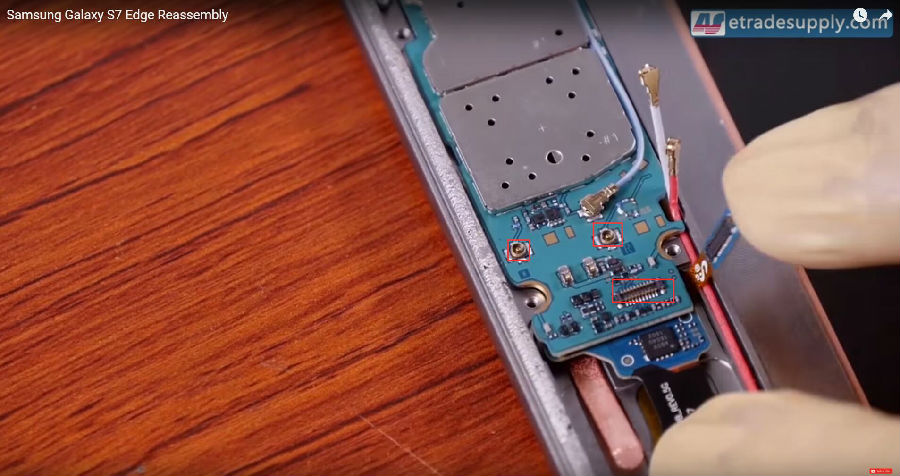 Step 29.
Reconnect the front facing camera.
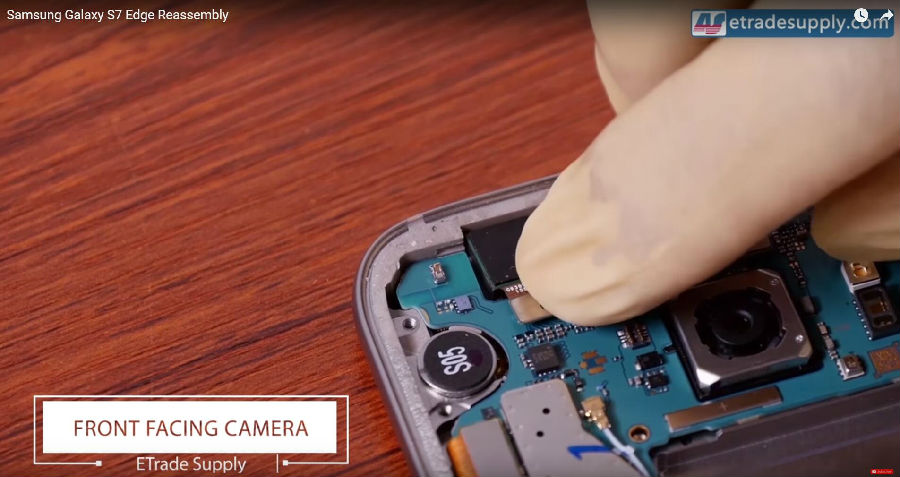 Step 30.
 Put back the battery.
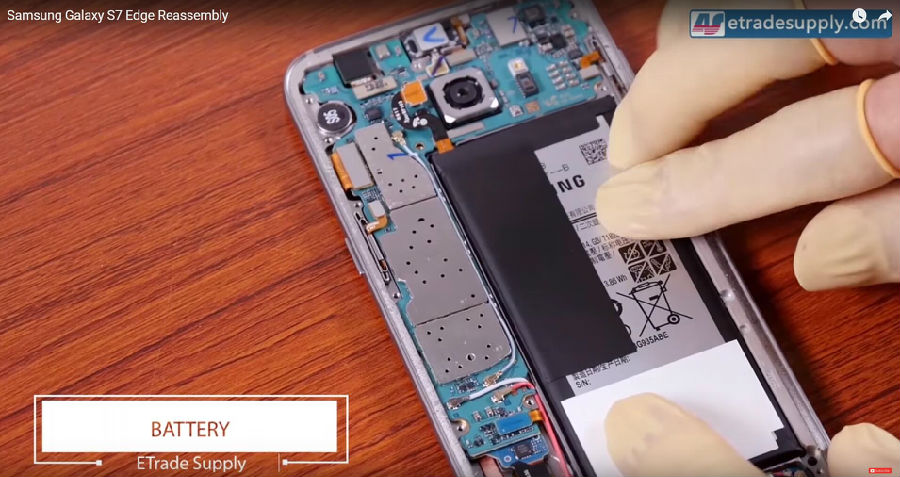
Step 31.
Reassemble the loud speaker module.
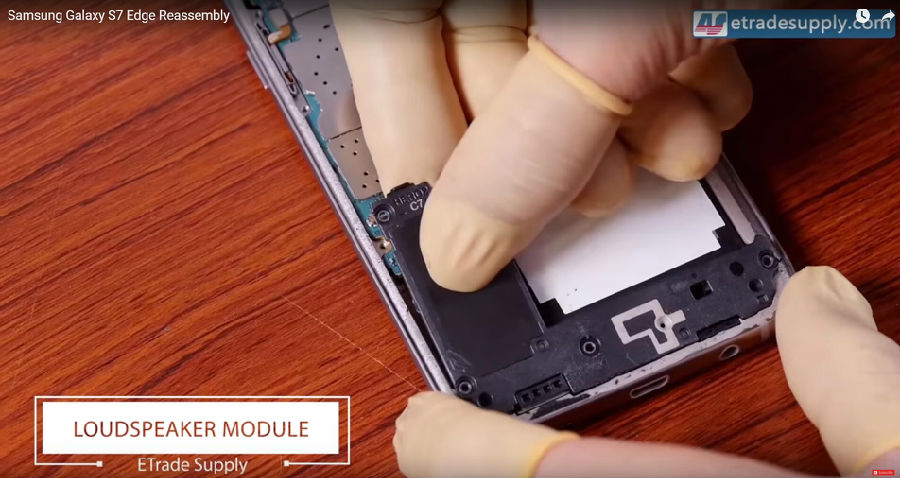 Step 32.
Reconnect the battery.
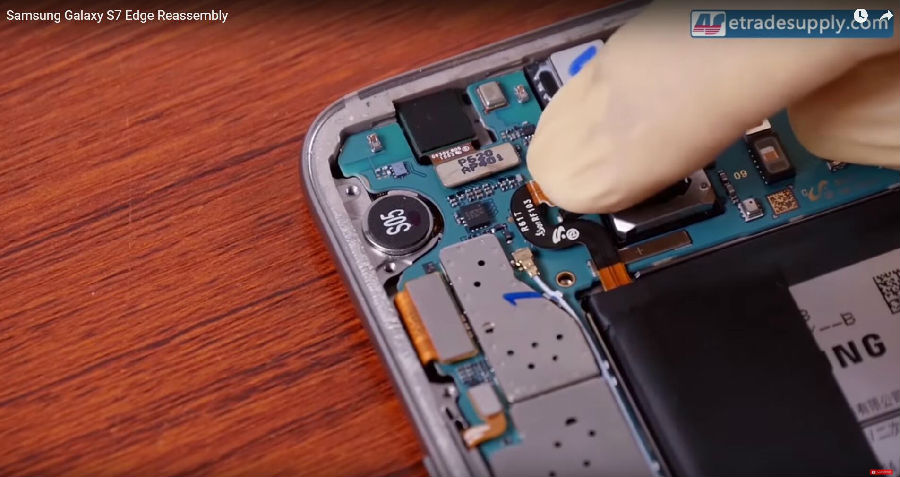 Step 23.
Re-put the wireless charging pad and the top plastic bracket.
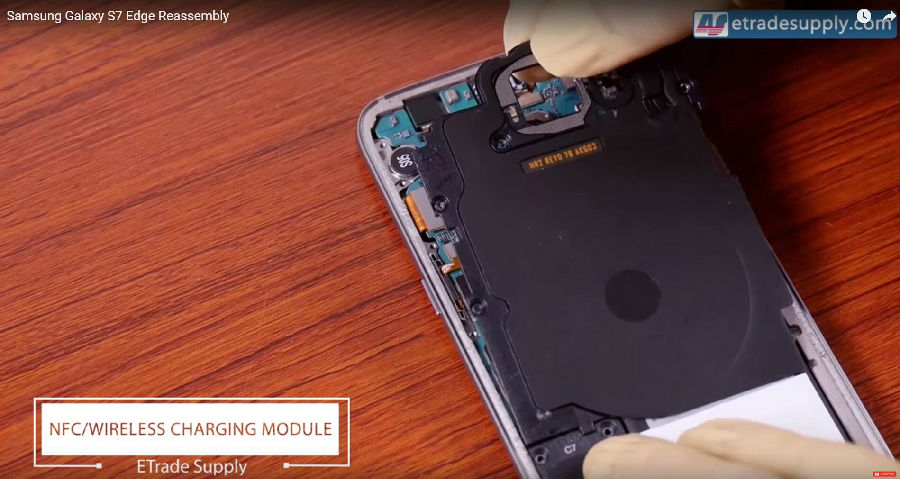
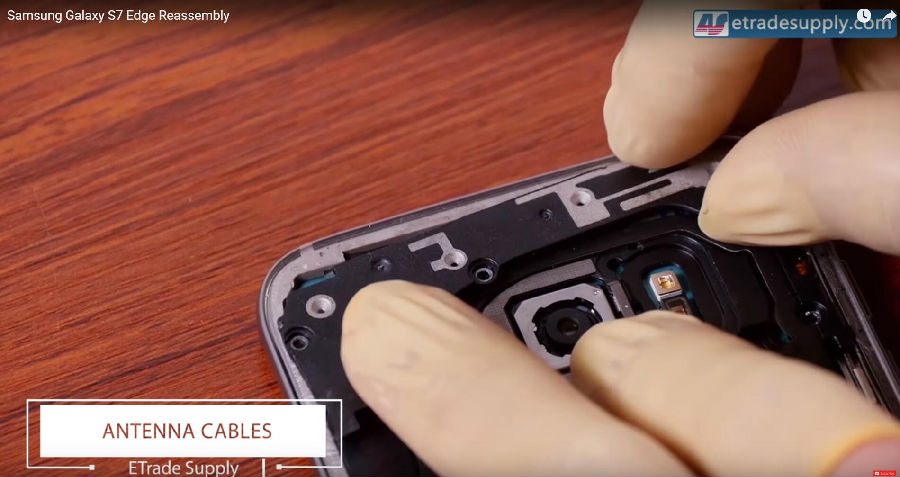
Step 24.
Re-assemble all the screws holding the rear housing.
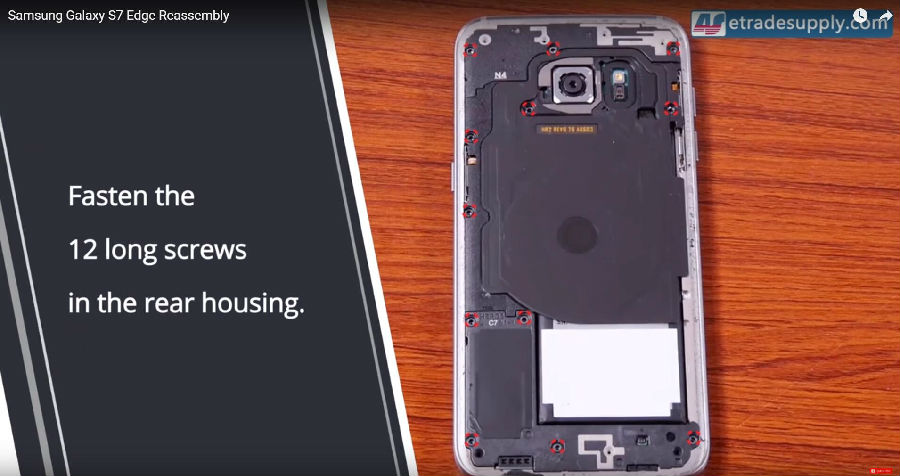 Step 25.
Put some 3M double adhesive around the edges then reassemble the back cover.
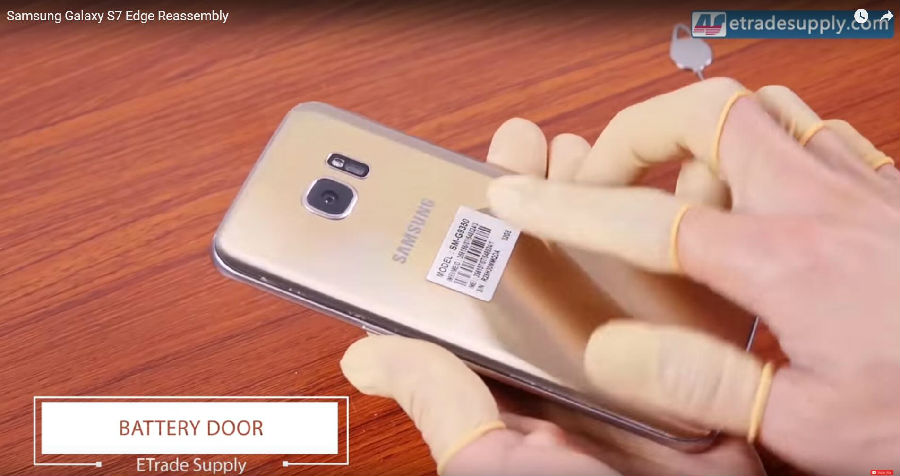
-
Customer also bought


 Loading...




-
(Posted on 06/05/21)Very poor quality replacement screen. Advertised as OEM (Grade S+) but that is not the case. Screen was delivered without the frame as advertised. The screen has a purple line after installation. Poor quality.