

 Loading...
- Home »
- Motorola »
- Android Models »
- Motorola Nexus 6 »


- Compatible With: Motorola Nexus 6
-
For Motorola Nexus 6 Middle Plate Replacement - Blue - Grade S+
This item includes:
1. Middle Plate;
2. Earphone Jack;
3. Camera Flash with Flex Cable Ribbon;
4. Side Key;
5. Side Key Flex Cable Ribbon;
6. Wireless Charging Coil.
Specifications:
Color: Blue
Material: Plastic
Compatibility: Motorola Nexus 6
Features:
This Motorola Nexus 6 housing replacement includes the components as mentioned above.
This Nexus 6 Middle Plate is brand new and original.
The Nexus 6 Middle Plate is available in blue at present.
This replacement middle chassis plate is compatible with Motorola Nexus 6 only.
How to Install / Tips:
Please read above features carefully so as not to purchase the wrong parts.
Special repairing tools are needed for disassembling the Nexus 6.
The installation of any new product should be done by a qualified person. ETS is not responsible for any damage caused during installation.
Motorola Nexus 6 Disassembly Tutorial Guide:
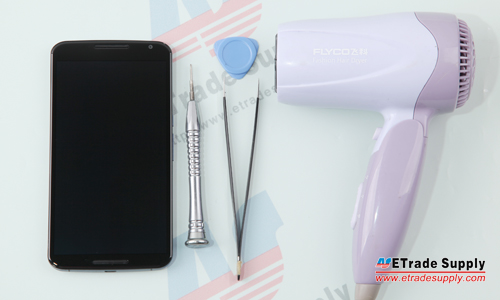
Tools Needed
1. Hair Dryer / Heat Gun;
2. Tweezers;
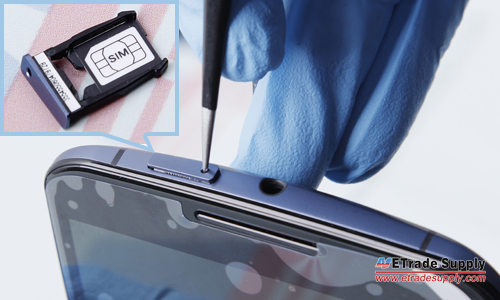
1. Remove the Motorola Nexus 6 SIM Card Tray.
Power off the device;
Use an eject pin or tweezers to release the SIM card tray.
2. Remove the Motorola Nexus 6 Battery Door.
Heat up the battery door for 2 minutes to soften the battery door adhesive;
Insert the case opening tool and pry up the battery door.

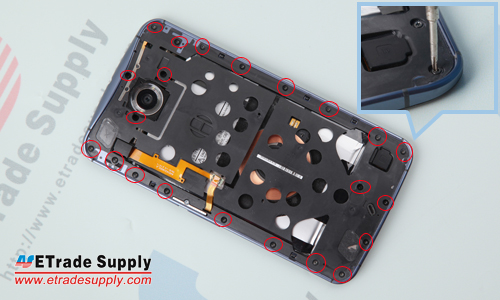
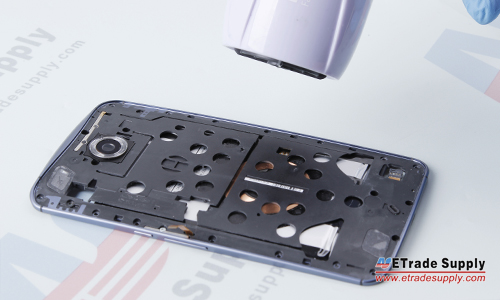
3. Remove the Motorola Nexus 6 Rear Housing Assembly.
Undo the 22 screws in the rear housing as shown below;
Gently remove the rear housing assembly from the screen assembly.
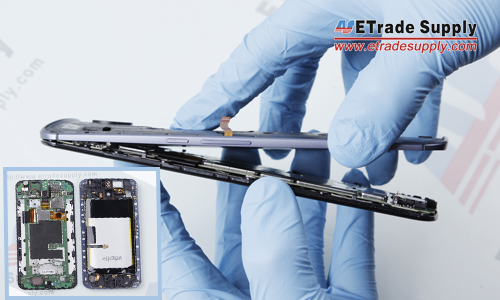
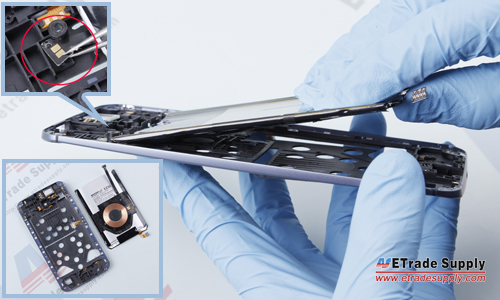
4. Release the Connectors in the Rear Housing.
Remove the gasket on the rear housing near the bottom of the phone;
Carefully pry up the flex ribbon connector underneath;
Remove the gasket on the rear housing near the top of the phone;
Carefully pry up the flex ribbon connector underneath.
5. Release the Flex Cable Ribbon Extender.
Carefully pry up the latch on the flex connector to separate it from the flex ribbon extender.
6. Remove the Motorola Nexus 6 Battery.
Heat up the rear housing for 10 seconds to soften the battery adhesive; (Notice: be more careful on this step as batteries might explode when overheated.)
Pry up the battery flex connector that adhered to the rear housing;
If you want to release the wireless charging coil as well, gently pry up the charging coil connector. However, we don’t recommend performing this step as you run a high risk of damaging the charging coil and battery.
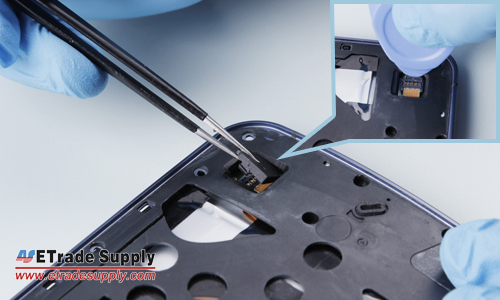
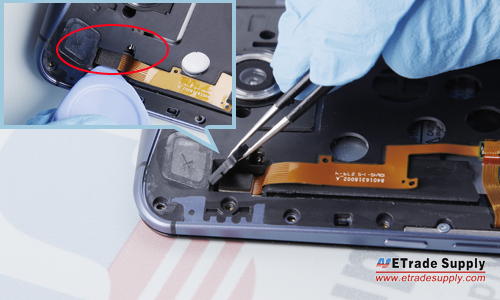
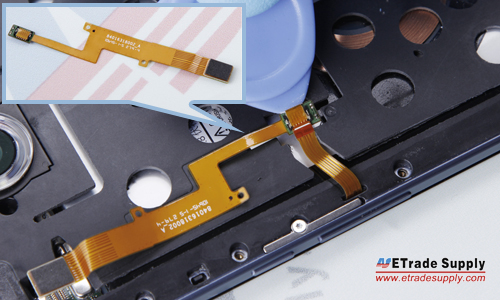
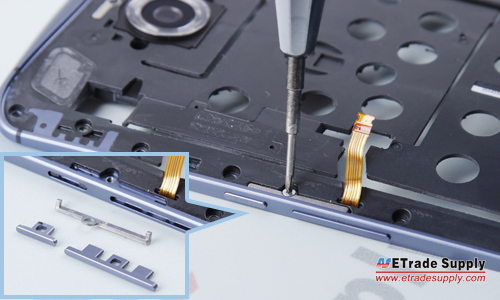
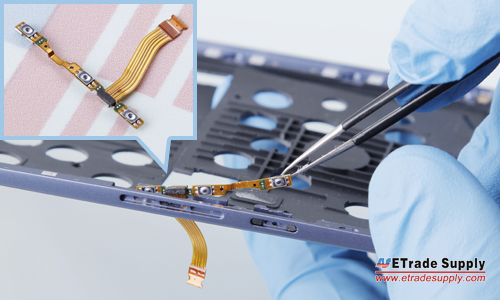
7. Release the Motorola Nexus 6 Side Keys.
Undo the screw that locks the side key metal bracket;
Remove the side key flex cable ribbon.
8. Remove the Motorola Nexus 6 Motherboard.
Undo the screw and metal bracket that locks the front housing and main board;
Pry up the LCD flex connector and digitizer connector;
Remove the motherboard.
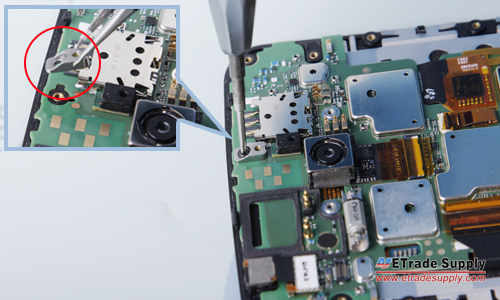

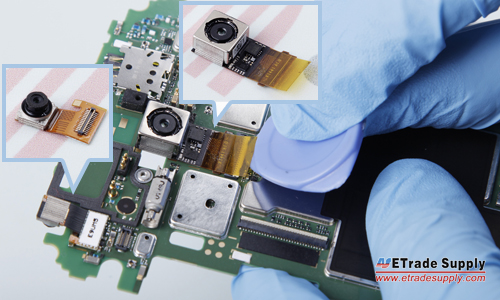
9. Remove the Motorola Nexus 6 Cameras.
Pry up the rear facing camera flex connector;
Remove the back camera;
Pry up the front facing camera flex connector;
Remove the front camera;
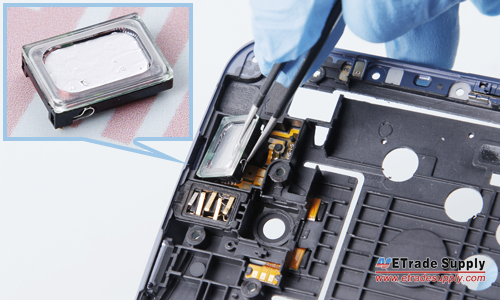
10. Remove the Motorola Nexus 6 Ear Speaker and Headphone Jack.
Remove the front speaker. (Notice: be careful not to scratch the flex ribbon underneath.)
Remove the headphone jack. (Notice: the headphone jack is strongly attached to the front housing with an adhesive.)

The Motorola Nexus 6 disassembly is now completed.


-
Customer also bought


