

 Loading...
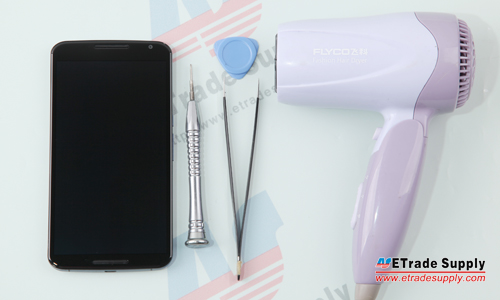
Tools you will need:


Released in October of 2014, the Nexus 6 is the 6th generation smartphone in the Google Nexus family. The Nexus 6 runs the latest Android OS, Android 5.0 “Lollipop” and will be the first Nexus device to support T-Mobile’s Wi-Fi calling which will arrive in early 2015. As it’s manufactured by Motorola, the Nexus 6 features similar hardware as the Moto X 2nd, let’s tear down the device and have a closer look.
Tools Needed:
1. Hair Dryer / Heat Gun;
2. Tweezers;
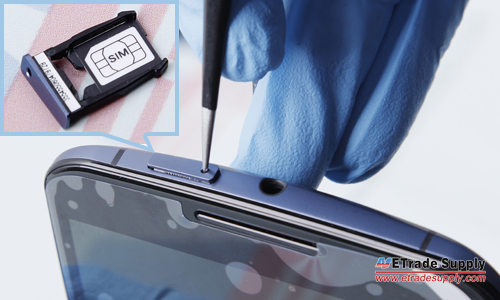
1. Remove the Motorola Nexus 6 SIM Card Tray.
● Power off the device;
● Use an eject pin or tweezers to release the SIM card tray.
2. Remove the Motorola Nexus 6 Battery Door.
● Heat up the battery door for 2 minutes to soften the battery door adhesive;
● Insert the case opening tool and pry up the battery door.

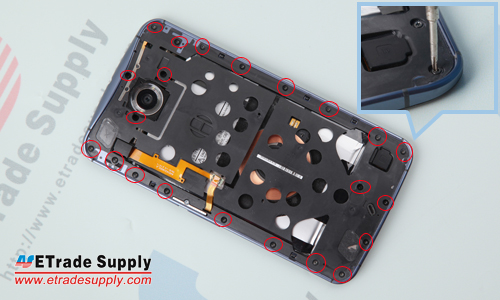
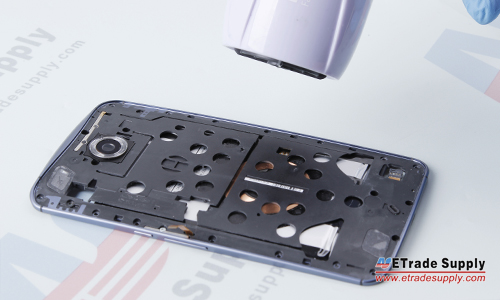
3. Remove the Motorola Nexus 6 Rear Housing Assembly.
● Undo the 22 screws in the rear housing as shown below;
● Gently remove the rear housing assembly from the screen assembly.
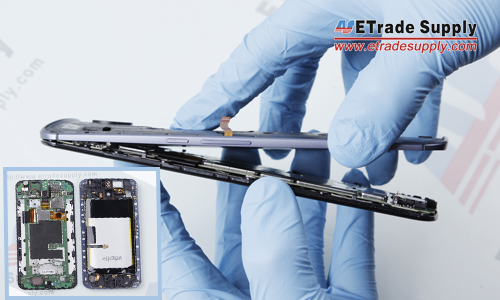
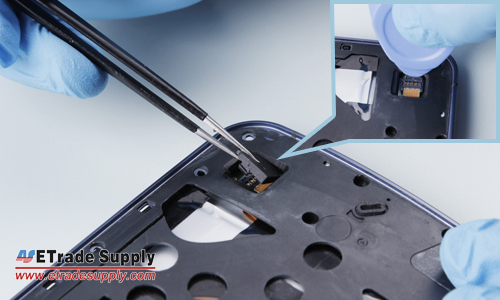
4. Release the Connectors in the Rear Housing.
● Remove the gasket on the rear housing near the bottom of the phone;
● Carefully pry up the flex ribbon connector underneath;
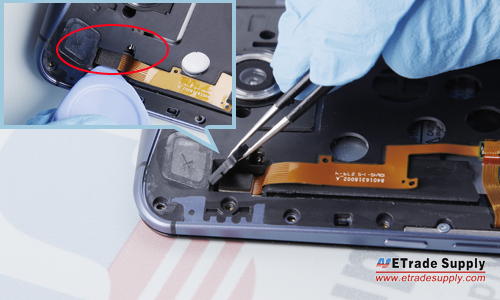
● Remove the gasket on the rear housing near the top of the phone;
● Carefully pry up the flex ribbon connector underneath.
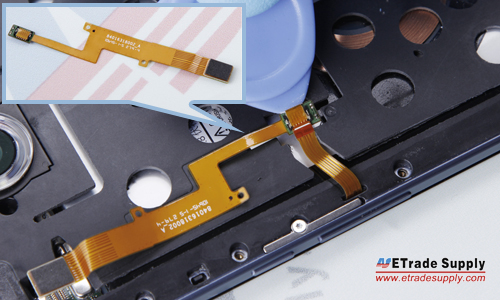
5. Release the Flex Cable Ribbon Extender.
● Carefully pry up the latch on the flex connector to separate it from the flex ribbon extender.
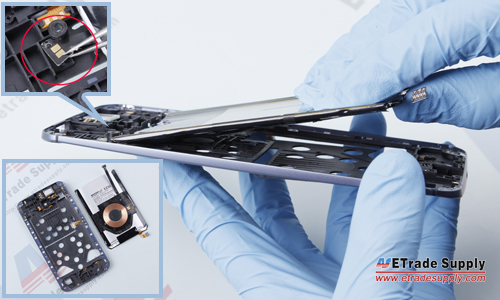
6. Remove the Motorola Nexus 6 Battery.
● Heat up the rear housing for 10 seconds to soften the battery adhesive;
(Notice: be more careful on this step as batteries might explode when overheated.)
● Pry up the battery flex connector that adhered to the rear housing;
● If you want to release the wireless charging coil as well, gently pry up the charging coil connector. However, we don’t recommend performing this step as you run a high risk of damaging the charging coil and battery.
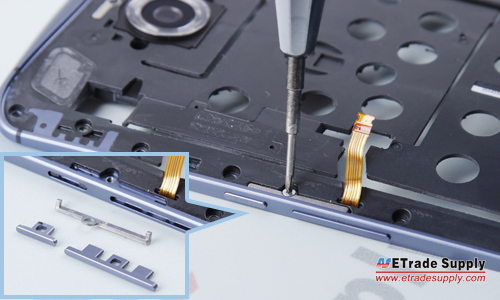
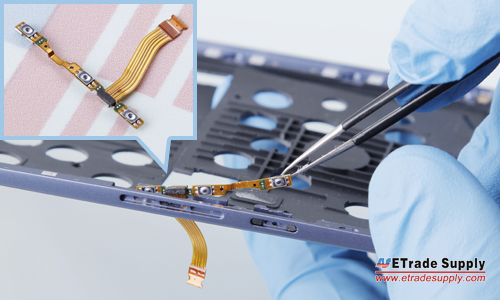
7. Release the Motorola Nexus 6 Side Keys.
● Undo the screw that locks the side key metal bracket;
● Remove the side key flex cable ribbon.
8. Remove the Motorola Nexus 6 Motherboard.
● Undo the screw and metal bracket that locks the front housing and main board;
● Pry up the LCD flex connector and digitizer connector;
● Remove the motherboard.
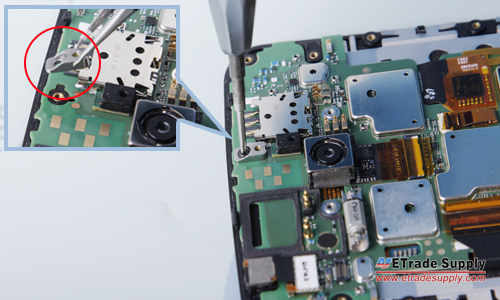

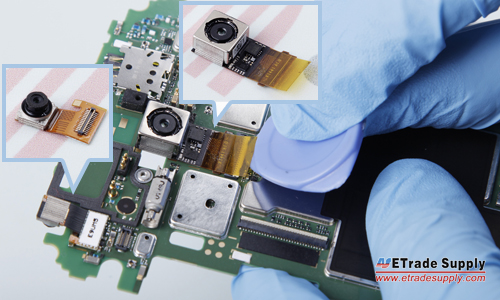
9. Remove the Motorola Nexus 6 Cameras.
● Pry up the rear facing camera flex connector;
● Remove the back camera;
● Pry up the front facing camera flex connector;
● Remove the front camera;
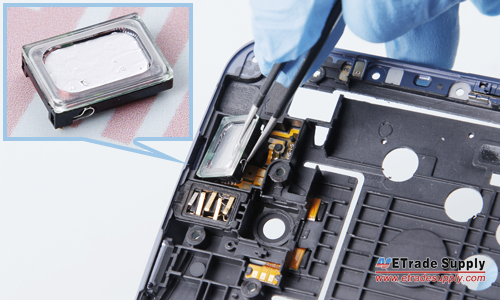
10. Remove the Motorola Nexus 6 Ear Speaker and Headphone Jack.
● Remove the front speaker.
(Notice: be careful not to scratch the flex ribbon underneath.)
● Remove the headphone jack.
(Notice: the headphone jack is strongly attached to the front housing with an adhesive.)

The Motorola Nexus 6 disassembly is now completed.

|
|

|
|
|
|
|
|---|


Download and print the repair tutorials here!


