

 Loading...
Tools you will need:
 For Repair Tools BST-8921 (38 pcs/set)

 For Curved Hook Tweezers (Model: 150) ,Silver
 Case Opening Tool for Cell Phone - Triangle (Thin)
 For Heavy Duty Suction Cup Dent Sucker Puller for Cellphone Screen
As the biggest iPhone ever in history, the iPhone 6 Plus attracts wide attention since it’s released. It features a 5.5-inch display, a 64-bit dual-core A8 processor with an M8 co-processor, an 8-megapixel iSight camera with optical image stabilization and a service supports Apple Pay. All these specifications are well-known to the globe, how about the inside design? Here we walk you through to tear down and have a closer look at the iPhone 6 Plus.
Tools Needed:
Pentalobe Screwdriver
Philip Screwdriver
Flathead Screwdriver
Tweezers
Suction Cup Tool
Case Opening Tool
Spudger Tool

1. Power off the iPhone 6 Plus.

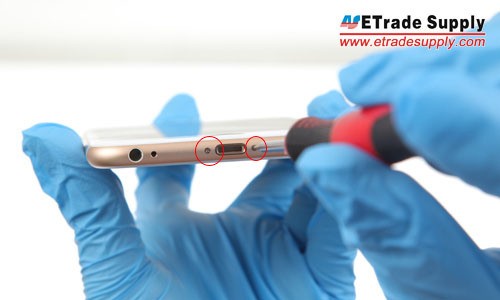
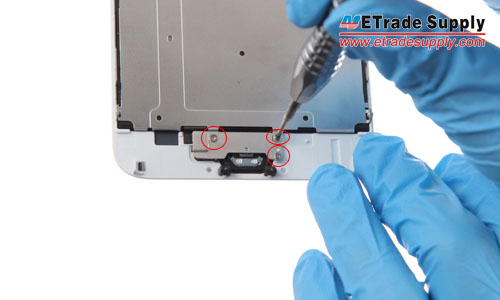
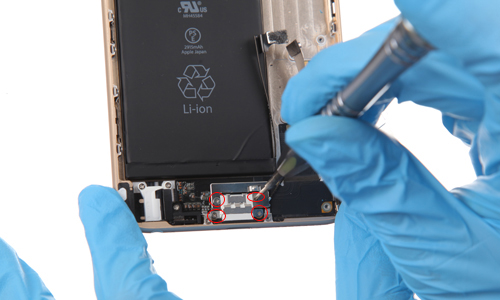
2. Undo the 2 charging port screws.
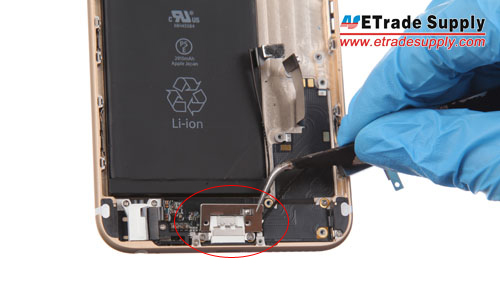
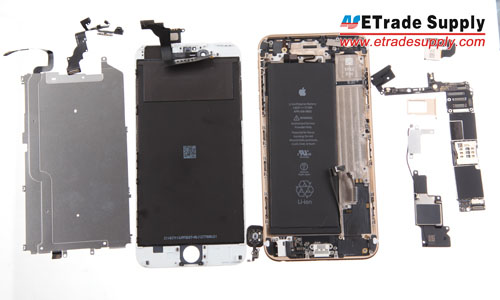
3. Separate the LCD assembly from rear housing assembly with suction cup tool and case opening tool. (Notice: be careful not to break the flex ribbons.)

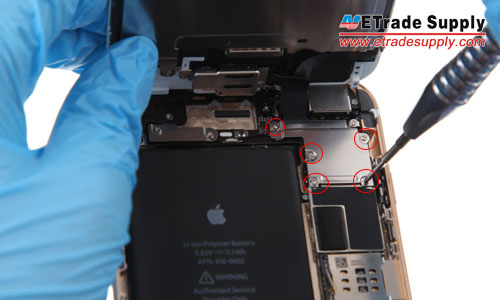
4. Pry up the 5 screws that locking the metal cover above LCD assembly connectors, then take out the metal cover.
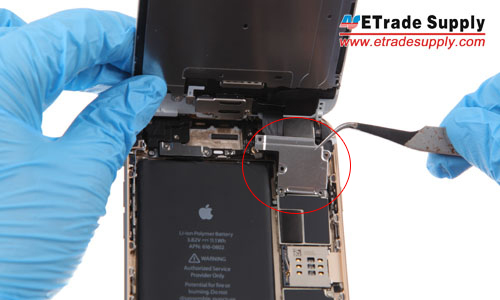
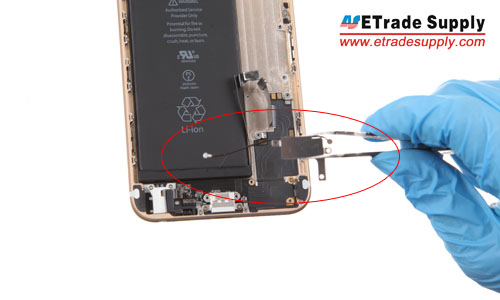
5. Pry up the 4 connectors.
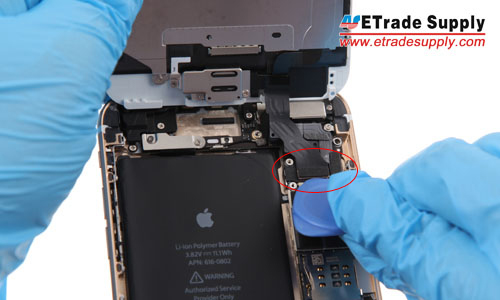
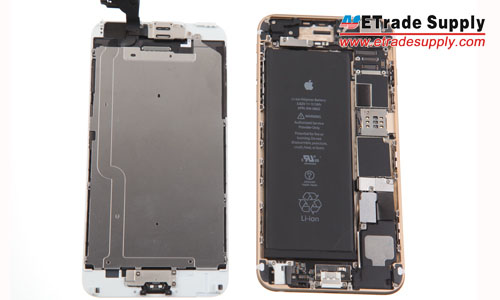
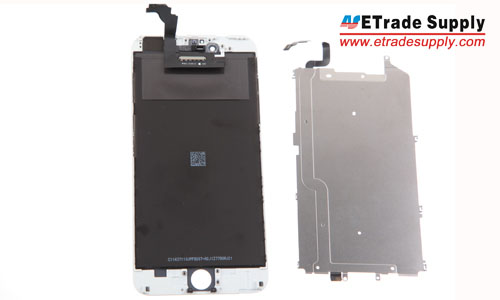
6. The LCD assembly and rear housing assembly are separated.
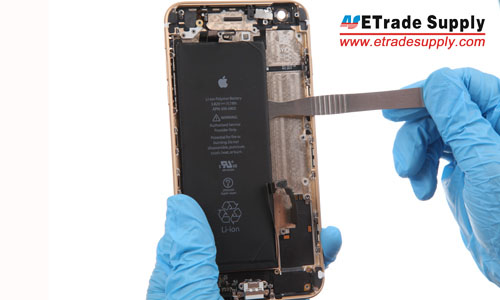
7. Undo the 3 screws that locking the metal cover above home button, then take out the metal cover.
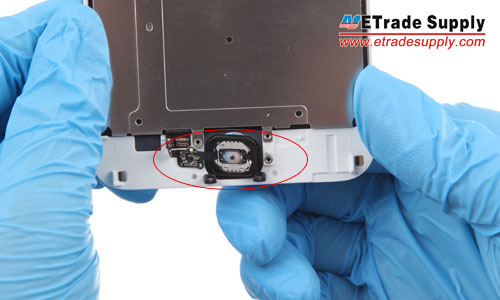
8. Pry up the home button flex ribbon connector and remove the home button.

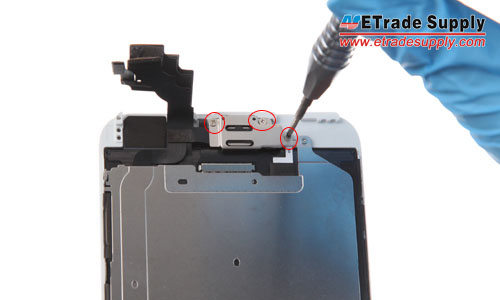
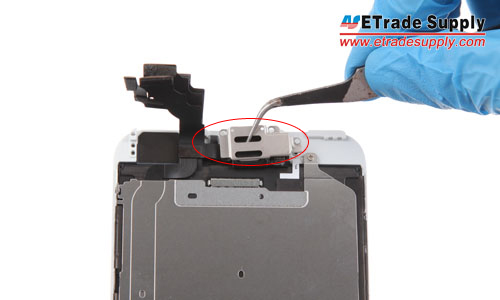
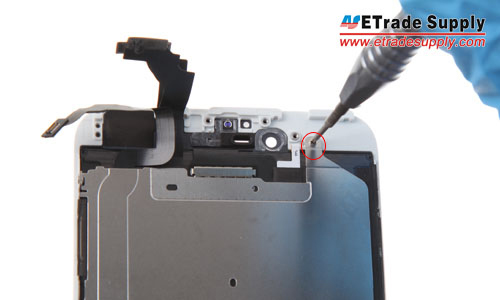
9. Undo the 3 screws that locking the metal cover above ear speaker, take out the metal cover.
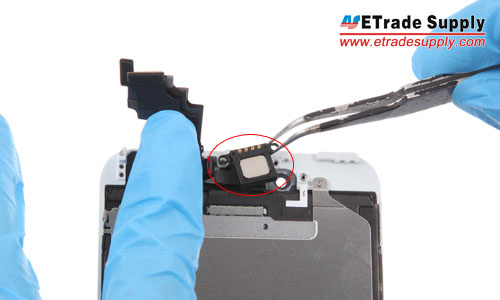
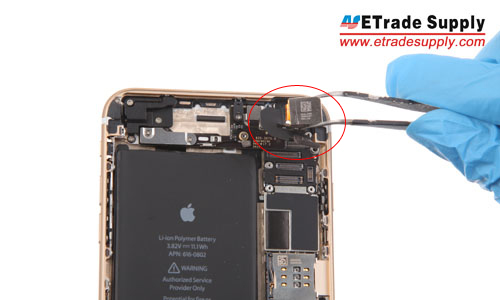
10. Take out the ear speaker and front facing camera.
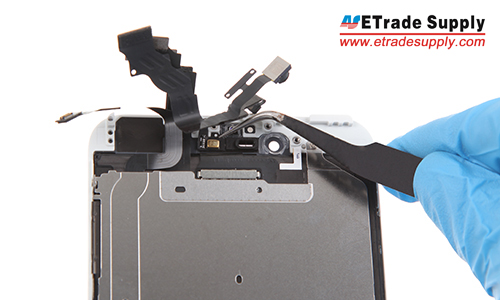
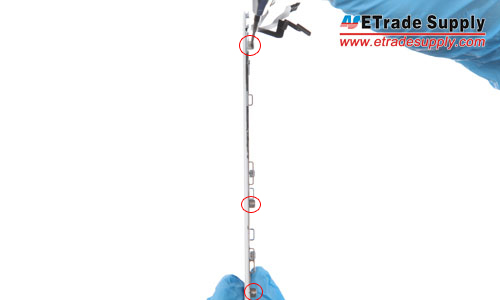
11. Undo the 7 screws that locking the LCD metal plate.
12. Pry up the LCD back plate connector.
13. The LCD assembly and back plate are separated.
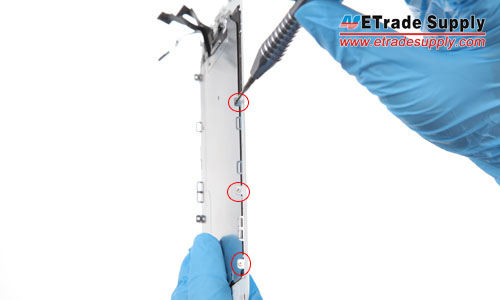
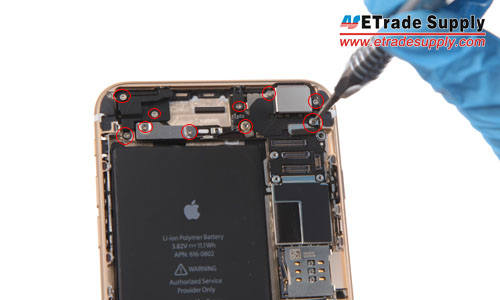
14. Undo the 10 screws in the rear housing assembly.
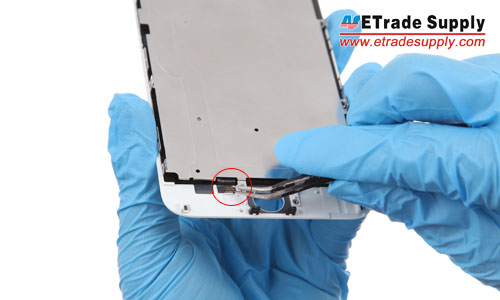
15. Pry up the rear facing camera metal cover and connector, take out the back camera.
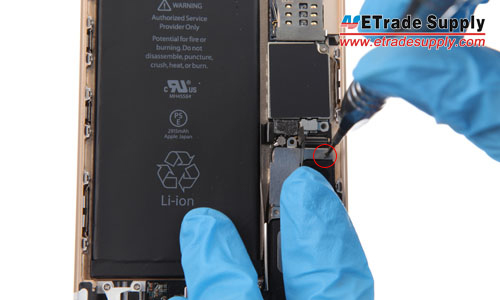
16. Undo the 4 screws.
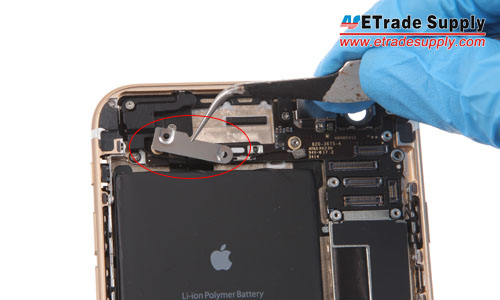
17. Remove the metal cover, then pry up the connectors.
18. Undo the screw under the connector.
19. Remove the metal cover and pry up the two connectors underneath.
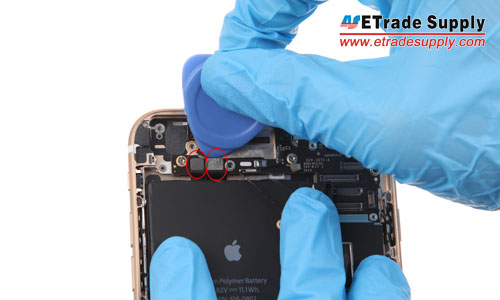
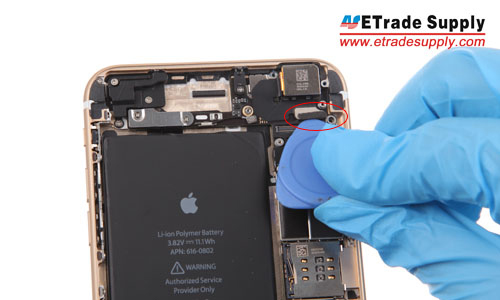
20. Remove the wifi antenna. (Notice: the wifi antenna is connected with the motherboard, be careful.)
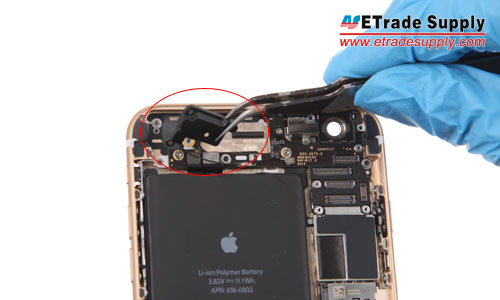
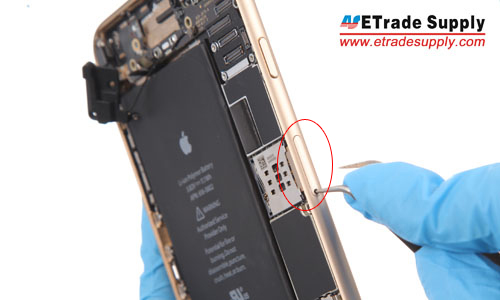
21. Use an eject pin or tweezers to release the SIM card tray.
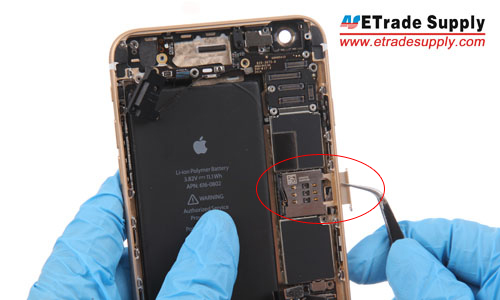
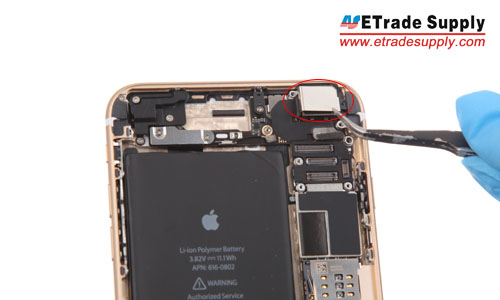
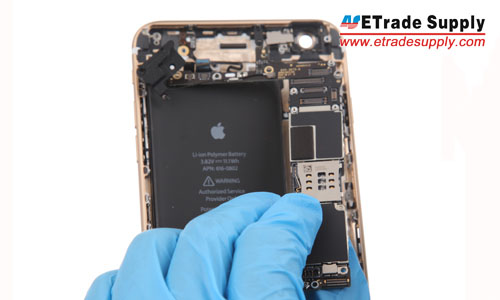
22. Remove the motherboard.
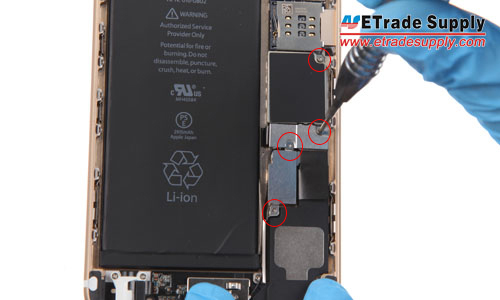
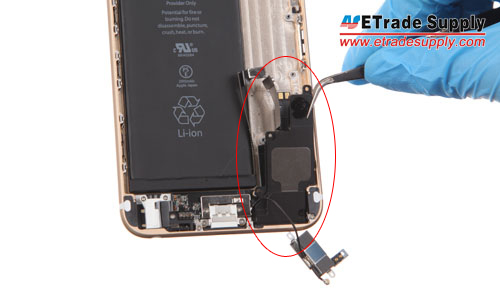
23. Undo the 3 screws and remove the loud speaker assembly.
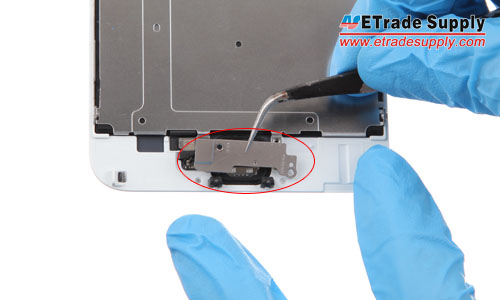
24. Undo the 4 screws and remove the charging port metal cover.
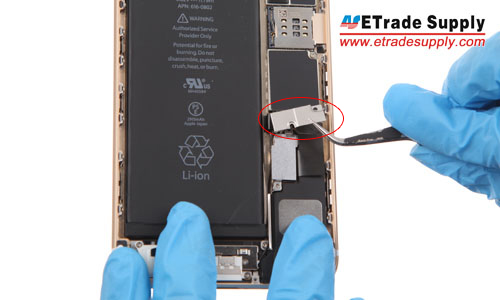
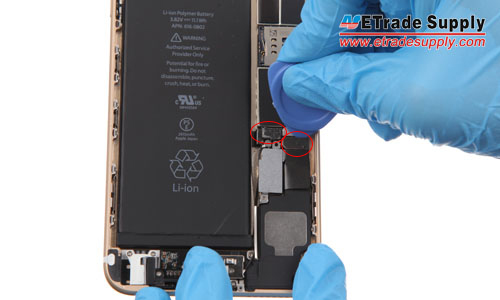
25. Pry up the antenna and take out the vibrating motor.

26. Gently pry up the battery.
27. The rear housing assembly was disassembled.
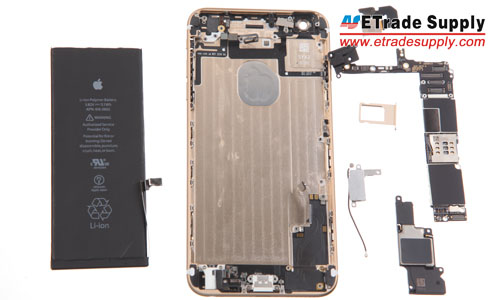
28. The iPhone 6 Plus disassembly was finished.
|
|

|
|
|
|
|
|---|


Download and print the repair tutorials here!


