

 Loading...
![]()


- Compatible With: SM-G920, SM-G920A, SM-G920V, SM-G920P, SM-G920R4, SM-G920T, SM-G920F
-
For Samsung Galaxy S6 Samsung-G920/G920A/G920P/G920R4/G920T/G920F/G920V Glass Lens Replacement - White - With Logo - Grade S+
Specifications:
Color: White
Material: Corning Gorilla Glass 4
Compatibility: SM-G920, SM-G920A, SM-G920V, SM-G920P, SM-G920R4, SM-G920T, SM-G920F
Features:
This is the Glass Lens Only. This Galaxy S6 SM-G920 Glass Lens is sold separately from the LCD and Digitizer Touch Screen.
This S6 SM-G920 Glass Lens is branded with Samsung logo on the top, please note.
This item is white, please note.
This Galaxy S6 SM-G920 Glass Lens replacement is a brand new and original replacement.
This Glass Lens replacement for Galaxy S6 is compatible with SM-G920, SM-G920A, SM-G920V, SM-G920P, SM-G920R4, SM-G920T, SM-G920F.
How to Install / Tips:
This Samsung Galaxy S6 SM-G920 Glass Lens is hermetically encapsulated, special tools and skills are required to change this part.
Be sure to choose the right color and version before placing an order.
Please try to handle the repair or replacement work in a dry and dust free environment without direct sunlight.
The installation of any new part should be done by a qualified person. ETS is not responsible for any damage caused during installation.
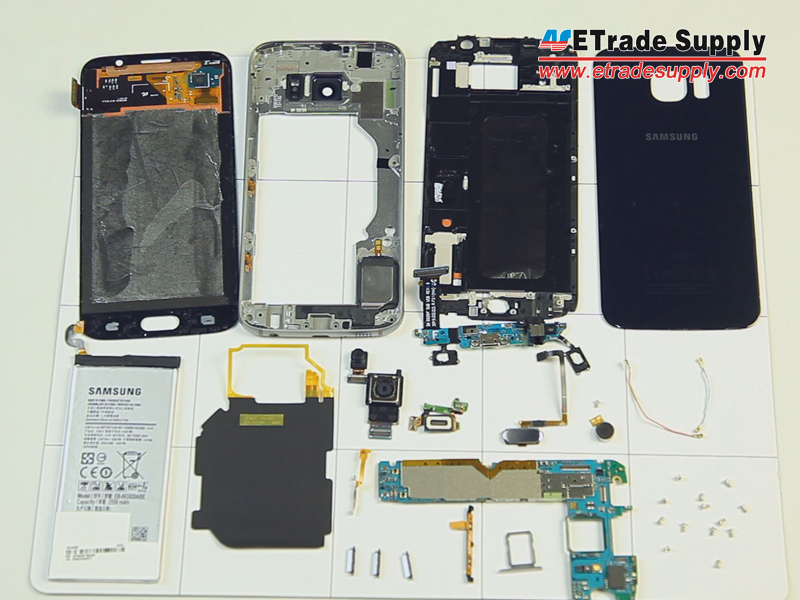
Samsung Galaxy S6 Teardown Tutorial Guide :
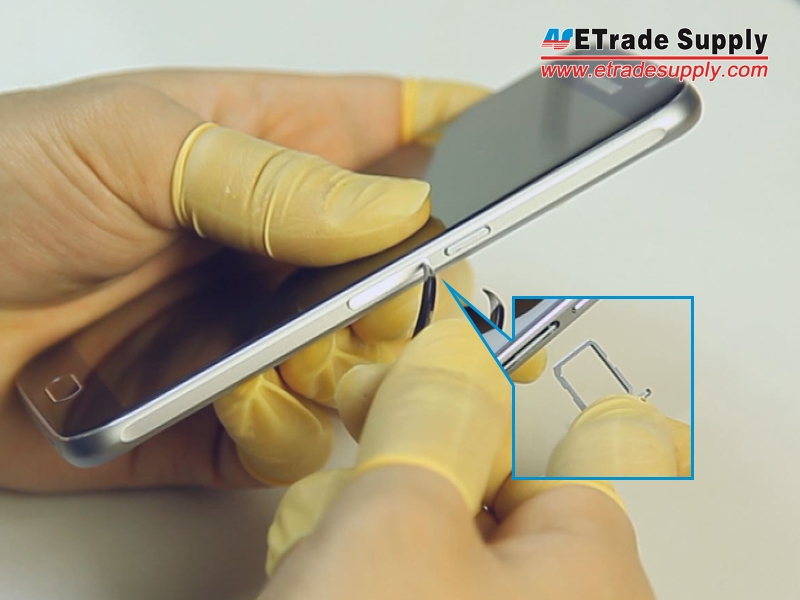
Step 1: Take Out The SIM Card Tray.
Power off the Samsung Galaxy S6.
Use an ejector pin or tweezers to take out the SIM Card Tray.
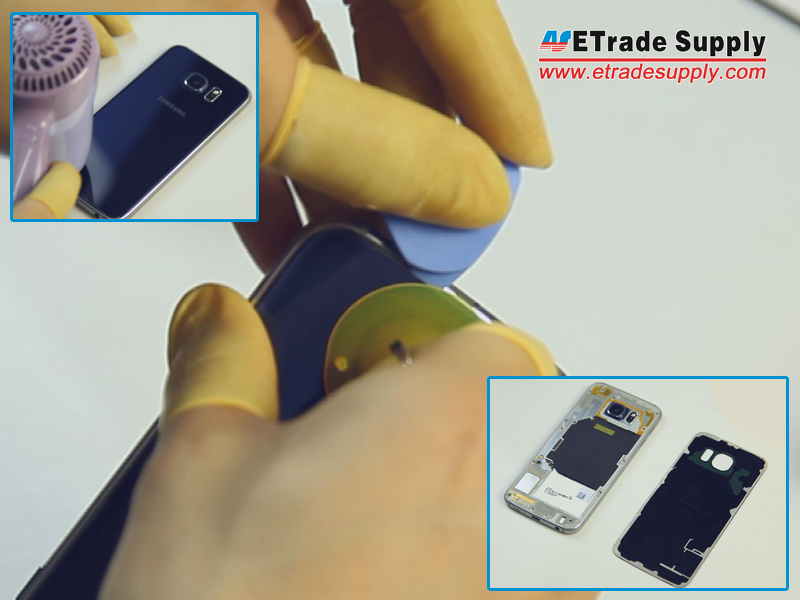
Step 2: Take Apart The Battery Door.
Heat up the Samsung Galaxy S6's Battery Door.
Pull the battery cover up with a screen suction cup tool. (The battery door is stuck to the middle plate with some really strong adhesive, take your time to remove it)
Separate the battery door with a case opening tool.
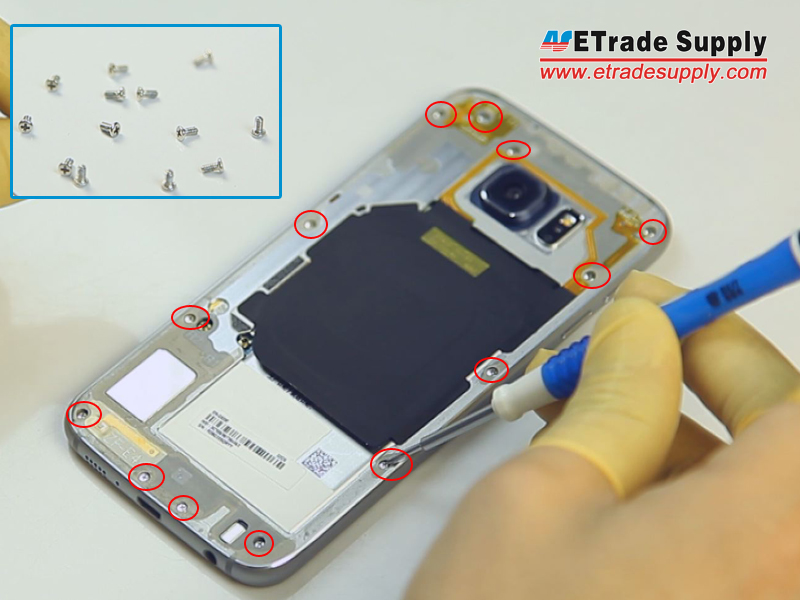
Step 3: Release The Rear Housing.
Undo the 13 screws in the rear housing.
Heat up the LCD Assembly.
Separate the rear housing from the LCD Assembly with the help of a suction cup tool and case opening tool.
(Notice: be careful not to damage the wireless charging chip attached to the battery.)
Step 4: Remove The Case Buttons.
Remove the power button flex.
Remove the volume button flex.
Remove the Case Buttons. (Notice: the Galaxy S6 power button and volume buttons are compatible with each other.)

Step 5: Release The Wireless Charging Chip.
Pry up the wireless charging coil's flex ribbons on both sides of rear housing. (Notice: be careful not to damage the flex ribbons.)
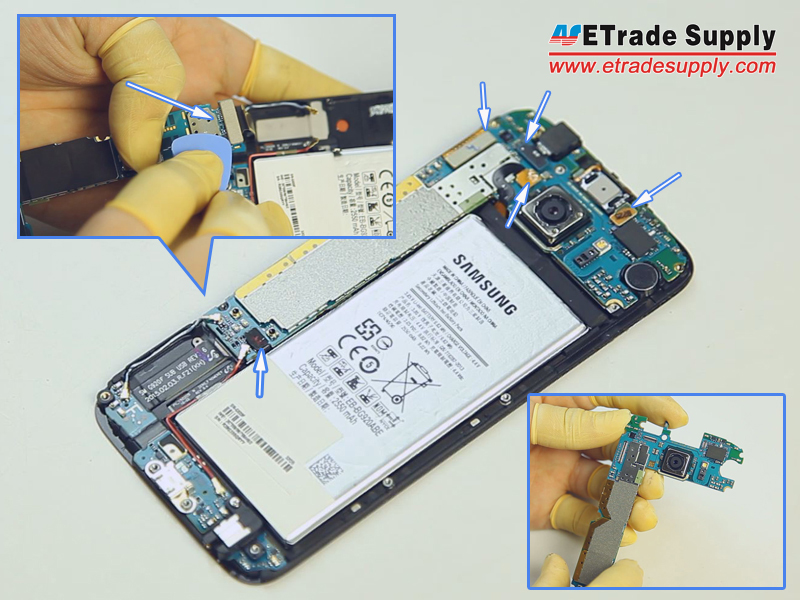
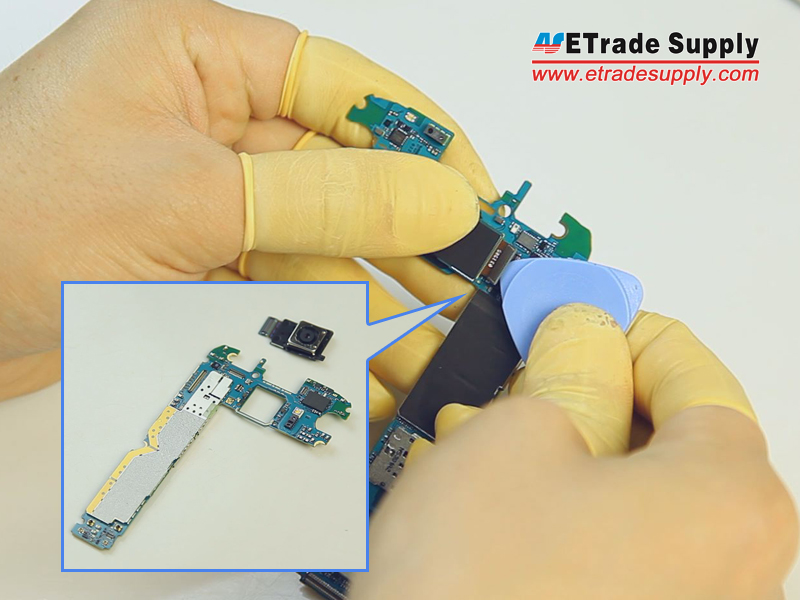
Step 6: Remove The Motherboard.
Pry up the LCD assembly connector, front facing camera connector, battery connector, ear speaker connector and home button flex ribbon connector.
Turn over the motherboard and pry up the connector.
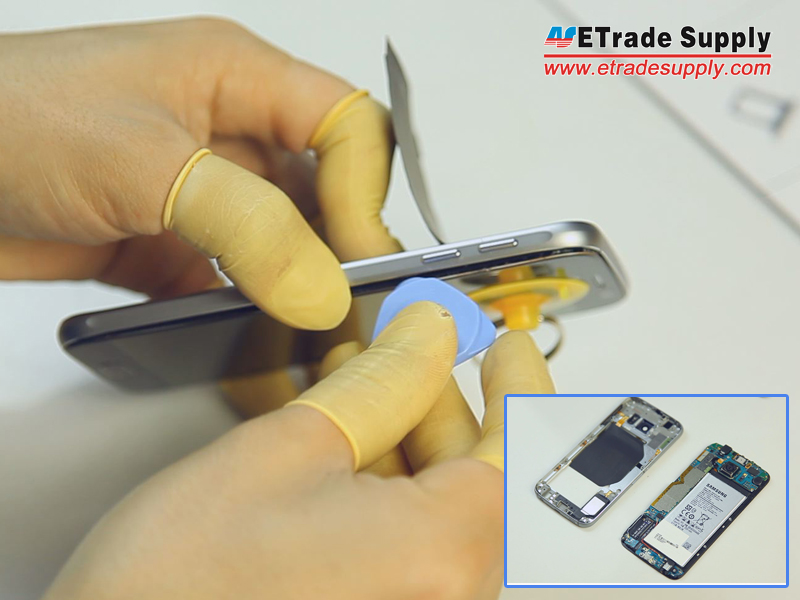
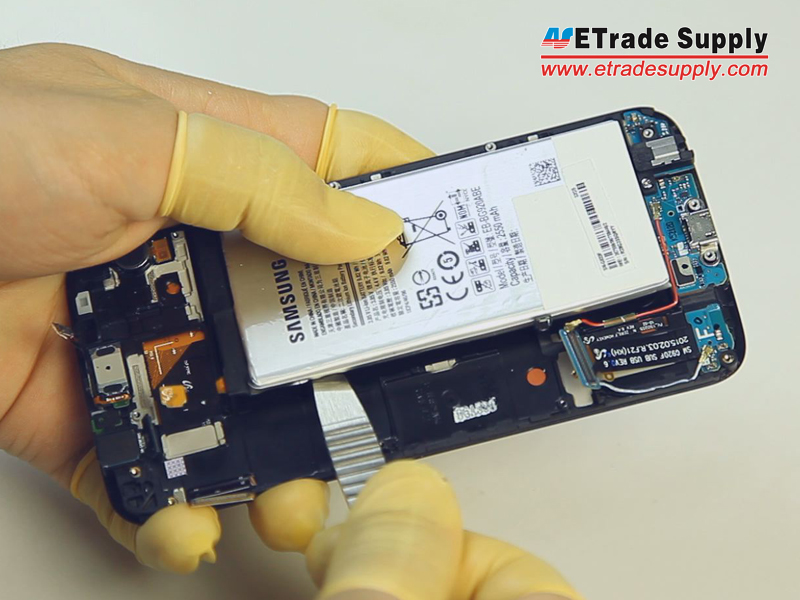
Step 7: Remove The Battery.
Gently pry up the battery with a spudger tool.
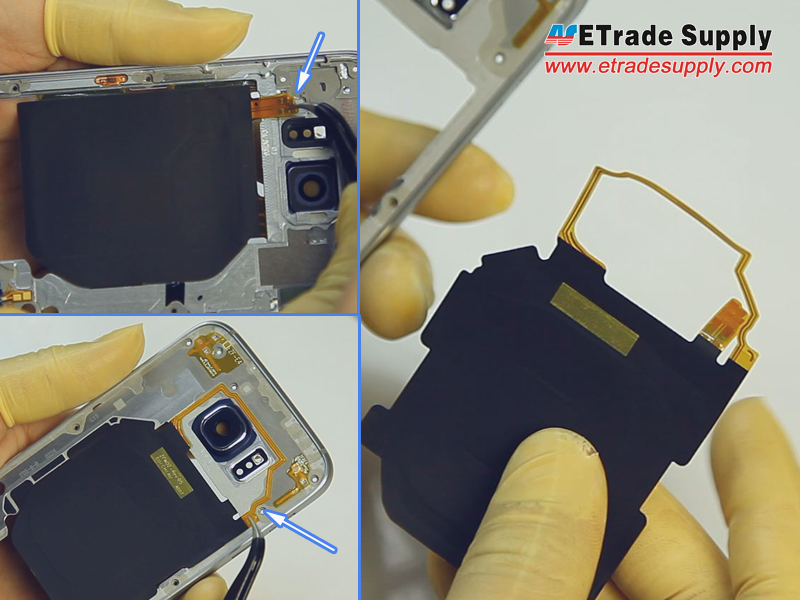
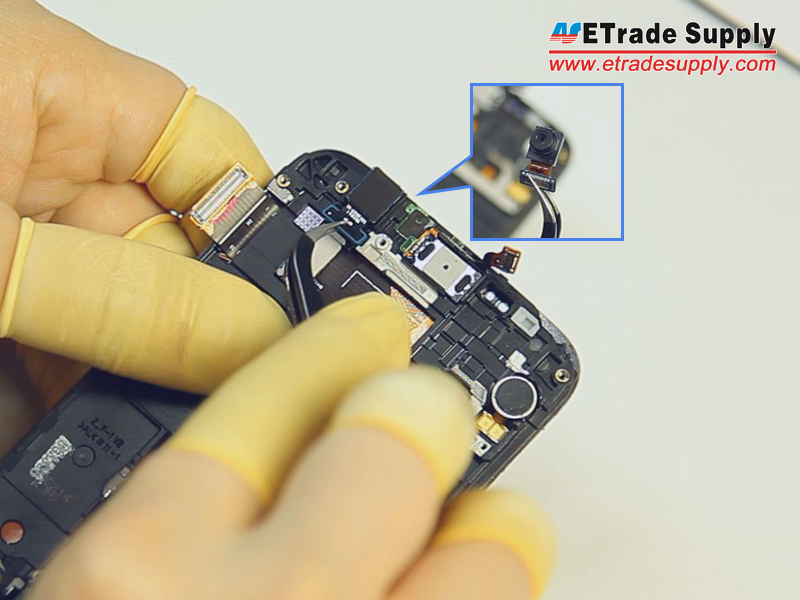
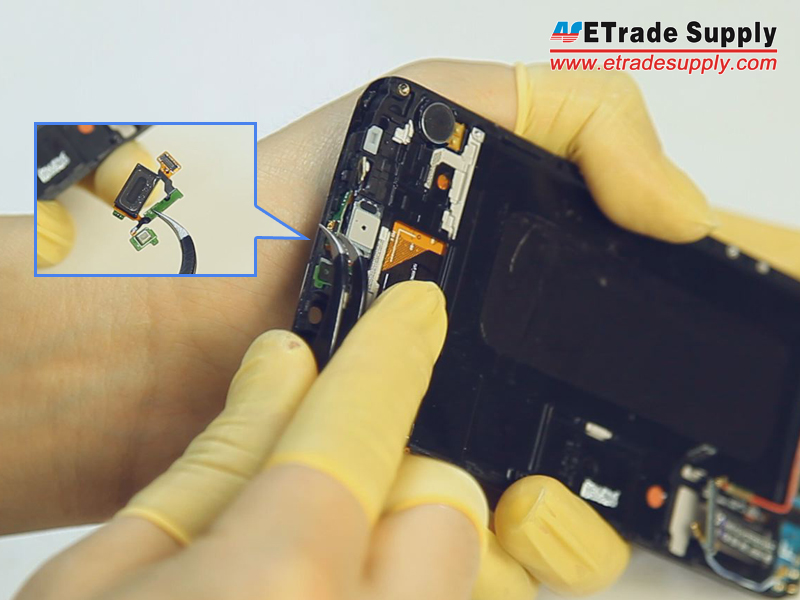
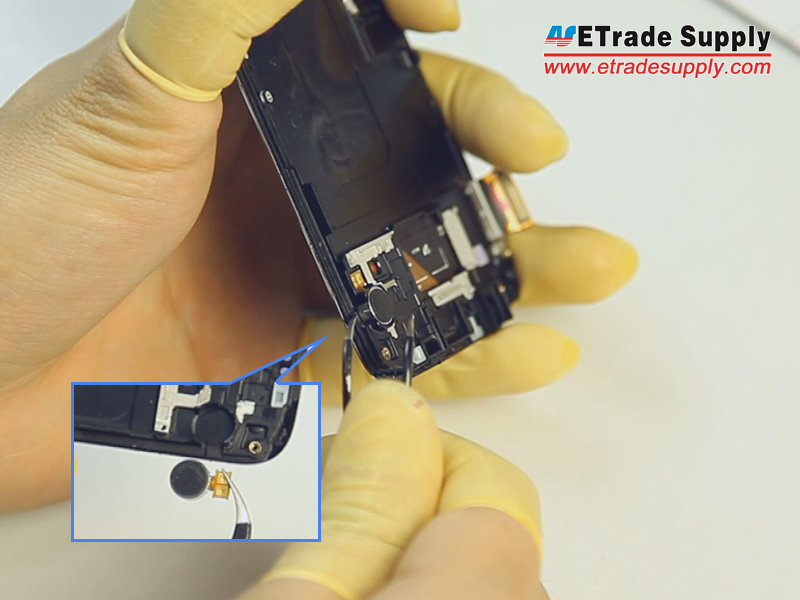
Step 8: Remove Small Components.
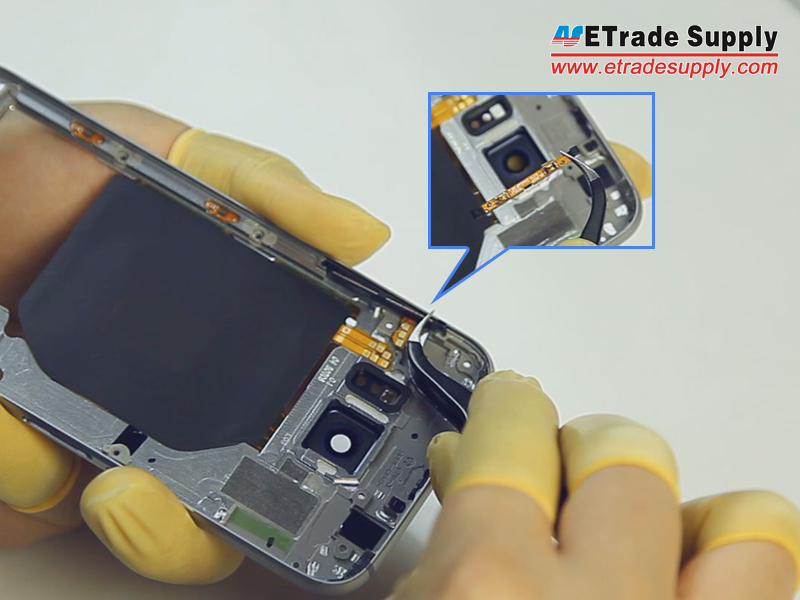
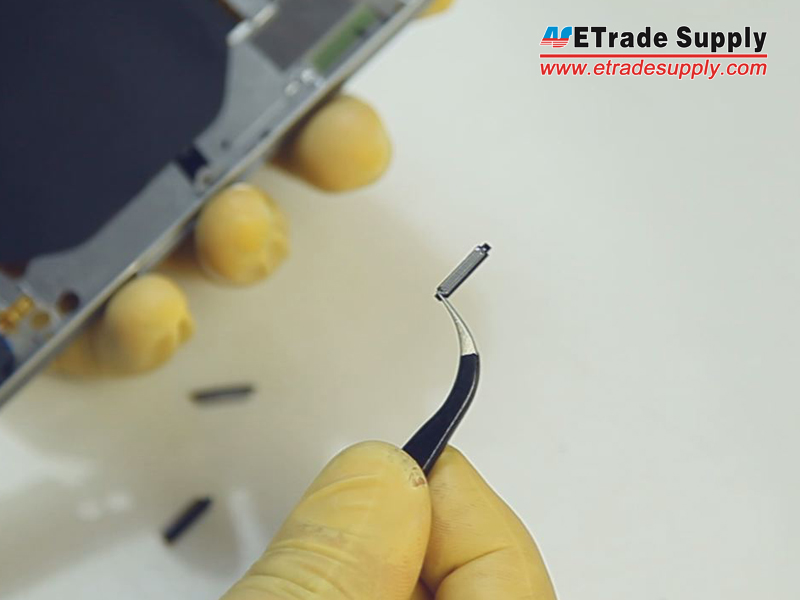
Remove the front facing camera.
Remove the ear speaker. (Notice: be careful not to break the flex ribbon.)
Remove the vibrating motor.
Remove the rear facing camera.
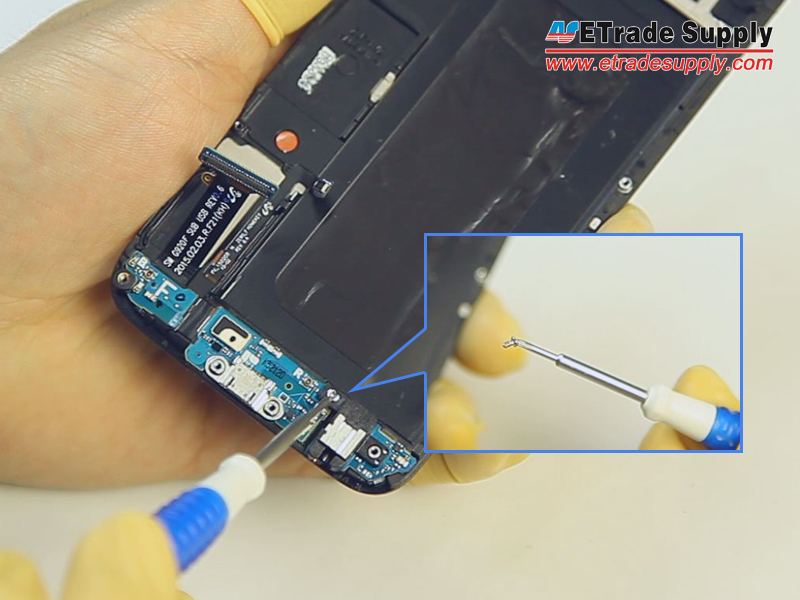
Step 9: Release The Charging Port Assembly.
Remove the Bluetooth and Wi-Fi cables.
Undo the earphone jack screw. (Notice: the screw is different than the rear housing screws.)
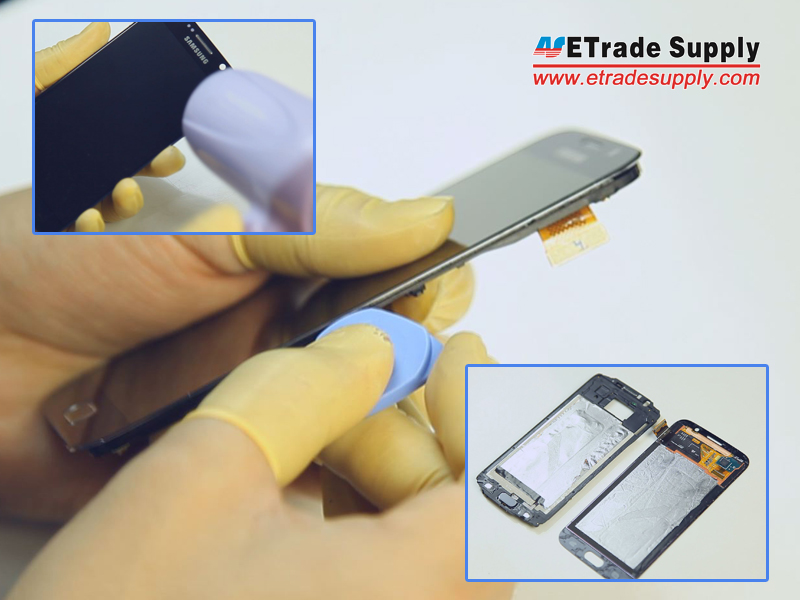
Heat up the LCD Assembly to release the front housing.
Pry up the navigation light stickers.

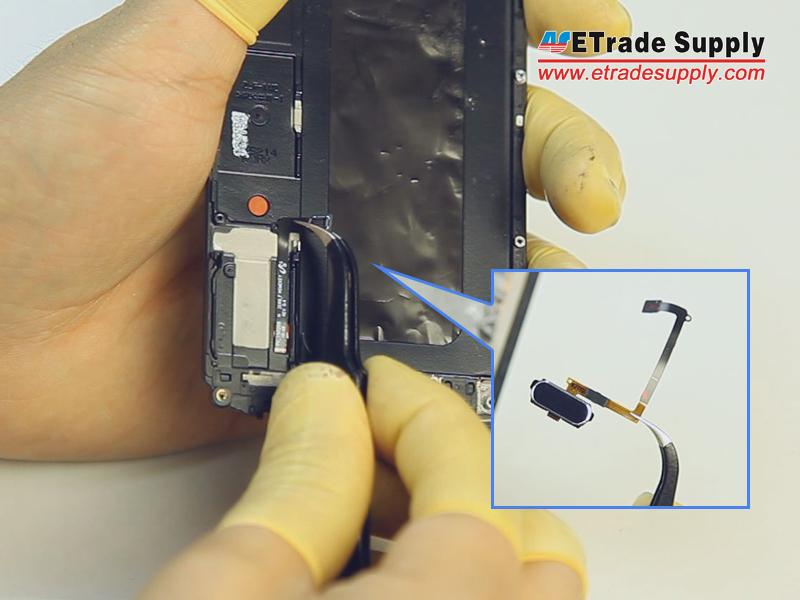
Step 10: Release The Home Button With Flex.
Pry up the connector on the back side of home button.
Pry up the home button.
The Samsung Galaxy S6 disassembly is now complete.

-
Customer also bought
 - Grade S+")

