

 Loading...


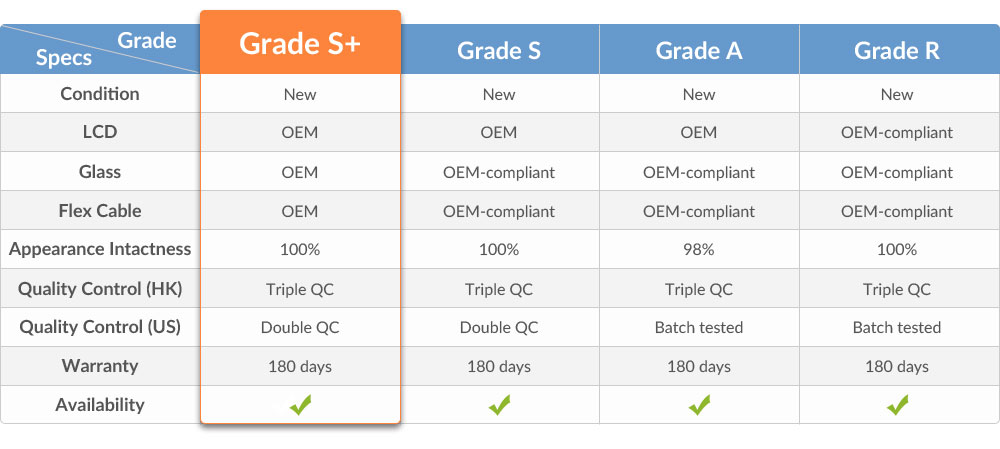
- Compatible With: Apple iPad Air 2
-
For Apple iPad Air 2 LCD Screen and Digitizer Assembly Replacement - Black - Grade S+
This item contains the following components:
1. LCD Screen;
2. Digitizer Touch Screen;
Notes: Please test the functionality of this item before installation.
Specifications:
Color: Black
Screen Size: 9.7 inches
Resolution: 1536 x 2048 pixels, 264 ppi pixel density
Display Type: LED-backlit IPS LCD, capacitive touchscreen, 16M colors
Protective Material: Scratch-resistant glass, oleophobic coating
Compatibility: Apple iPad Air 2
Features:
This iPad Air 2 LCD Assembly includes the LCD Display, Digitizer Touch Screen with Front Glass already attached.
This iPad Air 2 LCD and Screen Assembly replacement is brand new and original.
The Apple iPad Air 2 LCD Assembly is available in white and black, this is the black one.
This LCD Assembly is compatible with iPad Air 2 only.
How to Install / Tips:
Please choose the right part before placing an order.
Special repairing tools are required for assembling or disassembling as the Apple iPad Air 2 LCD Display and Digitizer Touch Screen are hermetically attached.
Handle the vulnerable and fragile flex cable ribbon carefully.
Please try to handle the repair or replacement work in a dry and dust free environment without direct sunlight.
The installation of any new part should be done by a qualified person. ETS is not responsible for any damage caused during installation.
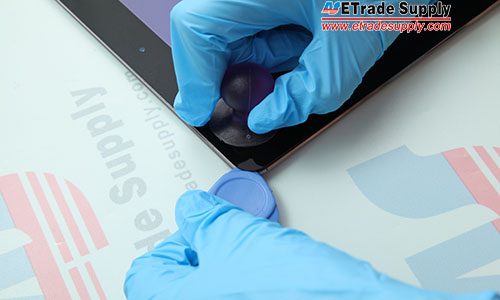
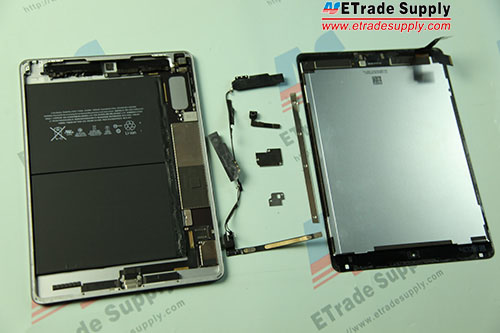
Following is a tutorial guide about how to disassemble iPad Air 2.
1.Heated the iPad Air 2 screen edge for 3 minutes to melt the adhesive, then pry up the screen with the suction cup tool and case opening tool.
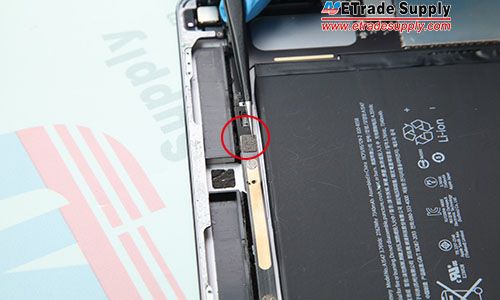
2.After opening the iPad Air 2 LCD assembly, undo 3 screws and remove the metal bracket covering the flex cables.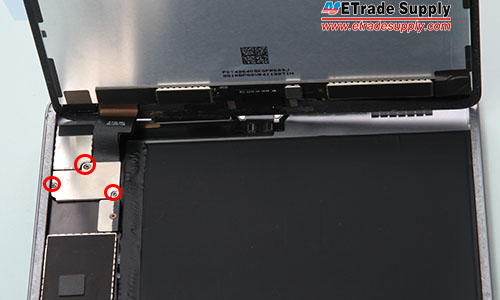
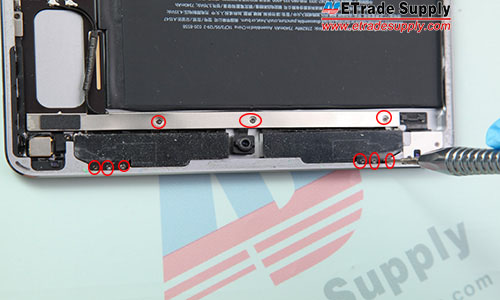
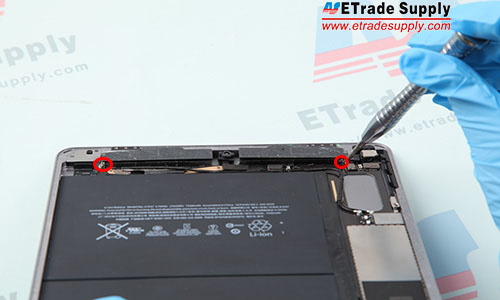
3.Undo 6 screws holding the antenna module and 3 screws in the metal bar.
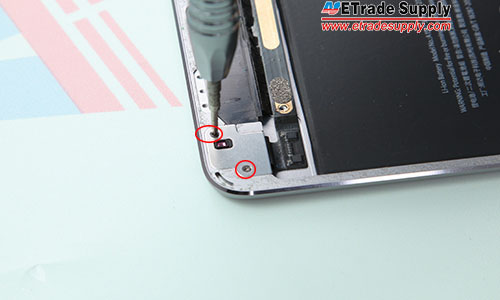
4.Peel off the adhesive and undo the screw under the adhesive.
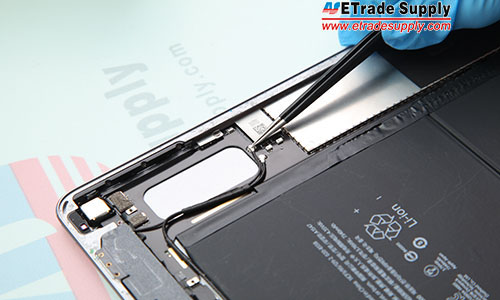
5.Undo 2 screws inside the bracket.
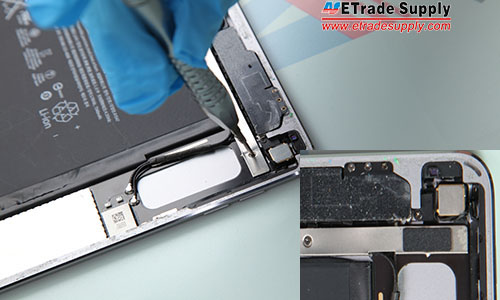
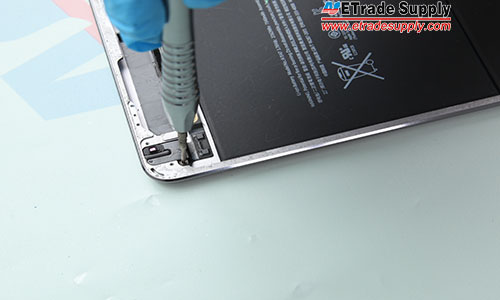
6.Disconnect the antenna, then remove the antenna module.
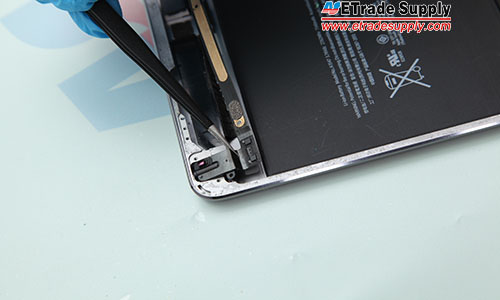
7.Disconnect the front facing camera flex cable and remove the front facing camera.
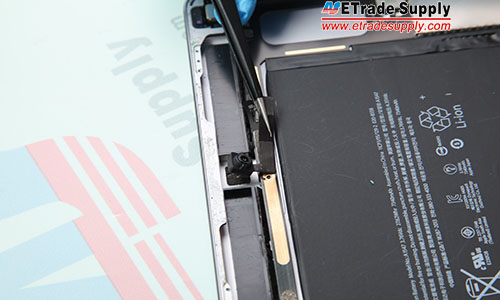
8.Disconnect the headphone jack flex cable.
9.Undo 2 screws in the headphone jack bracket.
10.Undo the screw under the bracket.
11.Remove the headphone jack flex cable assembly.
As the mother board is stuck to the back housing by strong adhesive, professional reparing skills are needed to remove the motherboard and battery. It's high risk and difficult, please note ETS is not responsible for any damage caused during your repair work.
-
(9)3.3 StarsReviewed by Arct** Te** Solutio** -Ca** Ma**Rating
Great service and product as always
Reviewed by LA** PC-REBEC** LAB**RatingPerfect product Original - Serious and professional website
Reviewed by ku** hag**Ratingquality products
Reviewed by LA** PC-REBEC** LAB**RatingWell product - and well package ! thank you - work - very well
Reviewed by LA** PC-REBEC** LAB**RatingWell product - and well package ! thank you - work - very well
Reviewed by Simo** Molel**Ratingexcellent quality, fast delivery and perfect packaging
Reviewed by Ni** Do**RatingWhile the quality of this part is near perfect, I was not pleased with the lack of adhesive which cause my repair to fail as the customer returned a device which had screen coming off, and home button could not stay without original grade adhesive. TIP. USE ONLY APPLE quality OEM adhesive to repair this device or you will have a returning customer with broken device. GREAT FUNCTION AND APPEARANCE. PERFECT
Reviewed by Jerm** Siemeri**Ratingperfect part for the job
[ ETS Answer ] Thank you for your feedback and supporting!
Reviewed by Jerm** Siemeri**Ratingexcellent
[ ETS Answer ] Thank you for your feedback and supporting!
- 1
- 2


-
Customer also bought


-
(Posted on 05/04/18)good service