

 Loading...


-
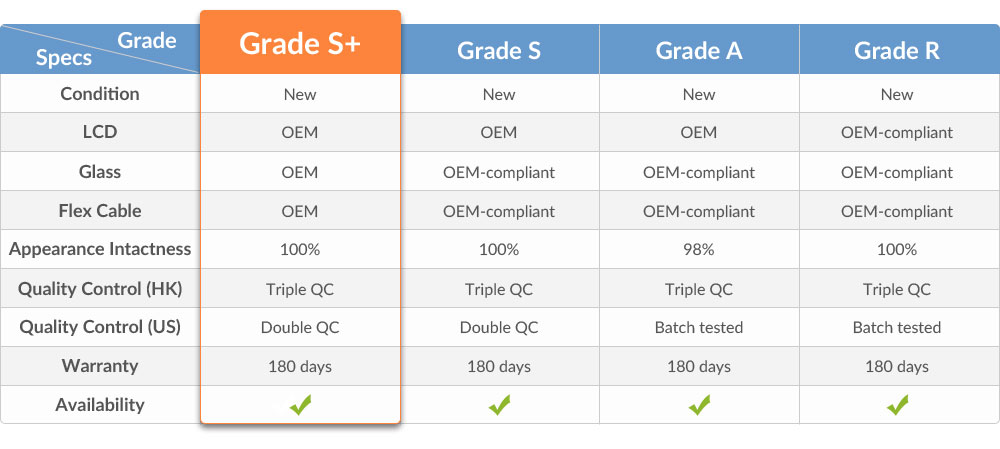
For Sony Xperia Z2 LCD Screen and Digitizer Assembly with Front Housing Replacement - Black - With logo - Grade S+
This item includes the following components:
1. LCD Screen;
2. Digitizer Touch Screen;
3. Front Housing;
4. SIM Card Cap;
5. SD Card Cap;
6. Power Button;
7. Volume Button;
8. Antenna Contacts;
9. Camera Button.
Notice: Please test the functionality of this item before installation.
Specifications:
Color: Black
Version: International
Screen Size: 5.2 inches
Display Type: IPS LCD capacitive touchscreen, 16M colors
Protective Material: Shatter proof glass
Resolution: 1080 x 1920 pixels, 424 ppi pixel density
Compatibility: Sony Xperia Z2
Features:
This Sony Xperia Z2 screen replacement includes the components as mentioned above. We can also supply the Xperia Z2 LCD Assembly without Frame.
This Xperia Z2 LCD Assembly with Frame is brand new and original replacement.
This Xperia Z2 LCD Touch Digitizer with Frame is available in black, white and purple, this is the black one.
How to Install / Tips:
Special repairing tools are required for reassembling or disassembling, as the Sony Xperia Z2 LCD and Digitizer are hermetically attached.
Handle the vulnerable and fragile flex cable ribbon carefully.
The installation of any new part should be done by a qualified person. ETS is not responsible for any damage caused during installation.
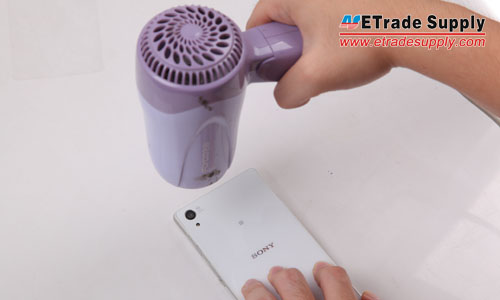
1. Heat up the edges of back cover with hair dryer.
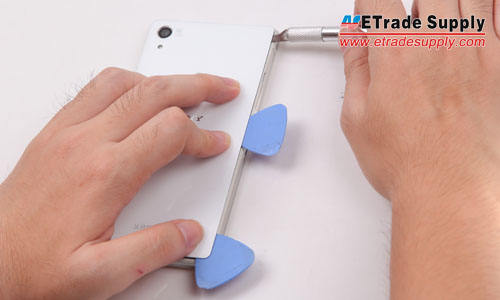
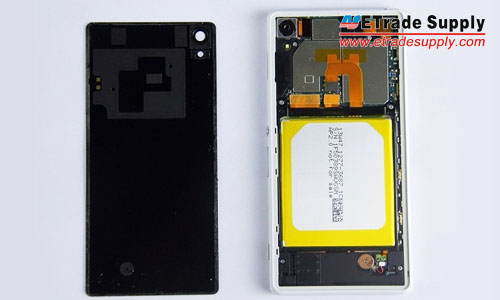
2. Pry up the back cover with spudger tool.
3. The back cover and LCD Assembly are separated.
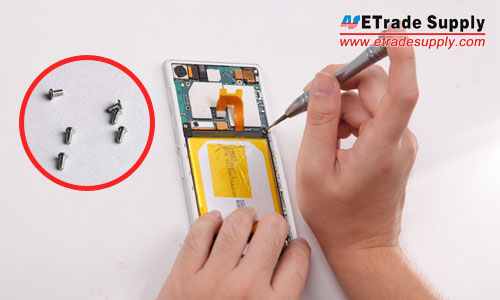
4. Undo the 6 screws to release the motherboard and loud speaker assembly.
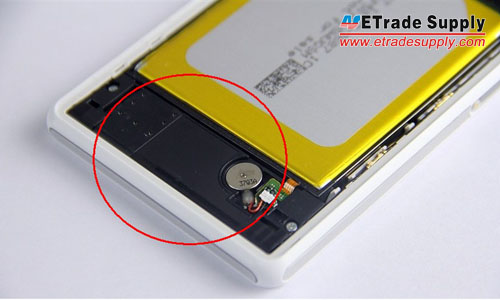
5. Pry up the vibrating motor, then take out the loud speaker assembly. (Notice: be careful not to damage the underneath flex ribbon.)
6. Pry up the battery flex connector, then pry up the battery gently. (Notice: be careful not to break the battery.)
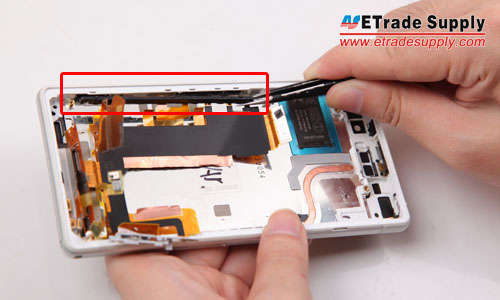
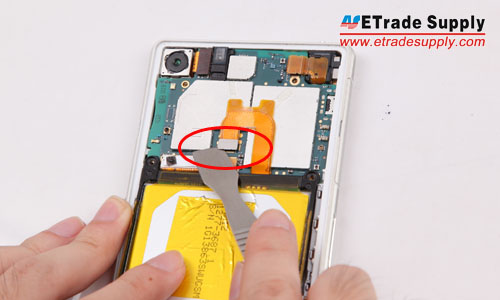
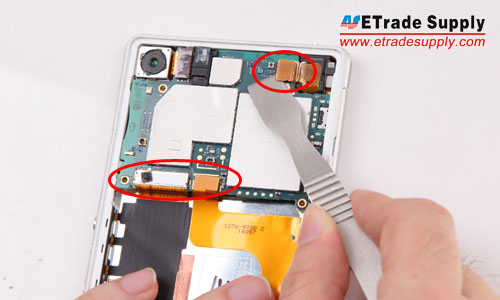
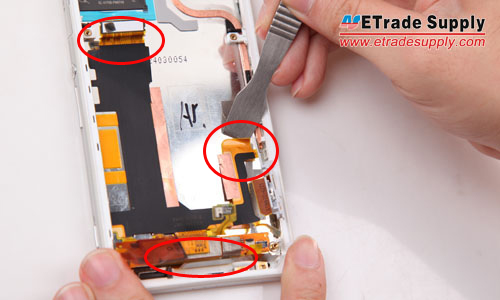
- 7. Pry up the three flex ribbon connectors on the motherboard.
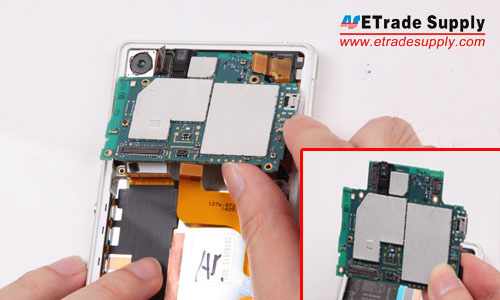
8. Take out the motherboard.
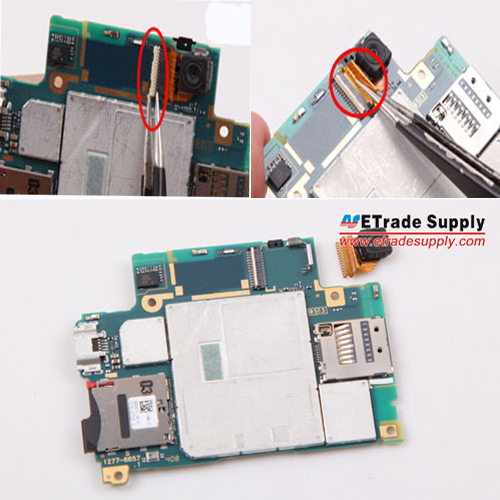
9. Pry up the front camera connector, then pull out the flex gently. (Notice: it’s very easy to snap the flex ribbon, be careful!)
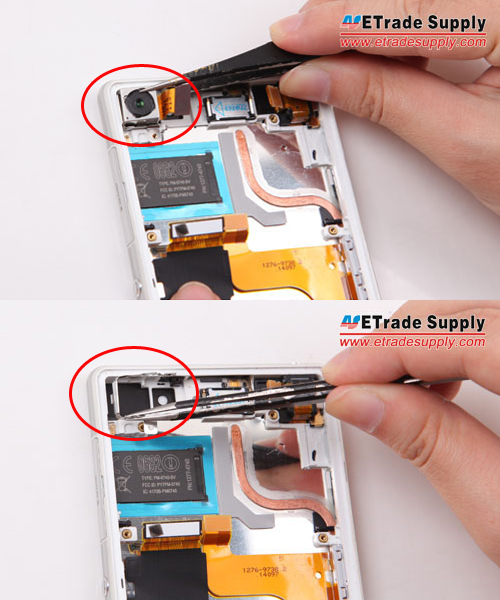
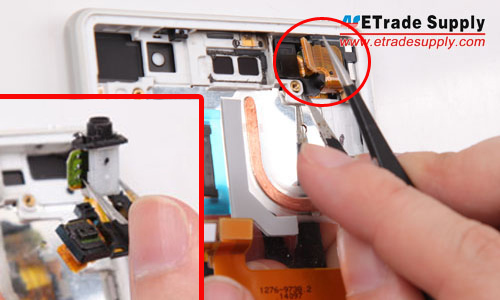
10. Take out the rear camera and camera retaining bracket.
11. Pry up the connector and take out the earphone jack module.
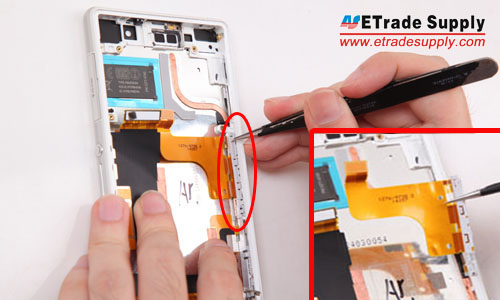
12. Loosen and take out the charging port flex cable ribbon.
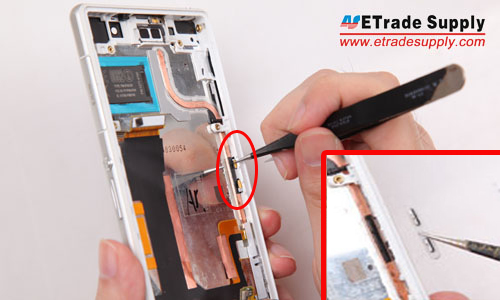
13. Gently poke the antenna contacts.
14. Take out the side rail bracket.
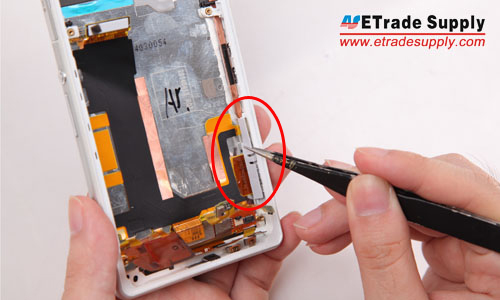
15. Pry up the three connectors to release the motherboard flex cable ribbon.
16. Take out the power button and camera button retaining bracket.
-
(3)3.3 StarsReviewed by vict** obreq**Rating
Espectacular muy buena calidad y excelente funcionamiento
Reviewed by LA** PC-REBEC** LAB**RatingBest shipping and packaging Good Quality - I will order always

-
Customer also bought


-
(Posted on 06/15/17)Just found some fingerprints in the inside but I'm glad to see that because I know it was totally inspected.
Both the LCD and digitizer work perfectly, perfect quality. My phone has been renewed totally.
[ ETS Answer ] Thank you for your kind feedback and support.