


How to Teardown Samsung S10 for Rear-Facing Camera Replacement?
BY kaye | 十一月 26th, 2019 | 0 | 0
Tools Needed:
Phillip Screwdriver
Plastic plectrum
Ultra-thin plastic sheet
Suction cup
Tweezers
Spudger
Steel pry tool
Hot air gun
1. Samsung S10 teardown
1.1 Power off the phone, use the hot air gun for blowing on the edge of back cover about 2 minutes

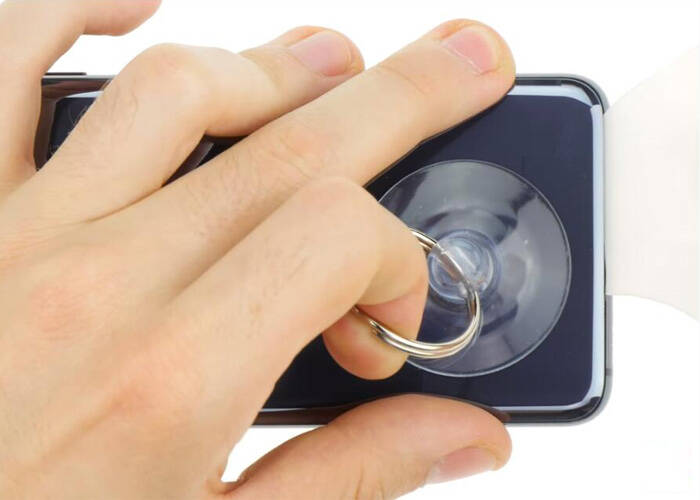
1.2 Use a suction cup to stick on the back cover and slightly pull to make a little gap. Use the plastic plectrum and ultra-thin sheet to slice around the back cover for separation
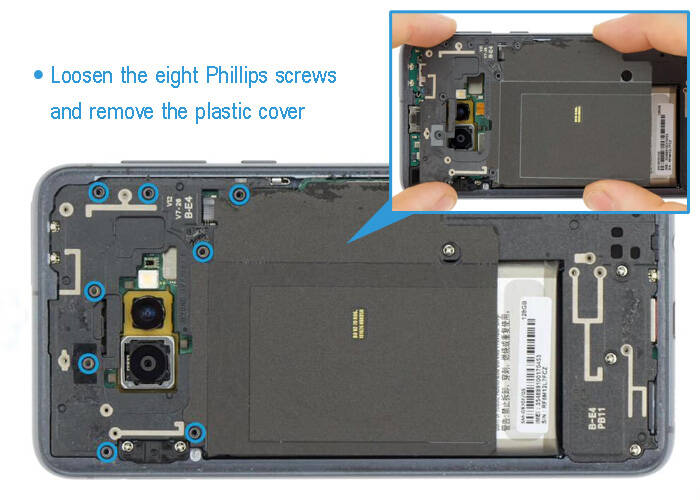
1.3 After the back cover is entirely separated, loosen the eight Phillips screws on the plastic cover and then remove the cover with the steel pry tool
1.4 Unplug the battery flex cable with the spudger first, and you can take the front-facing camera replacement on this step
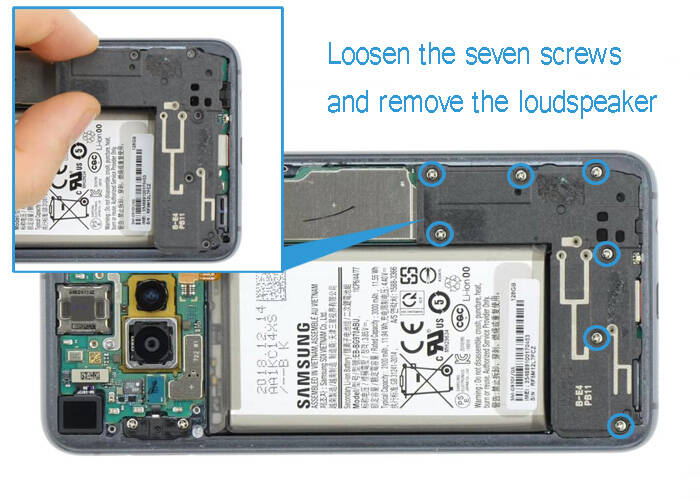
1.5 Loosen the sever Phillips screws and remove the speaker away
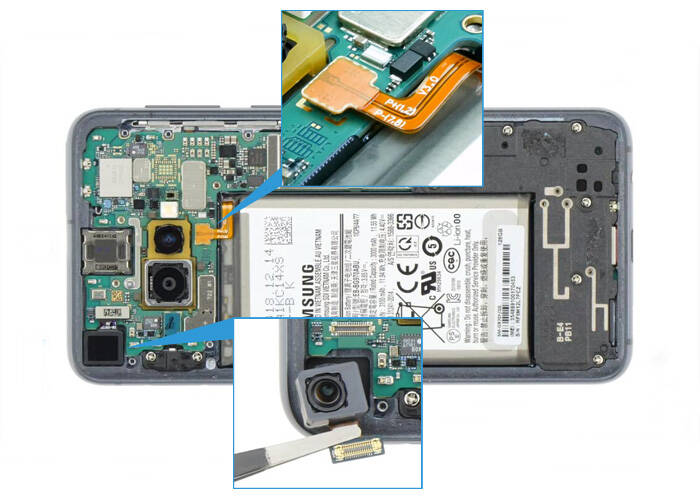
1.6 Disconnect and remove the headphone jack, then the front-facing camera, and the mainboard flex cables as well, just be careful do not damage other components on the board
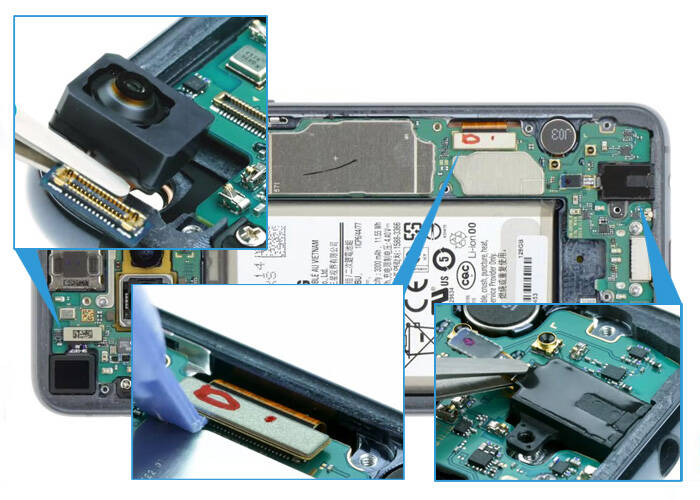
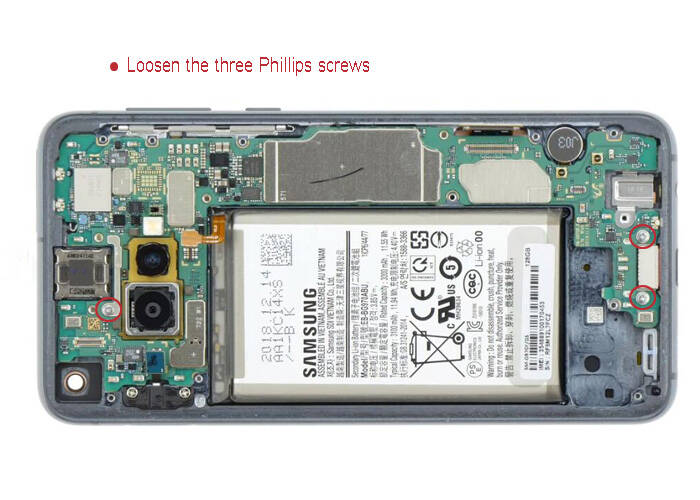
1.7 Loose the three Phillips screw fixing the main board
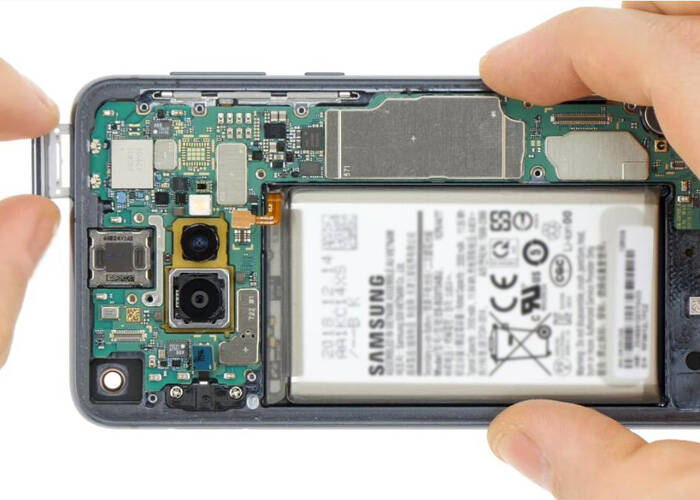
1.8 Eject and take out the SIM card tray with a SIM card tray ejection tool
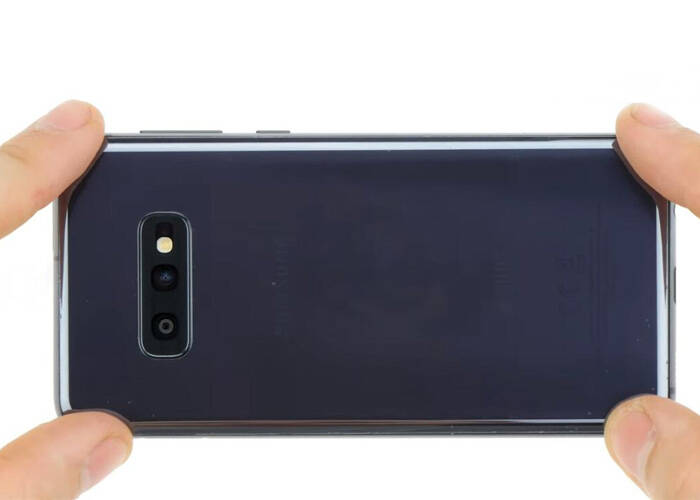
2. Samsung S10 rear-facing camera replacement
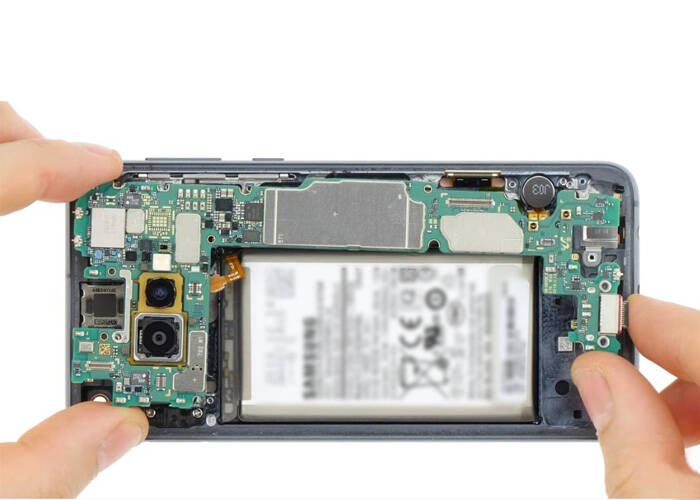
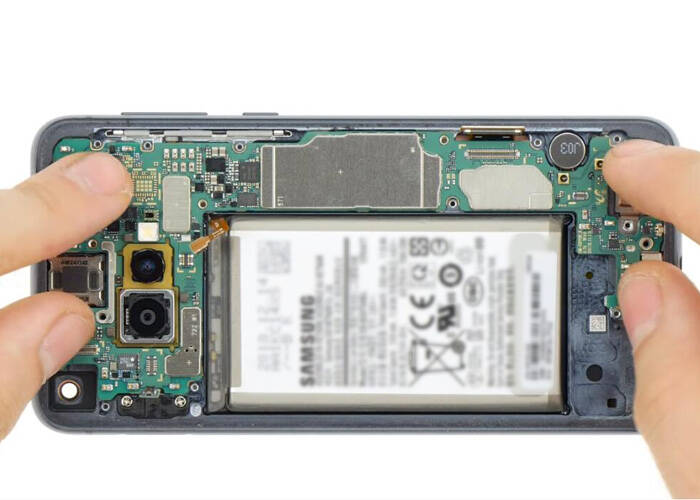
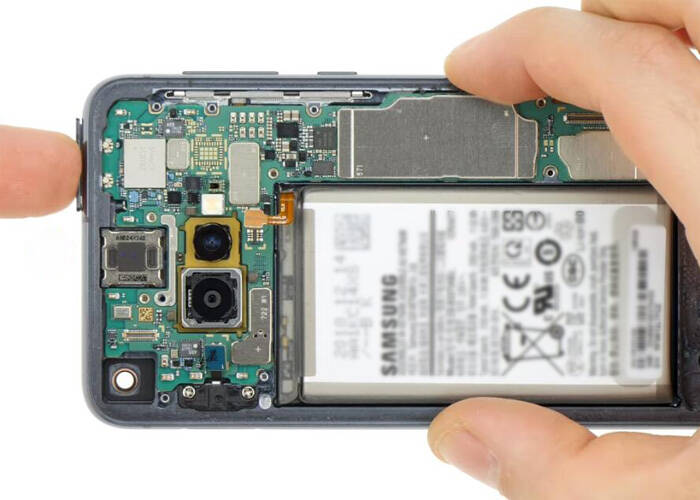
2.1 Takedown and the entire mainboard, make sure no flex cables remained connected
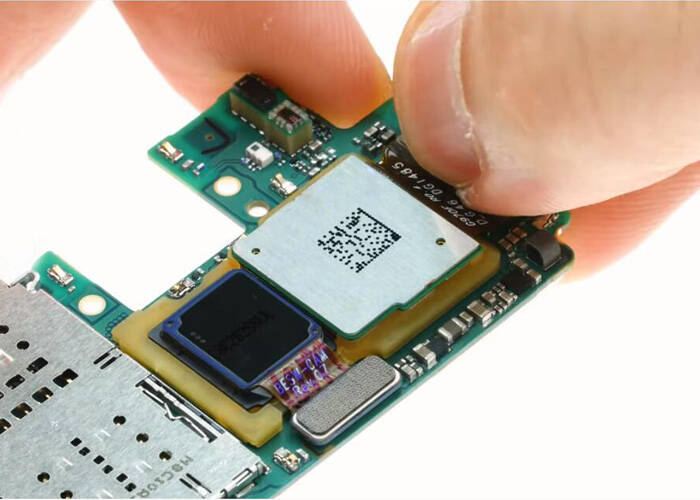
2.2 Carefully disconnect the rear-facing camera flex cables and take it down from the mainboard module
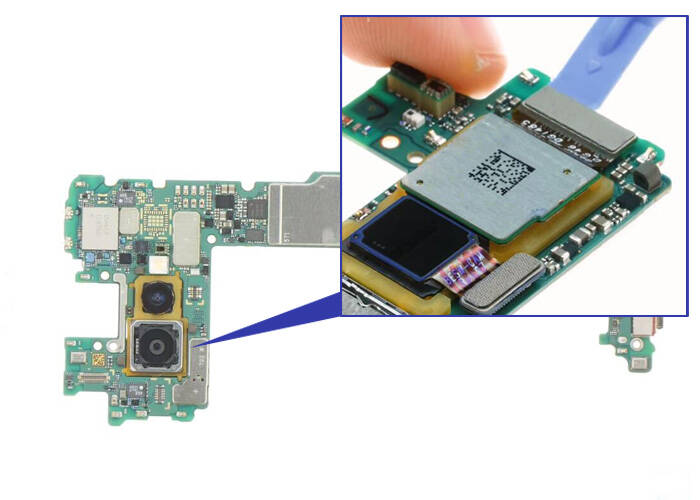
2.3 Install the new rear-facing camera onto the board, make sure no fingerprint, dust or dirt on the camera, and then connect the flex cables
3. Samsung S10 reassembly
3.1 Place the mainboard back into the phone, pay attention to the flex cables and don’t break the flex, make sure it is placed on the right position as it used to be
3.2 Insert the SIM holder back into the phone, don’t push it hard if it is stuck, just readjust the mainboard position and insert again
3.3 Tighten the three Phillips screws for fixing the mainboard
3.4 Reconnect the mainboard flex cables, install the front-facing camera and the headphone jack back as well
3.5 Put the loudspeaker back and fixing it with the seven Phillips screws
3.6 Connect the battery flex cable, then place the plastic cover back and tighten the eight screws back
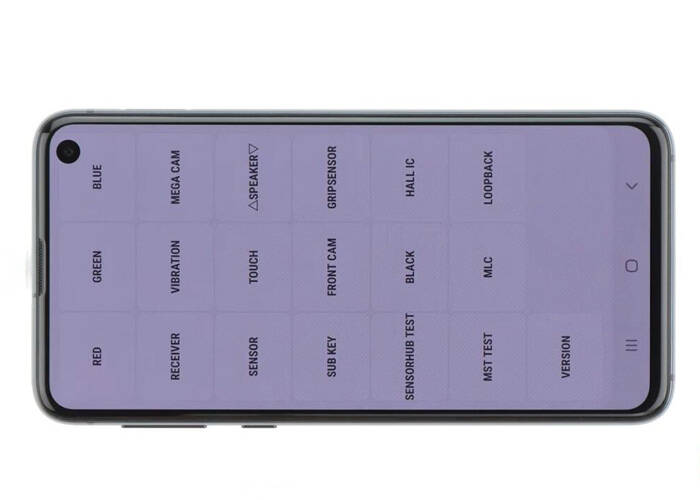
3.7 Test the new replaced rear camera, turn on the phone and open the number dial, enter with “*#0*#” to the test menu. You may test the pixel errors and other functions on the touch screen. Google it for details about the Samsung display screen test.
3.8 If all the functions are tested and are fine, then install the back cover. Clean the old adhesive glue on the edge and attach it to a new one. Use hot air gun blowing to make it easier for attachment. When the back cover is fully sealed, all process is done.
Noted: All procedures may be a little complicated for someone who is not familiar with the mobile repair. It requires patience and insistence. Just be careful and do not damage the internal parts. Your Samsung phone will not be 100% waterproof after teardown, you should notice that.
Parts of Samsung S10 for replacement mentioned in the process:
For Samsung Galaxy S10 rear-facing camera replacement
Samsung Galaxy S10/S10e/S10 plus SIM card tray
Samsung S10 back cover frame adhesive
Samsung mobile phone repair tool kit


