


Self-study mobile phone repair disassembly
BY ETrade Supply | 八月 1st, 2023 | 0 | 0
First, understand what are the main accessories of mobile phones?
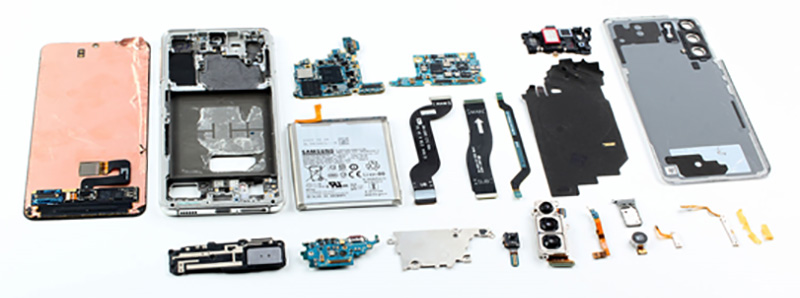 1.Screen 2. Motherboard 3. Small board 4. Display cable 5. Touch cable 6. Microphone 7. Infrared remote control 8. Handset 9. Speaker 10 Vibrator 11. Tail connector 12. Signal extension cable 13. Headphone jack 14. Flash 15. Front and rear cameras 16. Distance Sensor 17. Light Sensor 18. Power On Key 19. Volume Key 20. Battery 21. Fingerprint Key 22. Breathing Light 23. Wireless Charging 24. Iris Recognition 26. Face ID
Second, how to determine the mobile phone model
Settings—About This Mac or Settings—General—About This Mac
Third, disassembly precautions
Battery: Avoid using sharp metal tools to prevent puncture, try to avoid serious deformation, add a little alcohol.
Screen: Pay attention to the cable, bracket, screw, fingerprint cable, and the shielding cover screw should not be installed wrong.
Install the screen force point (earpiece and home button):home button shielding cover screw do not install wrong.
Handset: Magnetic and careful not to attach the screw Contact point (installed backwards or poor contact) Find the entry point and the earpiece net (clean the ash) from the bottom to avoid removing the two halves.
Vibration: heat, find the entry point, remove from the bottom, and fix it with glue during installation.
Camera: the mirror surface is gray, the lens should not be touched by hand, and the leather case is installed.
Cable: Avoid using sharp tools to avoid puncture, shovel forward along the line, not up, pay attention to the direction of the cable when installing, and heat it up in the direction of the line.
Holster: Light distance sensor holster, microphone holster, camera holster.
Fourth, the disassembly method
A.Glass back cover type
1.Heating: Because the glass back cover has a curve, and the camera bulge glue is around it. It is not suitable to use heating pads and separators, but can be heated by hair dryers.
2.Degumming solution: drop a small amount of degumming solution around the glass.
3. Suction cup or screen opener: use the suction cup to suck open small gaps.
4. Disassembly sheet: use the disassembly sheet and deglue solution to remove the glass back cover. Do not use blades, because the glass is fragile, and the internal paint is easy to scratch.
B. Disassemble the metal back shell type
1. Take the card: remove the metal back cover type mobile phone, be sure to remember to take out the card tray.
2. Tail screws: Most mobile phones with metal back covers have tail screws.
3. Flat blade: pay attention to the force point, do not pry the position of the charging port, button, and card tray port Pry these positions, the back cover is easy to deform.
C. Removal screen type
1. Heating: For mobile phones with flat screens, you can choose heating pads or separators to heat, which saves time and effort than hair dryers.
2. Degumming solution or alcohol: drop a small amount of degumming solution around the screen. Note that the LCD screen of the phone should drop less. Once it enters the backlight layer, it will damage the backlight.
3. Suction cup or screen opener: use the suction cup to suck open small gaps.
4. Disassembly sheet: use disassembly sheet or OCA film and deglue solution to disassemble the screen. Blades should not be used because the screen is fragile.
Five. Types of disassembly
1.Remove metal or plastic back shell - Huawei P9, Redmi Note4, vivo X9 oppo R11
1.Screen 2. Motherboard 3. Small board 4. Display cable 5. Touch cable 6. Microphone 7. Infrared remote control 8. Handset 9. Speaker 10 Vibrator 11. Tail connector 12. Signal extension cable 13. Headphone jack 14. Flash 15. Front and rear cameras 16. Distance Sensor 17. Light Sensor 18. Power On Key 19. Volume Key 20. Battery 21. Fingerprint Key 22. Breathing Light 23. Wireless Charging 24. Iris Recognition 26. Face ID
Second, how to determine the mobile phone model
Settings—About This Mac or Settings—General—About This Mac
Third, disassembly precautions
Battery: Avoid using sharp metal tools to prevent puncture, try to avoid serious deformation, add a little alcohol.
Screen: Pay attention to the cable, bracket, screw, fingerprint cable, and the shielding cover screw should not be installed wrong.
Install the screen force point (earpiece and home button):home button shielding cover screw do not install wrong.
Handset: Magnetic and careful not to attach the screw Contact point (installed backwards or poor contact) Find the entry point and the earpiece net (clean the ash) from the bottom to avoid removing the two halves.
Vibration: heat, find the entry point, remove from the bottom, and fix it with glue during installation.
Camera: the mirror surface is gray, the lens should not be touched by hand, and the leather case is installed.
Cable: Avoid using sharp tools to avoid puncture, shovel forward along the line, not up, pay attention to the direction of the cable when installing, and heat it up in the direction of the line.
Holster: Light distance sensor holster, microphone holster, camera holster.
Fourth, the disassembly method
A.Glass back cover type
1.Heating: Because the glass back cover has a curve, and the camera bulge glue is around it. It is not suitable to use heating pads and separators, but can be heated by hair dryers.
2.Degumming solution: drop a small amount of degumming solution around the glass.
3. Suction cup or screen opener: use the suction cup to suck open small gaps.
4. Disassembly sheet: use the disassembly sheet and deglue solution to remove the glass back cover. Do not use blades, because the glass is fragile, and the internal paint is easy to scratch.
B. Disassemble the metal back shell type
1. Take the card: remove the metal back cover type mobile phone, be sure to remember to take out the card tray.
2. Tail screws: Most mobile phones with metal back covers have tail screws.
3. Flat blade: pay attention to the force point, do not pry the position of the charging port, button, and card tray port Pry these positions, the back cover is easy to deform.
C. Removal screen type
1. Heating: For mobile phones with flat screens, you can choose heating pads or separators to heat, which saves time and effort than hair dryers.
2. Degumming solution or alcohol: drop a small amount of degumming solution around the screen. Note that the LCD screen of the phone should drop less. Once it enters the backlight layer, it will damage the backlight.
3. Suction cup or screen opener: use the suction cup to suck open small gaps.
4. Disassembly sheet: use disassembly sheet or OCA film and deglue solution to disassemble the screen. Blades should not be used because the screen is fragile.
Five. Types of disassembly
1.Remove metal or plastic back shell - Huawei P9, Redmi Note4, vivo X9 oppo R11
 2.Heated glass back cover - Honor V40, oppo R17, vivo X30, Samsung S10 mate40
 3.Remove the screen assembly and bracket - Apple series
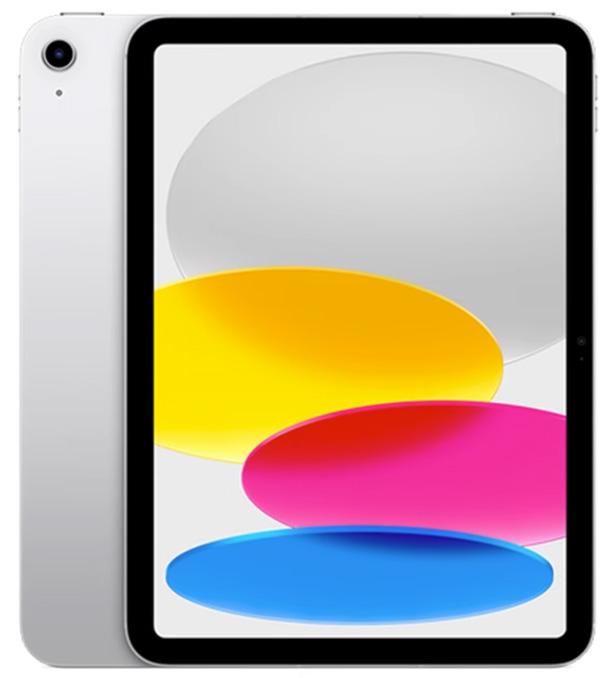
 4.Disassemble the screen assembly - LeTV, Black Shark, iPad, (this disassembly method is more difficult to master).
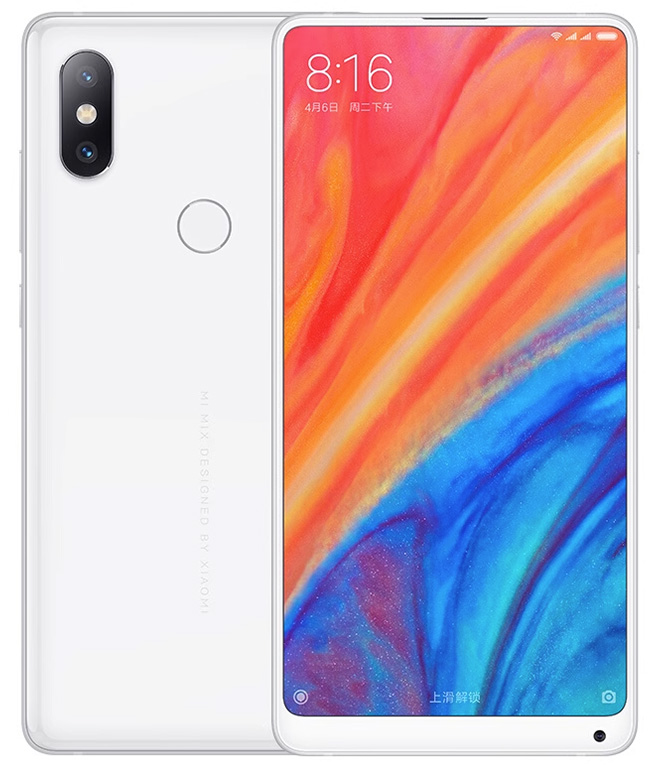
 5.Depending on the needs (screen change or battery), remove the glass back cover or screen - Honor magic2 Xiaomi Mix3
 Six. Summary of maintenance experience
1.Test first with any accessories.
2. The plastic protective film on the new accessories is torn off .
3. The vibrator and battery must be glued .
4. The cable interface is first buckled on the motherboard, and then pasted to prevent it from being buttoned up after it is pasted .
5. After the button is installed, test the feel immediately, do not test it again after the whole machine is installed .
6. The holster cannot be missed, and the holster pays attention to the direction .
7. Pay attention to the order and direction of the placement of accessories .
8. Turn off the machine first, take the card, power off, discharge static electricity, and install the battery at the end of the installation.
9. Check all cable holders and cable heads: dirty, black, corrosion, loose, deformation.
10. Stuck in the computer, with password, not booting, etc., resulting in the inability to connect to the computer normally and the inability to back up data.
11. Android screen change, first remove the motherboard, and finally remove the battery. Avoid puncture the battery when removing the battery and causing fire and damage to the motherboard.
Six. Summary of maintenance experience
1.Test first with any accessories.
2. The plastic protective film on the new accessories is torn off .
3. The vibrator and battery must be glued .
4. The cable interface is first buckled on the motherboard, and then pasted to prevent it from being buttoned up after it is pasted .
5. After the button is installed, test the feel immediately, do not test it again after the whole machine is installed .
6. The holster cannot be missed, and the holster pays attention to the direction .
7. Pay attention to the order and direction of the placement of accessories .
8. Turn off the machine first, take the card, power off, discharge static electricity, and install the battery at the end of the installation.
9. Check all cable holders and cable heads: dirty, black, corrosion, loose, deformation.
10. Stuck in the computer, with password, not booting, etc., resulting in the inability to connect to the computer normally and the inability to back up data.
11. Android screen change, first remove the motherboard, and finally remove the battery. Avoid puncture the battery when removing the battery and causing fire and damage to the motherboard.
1.Screen 2. Motherboard 3. Small board 4. Display cable 5. Touch cable 6. Microphone 7. Infrared remote control 8. Handset 9. Speaker 10 Vibrator 11. Tail connector 12. Signal extension cable 13. Headphone jack 14. Flash 15. Front and rear cameras 16. Distance Sensor 17. Light Sensor 18. Power On Key 19. Volume Key 20. Battery 21. Fingerprint Key 22. Breathing Light 23. Wireless Charging 24. Iris Recognition 26. Face ID
Second, how to determine the mobile phone model
Settings—About This Mac or Settings—General—About This Mac
Third, disassembly precautions
Battery: Avoid using sharp metal tools to prevent puncture, try to avoid serious deformation, add a little alcohol.
Screen: Pay attention to the cable, bracket, screw, fingerprint cable, and the shielding cover screw should not be installed wrong.
Install the screen force point (earpiece and home button):home button shielding cover screw do not install wrong.
Handset: Magnetic and careful not to attach the screw Contact point (installed backwards or poor contact) Find the entry point and the earpiece net (clean the ash) from the bottom to avoid removing the two halves.
Vibration: heat, find the entry point, remove from the bottom, and fix it with glue during installation.
Camera: the mirror surface is gray, the lens should not be touched by hand, and the leather case is installed.
Cable: Avoid using sharp tools to avoid puncture, shovel forward along the line, not up, pay attention to the direction of the cable when installing, and heat it up in the direction of the line.
Holster: Light distance sensor holster, microphone holster, camera holster.
Fourth, the disassembly method
A.Glass back cover type
1.Heating: Because the glass back cover has a curve, and the camera bulge glue is around it. It is not suitable to use heating pads and separators, but can be heated by hair dryers.
2.Degumming solution: drop a small amount of degumming solution around the glass.
3. Suction cup or screen opener: use the suction cup to suck open small gaps.
4. Disassembly sheet: use the disassembly sheet and deglue solution to remove the glass back cover. Do not use blades, because the glass is fragile, and the internal paint is easy to scratch.
B. Disassemble the metal back shell type
1. Take the card: remove the metal back cover type mobile phone, be sure to remember to take out the card tray.
2. Tail screws: Most mobile phones with metal back covers have tail screws.
3. Flat blade: pay attention to the force point, do not pry the position of the charging port, button, and card tray port Pry these positions, the back cover is easy to deform.
C. Removal screen type
1. Heating: For mobile phones with flat screens, you can choose heating pads or separators to heat, which saves time and effort than hair dryers.
2. Degumming solution or alcohol: drop a small amount of degumming solution around the screen. Note that the LCD screen of the phone should drop less. Once it enters the backlight layer, it will damage the backlight.
3. Suction cup or screen opener: use the suction cup to suck open small gaps.
4. Disassembly sheet: use disassembly sheet or OCA film and deglue solution to disassemble the screen. Blades should not be used because the screen is fragile.
Five. Types of disassembly
1.Remove metal or plastic back shell - Huawei P9, Redmi Note4, vivo X9 oppo R11
2.Heated glass back cover - Honor V40, oppo R17, vivo X30, Samsung S10 mate40
3.Remove the screen assembly and bracket - Apple series
4.Disassemble the screen assembly - LeTV, Black Shark, iPad, (this disassembly method is more difficult to master).
5.Depending on the needs (screen change or battery), remove the glass back cover or screen - Honor magic2 Xiaomi Mix3
Six. Summary of maintenance experience
1.Test first with any accessories.
2. The plastic protective film on the new accessories is torn off .
3. The vibrator and battery must be glued .
4. The cable interface is first buckled on the motherboard, and then pasted to prevent it from being buttoned up after it is pasted .
5. After the button is installed, test the feel immediately, do not test it again after the whole machine is installed .
6. The holster cannot be missed, and the holster pays attention to the direction .
7. Pay attention to the order and direction of the placement of accessories .
8. Turn off the machine first, take the card, power off, discharge static electricity, and install the battery at the end of the installation.
9. Check all cable holders and cable heads: dirty, black, corrosion, loose, deformation.
10. Stuck in the computer, with password, not booting, etc., resulting in the inability to connect to the computer normally and the inability to back up data.
11. Android screen change, first remove the motherboard, and finally remove the battery. Avoid puncture the battery when removing the battery and causing fire and damage to the motherboard.
Share:


