


How to Replace the Samsung Galaxy S20 Charging Port PCB Board
BY kaye | 九月 29th, 2020 | 0 | 0
The Samsung Galaxy S20’s charging port PCB board is a swappable part, which is installed on the bottom side, beneath the loudspeaker bottom bracket. As long as we tear down the back battery house, the wireless charging coil and the loudspeaker bottom bracket as well, we are able to take down the PCB charging port and replace a new one on it. Here are the details of the steps, let’s go start and do it.
1. Tear down the battery door and remove the wireless charging coil
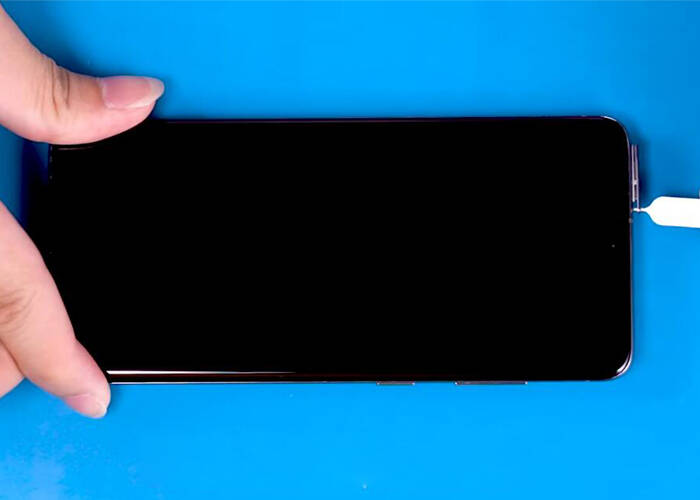
1.1 Turn off the Samsung phone, eject and take out the Samsung S20 SIM card tray
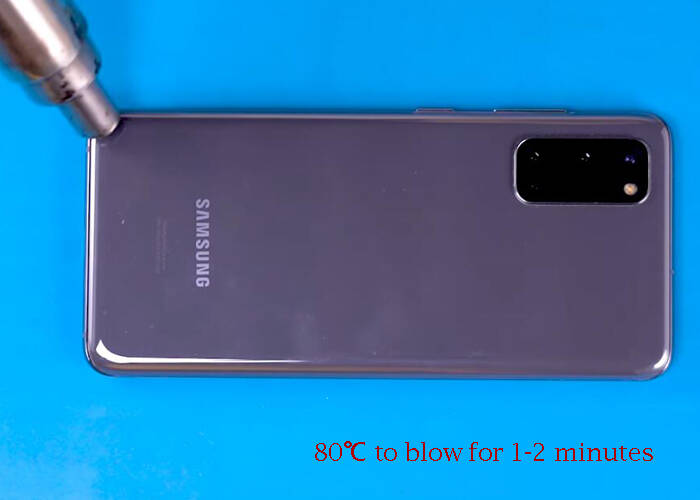
1.2 Use hot air gun to blow the back housing on the edge and each corner for easy to separation
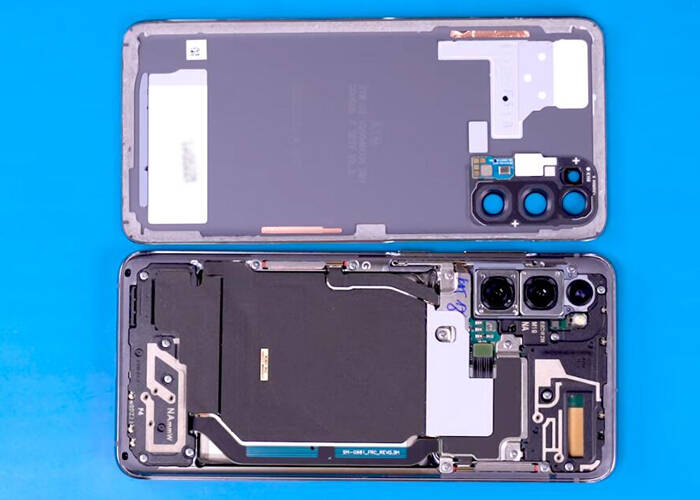
1.3 Pry and separate the back housing, flip over and remove it
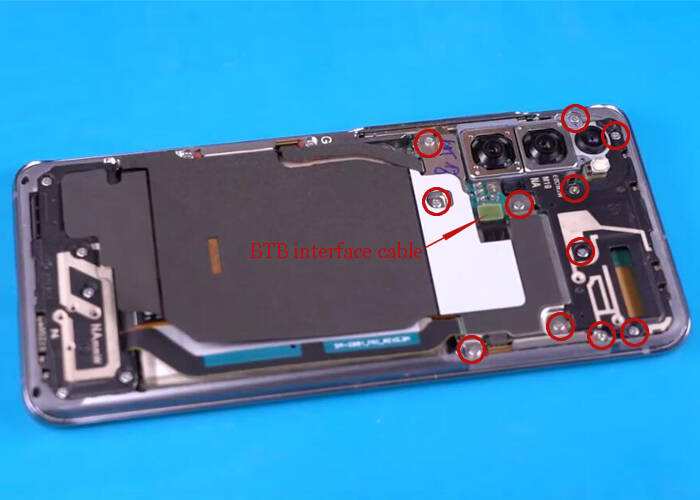
1.4 Unbolt the 11 Phillips screws for fixing the wireless charging coil, disconnect the BTB interface cable then remove the charging coil
2. Replace the Samsung S20 charging port PCB board
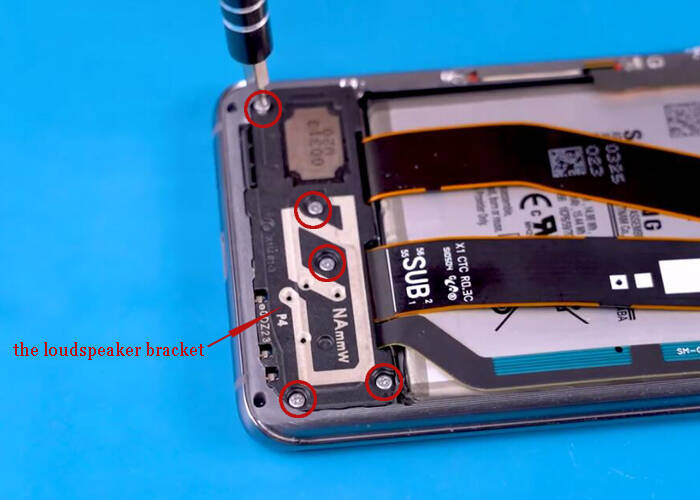
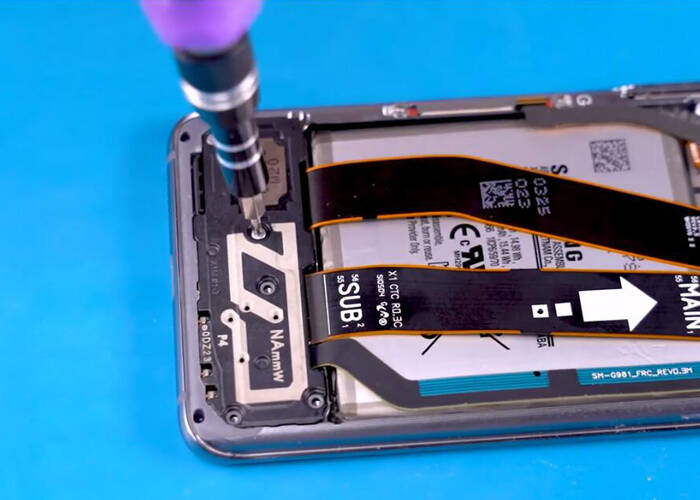
2.1 Loosen and remove the five Phillips screws for fixing the loudspeaker bracket, then remove the bracket
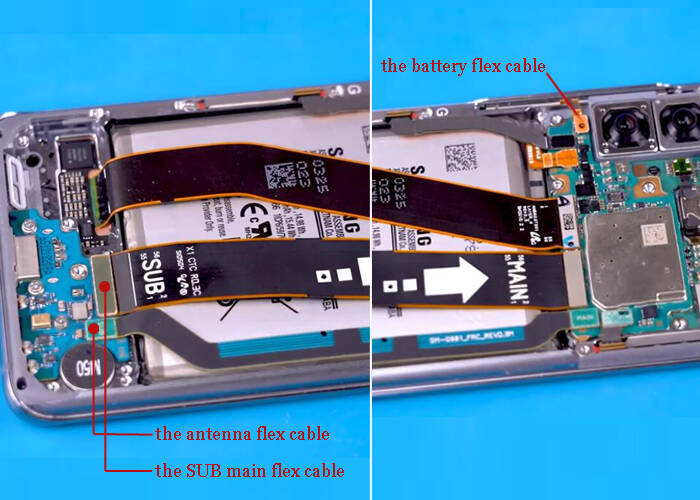
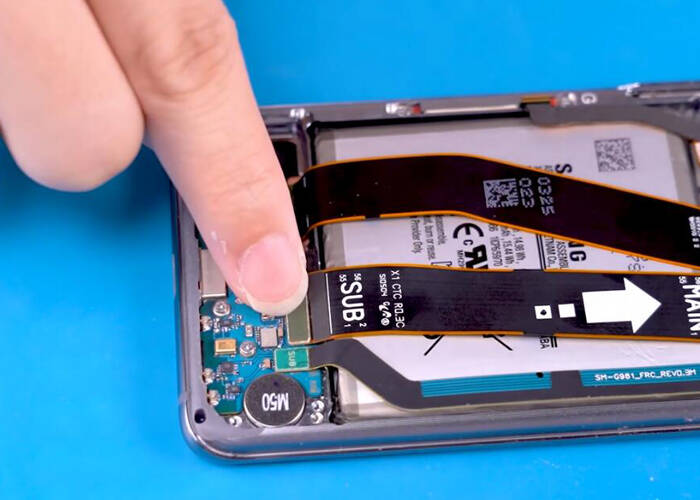
2.2 Disconnect the battery cable, the Samsung SUB main flex cable, and the antenna flex cable. Remove the flexes away
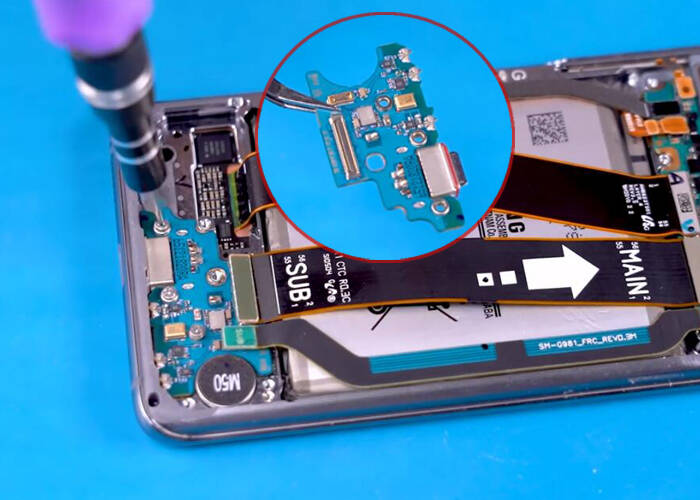
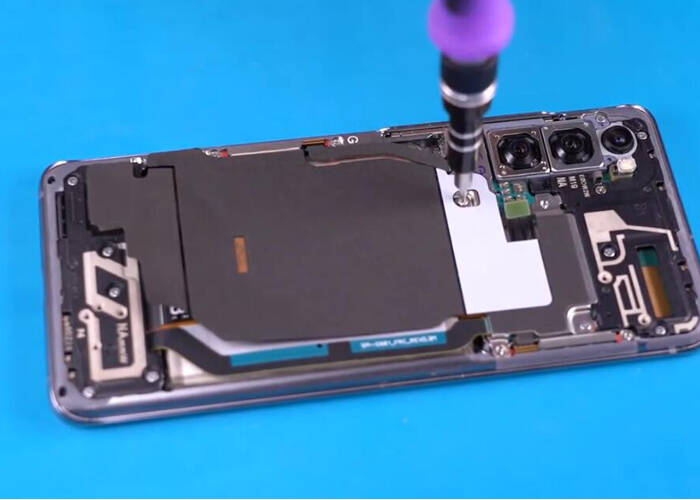
2.3 Unbolt the three screws for fixing the charging port PCB board, then take off and remove it
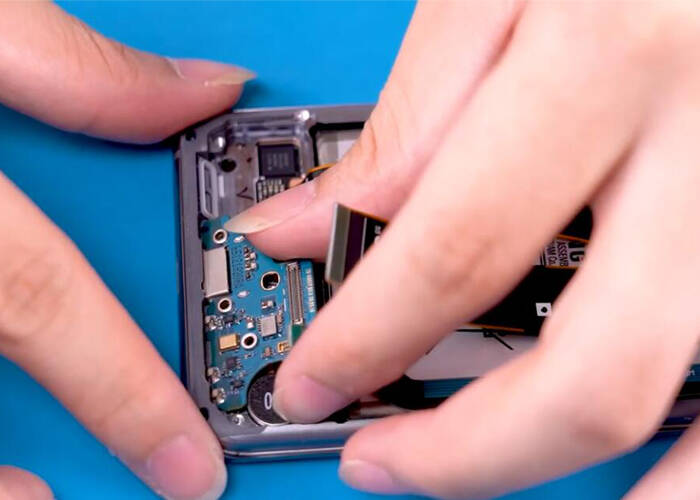
2.4 Install a new charging port and PCB board on the phone, fixing it with the screws
3. Assemble the phone and test the charging port
3.1 Connect the SUB flex and antenna flex to the new Samsung S20 charging port PCB board
3.2 Assemble the loudspeaker bracket back and fixing it with the five screws
3.3 Install the Samsung wireless charging coil back and fix it with the eleven Phillips screws
3.4 Assemble the back housing back and insert the SIM card tray

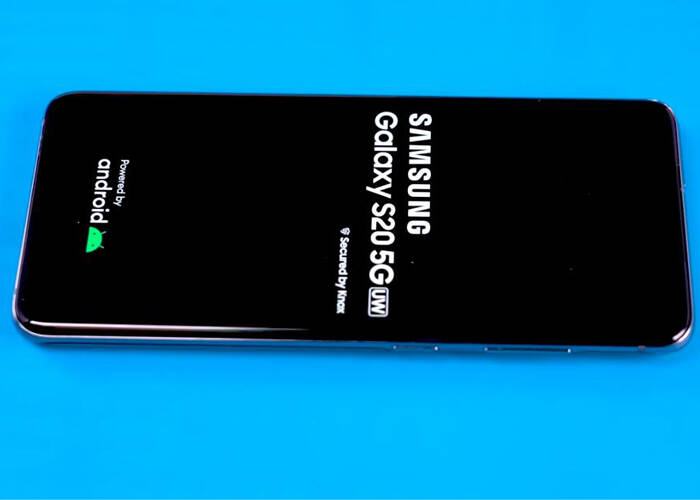
3.5 Turn on the Samsung S20 phone and plug the USB charger to check if the new replaced charging port is normal
In the end, we have to mention some notice during the repair process. The Samsung back housing is easy to damage, just be careful while slicing and separating it. There are three flex cables on connected on the PCB board, don’t forget to connect the flexes back when reassembling the phone. The battery cable should be disconnect first and lastly connect it back, don’t miss the orders. For more questions about Samsung repair, please leave your comment below or contact us via email. Besides, you may also come to Etrade Supply for new replacements parts for Samsung Galaxy S20 if you are interested.
erested.


