


How to Replace iPhone XR Front Face Camera?
BY kaye | 五月 7th, 2019 | 0 | 1
The front-facing camera is an important part of iPhone XR. You can’t unlock your phone via face ID function if there are problems with the front-facing camera. You need to have the front-facing camera replaced with a new one if it is damaged. Here Etrade Supply technique team shows you how to replace your Apple iPhone XR integrated front face camera.
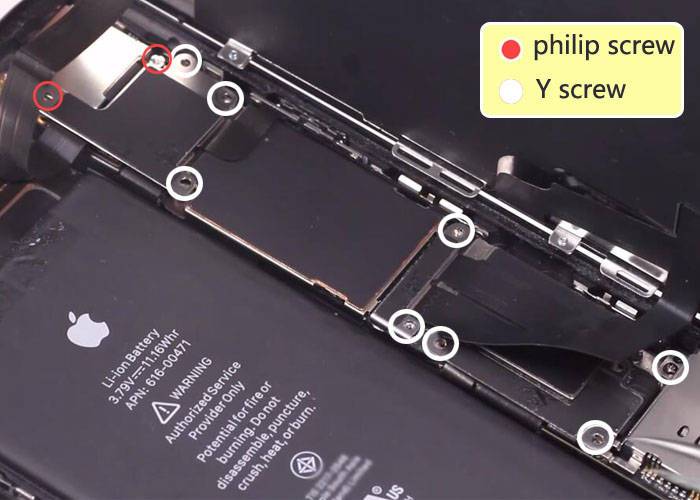
1. Display screen teardown
This is step has been mentioned times on the previous iPhone model teardown presentation before. Details of the process refer to iPhone XR display screen replacement. Just be careful about the display screen because this is an easy breakable part. Heat up the edge for it is easier to tear down. Unscrew the two Philip screws and seven Y screws as the picture below, and then remove the brackets. Disconnect the battery first, then the display flex, touch flex, and ear speaker flex. Don’t mix up the order.
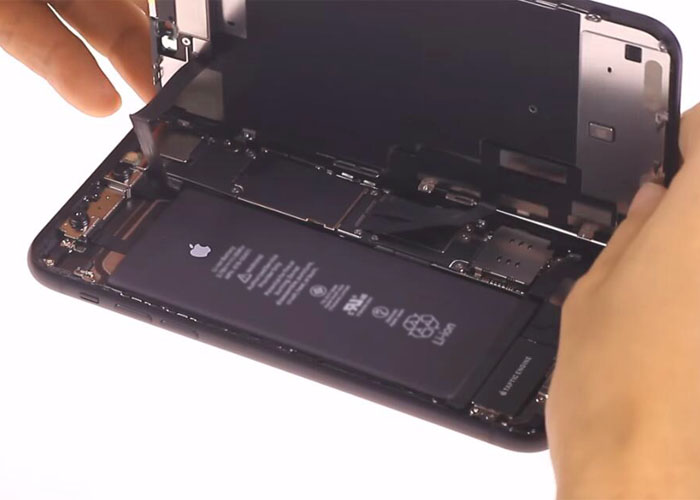
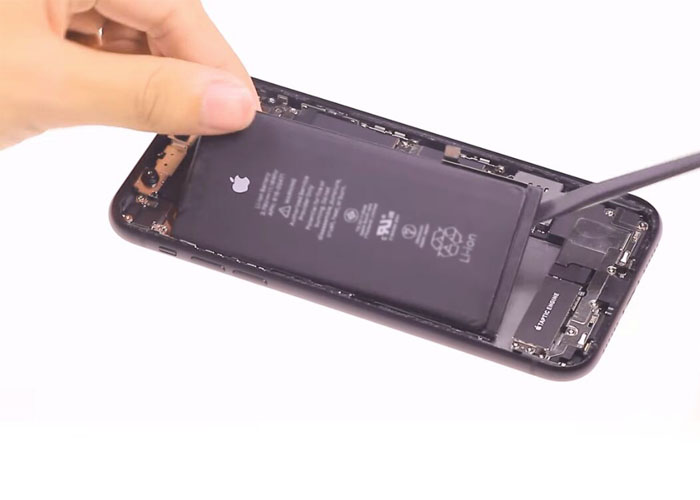
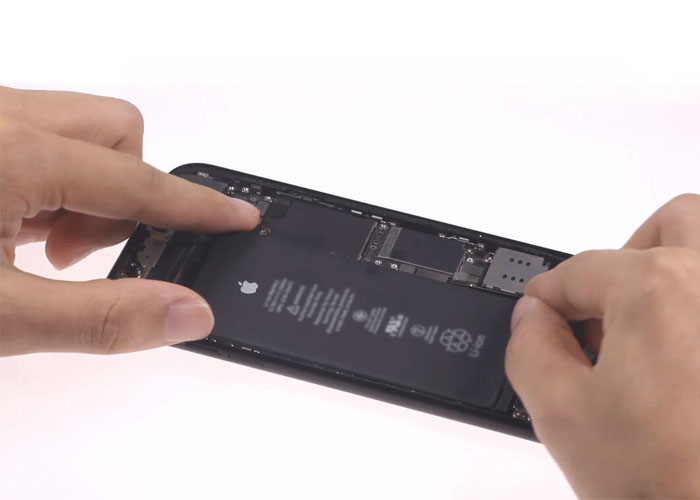
2. Remove the battery
When the iPhone XR display screen assembly is torn down, remove the battery from the back housing. Firstly, we need to disconnect the flexes. Use tweezers to pull out the battery adhesive slowly. Soften the adhesive by hot air gun blowing would make it easier to pull out. Pry out the battery with a spudger.
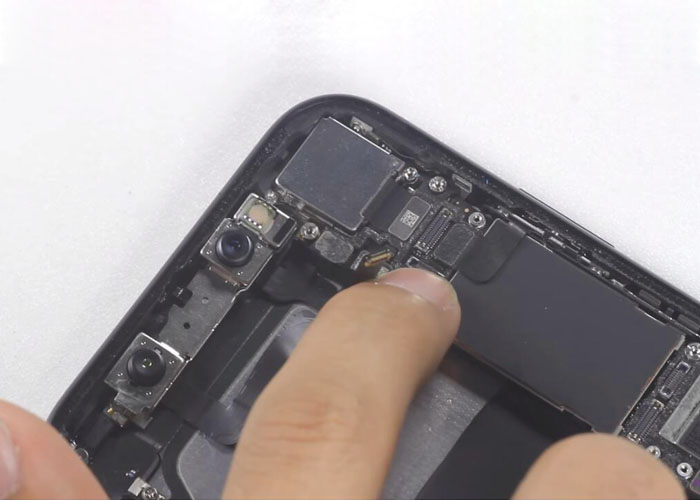
3. Remove the front camera module
After the battery is removed from the back housing, the next step is to remove the front camera module. Disconnect the flex firstly. It is easy to take out the front camera.
4. Install the new front-facing camera
After the original broken camera with the module is moved out, it is time to install the new one on it. Lock up the new camera module under the clip on the upright side corner, carefully readjust the place to make sure the module is on the right place. Connect the flex at last.
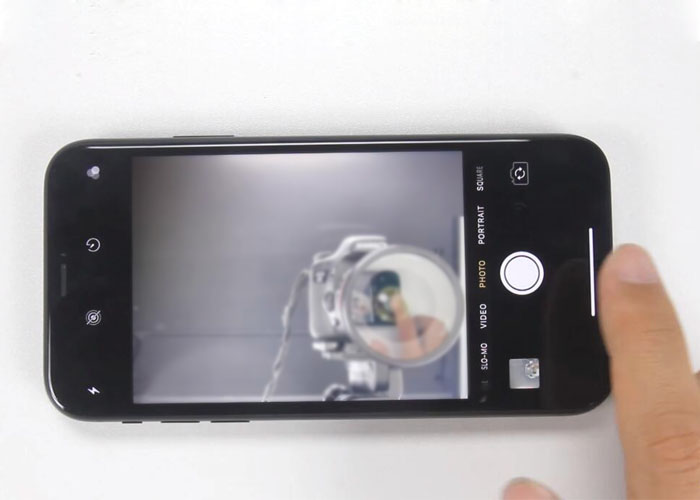
5. Test the front camera
We have to test the new front camera after its installation. Connect the flexes back, the ear speaker flex first, then the display flex, the touch flex, and the battery on the last. Don’t mix up the order. Screw the brackets back. When the internal flex is connected, turn on the phone and test the functions like front camera light sensor, the charging port, and the screen touch sensor. Make sure all the functional parts are normal.
6. Install the battery back
Test the new front camera function if it is ok, then install the battery inside the phone. Disconnect the iPhone XR display screen assembly and pry out the battery. Paste the battery adhesive on up and down on the side of the battery, tear up the protector screen and make the adhesive stick well on the battery. Place the battery back and connect the flex.
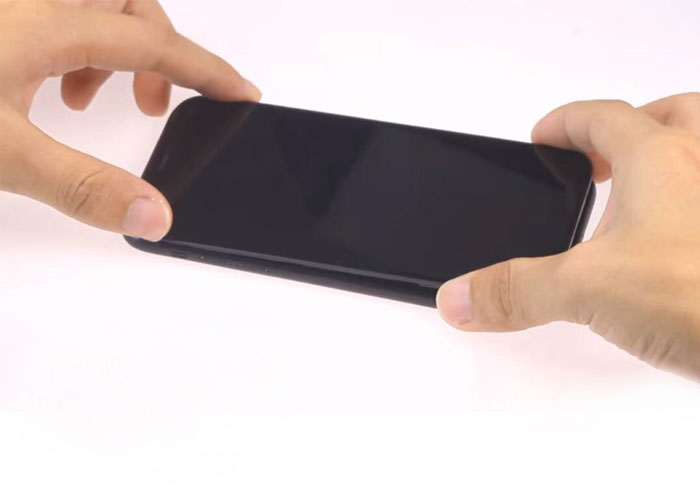
7. Install the display screen
When all the steps above are completed, install the display screen assembly back and seal up the phone. The whole process of iPhone XR front-facing camera replacement is done.
These are all about iPhone XR front-facing camera replacement. It’s not complicated if you follow these steps with carefulness and patience, but you have to get all the required tools ready first. If you are confident about yourself, you can have a try. Etrade Supply has original Apple iPhone XR flex cable ribbon and small parts in stock, as well as smartphone repair tools. Please contact us on service@etradesupply.com if you are interested. We will share more about iPhone repair tips with you next time, please stick on our blog.


RECOMMENDED PARTS
POPULAR ARTICLE
- How to Replace iPhone XR LCD Digitizer Screen?
- How Much Does It Cost To Fix iPhone XS, XS Max and XR?
- Can iPhone X Face ID still work after repair?
- How To Fix iPhone 6/iPhone 6 Plus Camera Problems
- iPhone X Water Damage Repair Guide (Still Work in 2019)
- How Much Does It Cost To Replace An iPhone XS Display?
- iPhone X Explosion: 7 Small But Important Things To Note
- 7 Ways To Fix Your iPad Not Charging In 2018
- iPhone 7 Screen Replacement | iPhone 7 Repair
- Which Parts of iPhone X and iPhone XS Are Exchangeable?
- iPhone X, XS, XS Max, and XR Battery Comparison
- How To Fix iPhone XS/XS Max, And XR Bluetooth Connection Issue
- Apple Will Fix the iPhone 8/8 Plus/X Auto Brightness Issue in iOS 12
- iPhone got exploded too?! How to protect your phone from battery explosion
- HTC 10 DIY Teardown for screen, charging port, battery replacement
- 6 Quick Tips To Distinguish Between Real And Fake iPhone SE
- Analysis on: Are China made LCDs for iPhone 5S Compatible with iPhone SE?
- How to Replace the Galaxy S7, S7 Edge Battery Replacement
- How to Disassemble the Galaxy S7 LCD Assembly to Replace Screen, Charging Port and Home Button
- How to Repair Samsung Galaxy S7 Edge Cracked Screen
- How to Tear Down/Disassemble the Galaxy S7 for Screen Replacement
- How to Fix Phone Gets Hot and Battery Drains Fast
- Xperia Z5 Premium USB Charging Port Replacement Tutorial
- How to Replace Your Broken Sony Xperia Z5 Premium Screen Step by Step Guide
- 15 Tips to Improve Your Galaxy Note 5’s Battery Life
- How To Replace A Cracked Motorola Droid Turbo 2 Screen
- How To Fix iPhone 6S Auto Shutdown When It Still Has Battery?
- How To Replace A HTC One A9 Cracked Screen
- How to Distinguish the Fake Apple Earpod from the Real One
- How to Replace the LG V10 Screen in 5 Steps
- How To Solder/Replace A Samsung Galaxy or iPhone Charging Port
- The Cost of Repairing a Cracked Galaxy S6, S6 Edge Screen
- How To Fix Cracked Xperia Z5 For Screen Replacement
- What’s Need to Be Prepared As a Startup Cell Phone Repair Shop
- *Update* The Root of Differences among Copy iPhone LCDs: Structure
- Important Info: Pay Attention To Defective Recycled iPhone LCDs
- How to Replace Galaxy Note 5, S6 Edge Plus Battery
- Are The Flood of New High Copy iPhone LCD Screens as Good as The OEM Ones?
- iPhone 6+ and iPhone 6S+ Screen Comparison Report
- How to Recover Photos and Data with Broken Screens
- How To Identify Different LG G4 Model Numbers
- How to Fix Cracked iPhone 6S for Screen Replacement
- Cost of Repairing a Damaged Screen on the LG G4
- How To Fix LG G4 Digitizer Touch Screen Issue
- As a Newbie, What You Should Know About Jailbreaking
- How To Tear Down/Disassemble Galaxy S6 Edge Plus For Screen Replacement
- 90% Of People Don’t Know These Cellphone Battery Information
- Insider Tips to Save Your Water-damaged Device
- How to Set Up ETrade Supply’s Adhesive Dispenser Robot
- Top 10 iPhone 6 Problems and Solutions
- How To Fix Vertical Lines On An iPhone Screen After Replacement
- How to Replace Sony Xperia Z3+ Screen/Screen Replacement Guide
- How To Disassemble/Tear Down Sony Xperia Z3+
- How to Assemble Small Parts on iPhone 6 LCD Screen Assembly
- Reasons Behind & Solutions for iPhone 6 Frame and LCD Separation Issues
- How to Replace The LG G4 Charging Port
- How to Replace the Cracking LG G4 Screen in 10 Minutes
- How To Replace An Oneplus One Cracked Screen
- iPhone 5 LCD Screen Assembly Small Parts List
- How to Replace the HTC One M9 Charging Port
- How to Replace HTC M9 LCD Screen Assembly
- Top 5 Most Common iPhone 6 Issues You May Come Across
- How To Tear Down The Samsung Galaxy S6 In 10 Steps
- The Cost Of Repairing A Cracked Nexus 6 Screen
- How To Repair A Nexus 6 Cracked Screen
- How To Disassemble Nexus 6 In 10 Steps
- The Cost Of Repairing A Broken iPhone 6 Screen
- Five Minutes Work to Replace Your iPhone 6 Plus Broken Screen
- How to Repair a Cracked Samsung Galaxy S5 Screen
 How to Replace iPhone XR LCD Digitizer Screen?
  How Much Does It Cost To Fix iPhone XS, XS Max and XR?
  Can iPhone X Face ID still work after repair?
  How To Fix iPhone 6/iPhone 6 Plus Camera Problems
  IOS 17.4 official version pushed to block battery vulnerability
  Is the Chinese-made rear case for the iPhone 15 series going on the market?
  New products coming:USB to MFI Lightning Cable
  Big BUG of iPhone 15
  How Chinese celebrate Christmas?
  Disadvantages of iPhone 15 Standard Edition
  Rumors about the Samsung Galaxy S24 Ultra
  TWS Wireless Bluetooth Headset: Connect Your Wireless World
  iPhone 15 Black Screen Self-Rescue Guide
  Comparison of LCD screens of different mobile phones
  Successfully submitted!