


How to Disassemble/Tear Down/Repair Your HTC One
BY alina | 七月 5th, 2013 | 2 | 1
With the design of all-aluminum unibody construction and other special features, the 4.7-inch HTC One became a top rated handset after it was released although it was once looked upon with suspicion of imitating the iPhone 5’s design pattern before it was announced.
However, this seamless aluminum design makes the HTC One almost impossible to repair because the plastic bezel surrounding the aluminum rear housing is glued strongly. Now we ETrade Supply challenged ourselves and have done the following HTC One teardown step by step. But we damaged the HTC One LCD screen and digitizer assembly during the disassembly and it is highly recommended to let people with professional skills to do this.
Tools needed: Small Phillips Screwdriver Tweezers Case Opening Tool
1. Turn off the phone.
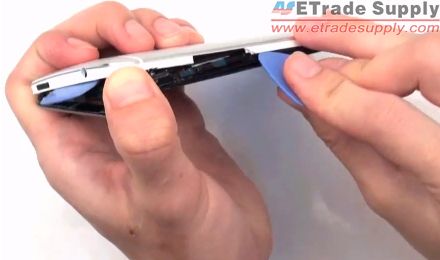
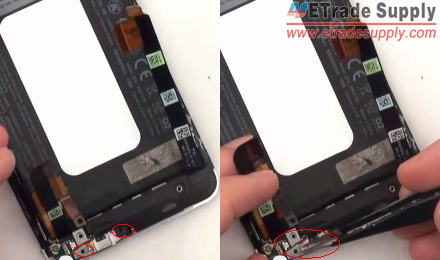
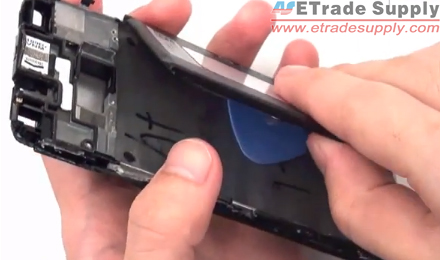
2. Pry out the LCD assembly of the HTC One. Insert the case opening tools into the gap between the rear housing and the motherboard, then separate them.
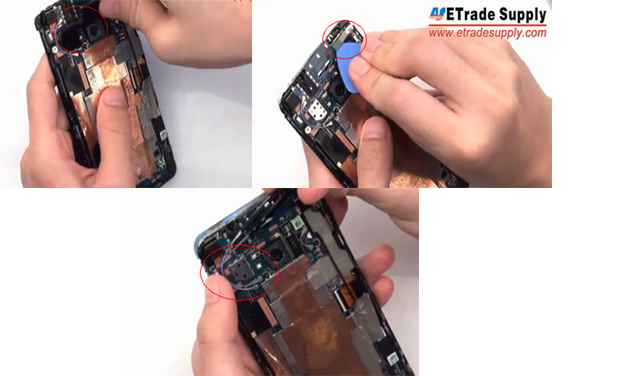
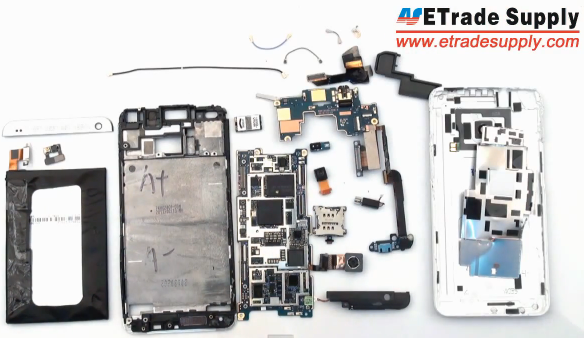
3. Take out the black retaining bracket, open 5 connectors, then remove 2 antennas.
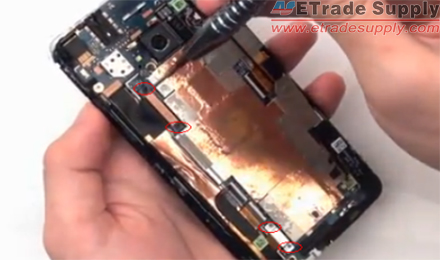
4. Undo 4 screws with the help of Small Philip Screwdriver.
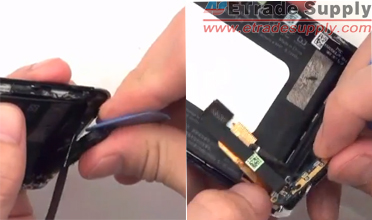
5. Use tweezers to disconnect 2 antennas.
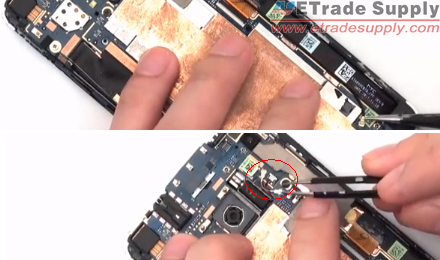
6. Use Tweezers to pry up the vibrating motor.
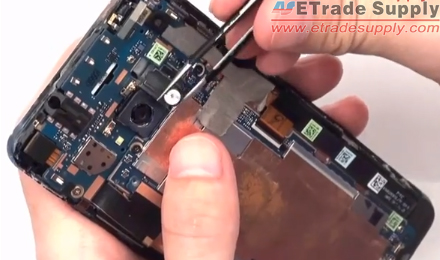
7. Disconnect the flex cables on the motherboard, take out the flex cables.
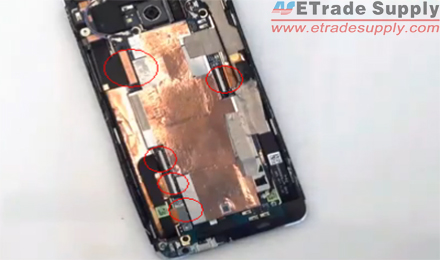
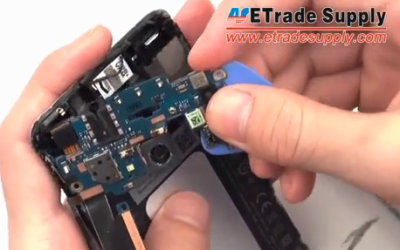
8. Undo the 4 screws on the motherboard.
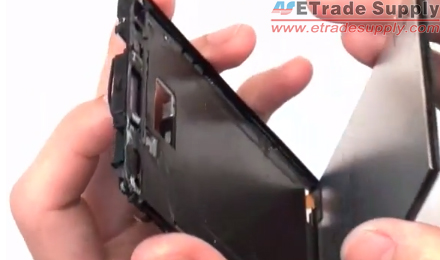
9. Take out the motherboard carefully.
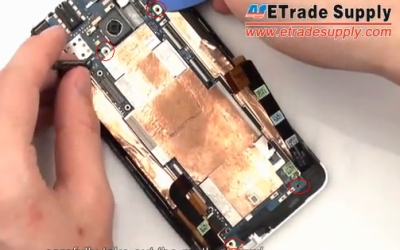
10. Undo 2 screws, then remove the USB metal shield.
11. Undo a screw, take out the loud speaker assembly and charging port flex cable.
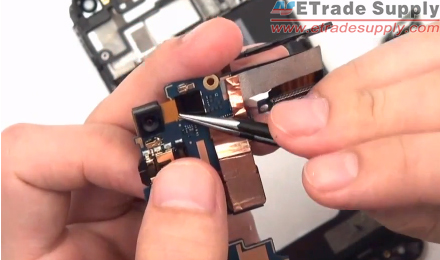
12. Undo 3 screws and take out the PCB board.
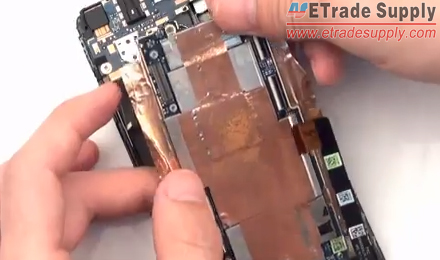
13. Peel off tapes, disconnect connectors and then remove the front facing camera and rear facing camera.
14. Use case opening tools to pry up the battery
15. Separate the HTC One LCD Screen Assembly from the front housing.
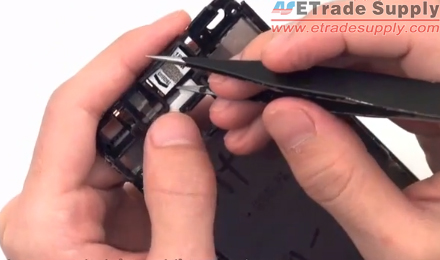
16. Peel off the tape on the front housing, then take out the SIM card tray.
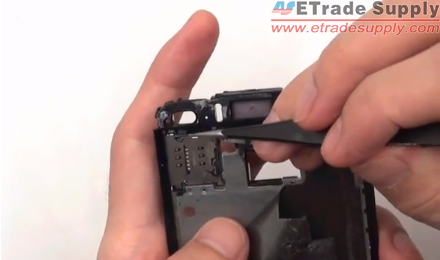
17. Use tweezers to take out the ear speaker.
We also have made a disassembly video of HTC One, welcome to watch it.
Subscribe our YouTube channel or like our facebook to get latest cell phone news and cell phone repair guide!


 IOS 17.4 official version pushed to block battery vulnerability
  Is the Chinese-made rear case for the iPhone 15 series going on the market?
  New products coming:USB to MFI Lightning Cable
  Big BUG of iPhone 15
  Successfully submitted!
Hello!
Please, can you tell me how you unmout Front Camera Top cover…
Actually i need to know how to replace just this part.
Thank you
Hello.
You disassembled phoen completely, but there is one step you didn’t explained.
How do you unmount alu speaker cover? upper and lower screen.
Thanks