


How to Repair the Cracked Nokia Lumia 720 Screen
BY Junior | 十二月 27th, 2013 | 65 | 1
Last week, one of our readers told us that his Nokia Lumia 720 slipped from his pocket. He was very unhappy on the situation that the LCD display has no problem and the device worked fine except there was an obvious crack on touch screen digitizer. Can the broken Lumia 720 screen be replaced? How much it will cost? He asked. Yes, people who cracked the Nokia smartphone screen can try to contact the local Nokia Care to know the exact cost of the spares and any additional repair charges, as this will not be covered under Warranty. Of course, you can also DIY repair your Cracked Lumia 720 Screen to save some of your money.
[caption id="attachment_6020" align="alignnone" width="225"]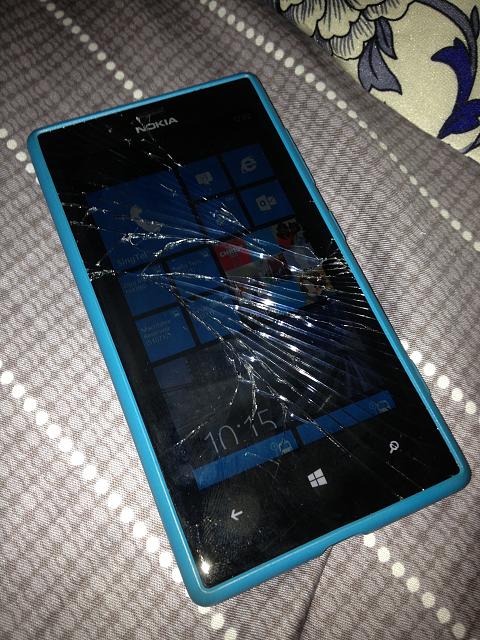 How to Fix the Cracked Lumia 720 Screen[/caption]
Today, we make this guide which will walk you through each step of taking apart your Lumia 720 and explain how to change the cracked screen.
This guide will help you replace the following Lumia 720 part(s):
1. Nokia Lumia 720 screen Assembly (Including the LCD Screen & Touch Screen Digitizer)
Tools Required to DIY Fix the Cracked Screen on Lumia 720:
1. T4 Screwdriver.
2. Case open tool.
3. Plastic card.
Nokia Lumia 720 Screen Repair Guide:
1. Protect the phone screen with a plastic protective film.
[caption id="attachment_5990" align="alignnone" width="300"]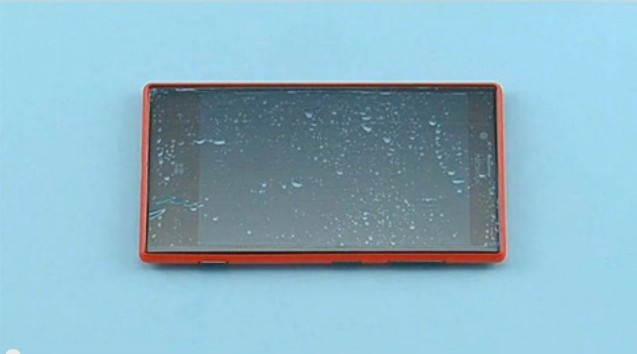 Protect the phone screen[/caption]
2. Remove the SD Card Tray.
[caption id="attachment_5991" align="alignnone" width="300"] Remove the SD Card Tray[/caption]
3. Remove the SIM card.
[caption id="attachment_5992" align="alignnone" width="300"]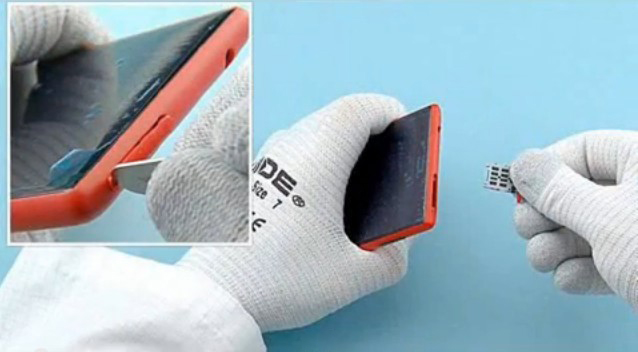 Remove the SIM card[/caption]
4. Unscrew the screw in the order shown.
[caption id="attachment_5993" align="alignnone" width="300"]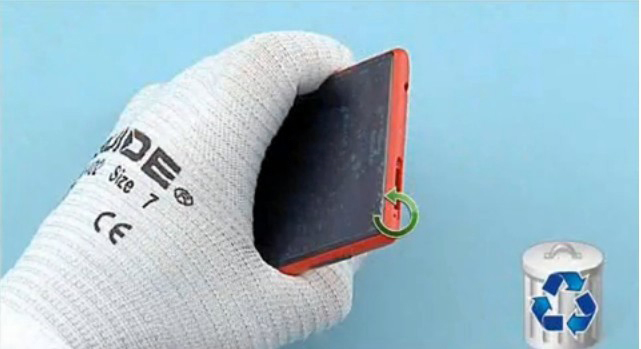 Unscrew the screw[/caption]
5. Prepare to release the display with the plastic pry tool.
[caption id="attachment_5994" align="alignnone" width="300"]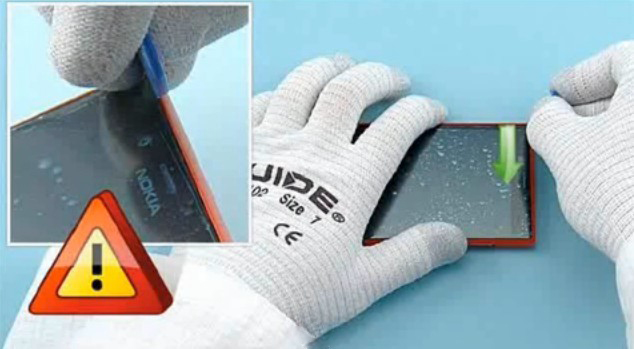 Release the display[/caption]
6. Remove the top part of the screen which is shown in the picture.
[caption id="attachment_5995" align="alignnone" width="300"] Remove the top part of the screen[/caption]
7. Release the left side of the rear housing.
[caption id="attachment_5997" align="alignnone" width="300"]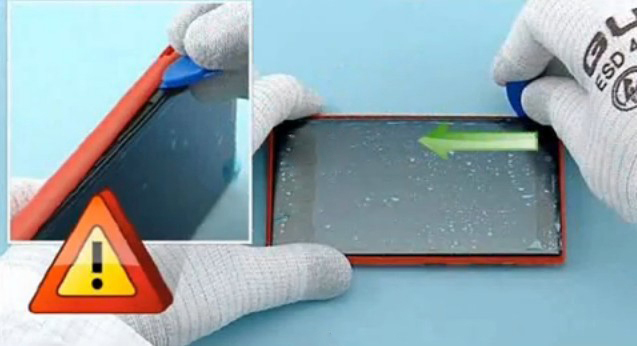 Release the left side of the rear housing[/caption]
8. Release the 4 clips on the right side of the device.
[caption id="attachment_5998" align="alignnone" width="300"]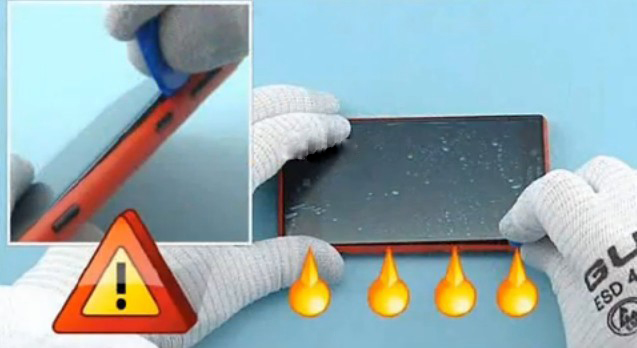 Release the 4 clips[/caption]
9. Lift the top end of the screen up.
[caption id="attachment_5999" align="alignnone" width="300"]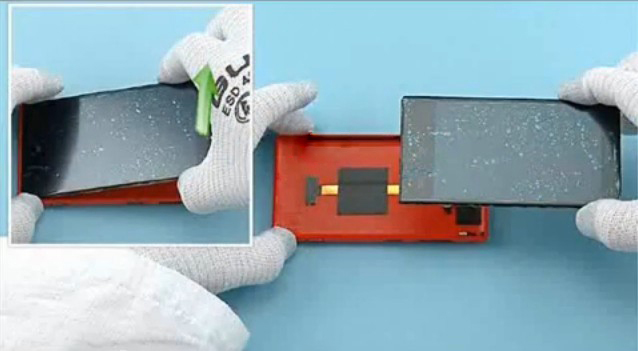 Lift the top end of the screen up[/caption]
10. Open the battery connector.
[caption id="attachment_6000" align="alignnone" width="300"]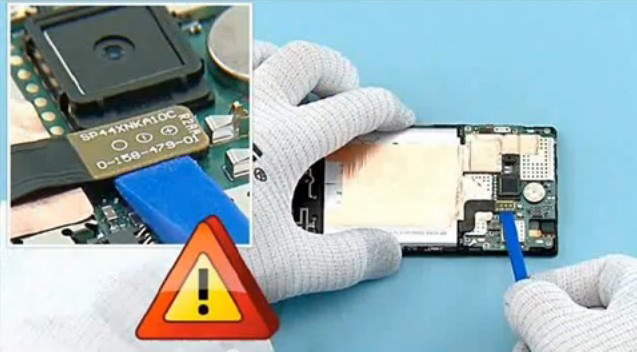 Open the battery connector[/caption]
11. Release the top parts of the heatspreader. And then peel off it.
[caption id="attachment_6001" align="alignnone" width="300"]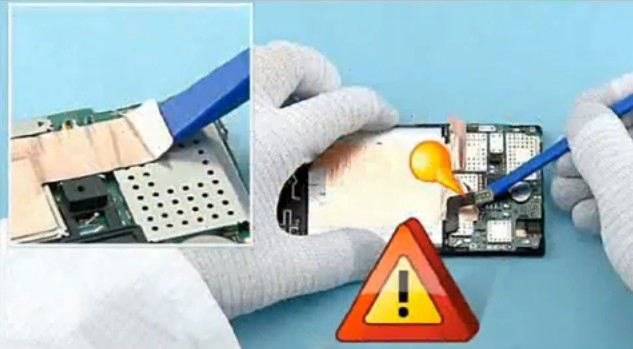 Release the top part of the heatspreader[/caption]
[caption id="attachment_6002" align="alignnone" width="300"]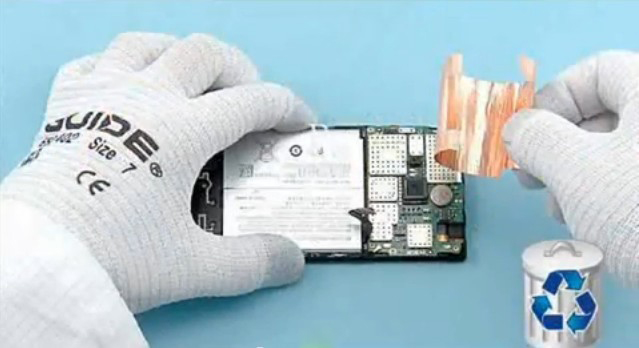 Remove the top parts of the heatspreader[/caption]
12. Lift up the battery.
[caption id="attachment_6003" align="alignnone" width="300"]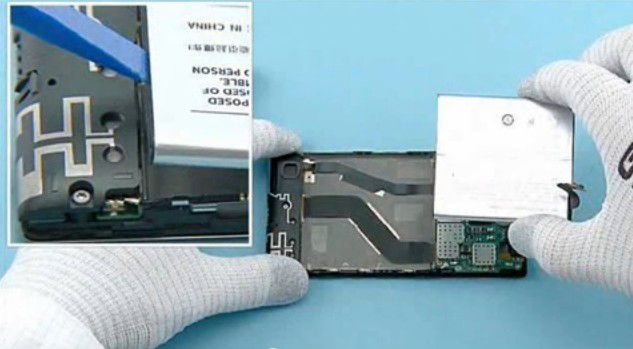 Lift up the battery[/caption]
13. Unscrew the 3 screws in the order shown.
[caption id="attachment_6004" align="alignnone" width="300"]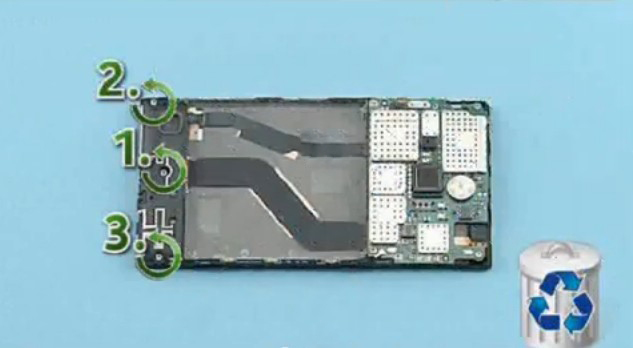 Unscrew the 3 screws[/caption]
14. Lift up and remove the Antenna.
[caption id="attachment_6005" align="alignnone" width="300"]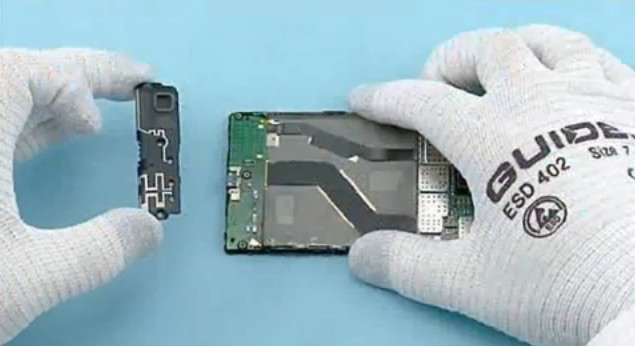 Lift up and remove the Antenna[/caption]
15. Remove the top end of the RF coax cable.
[caption id="attachment_6006" align="alignnone" width="300"]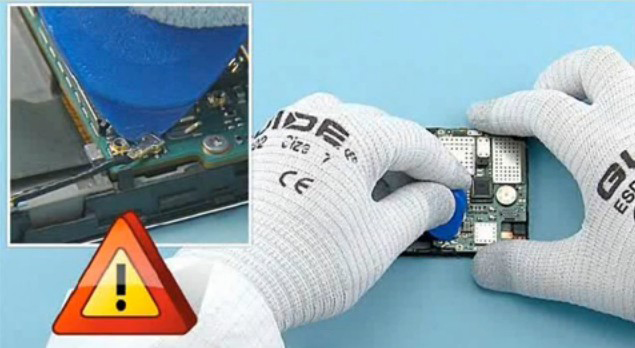 Remove the top end of the RF coax cable[/caption]
16. Remove the 4 screws in the order shown.
[caption id="attachment_6007" align="alignnone" width="300"]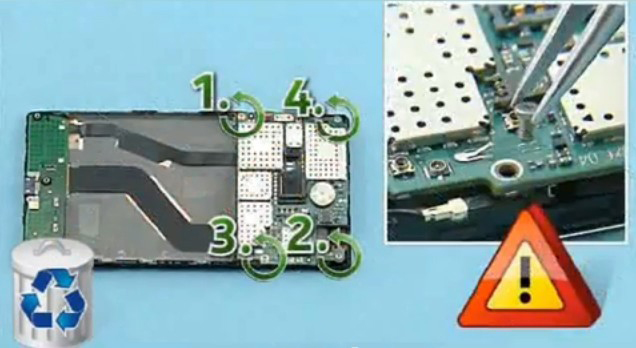 Remove the 4 screws[/caption]
17. Open the side key flex connector.
[caption id="attachment_6008" align="alignnone" width="300"]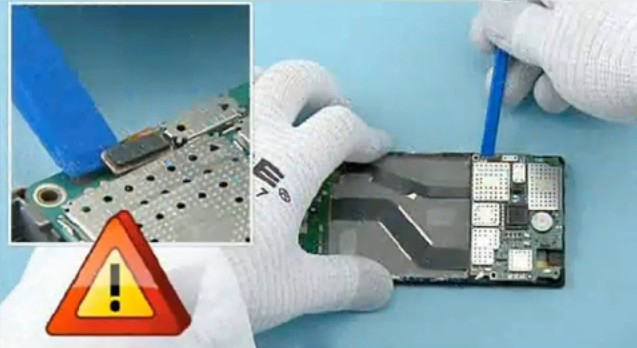 Open the side key flex connector[/caption]
18. Turn the motherboard over as shown and open the screen connector.
[caption id="attachment_6009" align="alignnone" width="300"] Open the screen connector[/caption]
19. Disconnect the USB connector.
[caption id="attachment_6010" align="alignnone" width="300"]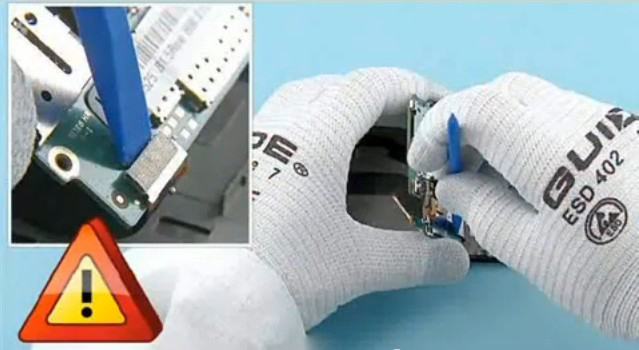 Disconnect the USB connector[/caption]
20. The motherboard can be separated from the screen assembly.
[caption id="attachment_6011" align="alignnone" width="300"]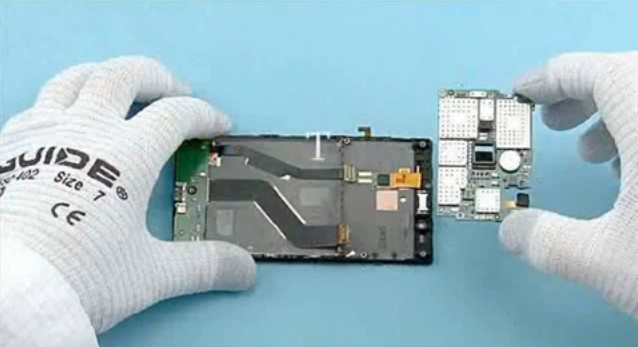 Seperate the motherboard from the screen assembly[/caption]
21. Remove the RF coax cable holder.
[caption id="attachment_6012" align="alignnone" width="300"]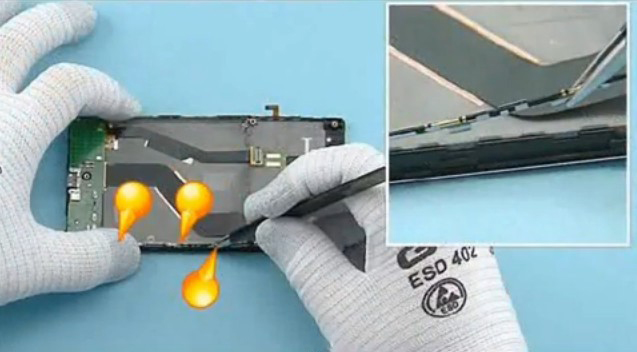 Remove the RF coax cable holder[/caption]
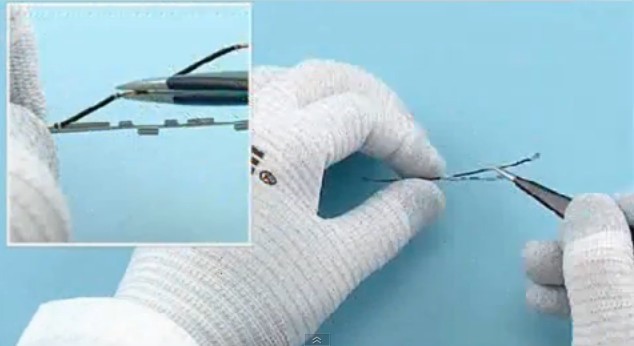
22. Open the bottom end of the RF coax cable. And then remove the cable from the RF coax cable holder.
[caption id="attachment_6013" align="alignnone" width="300"]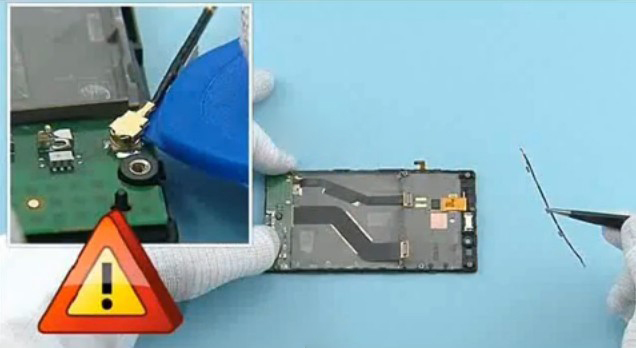 Remove the cable from the RF coax cable holder[/caption]
23. Release the flex cable ribbon.
[caption id="attachment_6015" align="alignnone" width="300"]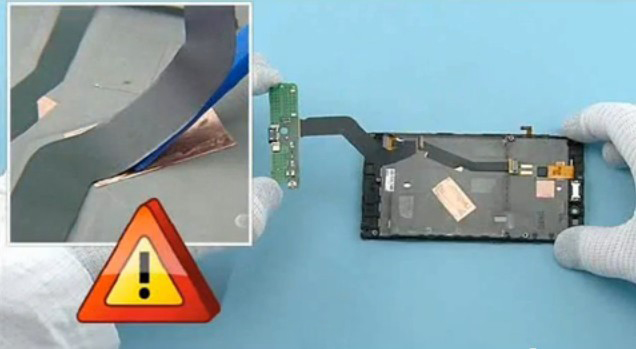 Release the flex cable ribbon[/caption]
24. Release the ear speaker.
[caption id="attachment_6016" align="alignnone" width="300"]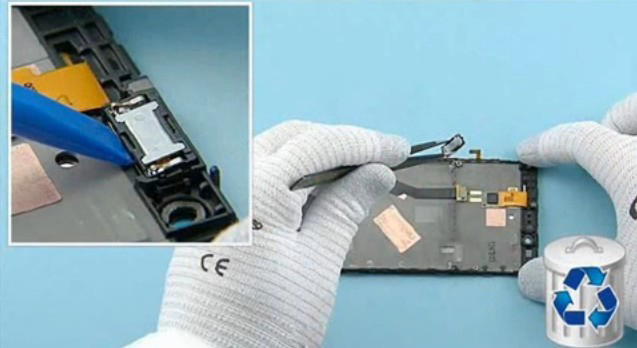 Release the ear speaker[/caption]
25. Remove the ear speaker gasket.
[caption id="attachment_6017" align="alignnone" width="300"]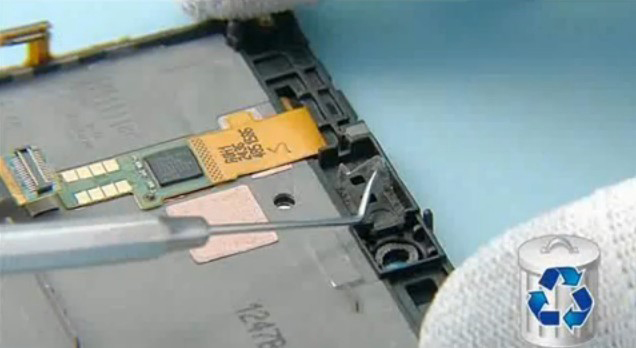 Remove the ear speaker gasket[/caption]
26. Remove the side key flex.
[caption id="attachment_6018" align="alignnone" width="300"]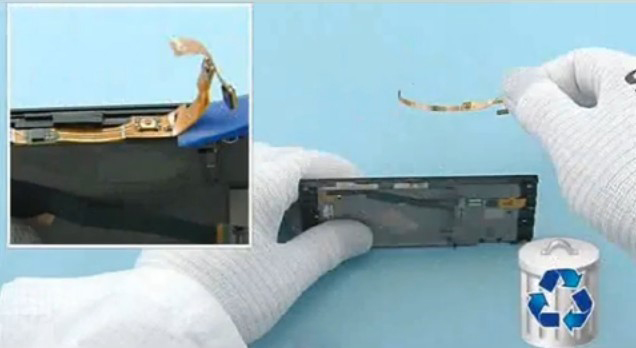 Remove the side key flex[/caption]
27. Remove the adhesive on the display frame and separate the screen assembly from the screen frame. And then you can replace the screen for your Lumia 720.
[caption id="attachment_6019" align="alignnone" width="300"] Remove the adhesive and replace the lumia 720 screen[/caption]
Notice:
To replace this Lumia720 Digitizer Touch Screen, professional equipment and skills are required. Individual users are not recommanded to replace it by themselves.
Welcome to visit our official Twitter, Facebook and YouTube. We will post more DIY repair guide videos and the latest news of upcoming cellphone on these social media platforms.


 IOS 17.4 official version pushed to block battery vulnerability
  Is the Chinese-made rear case for the iPhone 15 series going on the market?
  New products coming:USB to MFI Lightning Cable
  Big BUG of iPhone 15
  Successfully submitted!
Please I only need a touch for lumina 720. And how can I separate the touch from the screen
Hello Ansah, here are the links of Lumia 720 touchscreen and tutorial guide for your reference:
Lumia 720 digitizer: http://www.etradesupply.com/oem-nokia-lumia-720-digitizer-touch-screen.html
Tutorial: http://www.youtube.com/watch?v=0PTCftDZwA0
what is the cost for screen of nokia lumia 720??????
please suggest in Hyderabad location…………….
Hi Chandrakanth, the Lumia 720 LCD and digitizer assembly replacement costs about $30, you can check below link to for the part and estimated shipping cost:
http://www.etradesupply.com/oem-nokia-lumia-720-lcd-screen-and-digitizer-assembly-with-front-housing.html
lumia 720 touch panel cost???
The Lumia 720 touchscreen costs $14.39 now, you may check the latest price information here:
http://www.etradesupply.com/oem-nokia-lumia-720-digitizer-touch-screen.html
damn it, where are the steps to assemble the phone………..there is better to gain no knowledge than to gain half of it………..!
my completely phone touch working fine.down side some time working or sometime not…so could you inform me what i have to do now …i have to change phone touch or i have to do something differ
MA LUMIA 720 GLASS GOT BROKEN BUT STILL TOUCH IS WORKING PROPERLY …AND I GONE THROUGH NOKIA SERVICE CENTRE THEY ARE ASKING 7200RS … ITS FREEKY SO PLEASE LET ME KNOW CHEAPER SERVICE CENTRE IN BANGALORE
dear chetan, i have faced the same problem. screen of my lumia 720 has cracked and nokia care ppl asking for 8000 rs…pls help
Dont do this operation!!!!300 rmb repair cost in china,new phone cost 800 Rmb!!!!!!!!!Fuck nokia!!!!!!!!!
Is there a service center in chennai that does this outer glass replacement alone?
My Lumia 720 screen got broken. I visited Nokia care showroom in chennai, they are asking 8000rs.Please advise the cheaper shop in Chennai. appreciate your promote reply
I bought in only 1800 And its working good
In Chennai any service center ?
Can you give any service centre contact No of Bhopal (India), I have digitalizer of Lumia 720 Please send the address by SMS 9713320777 please help
My Lumia 720 screen got broken. I visited Nokia care showroom in chennai, they are asking 8000rs. Please help let me know any cheaper shop in chennai. Please let me know ASAP. 🙁
Hi Gugan,
This is Mani have you fix your mobile problem kindly let me know i have same issue like you call me +919884257618.
Regards
Mani.A
Me too… My screen glass also broken…. And they are asking me 7500 for display…also they are saying display and touch both in one unit…so I need to pay for both…. Help me now am living in bangalore… Somebody had told that at Bangalore it was available in a cheap rate…. Harshit you please say how much it cost???
I have changed my digitizer only 1500₹ in gorakhpur.
And it was 7500 at the nokia store.
Who soever wants to get this replaced in Bangalore, visit the repair shop on second floor in Ninza telcom building, SP Road, near corporation circle. Contact Amit for repairs.
Thanks Harshit,
Can you please share the conntact details of Amit, and also how much will be the cost of the screen replacement.
Thank you
Hey did u change….screen glass???
HI Dude, watch this tutorial so that you can change your screen you your own.
1> You need to firstly Learn some basic about lumia 720 assemble : Youtube watch ID v=0PTCftDZwA0
2> Now then watch this tuitorial for Replacing the digitizer: Youtube watch ID v=DpiJheOexZ8
Has any one tried replacing the digitizer ? my phone’s screen is broke too and Nokia SC asking for 7500 rs.
Hi Nitesh, we suggest not to replace the digitizer if you don’t have repair skills. To replace the whole LCD assembly will be much easier, the referential product is: http://www.etradesupply.com/oem-nokia-lumia-720-lcd-screen-and-digitizer-assembly-with-front-housing.html
@Indian., Could you please tell which service centre you got it serviced from? In bangalore?
which place …place
I m from chandigarh india …i changed my touch pannel of nokia lumia 720 only in 1500rs …nokia care said we need to replace display nd touch both i go to a private store nd they solve my problm only in 1500rs with new touch panel
Plz. Plz. Plz…..mail me the Add. of that shop of Chandigarh with Ph. No., I will change my broken screen…my Mob. No is 09438142047…
Dear Ankit could u plz giv me the Add where u done ur repair of Lumia 720, my Dispay has broken ,But it is working, I want to replace it.. But in Srvc. Centre told, Touch & Display both need to change, he told me in 720 touch & display is one unit, U have to change both…My Mob No. Is 09438142047, plz send me the Add SMS..
Dear Ankit, can you provide the address of the private store from where you got the work done. In Delhi it costing much higher, almost the same as Nokia Care..Thanks
I bought my lumia 720 in India, Delhi. but i’m now in Lesotho, Maseru. my phone screen cracked. where can I replace the screen in Lesotho or South Africa and the costs?
Is the glass used in digitizer is also gorilla glass…..
My lumia 720 screen cracked and display price is weary high i saleing my mobile
7500 rs in nokia care india for display glass
Guys if ur screen is cracked and ur works phone works well then go to a shop and tell them to change the PDA it will cost only 1000-1500 it will be cheap…….
Simon, please explain..
My nokia x touch damaged any know where it available and any say the price pls
hai guys ,
this tutorial has not covered the removal of the broken digitiser and touch screen . it is not very easy to remove .
i suggest ,that you give it to the service guys , otherwise you will be ending up with the replacement of the panel which costs around Rs 8000 .
with thanks,
Hey d, are those components authentic?
Hi,
Please give the details, where can i buy digitizer in Hyderabad. Unfortunately two times broken my lumia 720 phone and already invested Rs. 7500 earlier in Nokia care but currently I am looking bit cheaper one.
Also request to every one don’t buy lumia phones it is big problem about glass broken.
Thanks for this tutorial, i have gained some confidence although,
I have purchased the screen only(Digitizer) for Rs. 1600 ….yes one thousand six hundred
and the tools for Rs.160 ..one hundred and sixty from the following ebay and it has come from United Kingdom (imported) and the part matches the original one on the phone.
On Ebay Search this “New Replacement OEM Touch Screen Digitizer For Nokia Lumia 720”
The screen dizitizer and tools have arrived within 10 days..only thing is the service person is asking Rs1000.00 for replacing …but now i have this tutorial…but i am in little bit of dilemma as the steps are quiet a few and i need to memorize the parts before i start. I guess some expert advice would help.
Total cost on a Mobile service centre is Rs (1600 + 160 + 1000)= Rs. 2760
Total cost by just relying on this video is Rs (1600 + 160 + self memory and hard work)= Rs. 1760
(NON Indian readers please convert the amount into their respective currency through google currency converter , Dollar is roughly Rs 63….ie Rs. 1600 will become $26 (estimate only))
Please somebody update if they have succesfully done it.
Thanks
can i have a mail from you regarding this..need to discuss some things..plz rply..
Brother this needs a lot of experience.
instead of doing this, go to the parts store and buy T2 and T4 screw driver and the Lcd (LCD and touchpad are fixed), which cost you around 5100 INR.
Screw Driver- 100 INR
LCD and touchpad- 5000 INR.
I also faced the same problem. but now everything is Okay.
whr did u buy the lcd for Rs5000?
I too wana buy it..culd u specify d adres of d shop
Hey d can i hv ur phn no.cuz i hvsm pro.dat i wnt to consult
Are those components authentic?
@ Indian., Could you please tell which service centre you got it serviced from? at bangalore?
I got the service done from bangalore in a private service store and he charged 2800 to replace the digitizer.
Hi,
I am from bangalore and looking to replace digitizer. can you please help me with he shops name & address
Plzz tel me banglore adress repair centre
please give me the address of the repairing shop in bangalore..
Can you please tell which store in Bangalore did you get it replaced?
Where in Bangalore did you have this fixed??
Can you tell me the contact details of the local vendor in Bangalore as my phone digitizer also got broken. 2800 is very less amount. Also let me know the performance of the touch screen
Hi ,
can you tell me where in Bangalore , which shop u been to for screen replacement??
i too want to do the same urgently.
and is it the original one ?
thanks
@ Indian., Could you please tell which service centre you got it serviced from? at bangalore?
thank you for the very informative step by step instructions to replace lumia 720 touch. you have been a great help.
Dear sir
my lumia720 tach screen broken iam in Iraq erbil you ar serves centre wayar.how much cost
Actually in the corner of my lumia 720 the panel jus came out of the fix .. can u tell me how to solve this ?
Yesterday my cell fell& had got cracked now if I want to repair it they are saying ₹9500 where as new nokia Lumia 720 costs ₹17000 …y is it so costly…..thy r saying even display shoud be changed …y is tat…??? When only my screen is cracked..???
Can u pls tell me Wat wud be the approximate price fr fixing the cracks??? Cos they r asking quite a big amt (abt 50% of the phone cost)
The cost of a new Lumia 720 screen replacement is about $110. You can find it on our website.
but another web side providing same phone touch in $17 rs aprx…..and your telling i have to pay $110..it is too much…
The touchscreen only is about $17, while the price of LCD and touchscreen assembly is higher, plus, $110 was the price marked last year. A Lumia 720 LCD and Touchscreen Assembly with Frame is less than $40 now.
http://www.etradesupply.com/catalogsearch/result/?warehouse=0&q=lumia+720+screen