


Galaxy Mega 6.3 Repair Guide Step-by-Step Reassembly Instructions
BY yuki | 八月 16th, 2013 | 14 | 2
It seems that smartphones with large screen have become a trend in 2013. Samsung keeps the pace with the smartphone market and introduced Samsung Mega 6.3 and Mega 5.8. Featuring 6.3 inches with 233 ppi pixel density, Samsung Galaxy Mega 6.3 is called a tablet smartphone, or phablet. Samsung claims “Galaxy Mega 6.3 is a device that combines the portability and convenience of a smartphone with the power, multitasking capabilities and extensive viewing experience of a tablet."
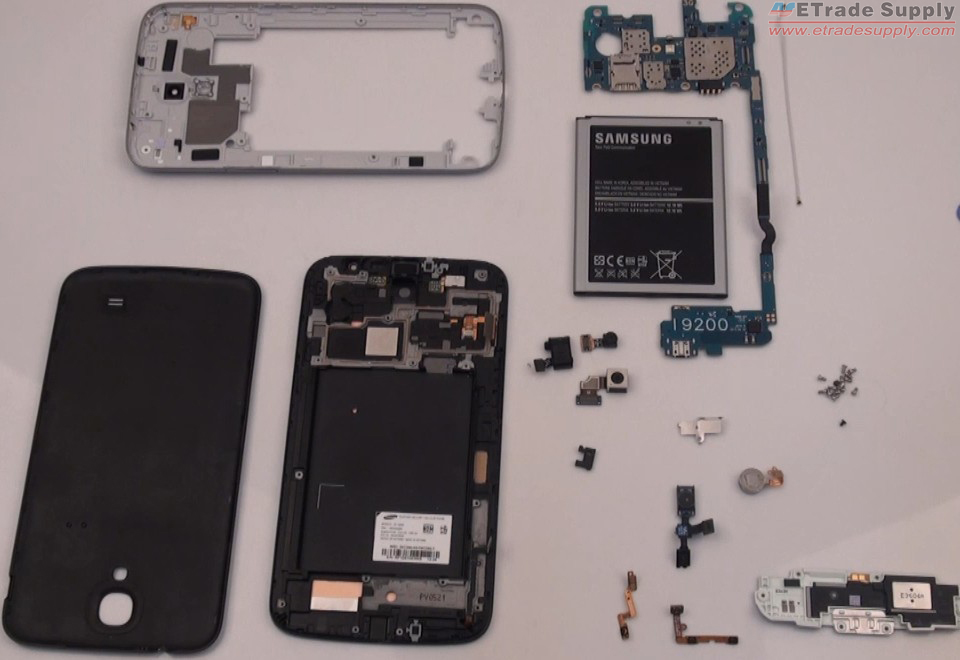
Samsung Mega 6.3 is regarded as a mid-range device, and it has gained more popularity by plenty of users favoring big screen. According to ETrade Supply’s Galaxy Mega 6.3 I9200 Teardown Tutorials, Galaxy Mega 6.3 disassembles easily. Are you confused with all teardown components of Mega 6.3 and don’t know how to assemble it? Here are the Galaxy Mega 6.3 repair guide step-by-step reassembly instructions for your reference.
You can follow this Samsung Galaxy Mega 6.3 reassembly video to get repair details.
Tools Needed:
1. Tweezers. 2. Small Philips Screwdriver
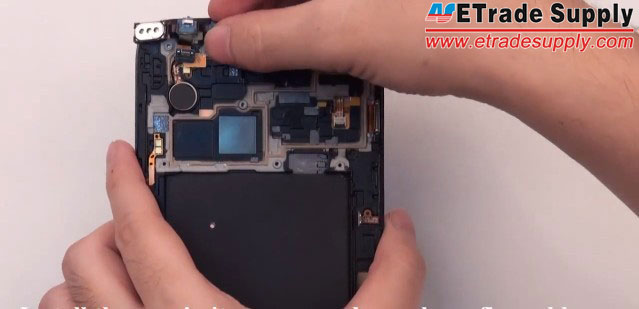
1) Install the power button and volume keys of the Samsung Mega 6.3.
2) Put the vibrating motor and front facing camera.

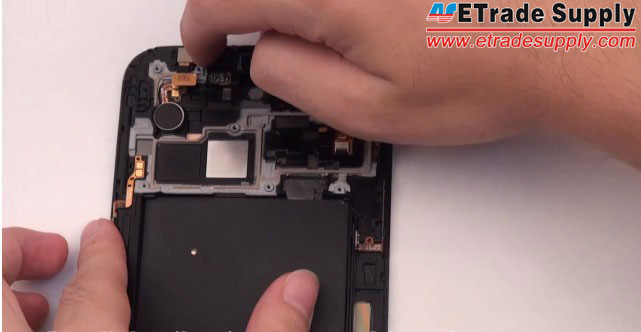
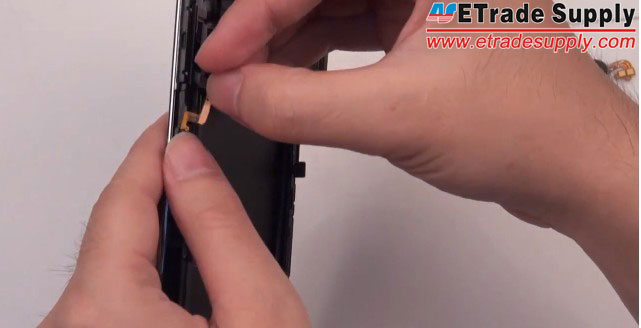
3) Assemble the proximity sensor and ear phone flex cable
(Don't forget to put back the rubber gasket)
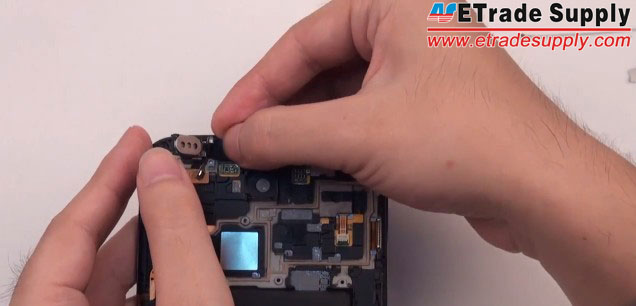
4) Install the head phone jack and metal shield.
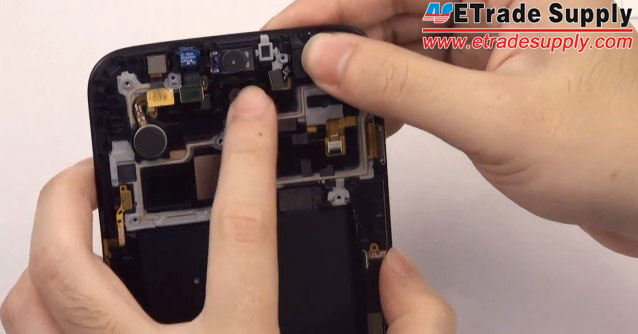
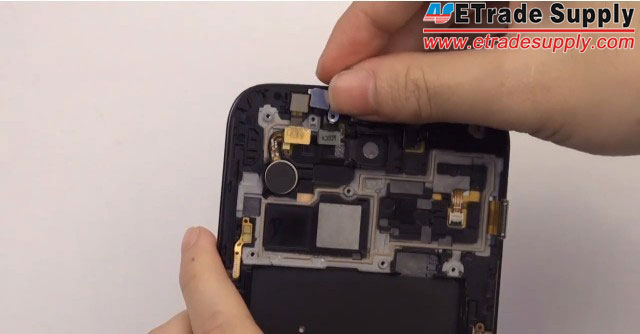
5) Install the rear facing camera of the Galaxy Mega 6.3

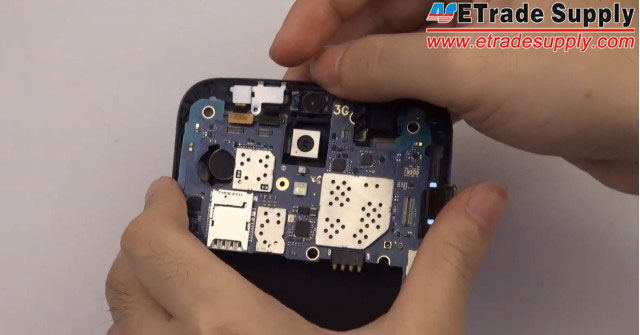
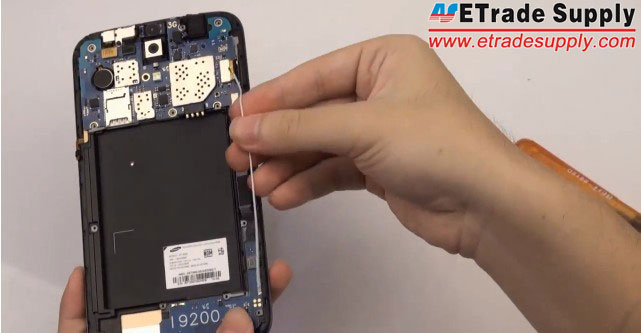
6) Put the motherboard then connect all connectors.
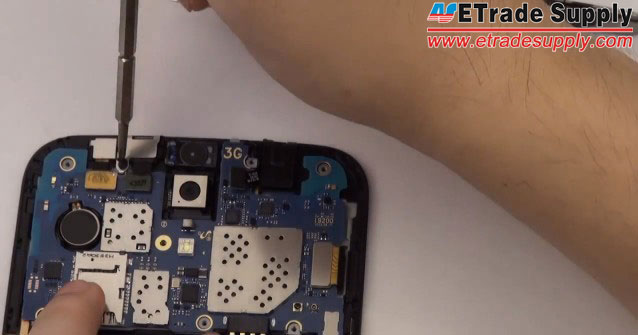
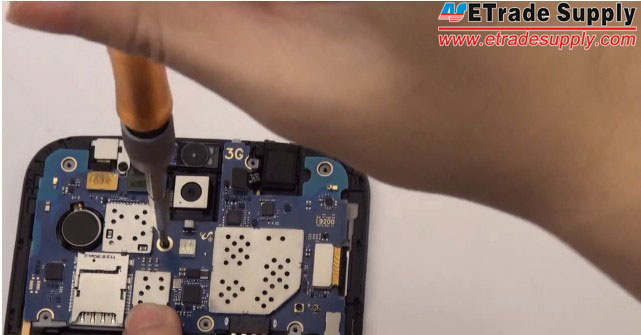
7) Fasten the Samsung Mega 6.3 motherboard with 2 screws.
8) Install the USB charging port flex cable.
9) Install the antenna of the Mega 6.3.
10) Put the loud speaker back to the rear housing.
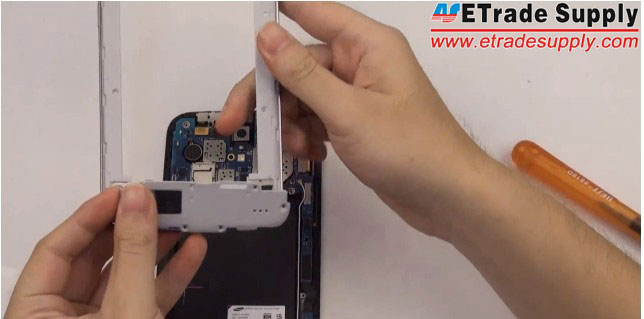
11) Install the Galaxy Mega 6.3 rear housing.
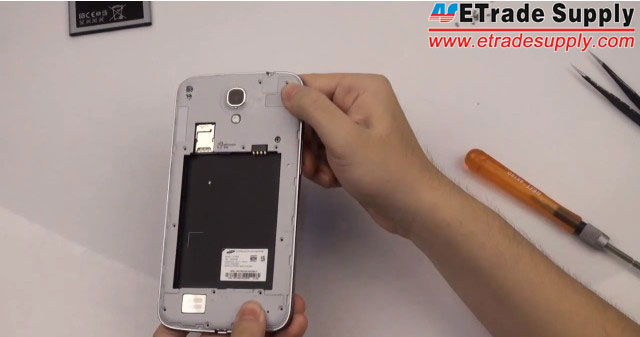
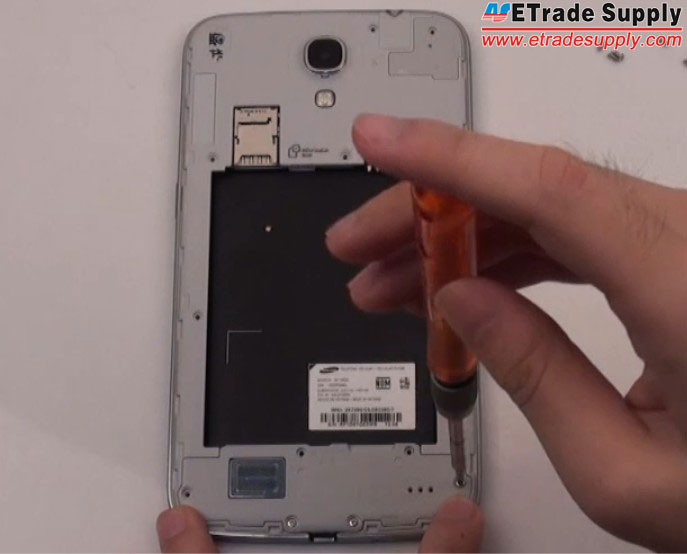
12) Fasten the rear housing with 14 screws.
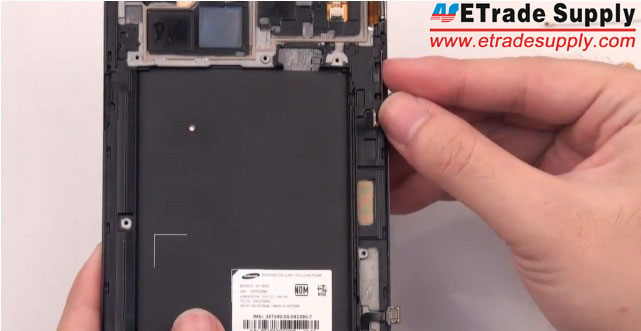
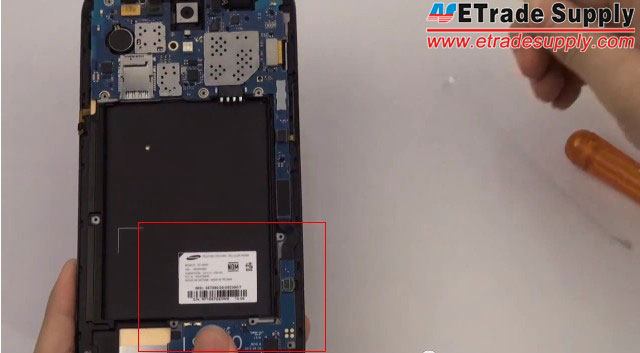
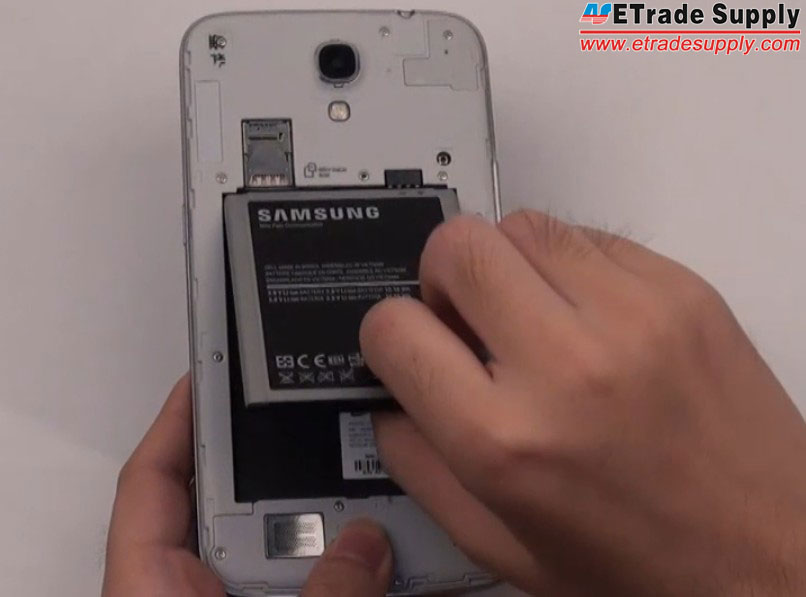
13) Put the Mega 6.3 battery.
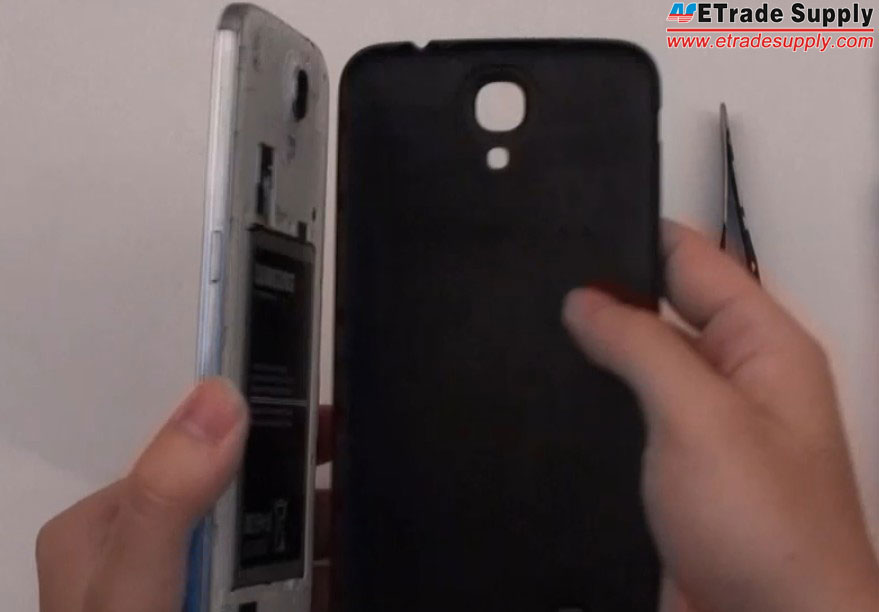
14) Assemble the Mega 6.3 battery cover.
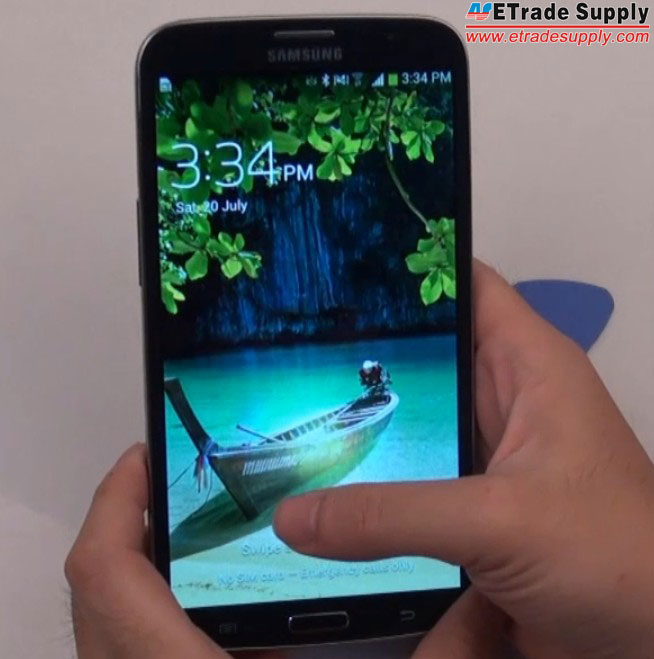
15) The Galaxy Mega 6.3 reassembly job is finished.
Subscribe ETrade Supply YouTube Channel to get more cellphone repair guides.


 IOS 17.4 official version pushed to block battery vulnerability
  Is the Chinese-made rear case for the iPhone 15 series going on the market?
  New products coming:USB to MFI Lightning Cable
  Big BUG of iPhone 15
  Successfully submitted!
If you change the assembly frame do u lose everything or not
Thank you May, for your reply.
I agree with you that the missing phone audio is a hardware-related problem, since it worked perfectly until they replaced the charging port.
The repair shop has asked me to return the phone to them, to open it and fix the sound problem.
While watching a YouTube video on how to replace the charging port on my Galaxy Mega, I saw that the speaker is part of the frame, with 2 contact points that MUST touch similar contact points the mother board when you re-assemble it, or the speaker won’t function..
I have a strong feeling that when the technician put my phone back together, she didn’t know that she needed to check that those contacts were touching each other.
She admitted to me that she had worked on very few of the large Mega phones, which left me a little worried that she might not get it correct. It now looks like my fears were well-founded.
Thank you for your advice, May. I will pass it on to my technician when I return the phone to her next week. – Jim Smith
Hope your problem will be fixed asap, good luck 🙂
Hello May,
I had the charging port on my Mega 6.3 professionally replaced a week ago.
Now, while everything else works perfectly… no sound at all will come from the speaker.
I’ve reset every software control, with no improvement. It must be a physical problem. What can be done to fix this?
Thank you, Jim Smith
Hi Jim, have you checked the speaker and the surroundings? I don’t think it’s a software related issue, it may caused by something broken, missing or improper installation.
I replaced my chrging port and now I have no sound. I checked all the connections and they are all good. Please help lol
REPLACE MY SAMSUNG GALAXY MEGA 6.3 CHARGE PORT
Well, I’m back. As I stated in my previous request. I replaced the charging port on my samsung mega 6.3. (see listing below. I did as May suggested and checked out the connections but it didnt make much of a difference. It will sometimes but not often reach the 4th bar. But mostly, it stays on the 1 and 2 bars and more often than not, no bars at all. What could be another problem that would be causing this please. Thanks.
Thank you May, I will try that and see if that is the problem. Your help is much appreciated.
No problem, good luck 😀
Hello. I replaced the charging port on my samsung mega 6.3. All went as it was suppose to but…after installing it I have had trouble reception. I’ve always had good bars, 4 and up but now I get the least and sometimes nothing. Also, the sound isnt as loud as it was. What did I do wrong? thanks
Hello Bennie, please check if all the connectors are connected right and tightly to the motherboard esp. the signal cable on Step 9.
my galaxy mega 6.3 dous not on
How do you attach a new digitizer to the screen on a galaxy mega ?