Full Process Presentation on Samsung Galaxy S21 Teardown
BY ETrade Supply | 三月 9th, 2021 | 0 | 0
1.5mm Phillips screwdriver
Hard Plastic plectrum
Ultra-thin plastic sheet
Suction cup
Spudger
Steel pry tool
Tweezers
Hot air gun
Step1: Open the back shell of the Samsung Galaxy S21
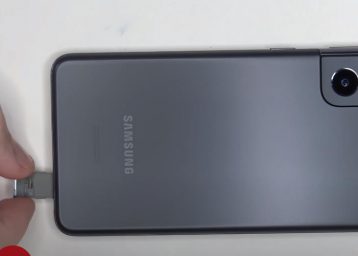
1.1 First of all, Power off the phone, eject and take out the SIM card tray.
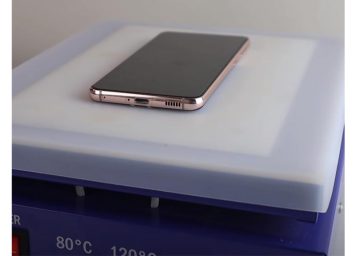
1.2 Then we need to use a hair dryer or a heat gun to heat up the back plate so we can loosen up the adhesive underneath. Of course, if you have a heat plate you can using it at 80 degrees to heating the back of the phone for a few minutes to soften the adhesive.
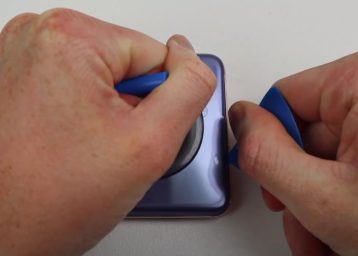
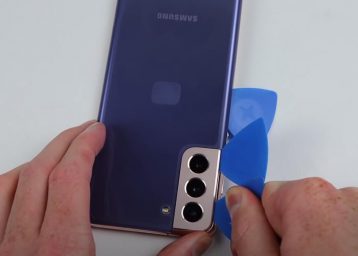
1.3 And then I can use my suction cup to create a gap for my plastic pick, use a plastic pry tool to get the back free.
You have to be careful, the new camera design will make your work a little more difficult. Be careful not to damage them.
Step 2: Remove the motherboard and wireless charging module
2.1 Remove the 13 Phillips screws from the upper speaker.
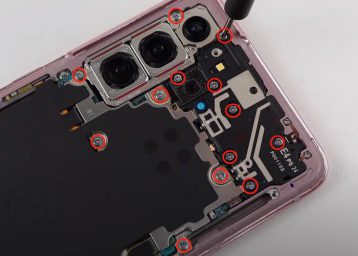
2.2 Once the screws are removed, we’re going to peel off the wireless charger module from over here from the bottom speaker assembly. And then we’re going to lift the top portion a little bit so we can disconnect the wireless charging cable underneath.
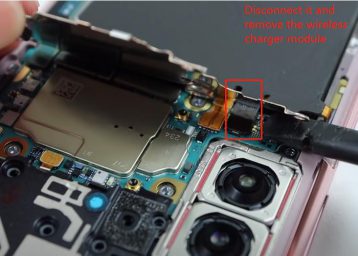
2.3 Now we’re going to disconnect the battery cable first before we disconnect the rest of the cables.
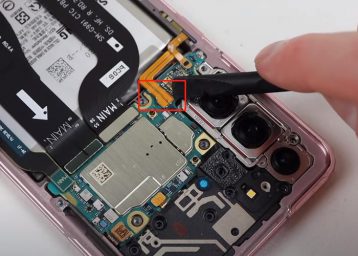
2.4 Let’s go ahead and disconnect the top speaker. Lift up and remove it.
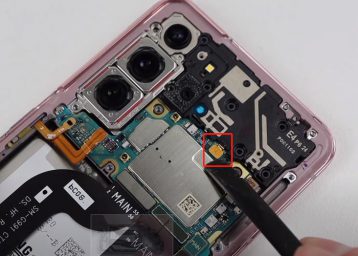
2.5 Let’s disconnect the power button flex cable, and then we can disconnect this flex cable right here. And this one right here which connects your main board to your sub board on bottom. We have one more flex cable here disconnect that and then we’re going to disconnect the front facing camera.
Now the front facing camera is glued in place so I’m not going to pry that off
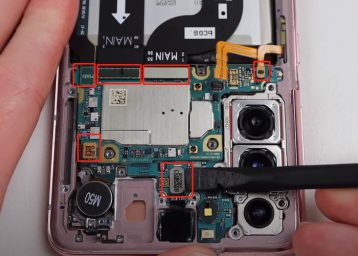
2.6 There is one more flex cable over here in the corner, just pop that off, now we can lift up and remover the main board.
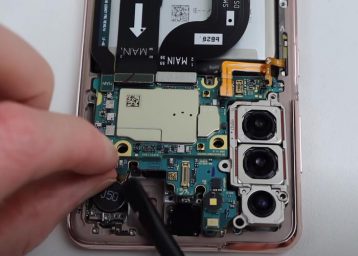
Step 3: Remove the sub board
3.1 Now we are going to remove the six Phillips screws holding the speaker. It will allow us to disassemble the charging port.
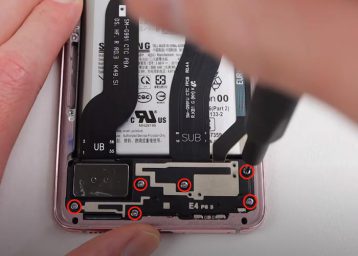
3.2 Remove the speaker assembly on the bottom.
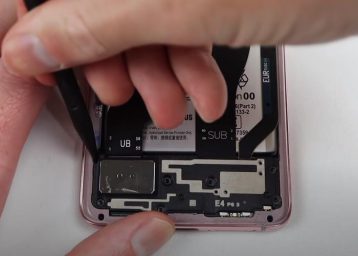
3.3 There are three flex cable, The flexible cable on the left connects the main board and the screen, and the flexible cable in the middle connects the main board and the sub-board.
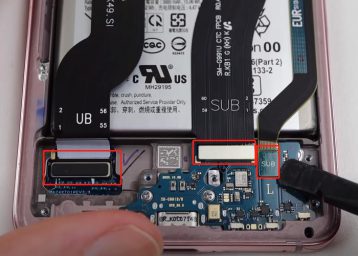
3.4 There are three Phillips screws holding the charger port down, remove them and we can lift up and remove the charger port sub board.
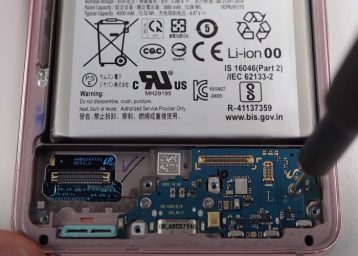
Step 4: Remove the battery
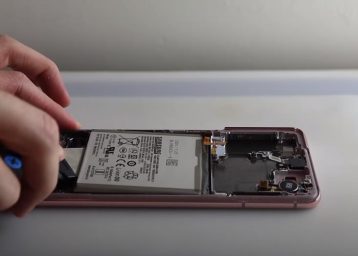
4.1 The last thing is to take out the battery, because a lot of adhesive is used, so we heat it up, even to 120 degrees. But battery removal is still difficult. I can only remove it carefully with a metal tool.
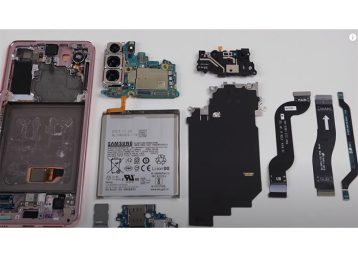
4.2 Now the phone has been completely dismantled down, you can take a look at its parts.
Notice: The whole procedure is practiced by our professional colleague, we don’t suggest you do it on your Samsung phone if you are not familiar with mobile phone repair. Any questions about our Samsung Galaxy S21 teardown and reassembly demonstration above, please leave your comments below so that we can discuss it further.
If you are interested, you can also go to our store to buy replacement parts for Samsung Galaxy S21, such as LCD screen assembly, battery, flexible cable, etc..Hope this article is helpful to you .


