


Full Process Presentation on OnePlus 9 Pro Teardown
BY ETrade Supply | 四月 13th, 2021 | 2 | 3
Screwdrivers – pentalobe, Phillips, Tri-wing, Standoff
Spudger
Tweezers
Suction cup
Steel prying tool
Hard plastic plectrum
Hot air gun
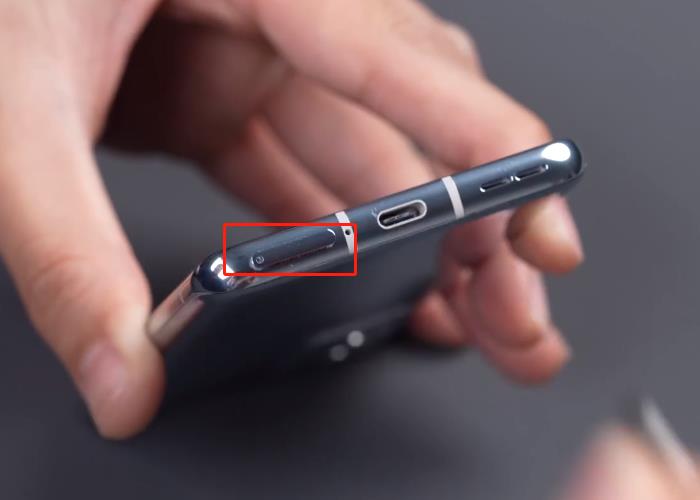
Step 1: Remove the card tray
1.1 Turn off the OnePlus 9 Pro, and then remove the card tray. The card holder is at the bottom of the phone, dual Nano-sim design.
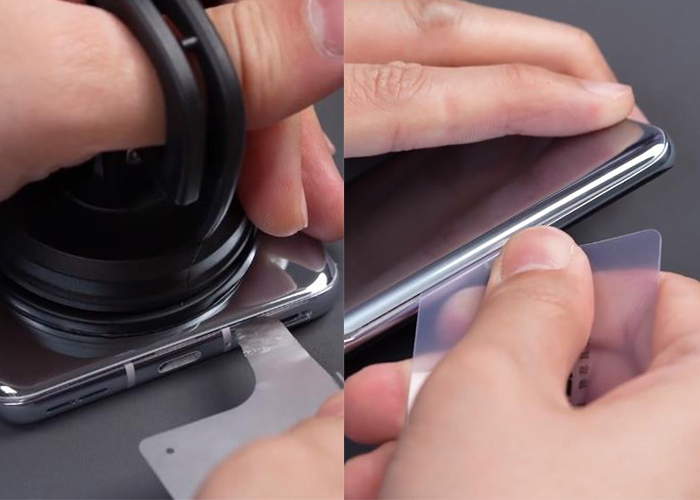
Step 2: Remove the back housing
2.1 After heating on a heating pad at 90 degrees Celsius for three minutes, use a suction cup to open a gap at the bottom.
Insert the disassembly sheet first, cut the bottom adhesive, and continue to cut along both sides.
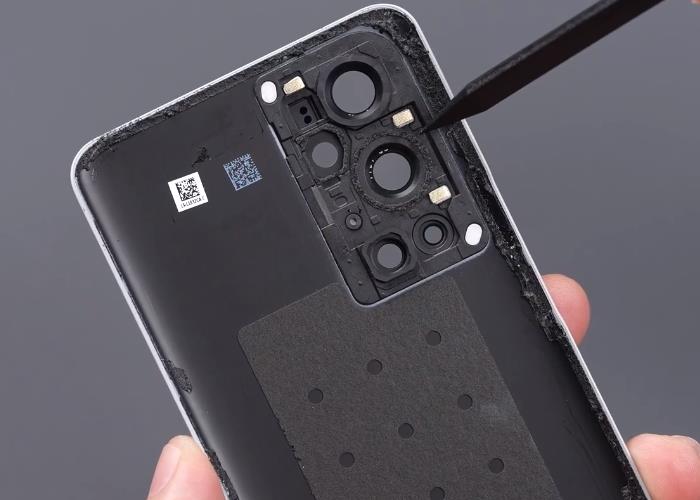
2.2 After slowly separating, we can see that the whole is relatively simple, except for the rear camera protection components, it is a large area of cushioning foam.
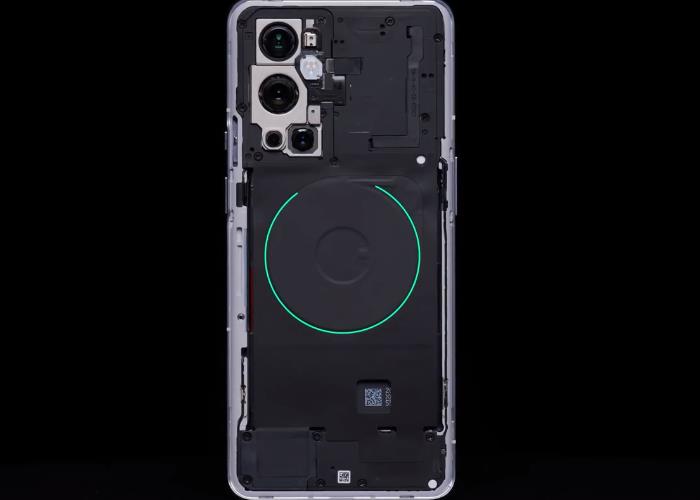
Step 3: Disassemble the motherboard
3.1 The structural layout of OnePlus 9 Pro is a conventional three-stage design, the heat dissipation film is basically covered completely, the upper part is the NFC coil, and the middle is the wireless charging module.
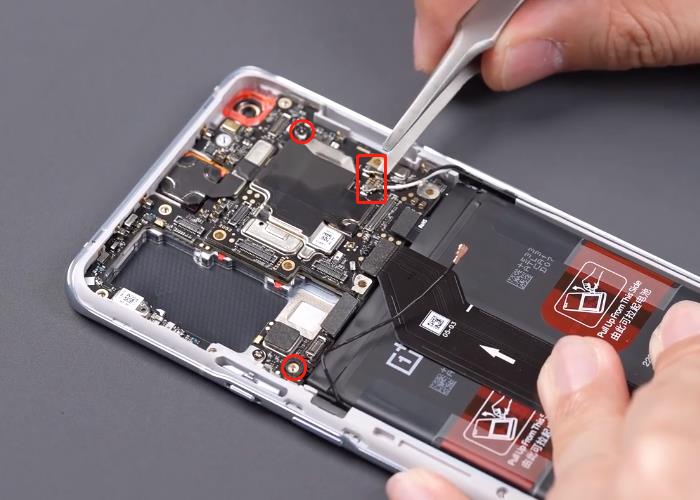
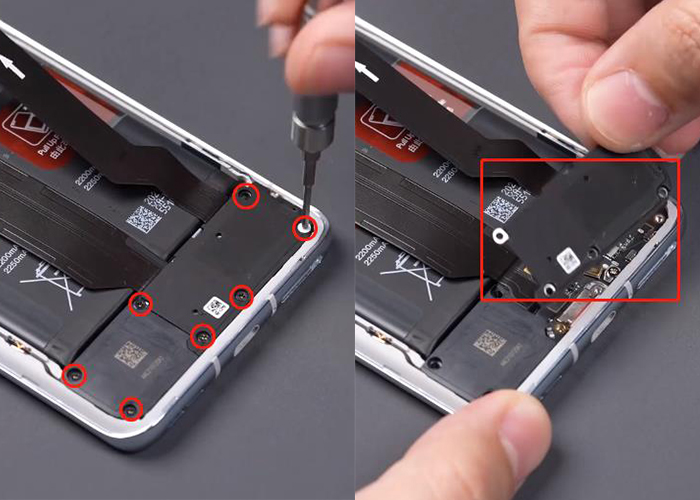
3.2 Remove the nine screws of the main board cover, pay attention to a screw under the microphone, remove it. Unplug one of the upper metal covers and open the BTB.
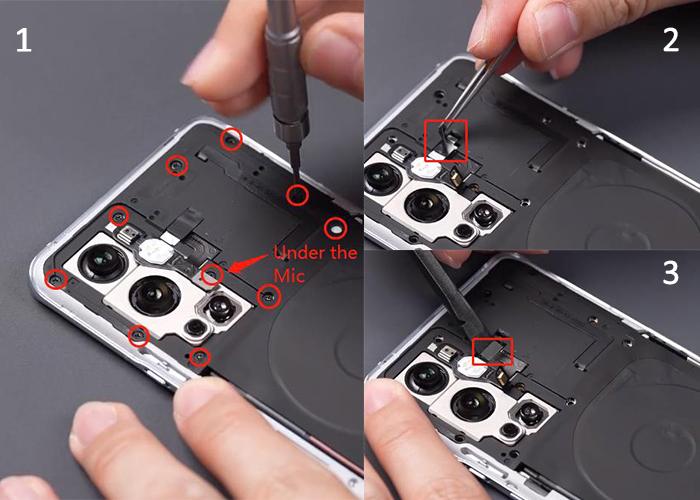
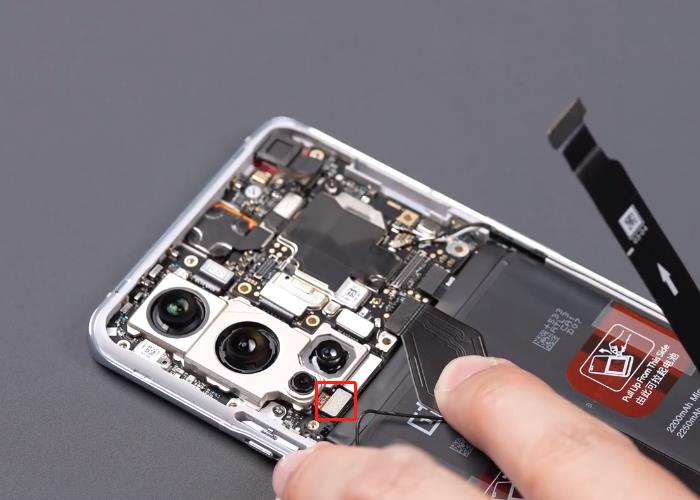
3.3 Then tear off the flash unit cable, there is a screw underneath.

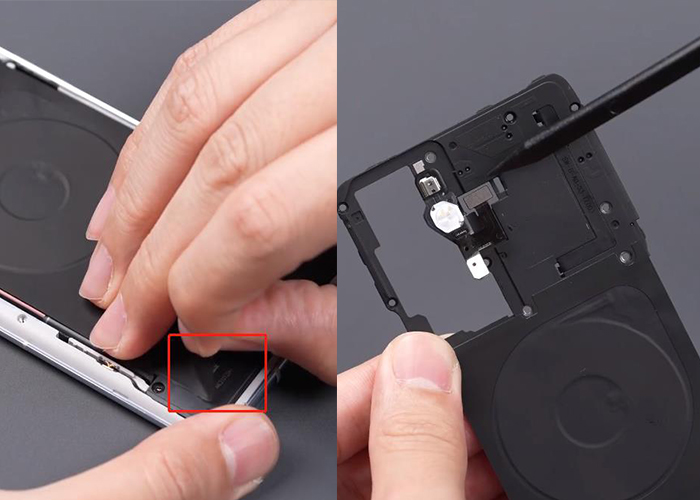
3.4 After removal, tear off the heat dissipation film at the bottom and unplug the cover.
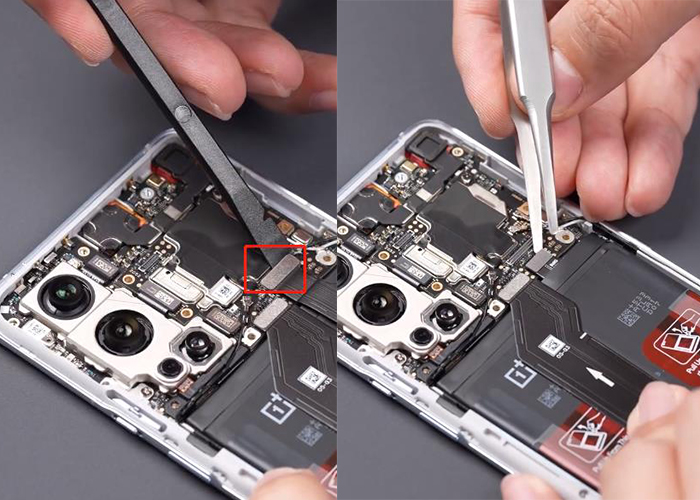
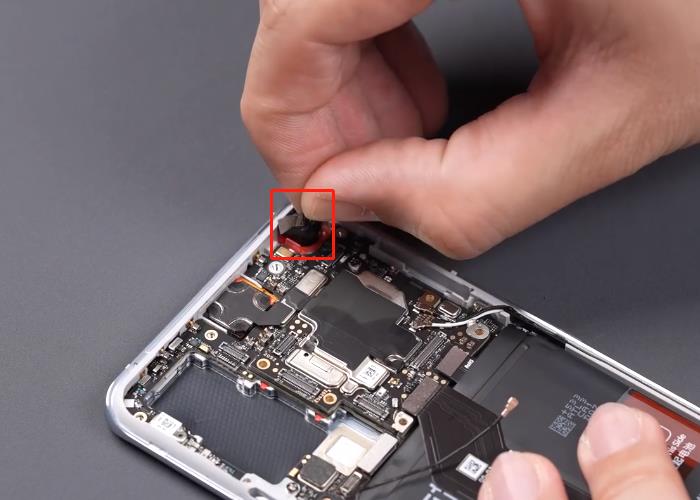
3.5 Open the BTB of the motherboard cable, now we can cut off the power.
3.6 Then unplug the BTB of TYPE-C port, telephoto, main camera, super wide-angle and front camera in turn, open a coaxial cable interface below, pull out the wire slot and open it.
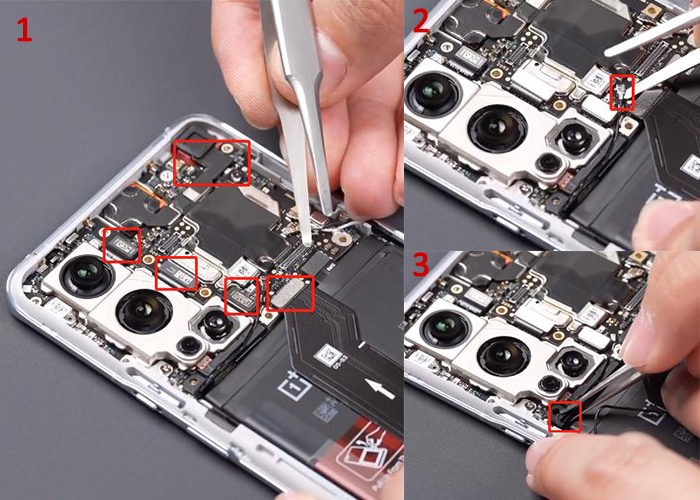
3.7 There is a black-and-white lens and a screen below, and the BTB with extended cable. After opening, Unplug the rear camera part.
Remove the front camera.
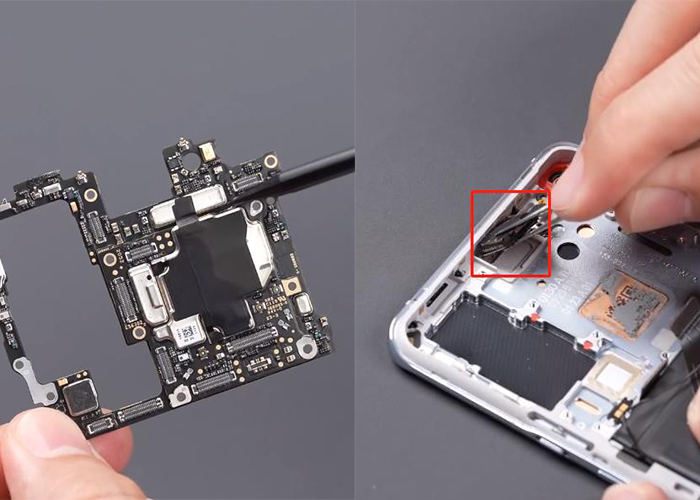
3.8 The two coaxial connectors at the lower corners, and then remove the two screws to fix the motherboard.
3.9 Unplug the motherboard, and then unplug the handset.
Step 4: Remove the sub-board part
4.1 Remove the seven screws that fix the sub-board, and unplug the cover
4.2 Unplug the metal cover plate above the main cable BTB, open the BTB of the main cable, the short focus camera and the small antenna board.
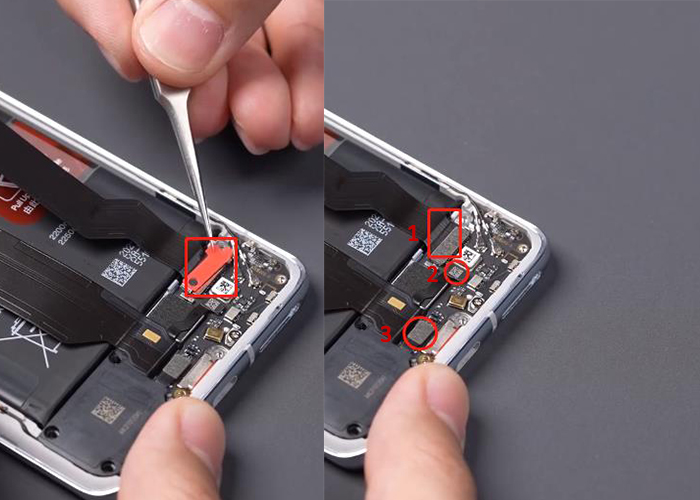
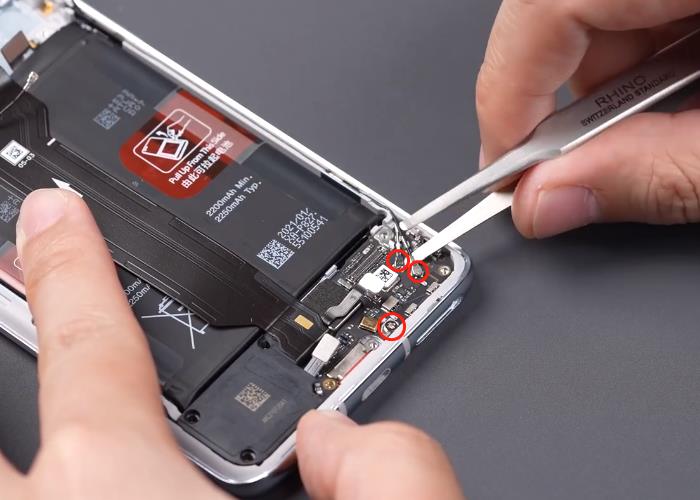
4.3 Open the two coaxial cable interfaces again, and remove a screw that fixes the guard plate.
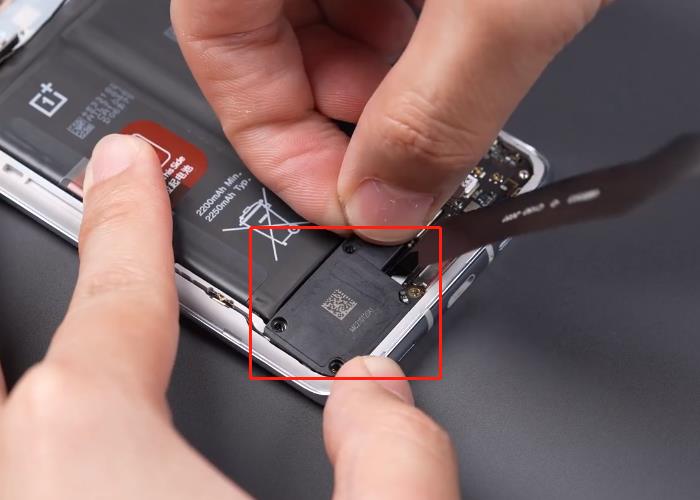
4.4 Unplug the speaker BOX before removing the auxiliary board
4.5 Then we Unplug the secondary board and continue to Unplug the charging port cable

4.6 Then Unplug the fingerprint under the screen, and then Unplug the X-axis linear motor
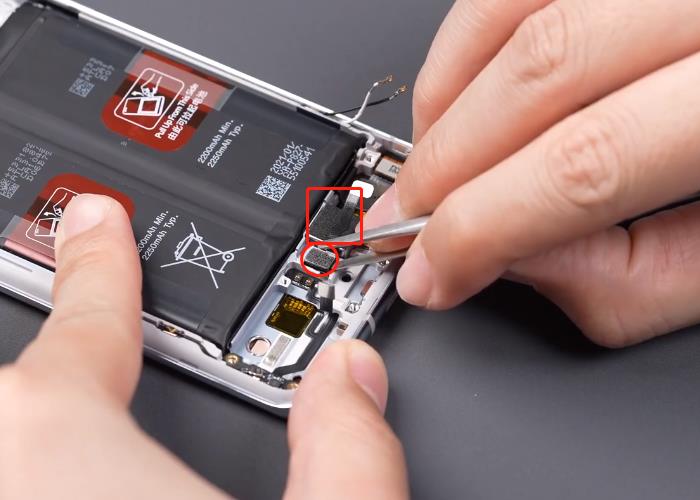
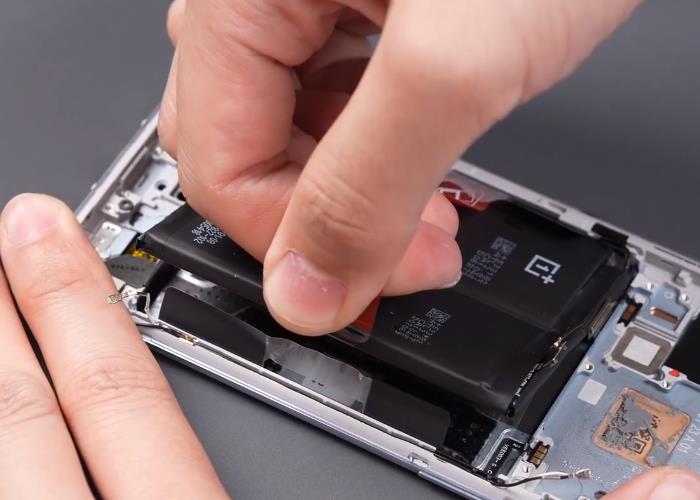
Step 5: Remove the battery part
5.1 The OnePlus 9 Pro battery has a quick-release design, which can be pulled on both sides. The dual-cell series design has a total battery capacity of 4500 mAh. With 65W flash charge, It only takes 29 minutes to be fully charged. 50W wireless fast charge, full charge in 46 minutes.
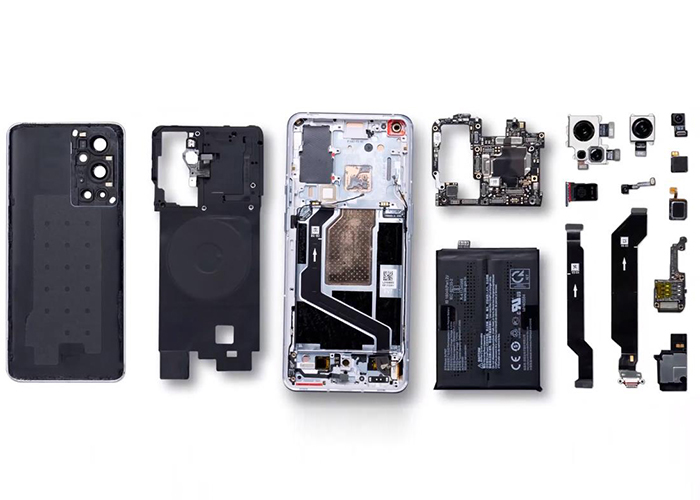
5.2 Here are all the parts of OnePlus 9 Pro
Notice:
The OnePlus 9 Pro screen and digitizer with flex cables are easy to break, just be careful. The battery connector should be unplugged at first and connected back last, just remember this. For more details about OnePlus 9 Pro tear down process, just follow our blog or leave comments about your questions. We are glad to discuss it with you.


