


Full Process Presentation on iPhone 13 Pro Teardown
BY ETrade Supply | 十月 12th, 2021 | 0 | 1
Screwdrivers – pentalobe, Phillips, Tri-wing, Standoff
Spudger
Tweezers
Suction cup
Hard plastic plectrum
Hot air gun
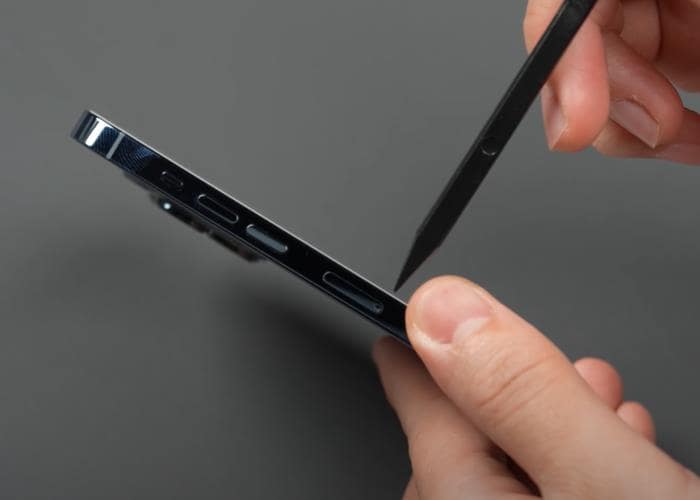
Step 1: Take out the card tray after shutting down
The card tray of iPhone 13 Pro is on the left side of the fuselage. It has a dual Nano SIM design and is placed up and down. The card tray is made of pure metal and has a dust-proof and waterproof rubber ring on the inside.
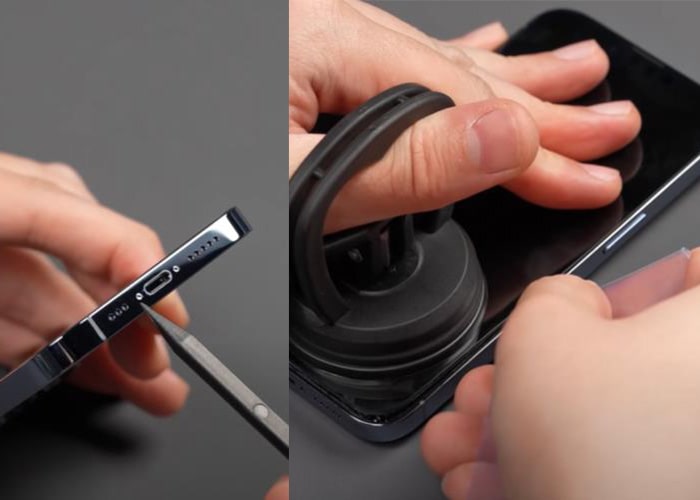
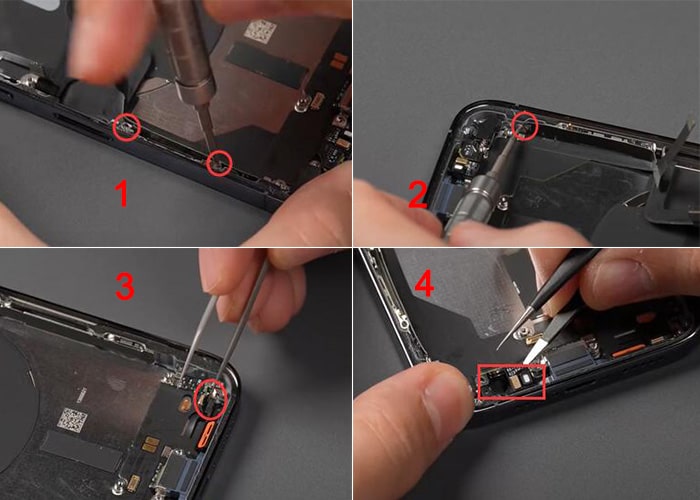
Step 2: Disassemble the screen
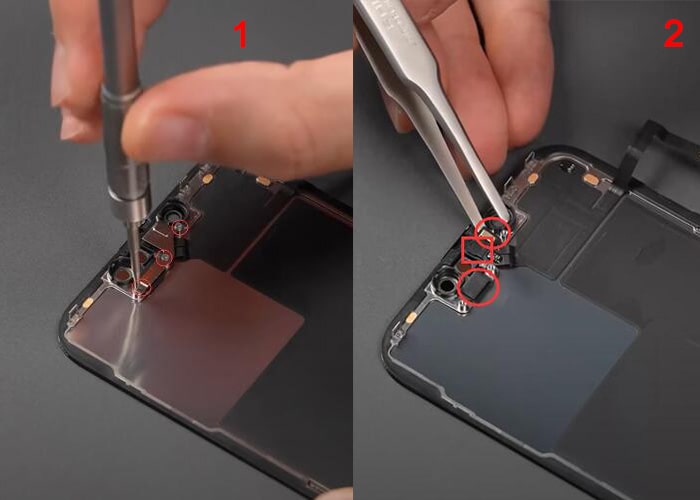
2.1 Use a 0.8 pentagonal screwdriver to remove the two screws. After heating on a heating pad at 90 degrees Celsius for three minutes, use a suction cup to open a gap, carefully insert it with a plastic disassembler, cut off part of the adhesive at the bottom, and then use the disassembler to cut all the adhesive. The screen cable of the iPhone 13 Pro is the same as the screen of the iPhone 12 Pro, which is also on the left side, so be careful when you draw the left side. Finally, pull out the buckle at the top of the screen to open the screen. It should be noted that the cable of the sensor component is very short, so the opening angle cannot exceed 88.6 degrees, otherwise it is easy to break.
2.2 Use a 0.6Y screwdriver to remove the 3 screws fixing the battery BTB cover, and take out the cover
2.3 Open the battery BTB to cut off the power, continue to remove the four screws that fix the cover of the induction component, and take out the cover
2.4 Disconnect the sensing component and the BTB of the touch display to separate the screen part.
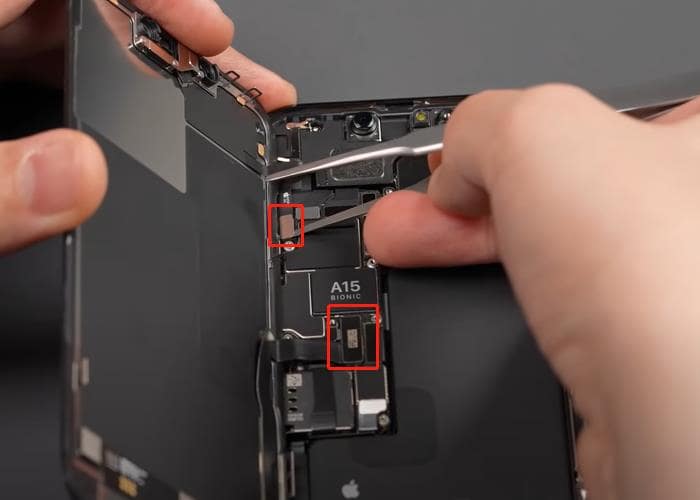
2.5 Remove the three screws fixing the cover of the induction component, and carefully pick out the cover. Then pick out the front microphone, proximity sensor, and ambient light sensor.
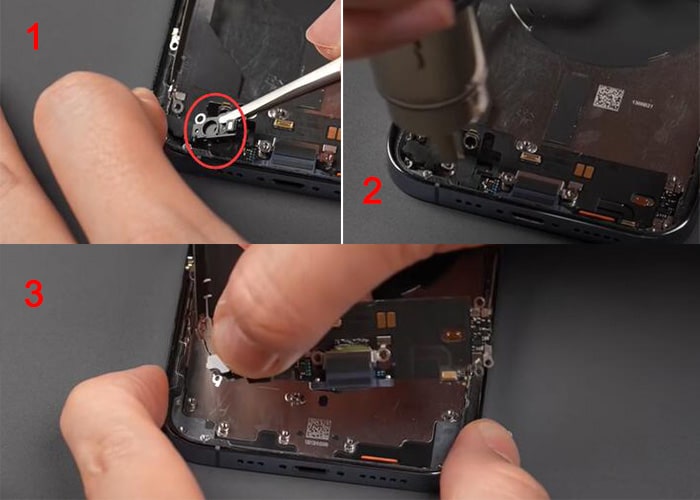
Step 3: Remove the motherboard
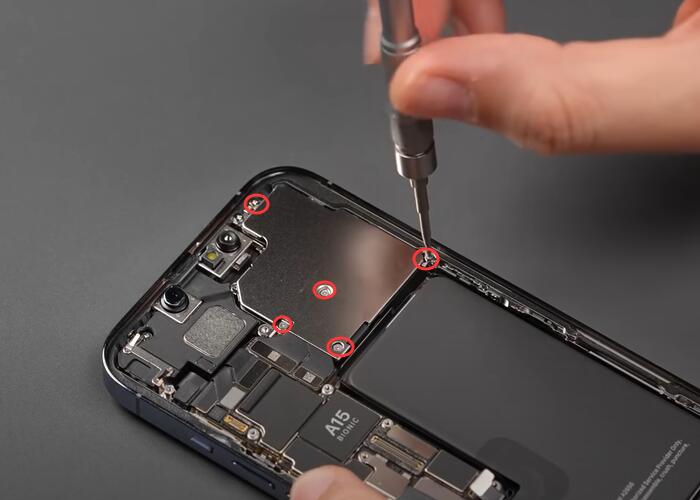
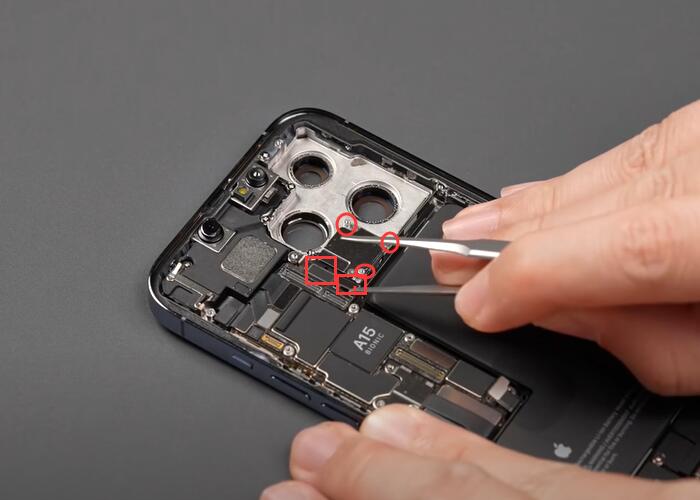
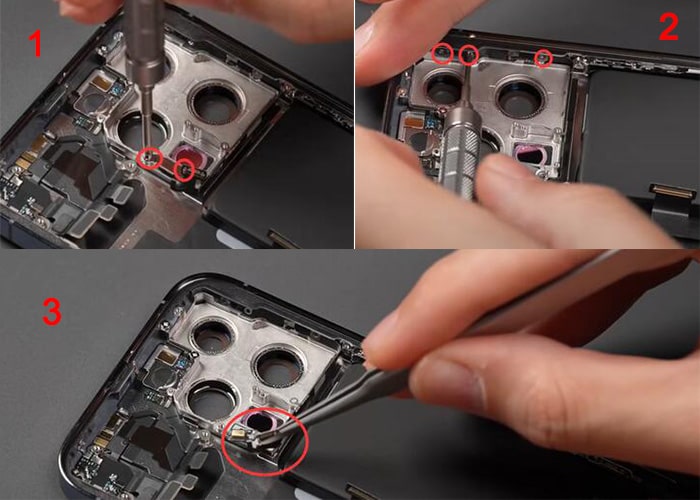
3.1 Remove the 5 screws fixing the rear camera cover and take out the cover
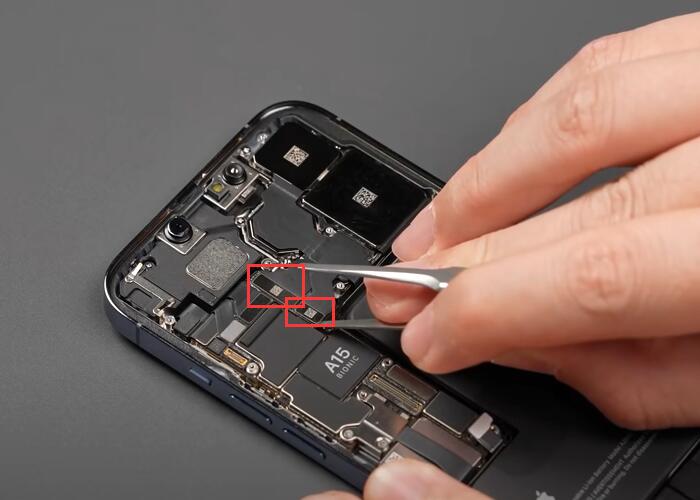
3.2 Pick up the two BTBs of the three cameras, and take out the three cameras.
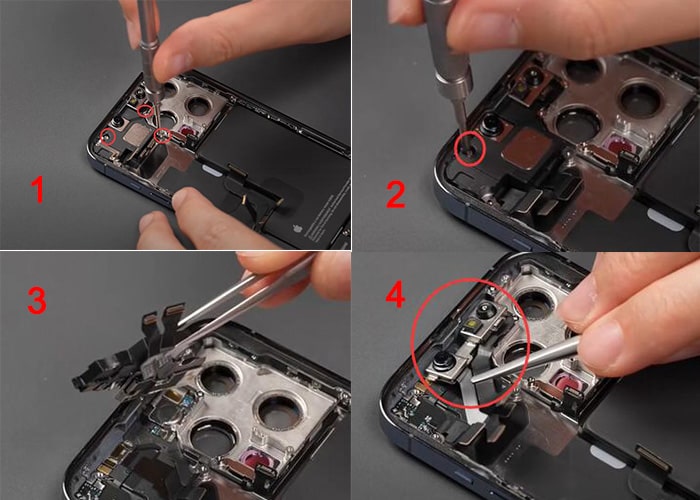
3.3 Open the BTB of the wifi and lidar, remove the 3 0.6Y-shaped screws that fix the lidar, and take out the lidar.
3.4 Remove the two screws fixing the antenna cover and take out the cover.
3.5 Pick up the BTB of the lower antenna, wireless charging module, sub-board, infrared, front camera, flash and two upper antennas in turn.
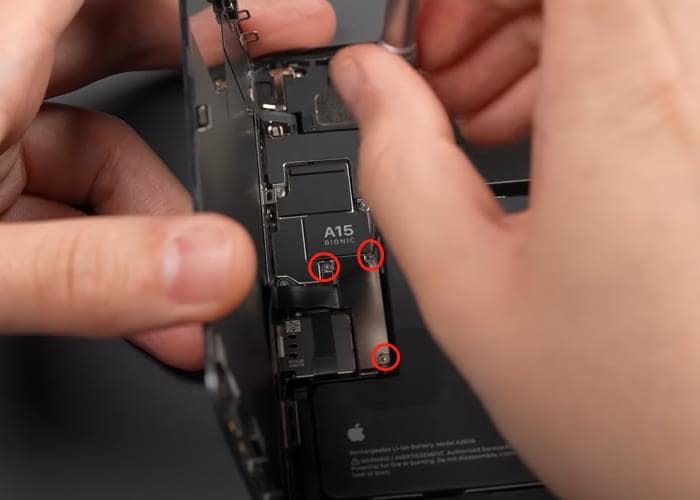
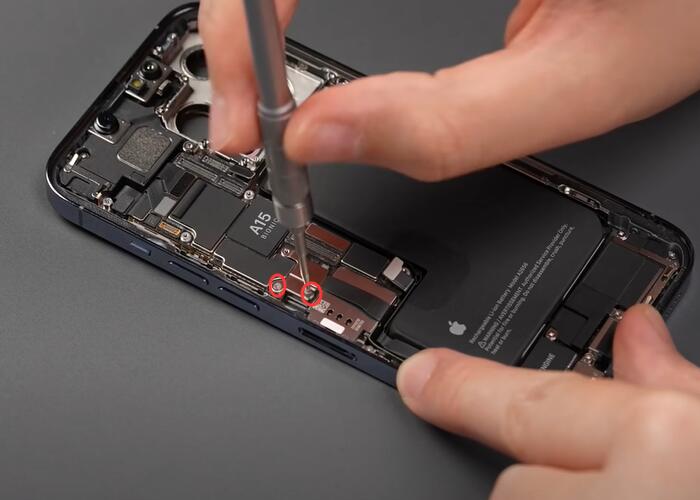
3.6 Remove the two screws that fix the motherboard and take out the motherboard from below. The motherboard is still a multi-layer stacking design.

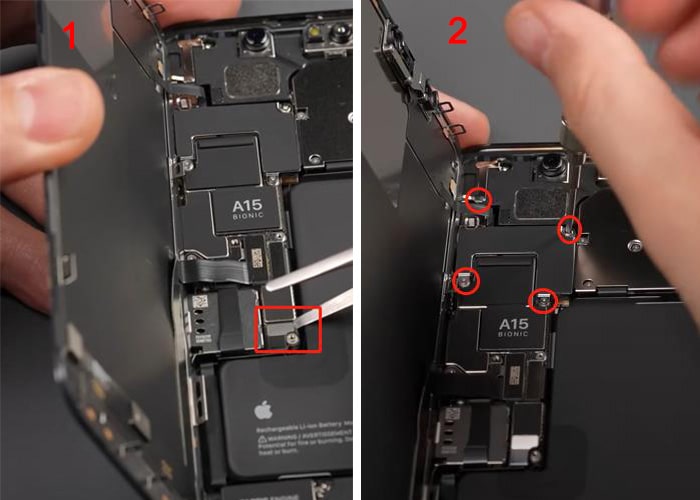
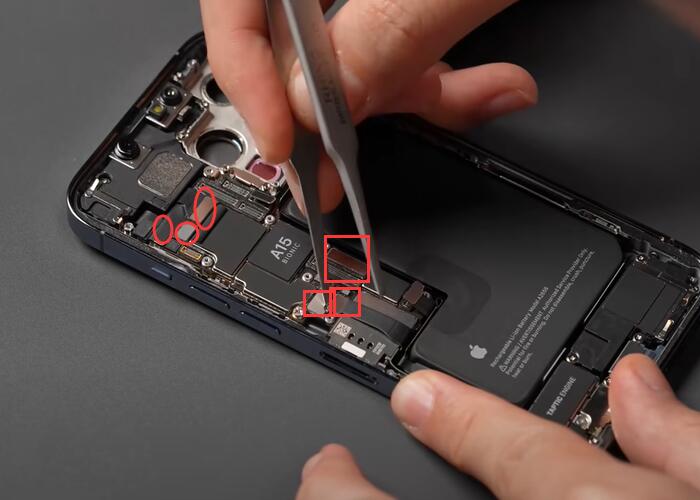
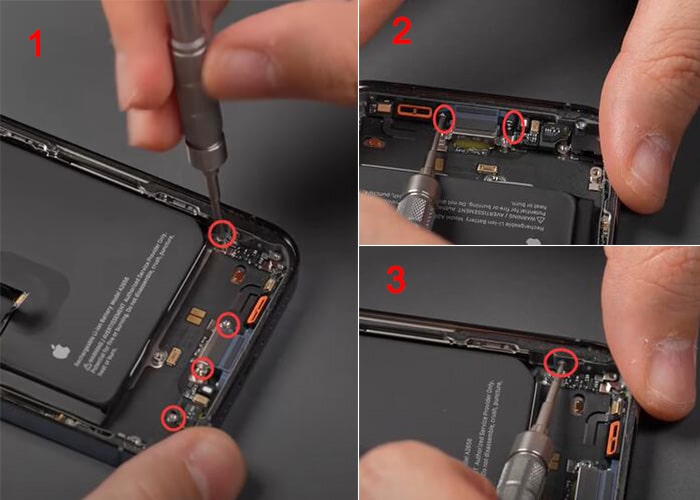
3.7 Look at the upper part again, remove the three screws that fix the handset, and take out the upper cover. There is a screw at the bottom, and the earpiece can be taken out after removing it.
3.8 Remove the two screws that fix the rear microphone cover, remove the cover, and then remove the three screws on the side to open the side cable. This cable also integrates an NFC antenna, and only one flash is left in the upper half.
Step 4: Remove the sub-board part
4.1 First remove the ten screws on the surface and take out the speaker.
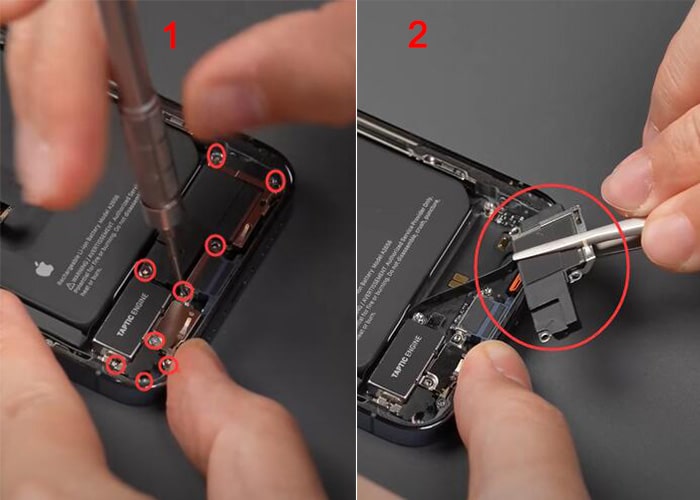
4.2 Continue to unscrew a TAPTIC ENGINE screw and take out the cover of the air pressure sensor
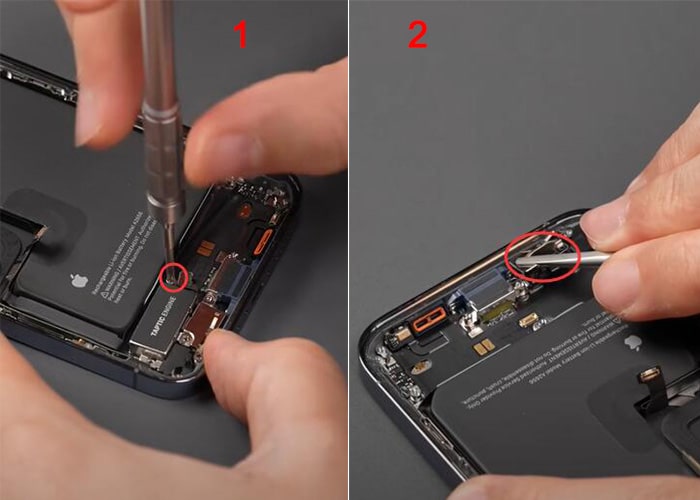
4.3 Remove the four screws on the surface, remove the two screws fixing the lighting interface and one screw on the right side.
But part of the sub-board is pressed under the battery, so we can only remove the battery first. The battery is fixed by three strips of easy-pull glue, and the battery of iPhone 13 Pro is taken out.
4.4 Now let's remove the sub-board again. Remove the remaining 3 screws and pick up the microphone and air pressure sensor at the bottom.
4.5 Take out the bracket of the air pressure sensor, and then heat it with a heat gun for a while, then the whole sub-board can be taken out.
Notice:
When disassembling the screen, use the plastic disassembling piece to pry open the left side of the phone and be careful to avoid breaking the screen cable. Then when opening the screen, the opening angle should not exceed 88 degrees to avoid breaking the cable of the sensor component. For more details about iPhone 13 Pro tear down process, just follow our blog or leave comments about your questions. We are glad to discuss it with you.


 Samsung Galaxy S22 Ultra – FIRST LOOK IS HERE
  IOS 17.4 official version pushed to block battery vulnerability
  Is the Chinese-made rear case for the iPhone 15 series going on the market?
  New products coming:USB to MFI Lightning Cable
  Successfully submitted!