


How to Make DIY iPhone Cute Teddy Case
BY Junior | 九月 4th, 2013 | 0 | 0
If you want to protect your iPhone and you need a life proof case for it, making such cute teddy bear case by yourself is a cool way to personalize your device. It’s even better than an expensive case from online store. Do you want to own a unique and beautiful case for your iPhone now? Do you have many different kinds of toys? Today we make this tutorial showing how you can make a super quick and cheap iPhone teddy case.
[caption id="attachment_4634" align="alignnone" width="300"]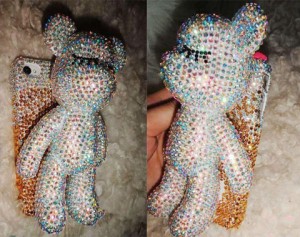 How to Make DIY iPhone Teddy Case[/caption]
Materials & Tools:
Teddy bear, Rhinestone, Glue, Drill stick pen, Tweezers, Plate.
Steps:
[caption id="attachment_4621" align="alignnone" width="300"]
How to Make DIY iPhone Teddy Case[/caption]
Materials & Tools:
Teddy bear, Rhinestone, Glue, Drill stick pen, Tweezers, Plate.
Steps:
[caption id="attachment_4621" align="alignnone" width="300"] Get the materials and tools ready[/caption]
Step One: Get the materials and tools ready; select a teddy bear according to your preference.
[caption id="attachment_4622" align="alignnone" width="224"]
Get the materials and tools ready[/caption]
Step One: Get the materials and tools ready; select a teddy bear according to your preference.
[caption id="attachment_4622" align="alignnone" width="224"]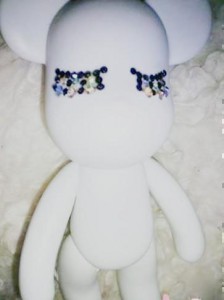 Make the eyes for teddy bear[/caption]
Step two: Make the eyes for teddy bear with some rhinestones. Please note that you need to choose some black rhinestones to make the eyeliners.
[caption id="attachment_4623" align="alignnone" width="222"]
Make the eyes for teddy bear[/caption]
Step two: Make the eyes for teddy bear with some rhinestones. Please note that you need to choose some black rhinestones to make the eyeliners.
[caption id="attachment_4623" align="alignnone" width="222"]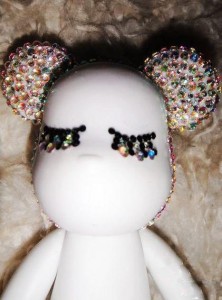 Paste the rhinestones on the whole head part of the teddy bear[/caption]
Step Three: Paste the rhinestones on the whole head part of the teddy bear. In this step, you must leave some room on the back part of the head, so that the bear can stick with your case closely.
[caption id="attachment_4624" align="alignnone" width="187"]
Paste the rhinestones on the whole head part of the teddy bear[/caption]
Step Three: Paste the rhinestones on the whole head part of the teddy bear. In this step, you must leave some room on the back part of the head, so that the bear can stick with your case closely.
[caption id="attachment_4624" align="alignnone" width="187"]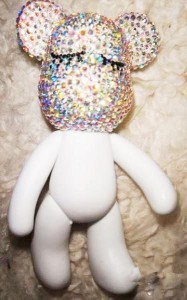 Decorate the face[/caption]
Step Four: Use the same way to decorate the face.
[caption id="attachment_4625" align="alignnone" width="204"]
Decorate the face[/caption]
Step Four: Use the same way to decorate the face.
[caption id="attachment_4625" align="alignnone" width="204"] Paste the body with your favorite rhinestones[/caption]
Step Five: Start to paste the body with your favorite rhinestones. You shouldn’t decorate the legs and hands in this step.
[caption id="attachment_4626" align="alignnone" width="197"]
Paste the body with your favorite rhinestones[/caption]
Step Five: Start to paste the body with your favorite rhinestones. You shouldn’t decorate the legs and hands in this step.
[caption id="attachment_4626" align="alignnone" width="197"]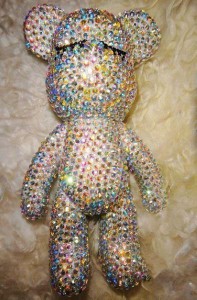 Decorate the legs and hands[/caption]
[caption id="attachment_4627" align="alignnone" width="196"]
Decorate the legs and hands[/caption]
[caption id="attachment_4627" align="alignnone" width="196"]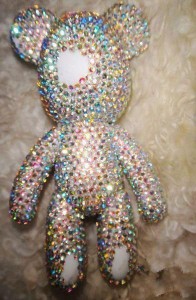 The back part of the teddy bear[/caption]
Step Six: Use the rhinestones to decorate the legs and hands. As you can see in the following picture, you need to leave the spaces on the legs part. This is the back part of the teddy bear.
[caption id="attachment_4628" align="alignnone" width="199"]
The back part of the teddy bear[/caption]
Step Six: Use the rhinestones to decorate the legs and hands. As you can see in the following picture, you need to leave the spaces on the legs part. This is the back part of the teddy bear.
[caption id="attachment_4628" align="alignnone" width="199"]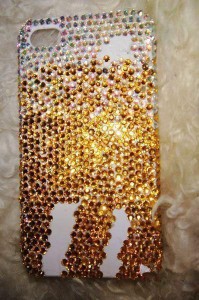 Decorate your iPhone case[/caption]
Step Seven: Use the rhinestones to decorate your case. Remember to leave two spaces on the bottom part of the case.
[caption id="attachment_4629" align="alignnone" width="196"]
Decorate your iPhone case[/caption]
Step Seven: Use the rhinestones to decorate your case. Remember to leave two spaces on the bottom part of the case.
[caption id="attachment_4629" align="alignnone" width="196"]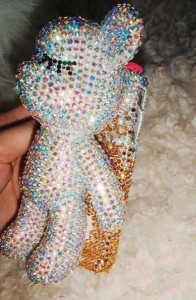 Stick the case and the bear together[/caption]
Step Eight: Use the glue to stick the case and the bear together.
[caption id="attachment_4630" align="alignnone" width="196"]
Stick the case and the bear together[/caption]
Step Eight: Use the glue to stick the case and the bear together.
[caption id="attachment_4630" align="alignnone" width="196"]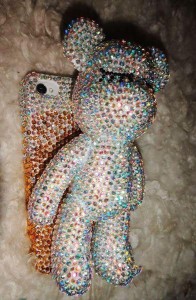 iPhone teddy case[/caption]
Step Nine: This is the picture of a completed iPhone teddy case. Although making this DIY unique case is not very hard, it requires patience.
iPhone teddy case[/caption]
Step Nine: This is the picture of a completed iPhone teddy case. Although making this DIY unique case is not very hard, it requires patience.
 How to Make DIY iPhone Teddy Case[/caption]
Materials & Tools:
Teddy bear, Rhinestone, Glue, Drill stick pen, Tweezers, Plate.
Steps:
[caption id="attachment_4621" align="alignnone" width="300"]
How to Make DIY iPhone Teddy Case[/caption]
Materials & Tools:
Teddy bear, Rhinestone, Glue, Drill stick pen, Tweezers, Plate.
Steps:
[caption id="attachment_4621" align="alignnone" width="300"]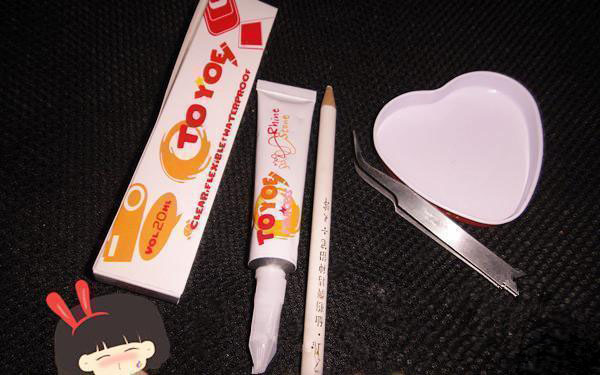 Get the materials and tools ready[/caption]
Step One: Get the materials and tools ready; select a teddy bear according to your preference.
[caption id="attachment_4622" align="alignnone" width="224"]
Get the materials and tools ready[/caption]
Step One: Get the materials and tools ready; select a teddy bear according to your preference.
[caption id="attachment_4622" align="alignnone" width="224"]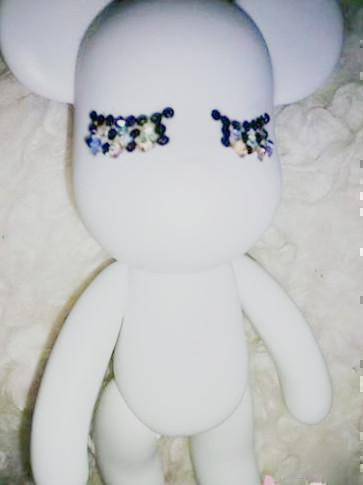 Make the eyes for teddy bear[/caption]
Step two: Make the eyes for teddy bear with some rhinestones. Please note that you need to choose some black rhinestones to make the eyeliners.
[caption id="attachment_4623" align="alignnone" width="222"]
Make the eyes for teddy bear[/caption]
Step two: Make the eyes for teddy bear with some rhinestones. Please note that you need to choose some black rhinestones to make the eyeliners.
[caption id="attachment_4623" align="alignnone" width="222"]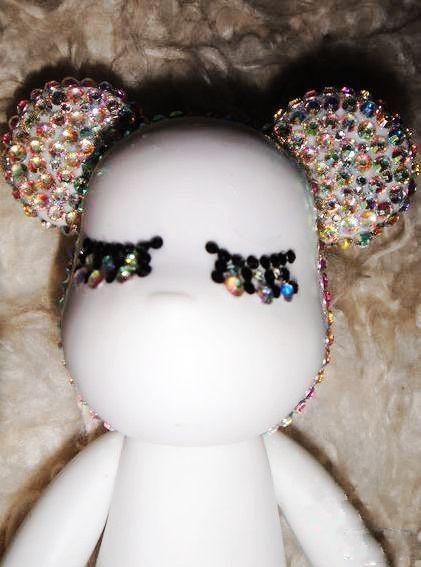 Paste the rhinestones on the whole head part of the teddy bear[/caption]
Step Three: Paste the rhinestones on the whole head part of the teddy bear. In this step, you must leave some room on the back part of the head, so that the bear can stick with your case closely.
[caption id="attachment_4624" align="alignnone" width="187"]
Paste the rhinestones on the whole head part of the teddy bear[/caption]
Step Three: Paste the rhinestones on the whole head part of the teddy bear. In this step, you must leave some room on the back part of the head, so that the bear can stick with your case closely.
[caption id="attachment_4624" align="alignnone" width="187"] Decorate the face[/caption]
Step Four: Use the same way to decorate the face.
[caption id="attachment_4625" align="alignnone" width="204"]
Decorate the face[/caption]
Step Four: Use the same way to decorate the face.
[caption id="attachment_4625" align="alignnone" width="204"]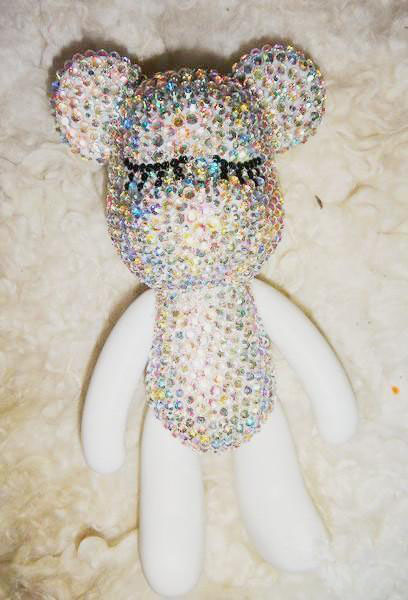 Paste the body with your favorite rhinestones[/caption]
Step Five: Start to paste the body with your favorite rhinestones. You shouldn’t decorate the legs and hands in this step.
[caption id="attachment_4626" align="alignnone" width="197"]
Paste the body with your favorite rhinestones[/caption]
Step Five: Start to paste the body with your favorite rhinestones. You shouldn’t decorate the legs and hands in this step.
[caption id="attachment_4626" align="alignnone" width="197"] Decorate the legs and hands[/caption]
[caption id="attachment_4627" align="alignnone" width="196"]
Decorate the legs and hands[/caption]
[caption id="attachment_4627" align="alignnone" width="196"]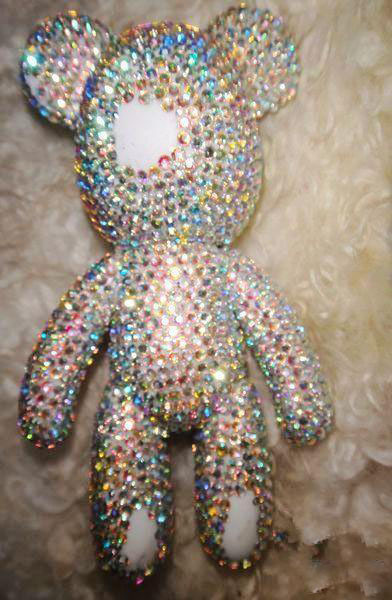 The back part of the teddy bear[/caption]
Step Six: Use the rhinestones to decorate the legs and hands. As you can see in the following picture, you need to leave the spaces on the legs part. This is the back part of the teddy bear.
[caption id="attachment_4628" align="alignnone" width="199"]
The back part of the teddy bear[/caption]
Step Six: Use the rhinestones to decorate the legs and hands. As you can see in the following picture, you need to leave the spaces on the legs part. This is the back part of the teddy bear.
[caption id="attachment_4628" align="alignnone" width="199"] Decorate your iPhone case[/caption]
Step Seven: Use the rhinestones to decorate your case. Remember to leave two spaces on the bottom part of the case.
[caption id="attachment_4629" align="alignnone" width="196"]
Decorate your iPhone case[/caption]
Step Seven: Use the rhinestones to decorate your case. Remember to leave two spaces on the bottom part of the case.
[caption id="attachment_4629" align="alignnone" width="196"]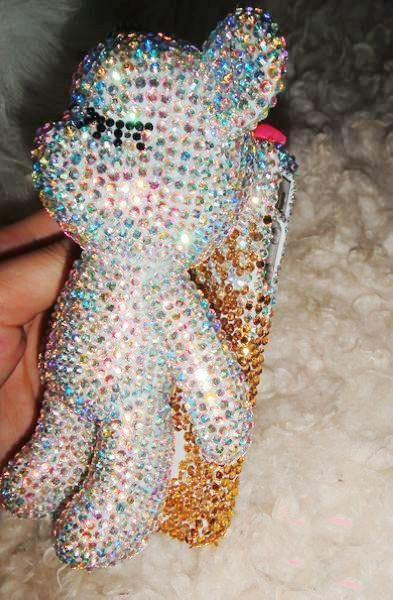 Stick the case and the bear together[/caption]
Step Eight: Use the glue to stick the case and the bear together.
[caption id="attachment_4630" align="alignnone" width="196"]
Stick the case and the bear together[/caption]
Step Eight: Use the glue to stick the case and the bear together.
[caption id="attachment_4630" align="alignnone" width="196"] iPhone teddy case[/caption]
Step Nine: This is the picture of a completed iPhone teddy case. Although making this DIY unique case is not very hard, it requires patience.
iPhone teddy case[/caption]
Step Nine: This is the picture of a completed iPhone teddy case. Although making this DIY unique case is not very hard, it requires patience.
Share:


