


How to Change an iPhone 11 to iPhone 12 by Replacing the Back Housing
BY kaye | 十月 20th, 2020 | 0 | 5
The iPhone 12 is going to launch on the global market in this September. This new iPhone model has become the top one mobile phone we are expecting this year. It is still a time we have to wait for the real iPhone 12 in the flagship store, meanwhile, the third-party iPhone 12 back housing and other small parts have been manufactured. In doing so, it makes us possible to replace an iPhone 11 with the iPhone 12 back housing, which makes it the iPhone 12 look and functions well as iPhone 11. Here we would like to specify our test.
1. Tear down the iPhone 11 and take off all the inner parts and components
1.1 Loosen and unbolt the screws, disconnect the flex cables and tear off the iPhone 11 display screen first
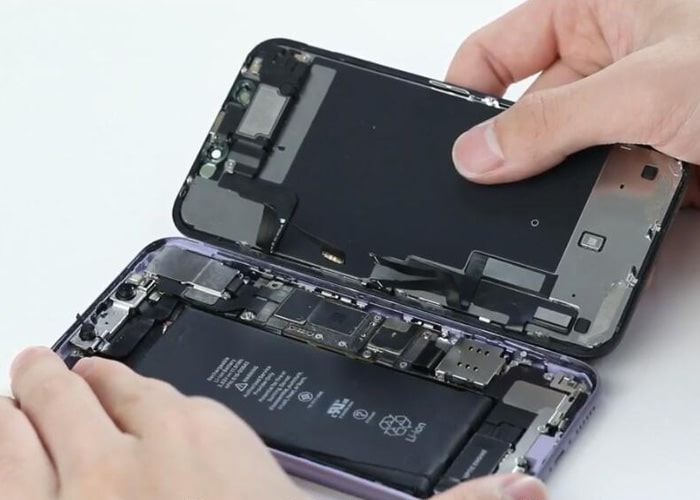
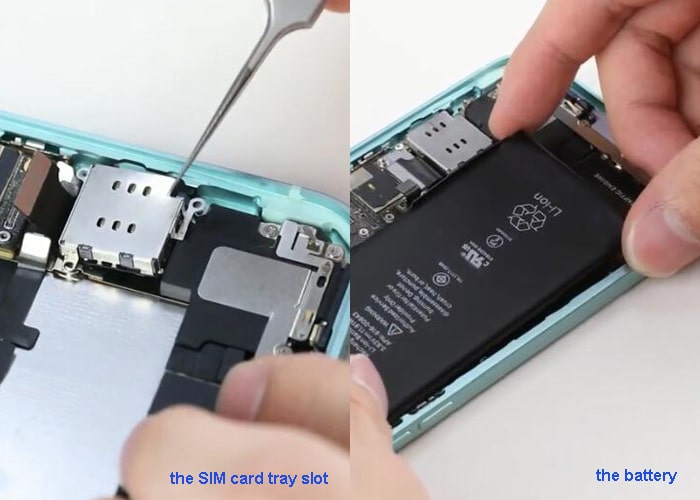
1.2 Eject out and take out the SIM card tray, unbolt the screws and remove the metal panel, take down the loudspeakers on the bottom
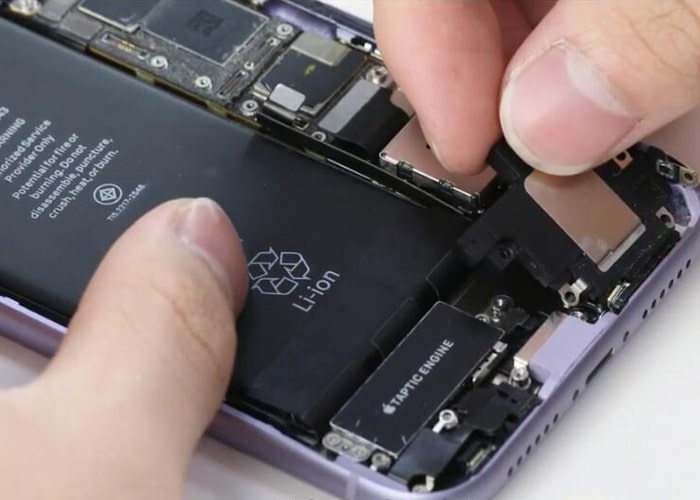
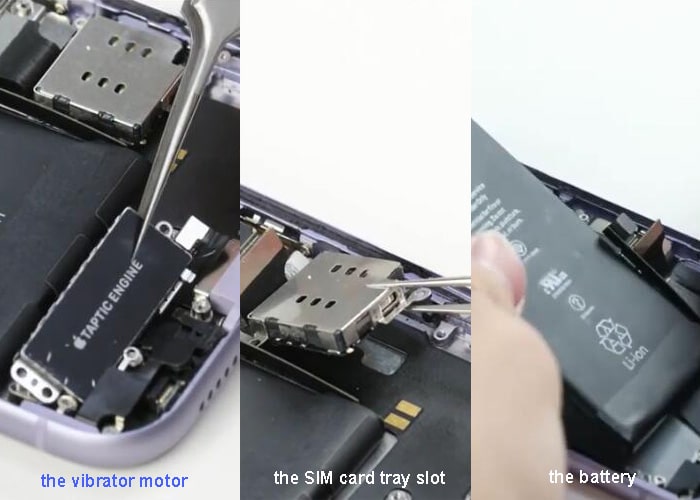
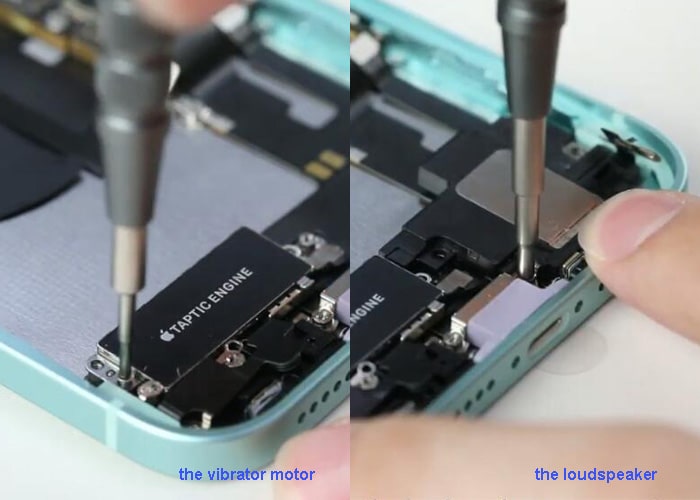
1.3 Disconnect and take off the vibrator engine, the SIM card slot, and then remove the battery
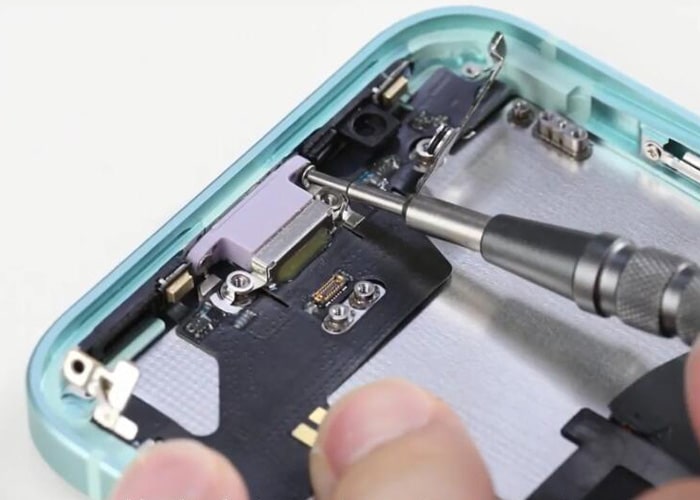
1.4 Unbolt and snap off the screws, take off the charging port connector flex. Just be careful while prying. Don’t break the flex
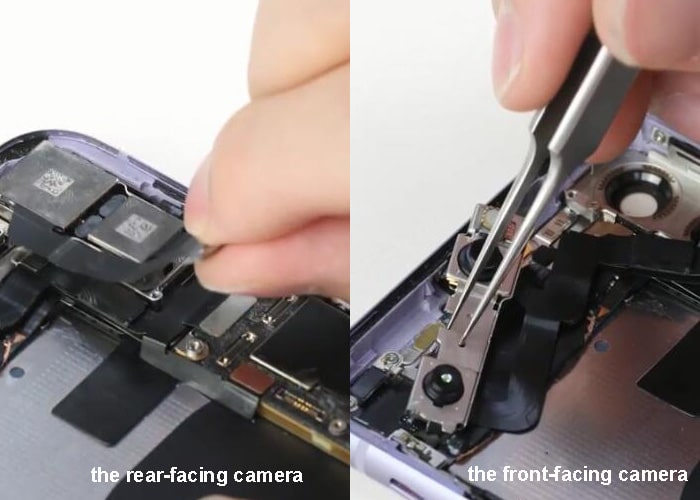
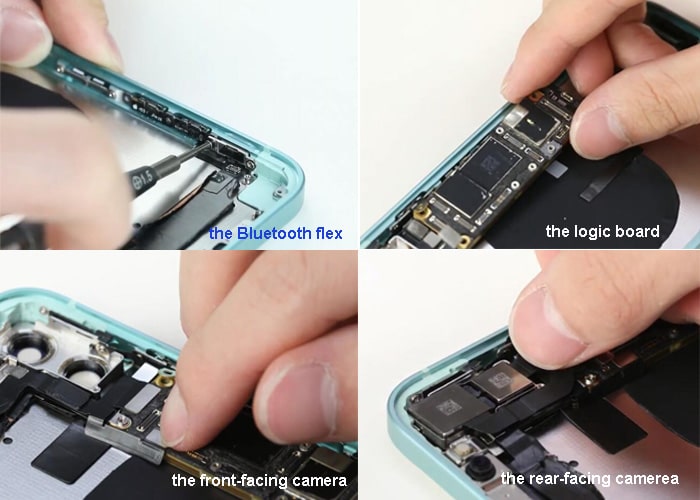
1.5 Undo the screws and remove the metal shield. Take off the rear-facing cameras and the front-facing camera module
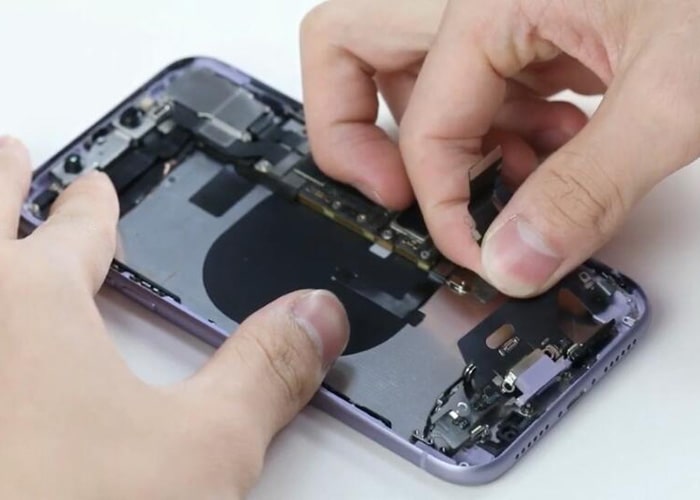
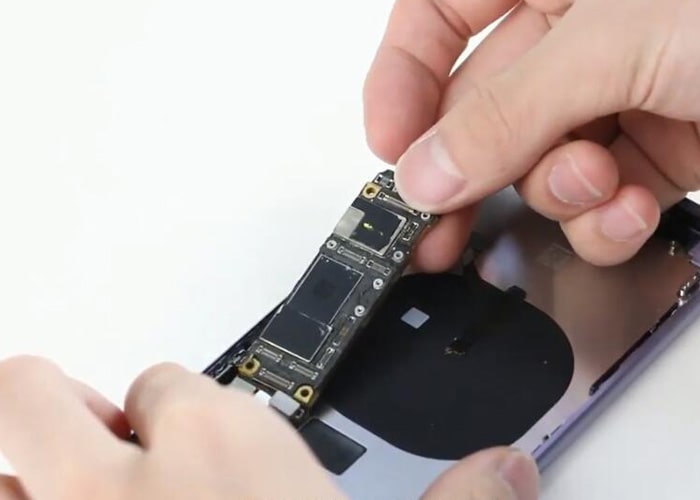
1.6 Loosen the screws and tear off the logic board
1.7 Use a hot air gun to blow, unbolt the screws and take off the bottom flex
1.8 Take off the volume up/down side keys with flex and all the side key fixtures, take off the power button flex and flesh
2. Assemble the iPhone 11 parts and components to the new iPhone 12 back housing
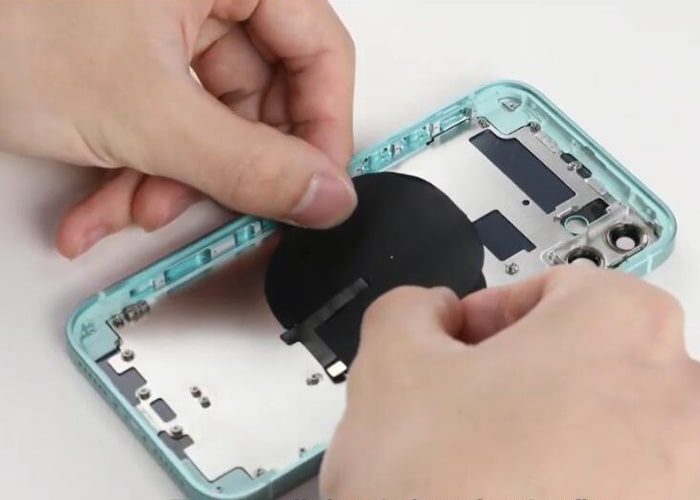
2.1 Here comes the steps of assembling the iPhone 11 parts to the iPhone 12 back housing. Install the wireless charging coil on to the back housing firstly
2.2 Assemble the side key buttons and fix them with small metal panels on the back housing
2.3 Assemble dust-proof into the ear speaker and loudspeaker, install the iPhone 11 power button flex and flesh back
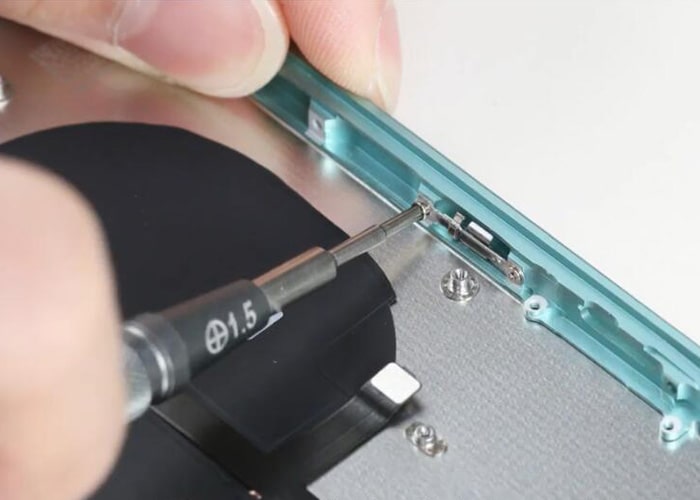
2.4 Assemble the volume up/down buttons with flex, fixing the side keys with screws on the back housing
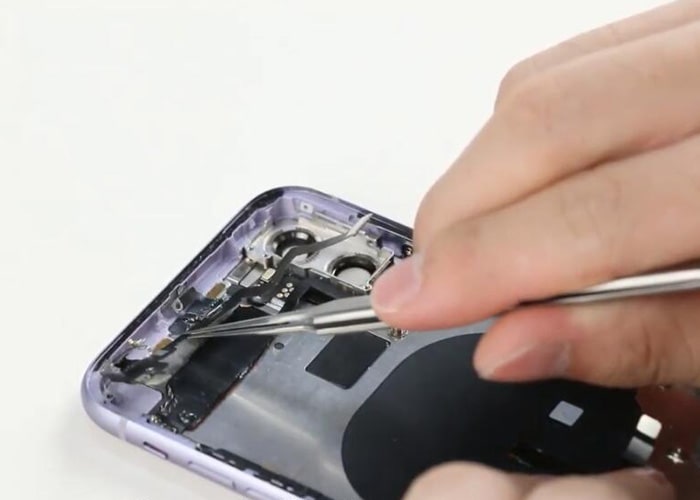
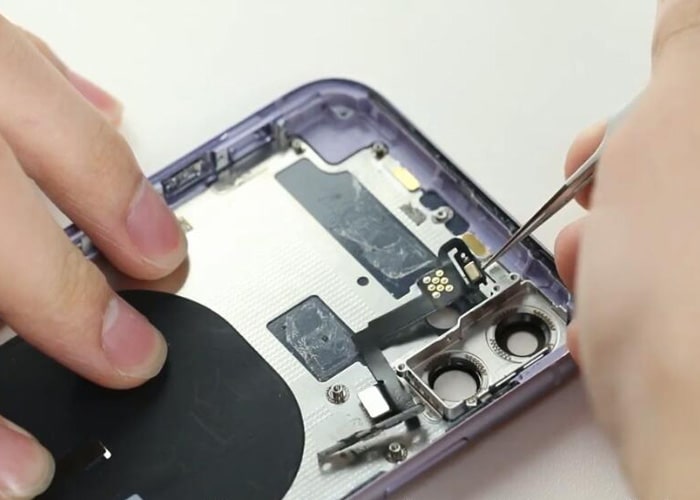
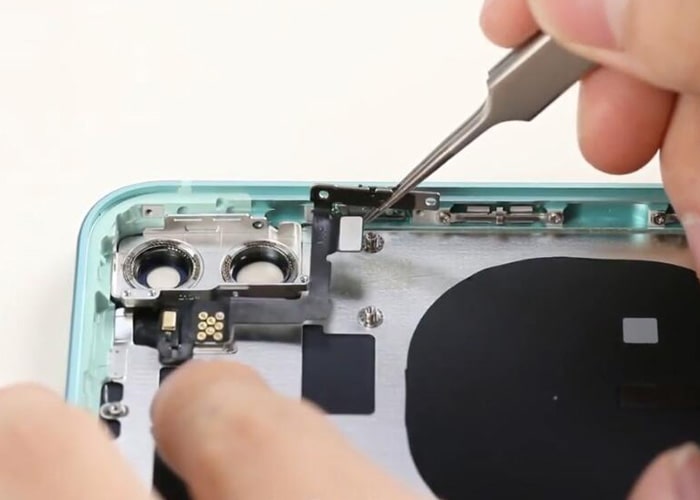
2.5 Install the Bluetooth flex, then the logic board, the rear-facing cameras, and the front camera modules to the back housing. Connect the flex cables and fix the components with screws and metal panels
2.6 Assemble the charging port connector flex and fix it with screws
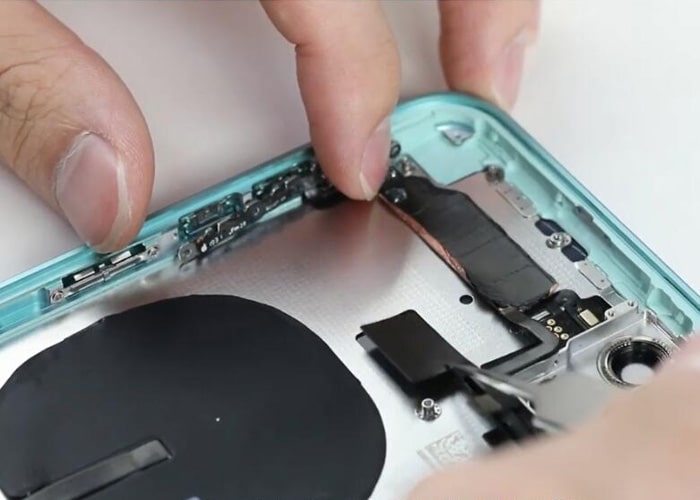
2.7 Install the vibrator motor and the iPhone 11 loudspeaker to the back housing, fix the components with the metal shield
2.8 Install the SIM card slot, fasten the screws. Assemble the battery and connect the flex cable
3. Install the iPhone 11 display screen to the iPhone 12 back housing, turn on the iPhone and test the functions
3.1 After all the iPhone parts and components are assembled to iPhone 12 back housing, let’s move to the last step of the iPhone display screen assemble. Apply a frame adhesive sticker on the back housing first
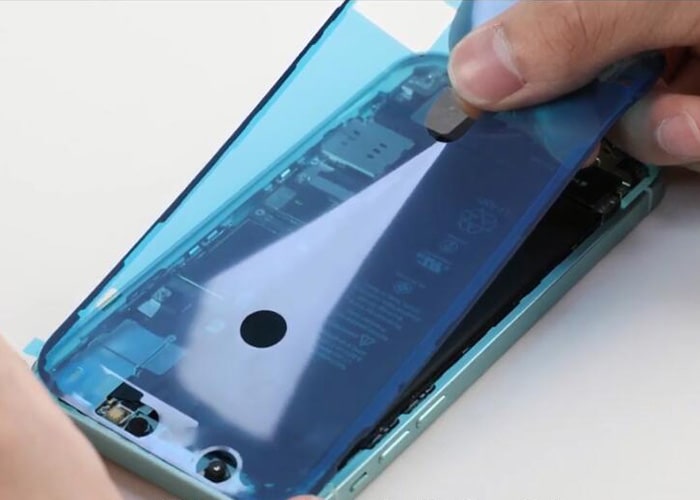
3.2 Connect the display flex cables and fix metal shield back with screws, assemble the display screen, and fasten the two pentalobe screws on the bottom

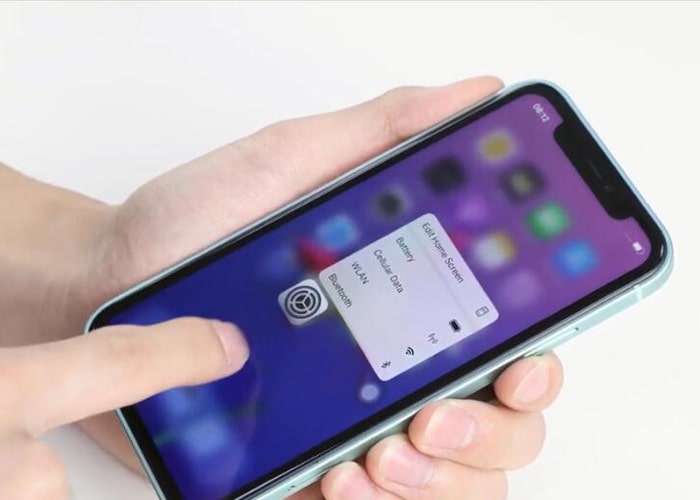
3.3 Turn on the iPhone and test on the screen touch sensitiveness, test on the camera functions, the loudspeakers, the flash, the wireless charging coil and, the charging port functions, etc. The whole process is completed.
Notice: The iPhone 11 parts are complicated and some of them are tiny, be careful with the arrangement. Don’t mess up or miss any of them. The iPhone 12 look iPhone 11 display screen may have bulge because the thickness is different between these two models. All the functions remind the same, though the iPhone looks like an iPhone 12 on the appearance.


RECOMMENDED PARTS
POPULAR ARTICLE
- Can iPhone SE 2020 Display Screen and iPhone 8 Screen Be Interchangeable?
- How to Fix iPhone 11 Pro Volume Buttons Not Working Problem?
- How to Replace The iPhone 11 Pro Speaker?
- 3 Steps for iPhone 11 Back Rear Camera Replacement
- How to Teardown iPhone 11 for Display Screen Replacement
- iPhone X Water Damage Repair Guide (Still Work in 2019)
- How Much Does It Cost To Replace An iPhone XS Display?
 Can iPhone SE 2020 Display Screen and iPhone 8 Screen Be Interchangeable?
  How to Fix iPhone 11 Pro Volume Buttons Not Working Problem?
  How to Replace The iPhone 11 Pro Speaker?
  3 Steps for iPhone 11 Back Rear Camera Replacement
  How to Teardown iPhone 11 for Display Screen Replacement
  IOS 17.4 official version pushed to block battery vulnerability
  Is the Chinese-made rear case for the iPhone 15 series going on the market?
  New products coming:USB to MFI Lightning Cable
  Big BUG of iPhone 15
  How Chinese celebrate Christmas?
  Disadvantages of iPhone 15 Standard Edition
  Rumors about the Samsung Galaxy S24 Ultra
  TWS Wireless Bluetooth Headset: Connect Your Wireless World
  iPhone 15 Black Screen Self-Rescue Guide
  Comparison of LCD screens of different mobile phones
  Iphone 14/14 Plus IC Swap Tutorial
 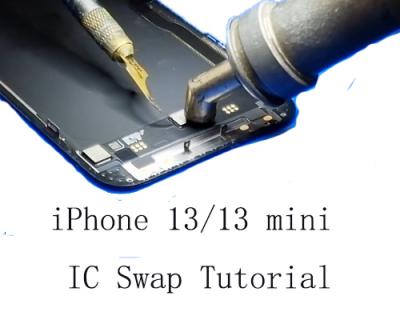 iPhone 13/13 mini IC Swap Tutorial
  Inexpensive Fix For iPhone XS MAX earpiece Low Voice
  How to Check If Your Samsung Phone is Original or Fake
  Galaxy S20 series Workaround with display issues
  IPhone 12 Pro Max Back Glass Replacement
  Fix Samsung S20 U WiFi Issue
  How to Resolve the ‘Unknown Part’ Error on iPhone 14 plus
 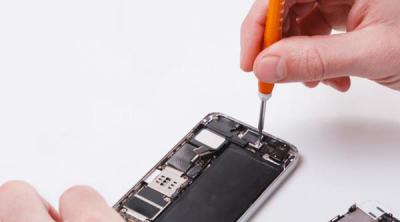 iPhone 14 Pro glass replacement tutorial
  Self-study mobile phone repair disassembly
  Workaround for iPhone 13 white screen
  How to solve the problem of iPhone 12 photo shaking
  4 ways to solve the intermittent touch failure of IPhone 13 screen
  Some rumors about the iPhone 15
  Samsung GalaxyZ Flip4 vs Galaxy Z Flip3:What’s Different?
  How to distinguish whether the iPhone 12 is an American version or a European version from the appearance of the iPhone 12
  Apple phone replacement non-original battery prompts the solution of non-genuine pop-up window
  Cell phone repair master commonly used seven methods you will how many?
  What is the use of iPhone Airplane Mode?
  What’s wrong with the sudden inability to make calls on the iPhone?
 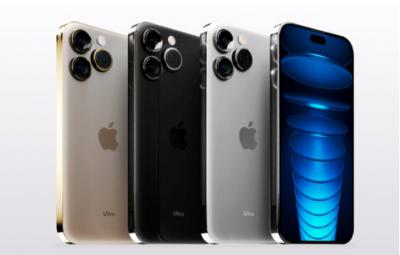 iPhone 15 “real machine” leaked, all-round configuration upgrade?
 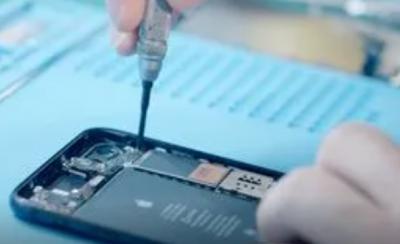 Four Daily Mobile Phone Troubleshooting Guide!
  What should I do if the iPhone screen is broken? How to change the screen?
  What is the reason why the battery of the mobile phone is draining rapidly?
  Matters needing attention before repairing mobile phones
  How to solve the problem of stuck iPhone?
  Practical skills, how to deal with the water and heat of the mobile phone?
  Do you know that there are four ways to maintain an Android phone?
  What are the advantages and disadvantages of upgrading the mobile phone system?
  Why can’t most iOS and Android game data communicate with each other?
  How Charging Can Protect Your Phone’s Battery Life?
  How to solve the problem that the screen of Apple mobile phone cannot be swiped?
  Is the power usage from the battery or the charger when a cell phone is charging while playing?
  How can I use my Android phone for a little longer?
  What is the OLED screen?
  What are the advantages of iris recognition and fingerprint recognition?
  Is the role of the data cable in fast charging or the charging head in the cell phone fast charger important?
  According to reports, the Apple iPhone 15 series will feature a 28nm OLED driver chip
  How do you solve the problems of fast power consumption, lagging, and heating on cell phones?
  This advice will help you overcome the problem of slow cell phone charging
  Misconceptions about cell phone batteries
  What common sense and repair tips about Android phone accessories do you know all about?
  How to check a new phone
  These types of cell phone battery issues are also detectable and repairable by yourself
 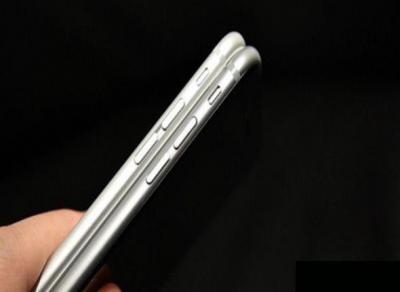 5 hidden functions of the phone volume keys
  China Telecom has successfully developed a 100% domestically produced 5G pRRU
  How to solve the problem of insufficient storage space on your phone?
  The solution to the cell phone touch is not sensitive
  Apple Files Patent for Reverse Wireless Charging, Future iPhones Can Charge AirPods
  Apple asks Samsung to seal iPhone 14 Pro models with inkjet printing
  Why has the iPhone been popular?
  Tips for buying a cell phone
  Some tips to fix your phone
  Apple launches self-service repair program in Europe
  Apple’s iOS 16.2 RC Release Brings Support for 5G Networks to iPhone Users in India
 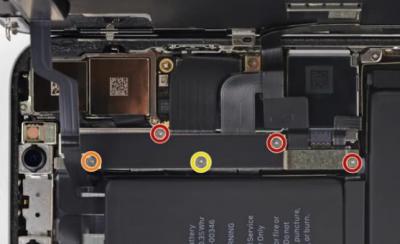 How to replace an Apple 12 battery?
 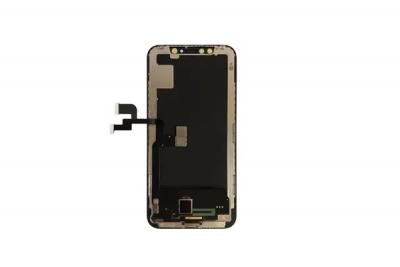 Cell phone broken touch is caused by internal or external screen issues.
  Why is it so difficult to popularize the glass body?
  How to clean the phone handset when it is clogged with dust?
  The difference between various types of cell phone screens
  How do you deal with a phone’s splash screen?
  Huawei XMAGE imaging technology and BeiDou satellite short message function
  Samsung Galaxy S22 / Ultra US version starts full push of Android 13 / One UI 5.0 update
  What are the screen specs for the iPhone SE 4?
  Samsung Galaxy S22 / Ultra US version starts full push of Android 13 / One UI 5.0 update
  About iPhone 14 Repair
  Methods for maintaining the iPhone8 battery
  What’s the difference between iPhone 13 and iPhone 14?
  Samsung Galaxy S23 vs. iPhone14: Which one is better?
  iPhone 14 Pro Rumored Release Date, Specs, Design and Leaks
  Samsung Galaxy Tab S8 Ultra: Flagship Tablet
  Best of CES 2022: Tech products to watch
  Samsung Galaxy S21 FE vs Galaxy S21: The differences
  12 Useful iPhone 13 Tips and Tricks
  Samsung Galaxy S22 release date rumors, price, specifications and leaks
  iPhone 14 rumored release date, specs, design and leaks
  Full Process Presentation on iPhone 13 Pro Max Teardown
  MacBook Pro 14 inch & 16 inch, which should buy in 2021?
  Full Process Presentation on iPhone 13 Pro Teardown
  Samsung Galaxy S22 Ultra – FIRST LOOK IS HERE
  Full Process Presentation on Xiaomi Mix 4 Teardown
  Samsung Galaxy A03s – Full phone specifications
  Samsung Galaxy Z Fold 3 Rumors Roundup
  New iPadOS 15 Features
  Top iOS 15 Features! What’s New Review
  The key update content of WWDC21
  Android 12 Beta 1: Top new features!
  iOS 14.5 Out Now: Top New Features
  To travel with a lot of charger? No, one is enough!
  Full Process Presentation on OnePlus 9 Pro Teardown
  Fresh iPhone 13 Leaks! New Lens, 120Hz,Touch ID, No USB-C, No Port?
  Full Process Presentation on Samsung Galaxy S21 Teardown
  4 Ways to solve the problem of the frozen screen For iPhone X
  Full Process Presentation on HUAWEI P40 Pro Teardown
  How to Fix the iPhone Face ID Issue by Replacing the Front Camera Blue Lenses
  How to Fix iPhone X Ear Speaker Not Working Problem
  Big News About iPhone 13 Features – How Much do You Expect?
  Explanations on iPhone X Series Aftermarket Screen Touch Issues
  Why My iPad Home Button Collapsed After Screen Repaired?
  How to Fix the Replaced iPhone LCD Screen Backlight Dim Issue
  5 Tips and Tricks on How to Prolong Your iPhone 12 Battery Life
  10 Apps You Must Install on Your iPhone in 2021
  How to Tear Down iPhone 12/12 Pro for Screen Replacement?
  Samsung Galaxy S21 Release – What Features Will You Expect For?
  8 Hidden Tips and Tricks that You Should Try on Your iPhone 12
  5 Reasons Why People Choose Samsung Galaxy Note20 Ultra Over iPhone 12 Pro
  Buying the iPhone 12? Read This When You are Planning on It
  Full Process Presentation on iPhone 12 Teardown
  How to Replace the Dot Projector Flex for Fixing the iPhone X Face ID Issue
  How to Replace the Samsung Galaxy S20 Charging Port PCB Board
  Top 10 Features You Should Know About Apple WatchOS7
  How to Tear Down the iPad Air 3 Display Screen for Earphone Replacement
  Exclusive iPhone 12 Features Leaks! How Much Do You Expect?
 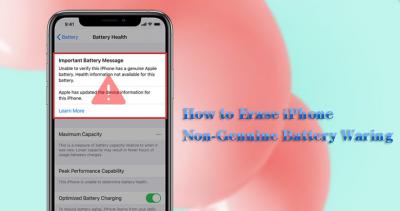 How to Erase the Non-Genuine Battery Warning on iPhone
  10 Useful Tips and Tricks Apple Never Told You About Your iPhone
 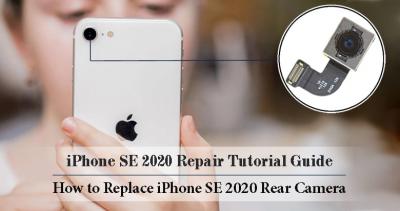 How to Tear Down iPhone SE 2020 for Rear Camera Replacement
 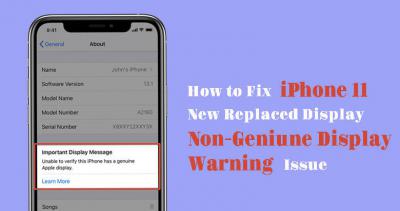 How to Fix the iPhone 11 New Replaced Display Non-Genuine Display Warning Issue
  10 Useful Tips and Tricks We Should Know While Using the iPad
 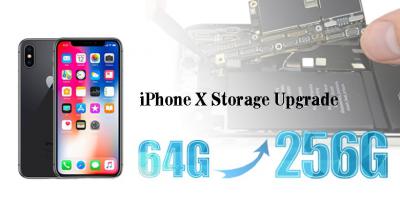 How to Upgrade the iPhone X Memory From 64G to 256G
  Top 8 Features You May not Know About iOS 14
  First 10 Things You Need to Do on Your iPhone SE 2020
  10 Apps You Will Find Very Useful on Your iPhone
  How to Tear Down and Reassemble Samsung Galaxy A51
 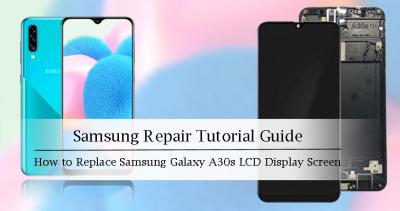 How to Replace Samsung Galaxy A30s LCD Display Screen?
  3 Questions We Need to Know about Covid-19 Vaccine
  3 Things You May Not Know about Coronavirus Test
 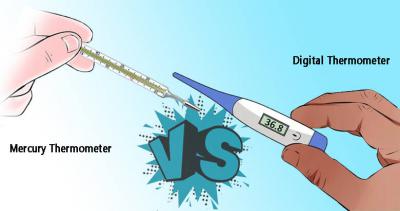 3 Reasons Why Digital Thermometer is Better than Normal Mercury Thermometer
  3 Ways to Make DIY Face Masks at Home
  3 Things You Need to Know About Personal Protective Equipment
  12 Terms You Need to Know About the COVID-19
  Must We Wear Face Shield and Goggles Outdoors?
  How to Use An Infrared Thermometer in The Right Way?
  KN95 Mask Vs Normal surgical Mask, Which One is Better?
  8 Tips & Tricks about Samsung Galaxy S20 Ultra that Samsung Didn’t Tell You
  How to Replace Samsung Galaxy S10e’s Earpiece and Vibration Motor
  5 Useful Solutions to iPhone Xs Screen Unresponsive Issue
  10 Features You May Be Surprised about Samsung Galaxy Z Flip
  How to Replace OnePlus 6 Camera Lens Glass Cover
  Top 8 Features of Redmi K30 You May Not Know About
  How to Choose Screen Protector for Your Mobile Phone?
  How to Replace the iPhone 11 Pro/Pro Max Rear-facing Camera?
  How to Replace the iPhone XS Taptic Engine & Loudspeaker?
  Tips on How to Clean and Maintain Your Earbuds
  5 Questions will be asked about Samsung Galaxy S11
 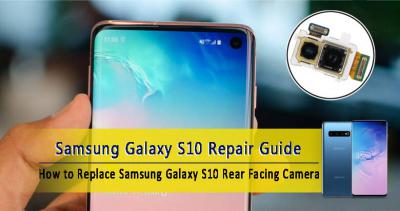 How to Teardown Samsung S10 for Rear-Facing Camera Replacement?
 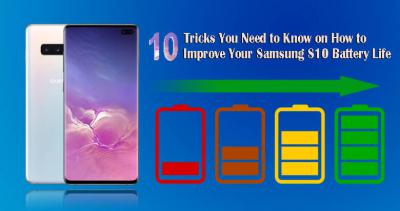 10 Tricks You Need to Learn to Improve your Samsung S10 Battery Life
 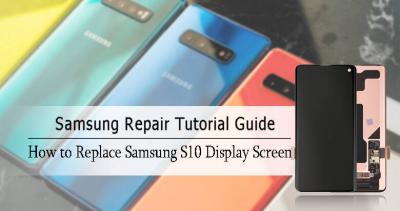 Simple Steps for Samsung S10 Display Screen Replacement
  10 Hidden Features Apple Didn’t Tell You About iPhone 11 Pro
 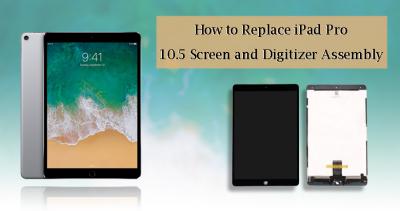 How to Replace iPad Pro 10.5” Touch Screen and Digitizer Assembly
  9 Features You Should Know About iPadOS
  10 Hidden Features You Should Know about Apple Watch Series 5
  Top 10 Features that iOS 13 brings to Your iPhone
  10 Tips You Might Not Know About iPhone XS/XS Max
  How Much Do You Know About Motorola Moto One Zoom?
  How to Teardown Samsung Galaxy A80 and reassembly
  Huawei P30 Teardown and Reassembly for Display Screen Replacement
  10 Amazing Features about Samsung Galaxy Note 10
  12 Points You Need to Do When You Get Your New Purchase iPhone XR
  8 Highlights You Should Not Miss About Samsung Galaxy A80
  8 Aspects You May not Know About iPhone Face ID Recognition System
  Top 10 Amazing Features about Xiaomi Redmi K20/K20 Pro
  What to Do When iPhone XR FaceTime Camera Not Working?
  How to Fix Your iPhone Microphone Not Working Problem
  Samsung Galaxy S10 Plus Disassembly Teardown and Reinstallation
  Two Useful Ways to Reset Your Android Phone Password
  5 Common Problems on OnePlus 5 and How to Fix Them
  12 Mistakes You Probably Make While Charging Your Phone
  How to Fix iPhone Not Sending Pictures
 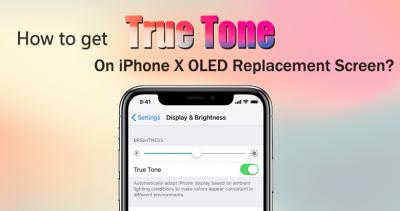 How to Get True Tone Function Back on Aftermarket iPhone X OLED Screen?
  6 Ways to Mirror Netflix from iPhone to TV
  10 Amazing Features to Us on iPhone XI and iPhone XI Max Preview
  How to Replace iPhone XR Front Face Camera?
  7 iPhone Privacy Settings You Should Check Today
  How to Modify iPhone XR/XS from Single-SIM Card to Dual-SIM Card?
  Will Huawei Mate 30/30 Pro Be Our Good Choice in the Smartphone Market?
  How to Upgrade Your iPhone 6/6S Storage From 16G to 128G
  6 Highlights for Buying Huawei P30 Pro
  10 things about Samsung Galaxy S10 make it unbelievable
  How to Replace iPhone XR LCD Digitizer Screen?
  What Will iPhone XI Triple Camera Make Difference to Us?
  2 Bad Designs for Samsung Galaxy S10 Series Phone Repair
  4 Ways To Restart Your iPhone Device For All iPhone Models
  Huawei Mate X VS Samsung Galaxy Fold, Everything You Want Know
  How To Fix iPhone 7/7P/8/8P Home Button Not Working Issue
  What Is 5G And Should We Buy 5G Phones In 2019?
  7 Ways to Fix Cellular Data Connect Issue On iPhone in 2019
  iPhone X Water Damage Repair Guide (Still Work in 2019)
  Will the triple camera become mainstream in 2019?
  Top 5 Reason Why You Need A Phone Screen Protector 2019
  Which Device Has The Best IP68 Waterproof In 2018?
  How Much Does It Cost To Replace An iPhone XS Display?
  Top 10 iPhone XR Common Issues and How to Fix
  iPhone X Explosion: 7 Small But Important Things To Note
  7 Ways To Fix Your iPad Not Charging In 2018
  iPhone 7 Screen Replacement | iPhone 7 Repair
  Which Parts of iPhone X and iPhone XS Are Exchangeable?
 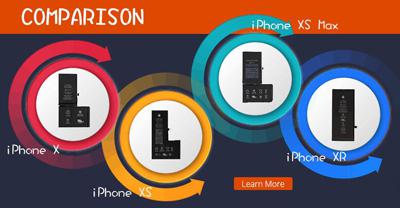 iPhone X, XS, XS Max, and XR Battery Comparison
  How To Fix iPhone XS/XS Max, And XR Bluetooth Connection Issue
  Huawei Mate 20 Pro VS iPhone XS Max VS Samsung Galaxy Note 9
  The Newest iPhone XS/XS Max Common Issues and Solutions
  Can iPhone 7 Touch Issue Caused by Different LCD Versions Be Fixed?
  How Much Does It Cost To Fix iPhone XS, XS Max and XR?
  iPhone XS, XS Max and XR Comparison: Which One Should You Buy?
  15 New Features On Samsung Galaxy Note 9
  Rumors About 2018 iPhone XS, XS Max And iPhone XR
  Apple Special Event: The iPhone Calendar Release Time
  Is It Worth To Buy iPhone X Or The New iPhone 2018?
  Teardown Comparison: Samsung Galaxy Note 9 VS Note 8
  Analyse About iPhone High Brightness LCD Screen VS Original VS Common
  Read This Article Before You Buy The Samsung Galaxy Note 9
  4 Ways to Fix iPhone X Side Button Non-Working or Delay Responding
  6 Solutions for iPhone 8/8 Plus Most Common Issues
  OPPO Find X Teardown – The Secret of Hidden Cameras
  Tag: Screen Repair Cost – How Much Does It Cost to Replace A Screen?
  The Top Samsung Galaxy Note 9 News You Should Read
  Ultimate guide to Fix iPhone 8/8Plus/X Auto Brightness Issue
  How to Fix Samsung Galaxy Note 8 Common Issues
  Apple Will Fix the iPhone 8/8 Plus/X Auto Brightness Issue in iOS 12
  How to Fix iPhone Battery Drains Fast with iOS 11.4
  Difference among iPhone X OEM Screen, Aftermarket OLED Screen and Aftermarket LCD Screen
  Comparison Between OEM and Aftermarket iPhone X Screen
  OnePlus 6 Display, Camera and Battery Review
  3 Tips and Tricks for iPad 2018
  Rumors Collection about iPhone SE 2
  How to Check Your iPhone Battery Health with iOS 11.3
  The Way to Fix iPhone 8/8 Plus Screen Ambient Light Sensor Disabled
  Can iPhone 8 copy LCD screen work well with iOS11.3?
  Real or Fake ETrade Supply?
  Does your Samsung Galaxy S9/S9+ Has Touchscreen Dead Zones?
  How To Identify If Your iPhone Is New Or Refurbished?
  How To Speed Up iPhone By Cleaning RAM?
  How to stop iPhone X from overheating?
  How to Fix iPhone 8 Touch Failure After LCD Replacement
  Free to Repair Your iPhone 7 No Service Issue
  The latest four ways to unlock your cell phone
  Tips for how to improve iPhone X battery life
  2 Ways to add a home button to your iPhone X
  4 Ways to fix Samsung Galaxy Note 8 battery drop to 0% not charge issue
  Can iPhone X Face ID still work after repair?
  What can I do to avoid iPhone X screen burn-in?
  How to fix iPhone 8/8 Plus screen black issue?
  How to use your iPhone X proficiently?
  How far does the foldable phone away from us?
  Why Does iPhone X Face ID Fail?
  Did your iPhone X middle frame paint peel off?
  iPhone X Tear-down/Disassembling for Screen Replacement
  How much does it cost to replace iPhone X screen?
  Can the aftermarket iPhone 7 LCD screen work well on iOS 11?
  How much does it cost to replace iPhone 8/8 Plus battery and LCD screen?
  What’s the difference between iPhone 8 and iPhone 7 LCD screen?
  How To Replace iPhone 8 Screen, Battery and Charging Port?
  What is the production cost of iPhone X?
  Samsung Galaxy Note 8 Teardown In 7 Steps
  What to do if iPhone fails to turn on?
  Why there is microphone issue after iPhone 7 screen replacement?
  Tips you should know for iPhone 7 series LCD screen assembly
  How to Fix Your iPhone Charging Issue?
  Sony Xperia XZ Premium Teardown/Disassembly
  How To Replace Samsung Galaxy S8/S8 Plus LCD Screen, Charging Port And Battery
  How to replace HTC U11 cracked screen, charging port and battery
  How To Replace Samsung Galaxy S8/S8 Plus Rear Camera Lens Without Teardown
  How to Replace OnePlus 5 LCD Screen, Battery and Charging Port?
  Why Jelly Scrolling effect happened to OnePlus 5?
  OnePlus 5 Disassembly/Teardown Review
  How to refurbish Samsung Edge screen
  How to close Samsung smartphone 25% battery pop-up notification
  When to update your mobile phone system?
  Will wireless charging become the mainstream in future?
  What Surprise Stretchable OLED Will Bring to Us?
  How to fix the Samsung Galaxy S8/S8 Plus issues?
  How to take care of aftermarket home button flex on iPhone 6S screen
  What do you need to know before buying Samsung S8?
  Compatibility of the 2017 iPad (iPad 5) and iPad Air parts
  Will OLED Display Be Applied in iPhone 8 and Become Mainstream?
  Something about iPhone Screen Backlight You May Not Know
  iPhone Screen Got Black? Here is the Fix!
  Moto G5 Disassembly/Teardown Review
  Why Touch ID not Working After Screen Replaced!
  Analysis On China Made iPhone 7 Series LCD Screen
  Get Through LG G6 Teardown Process within 5 minites!
  How To Extend Your Android’s Battery Life?
  These Tips for iPhone You Probably Don’t Know!
  Do You Know These Tips for Hard Resetting Your iPhone?
  How Do You Know Your iPhone is Unlocked Or Not?
  Huawei Mate 9 Teardown to Repair LCD screen and Battery
  Watch out! These May Cause China-made iPhone Screen Easily Getting Cracked!
  Check These Before Buying a Used iPhone!
  iPhone 6S unexpectedly shut down? Check Whether you can get a free battery replacement!
  Sony Xperia XZ Screen, Battery, Charging Port Flex Teardown Review
  Try These Ways When Your iPhone Shows No Services or Searching Network
  These Signs Means Your Mobile Phone Needs A New Battery
  LG V20 Quick Teardown Review Within 3 Minutes!
  What You Need to Know Before Buying a Qualified Power Bank
  How to replace your iPhone 7 Plus battery
  What you should know about replacing screen parts!
  Tips & tricks for New3D touch on your iPhone 6S with iOS 10
  iPhone got exploded too?! How to protect your phone from battery explosion
  Have you encountered these problems in your iPhone 7?
  iPhone 7 Full Teardown for Screen, Battery And Charging Port
  How to Teardown iPhone 7 Plus to Replace Screen, Battery Replacement
  How to teardown Moto Z to replace Screen and battery
  9 New features you may like to know before buying the new iPhone 7
  Iris scanning or fingerprint scanning, which one do you prefer?
  How Does Your Waterproof Phone Prevent Water Damages?
  10 New Tips & Tricks of Galaxy note 7 S Pen you need to know
  Galaxy Note 7 Teardown for screen, battery, charging port replacement
  Did high pixels makes your phone camera take better pictures?
  How well do you know about your Fast-Charging phone?
  Why you can’t see the iPhone screen with polarized sunglasses?
  Exchangeable Battery for iPhone 6S+/6+, iPhone 6S/6?
  How to Replace the Huawei Honor 8 Broken Screen
  What you should know about Sony Z3/Z3Compact/Z3+, Z5/Z5Compact/Z5 Premium front housing adhesive
  Did your iPhone 6S rear housing paint peel off?
  Did you pick the right screwdriver to repair iPhone?
  OnePlus 3 quick tear down review for screen, battery and charging port replacement
  10 Coolest iOS 10 New features you should know
  Become An Affiliater, Grow Your Money
  How to teardown Moto G4 Plus for screen, camera and battery replacement repair
  Spend The Dragon Boat Festival Together With Us!
  Huawei P9 Reassembly After Replacing LCD screen, Battery and Camera Replacement
  Analysis On China Made iPhone 6 Plus LCD Screen
  The Way to Distinguish OEM Flex Cable from Copy Ones on iPhone Replacement Screens
  Why the Your iPhone Drains Quickly? Reasons and Solutions Here
  HTC 10 DIY Teardown for screen, charging port, battery replacement
  6 Quick Tips To Distinguish Between Real And Fake iPhone SE
  What Will It Bring To Repair Industry When iPhone 7S Features OLED Screen?
  How to Tear down the Huawei P9 for Screen, Battery, Camera Replacement
  Analysis on: Are China made LCDs for iPhone 5S Compatible with iPhone SE?
  Why We Think China Made LCDs won’t be Blocked by Apple in the Coming iOS Updates
  How to Disassemble the LG G5 to Replace Cracked Screen
  How to Tear Down the 9.7-inch iPad Pro for Screen Replacement
 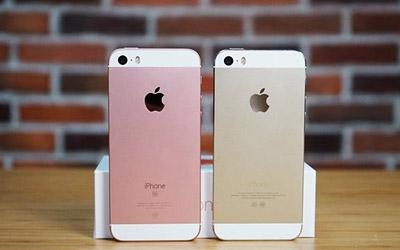 iPhone SE Full Tear Down Comparison with iPhone 5S by ETrade Supply
  Apolo F1 Waterproof Spray for Your Cellphone
  How to Successfully Tear Down the Samsung Galaxy S7 Edge Screen
  Plastic Again, Watch Out to Keep Scratches Away from Your Samsung Galaxy S7/S7 Edge Home Button
  Analysis of China Made iPhone 6 Screens – Manufacturer Version
  How to Replace the Galaxy S7, S7 Edge Battery Replacement
  How to Disassemble the Galaxy S7 LCD Assembly to Replace Screen, Charging Port and Home Button
  How to Disassemble the iPad Mini 4 for Screen Replacement
  How to Repair Samsung Galaxy S7 Edge Cracked Screen
  How to Tear Down/Disassemble the Galaxy S7 for Screen Replacement
 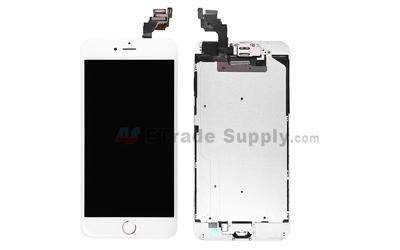 A Clear View of China Made iPhone 6 LCD Screen (First Version)
  How to Replace/Repair iPhone 6S 3D Touch Layer
  How to Fix the iPhone “1970 Date” Bug
  How to Fix Phone Gets Hot and Battery Drains Fast
  Finally, There Is a Solution for the Bricked iPhone Due to the Error 53
  How to Replace a Cracked Oneplus X Screen
  Samsung Galaxy S7 Edge and LG G5 Leaked Before Announcement
  Why LG G2 Won’t Charge Due to Low Temperature
  How to Replace the Sony Xperia Z5 Premium Camera Lens
  Xperia Z5 Premium USB Charging Port Replacement Tutorial
  How to Replace Your Broken Sony Xperia Z5 Premium Screen Step by Step Guide
  How to Fix Cracked Motorola X Style for Screen Replacement
  15 Tips to Improve Your Galaxy Note 5’s Battery Life
  How To Replace A Cracked Motorola Droid Turbo 2 Screen
  How to Replace the Microsoft Lumia 950 XL Screen
  Why Galaxy S4 Stopped Charging and Auto Powered off After Replacing a New Charging Port Flex?
  How To Fix iPhone 6S Auto Shutdown When It Still Has Battery?
  Why the Moto Droid Turbo 2 Has the Best Shatter Proof Screen
  How Well Do You Know About Waterproof Cellphones
  How to Fix Galaxy S6 Edge+ Common Problems
  How To Replace A HTC One A9 Cracked Screen
  How to Distinguish the Fake Apple Earpod from the Real One
  How to Replace the LG V10 Screen in 5 Steps
 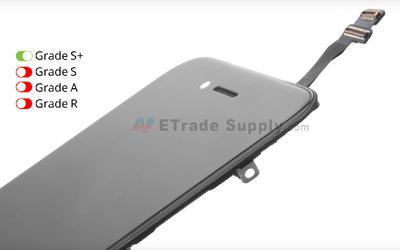 What do Grade S+, S, A and R Stand for in ETrade Supply
  How To Solder/Replace A Samsung Galaxy or iPhone Charging Port
  Reasons Behind Third Party Assembled iPhone 6S & 6S+’s Unstable 3D Touch Function
  5 Tips To Protect Your Smartphone
  What Are the 4 Microphones on iPhone 6S/6S+ for?
  The Cost of Repairing a Cracked Galaxy S6, S6 Edge Screen
  Self-Healing Water-Proof Port Cover Might Be Applied on iPhone 7
  9 Important Tips to Prevent Motherboard Issues during Repair iPhone 5
  How To Fix Cracked Xperia Z5 For Screen Replacement
  How to set 2-step verification on iDevices
  Make Sure You know The Meaning of Error Codes of iPhone
  What’s Need to Be Prepared As a Startup Cell Phone Repair Shop
  Shortcut Tips You Should Know about iPad Pro Smart Keyboard
  How to Tell Copy iPhone USB Cable and Charger and Prevent Loss
  *Update* The Root of Differences among Copy iPhone LCDs: Structure
  Important Info: Pay Attention To Defective Recycled iPhone LCDs
  How to Replace Galaxy Note 5, S6 Edge Plus Battery
  How to Fix the 10 Most Annoying iOS 9 Problems
  How to Replace the iPad Pro Home Button-Step by Step Guide
  Update: Don’t Miss the Copy iPhone LCDs’ Features
 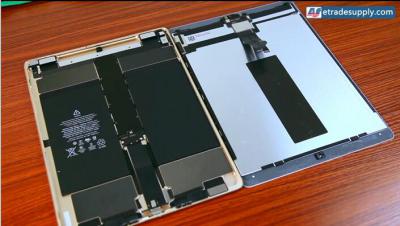 How to Disassemble iPad Pro For Screen Replacement
  The Cost of Repairing a Cracked iPhone 6S or 6S+ Screen
  How did an Aluminum Panel Made from Metal
  How to Tell The Copy Parts From OEM (Without Tear Down the LCD Part)
 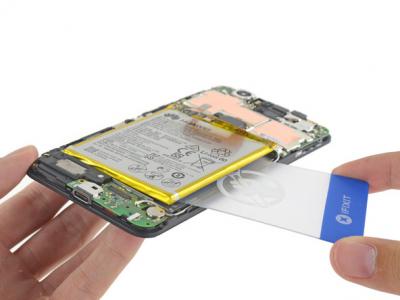 How to Replace the Huawei Nexus 6P Battery in 8 Steps
  How to Replace A Cracked Nexus 6P Screen
  Are The Flood of New High Copy iPhone LCD Screens as Good as The OEM Ones?
  How to Replace the Nexus 5X Battery, Step by Step Guide
  99.9% People Don’t Know the Rare Function on iPhone 6S’ AssistiveTouch
  How to Fix Broken LG Nexus 5X for Screen Replacement
  How To Check Samsung Galaxy Note 5 Model Numbers
  4 Highlights of HTC One A9
  iPhone 6+ and iPhone 6S+ Screen Comparison Report
  How to Recover Photos and Data with Broken Screens
  How To Identify Different LG G4 Model Numbers
  15 Tips and Tricks of 3D Touch You Don’t Want to Miss
 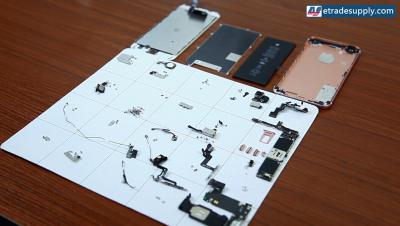 How To Disassemble/Tear Down/Take Apart iPhone 6S+
 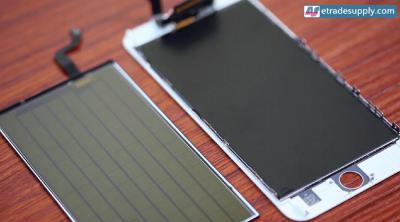 How to Replace the iPhone 6S+ Screen in 8 mins(3D Touch layer disassembled)
  How to Protect Your Smartphone from Viruses
 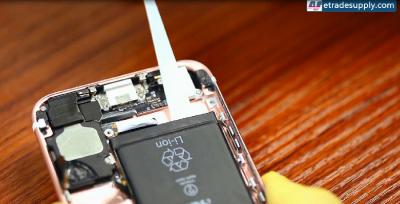 6 Steps to Replace an iPhone 6S’ Battery in 5 Minutes
 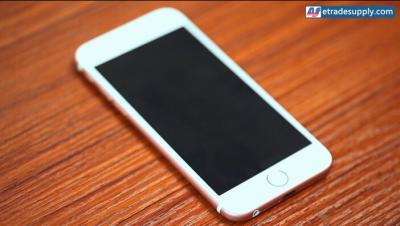 How to Fix Cracked iPhone 6S for Screen Replacement
 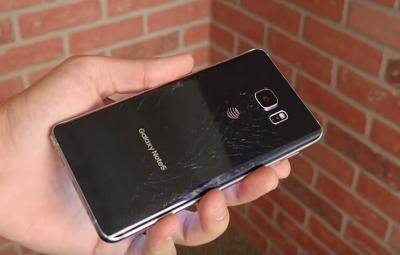 How to Replace a Cracked Galaxy Note 5 Glass Back Cover
  Cost of Repairing a Damaged Screen on the LG G4
  Will 3D Touch Still Work On A Tempered Glass Screen Protector?
  ETrade Supply Now Recognized As Google Trusted Store
  The Cost Of Repairing A Cracked Galaxy Note 5 Screen
  Is 3D Touch That Different From Force Touch?
  How To Fix LG G4 Digitizer Touch Screen Issue
  How To Install a Oneplus Two Cracked Screen Replacement
  Market Info and Analysis of iPhone 6 LCD Screen Assembly
 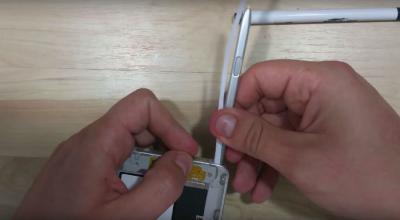 How to Fix Galaxy Note 5 Stuck S Pen Issue
 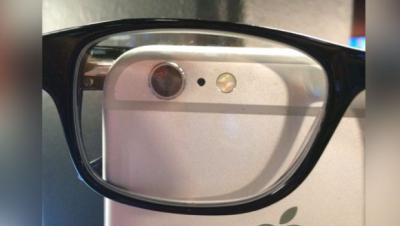 Apple Offers Free iSight Camera Replacement For iPhone 6 Plus
  As a Newbie, What You Should Know About Jailbreaking
  How To Tear Down/Disassemble Galaxy S6 Edge Plus For Screen Replacement
  How To Tear Down/Disassemble Galaxy Note 5 For Screen Replacement
  Insider Tips to Save Your Water-damaged Device
  How to Set Up ETrade Supply’s Adhesive Dispenser Robot
  Why Should I Charge My iPhone Every Day
  What You Should Know Before Cellphone Repair – Part 1
  iPhone 6S Battery Leaked
  Top 10 iPhone 6 Problems and Solutions
  OnePlus 2 Announced: Features and Specs
  Reason and Solution behind Ghost Touch Issues on iPad Air Digitizer
  Calibrating Your Battery to Reinvigorate Your Phone
  Apple’s Touch ID and You
  Rumor iPhone 6S Glass Lens Leaked
  How To Fix Vertical Lines On An iPhone Screen After Replacement
  How to Replace Samsung Galaxy Tab 3 7.0 SM-T210 Digitizer/Screen Replacement guide
  5 Tips to Fix iPhone or Samsung Scratched Camera Lens
  Hall Pass Registration For CTIA Super Mobility 2015
  How Much Does It Cost To Repair An iPhone 6 Plus Cracked Screen
  The Causes and Analysis of Why Digitizer Touch Assemblies/LCD Display Assemblies or Nokia Lumia 520 Separate from the Frame after Installation
  How to Replace Sony Xperia Z3+ Screen/Screen Replacement Guide
  Possible Reasons Why iPad/iPad Mini Digitizer Functions Are Affected by Its Inner Magnets
  How To Fix Slow Or Unable To Charge Problems
  Why Are LG LCD Assemblies So Easily Damaged
 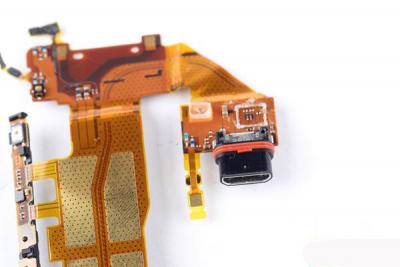 How to Replace Xperia Z3+’s Charging Port
  How To Disassemble/Tear Down Sony Xperia Z3+
  Random Restart Fixes
  Samsung Galaxy S7 Will Release in 2015?
  How To Fix iPhone 6/iPhone 6 Plus Camera Problems
  How to Assemble Small Parts on iPhone 6 LCD Screen Assembly
  How to Save Your Water Damaged Phone
  How to Save Battery Life with iOS 9?
  Reasons Behind & Solutions for iPhone 6 Frame and LCD Separation Issues
  How To Fix Wi-Fi Problems on the iPhone 6/6 Plus
  How To Fix HTC Nexus 9 Charging Port Replacement
  How to Replace The LG G4 Charging Port
  How to Replace the Cracking LG G4 Screen in 10 Minutes
  How To Find Your Galaxy S6, S6 Edge Model Number
  How to Assemble the Small Parts on Your iPhone 5 & 5S& 5C LCD Screen Assembly
  How To Replace An Oneplus One Cracked Screen
  iPhone 5 LCD Screen Assembly Small Parts List
  5 Tips to Tell OEM and Copy LCD of iPhone 6
  Why Won’t New-Bought iPhone Battery Charge?
  How To Disassemble/Tear Down/Take Apart The LG G4
  How to Replace the HTC One M9 Charging Port
  How to Replace The Samsung Galaxy Tab S 8.4 LTE’s Battery
  How to Replace HTC M9 LCD Screen Assembly
  How To Disassemble/Tear Down HTC One M9
  Galaxy S6 Edge Not Charging? Here’s What You Need To Know To Fix It
  How to Tear Down The BlackBerry Passport within 10 minutes
  How To Choose The Right LG Nexus 5 Screen For You
  How To Repair A Cracked Nexus 9 Screen Replacement
  How To Replace A Galaxy S6 Edge Cracked Screen
  How to Change Samsung Galaxy S6 Charging Port–Easiest Way
  How to Tear Down Samsung Galaxy S6 Edge In 5 Steps Within 10 Minutes
  How To Reassemble Samsung Galaxy S6 Edge
  3 Common Causes For Ear Speaker Malfunctions
  How to Replace A Samsung Galaxy S6 Screen in 7 Steps
  Top 5 Most Common iPhone 6 Issues You May Come Across
  How to Save Your Data from a Corrupted SD Card
  Why My OnePlus One Battery Drains Quickly
  How to change your Galaxy S6 and Galaxy S6 Edge battery in 5 Steps
  Good News For Cellphone Enthusiasts: Battery Can Be Charged In A Minute
  Is Samsung’s Galaxy S6 Edge Worth Your Hard Earned Cash?
  Rainbow Marks on Your iPad Screen?
  Our Glass Repair Solution
  2 Tips to Tell OEM LCD Screen from High Copy Screen
  3 Tips For Identifying Galaxy S4 Rear Camera Compatibility
  Samsung Galaxy S7 Rumored To Feature A Foldable Display
  Eager to Upgrade to iOS 8.2? Wait!
  Watch Out for the Scam Site cellphonepartsfactory.com
  How To Tear Down The Samsung Galaxy S6 In 10 Steps
  You Can Have A Phone With 6000mAh Battery
  What to Expect from Samsung Galaxy S6 and S6 Edge
  LG G4 Back Side Press Render Leaks
  The Ups and Downs Of The Apple Watch
  Galaxy S6 Removable Battery??
  iPhone 6S Rumor Roundup
  Are You Ready to Buy Apple Watch?
  What’s The Cause of LCD Light Leakage?
  HTC One M9 VS M8, Is It Upgradeable?
  How to Solve iPhone 5S Ear Speaker Problems
  Galaxy S6 Antutu Score Leaks, Shows Samsung Still Dominate Android Phone Market
  Does Your iPhone 6 Need A Screen Protector?
  Are You Ready For Chinese New Year?
  New Battery May Change The World: Same Volume, Double The Energy
  When Will Apple Beat Samsung to Be the Biggest Smartphone Vendor?
  The Cost Of Repairing A Cracked Nexus 6 Screen
  iPhone Copycat Galaxy S6 Metal Frame Leaks
  How To Fix Stripes On Your Cellphone Screen
  Does Your iPhone 6 Need A Protective Case?
  Samsung Galaxy S6 Will Be Released On March 2nd
  Rumors: “iPad Pro” Come With A Stylus?
  How to Repair A Samsung Galaxy Note 4 Screen
  How To Repair A Broken Galaxy Note Edge Screen
  How to reassemble Samsung Galaxy Note 4
  How To Take Apart Galaxy Note 4 In 10 Steps
  How to Reassemble Samsung Galaxy Note Edge
  How To Disassemble Samsung Galaxy Note Edge
  LG Dual-Blending Screen: Curve-Display Time Is Coming ?
  Hardware Comparison of the Note 4 and Note Edge
  How to Reassemble Nexus 6
  How To Disassemble Nexus 6 In 10 Steps
  Apple iPhone 7 Concept: Features More Smart Sensors
 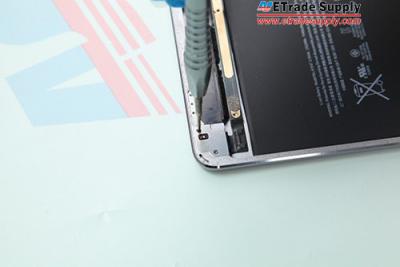 How to Reassemble iPad Air 2
 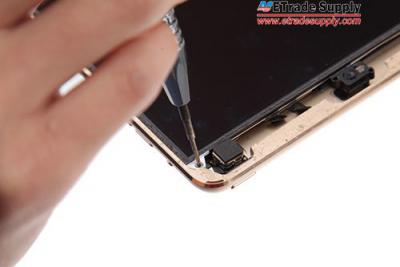 How to reassemble iPad mini 3
  Samsung Pushes Forward The 360 Degree Speaker To CES 2015
  5 Disappearing Products In The Upcoming Years
  Top 5 Selfie Mobile Phones You Don’t Want To Miss
  iPad Air 2 VS Nexus 9, Which Is Better?
  10 Of The Most Annoying Galaxy Note 4 Problems
  How to Tear Down/ Take Apart/ Disassemble iPad Mini 3 within 10 Minutes
  The Cost Of Repairing A Broken iPhone 6 Screen
  Top 5 Issues And Potential Solutions To Sony Xperia Z3
  Differences Between iPhone 6 and iPhone 6 Plus LCD Assembly
  Etrade Supply Products Naming Rule
  10 Common Galaxy Note 3 Problems and Solutions
  8 Common Problems with The HTC One M8, and How to Fix Them
  7 Common Nexus Lollipop Problems & How to Fix them
  Five Minutes Work to Replace Your iPhone 6 Plus Broken Screen
  Top 5 Nexus 6 Problems and How to Deal with Them
  The Puzzle Phone: A New Challenger To The Modular Smartphone Era
  Largest Size iPad Mockup Leaks
  Gorilla Glass 4 works better to keep from shattering
  How to Know Your iPhone IMEI and Carrier
  World’s Biggest Selfie Powered By Nokia Lumia 730
  Android Phone Beat iPhone in 5 Aspects
  Most useful New Features of Android Lollipop
  Nexus 9 4G LTE Version Will be Available in Early December
  15 Ways to Extend Your iPhone Battery Life
  How to Disassemble Lumia 930 for Repairing Cracked Screen
  How to Tell the Different Moto X 2nd Model Numbers
  iPhone 6 VS Galaxy Note 4, Which Would You Prefer?
  Top 6 iPhone 6 Issues and How to Fix Them
  How to Solve Wi-Fi Problems After Updating iOS 8
  How to Fix A Broken iPhone 6 Screen Replacement
  Nexus 6 Would Release Today
  How to reassemble Huawei Ascend P7
  How to tear down Huawei Ascend P7
  iPhone 6 Plus Review
  How to Disassemble/Tear Down/Take Apart iPhone 6 Plus
  How to Reassemble iPhone 6 Plus
  How to Disassemble/Tear Down/Take Apart iPhone 6
  How to reassemble iPhone 6
  Should I Upgrade to iPhone 6 from Older iPhones?
  Is iPhone 6 Better than GS5? Who Knows?
  9 Things You Have to Know Before Updating Your iPhone
  Apple Watch
  What are the Differences Between iPhone 6 Plus, iPhone 6 and iPhone 5S
  BlackBerry Z30 Disassembly/Tear Down/Tear Apart
  Samsung Galaxy Note 4 Features
  The Cost of Repairing a Cracked Screen on the LG G3
  How to Solve Common Galaxy S5 Problems
  Corning Gorilla Glass is still the Best Panel Choice
  How to Distinguish LG G3 Model Numbers
  GS5, HTC One M8, iPhone 5S and Lumia 930 Ice Bucket Challenges
  BlackBerry Porsche Design P’9983 Leaked
  Apple Bumps 5.5-Inch New IPhone Battery Capacity To 2915mAh
  Full Display Smartphone: Sharp AQUOS Crystal
  How to Repair A Cracked / Broken Xperia Z2 Screen
  Android One Smartphone May Be Available in September
  LG G3 Disassembly/Tear Down/Tear Apart
  LG G3 Reassembly
  Galaxy Alpha Released with Metal Frame
  Galaxy Note 4 Supposed to Be Released on Sep. 3rd
  Nokia Comes Back with Android?
  Sony Xperia Z2 Disassembly/Tear Down/Tear Apart
  Super Selfie Smartphone: Lumia 730
  IPhone 6 Hardware Features
  Apple may release iPhone 6 on Sep. 9th
  10 HTC One M8 Tips and Tricks You Should Know
  HTC J Butterfly is a waterproof One M8
  Xperia Z3 Will Be Launched Soon
  How to Replace Galaxy Note 3 Volume & Power Key without Removing Mainboard
  How to Repair a Cracked Screen on the Nexus 7 (2012 Edition)
  First Look: BlackBerry Passport in White
  LG G3 Beat Launched in Korea
  The Nokia Lumia 1020 Would Discontinue on September 14th
  Samsung Galaxy Alpha May be Launched On August 13
  Supposed iPhone 6 LCD Metal Frame Leaked
  MindRDR: the First App to Take Pictures without Hands or Voices
  Supposed iPhone 6 Rear Housing Leaked Including New Dark Color
  iPhone 6 Sapphire Crystal Display Test
 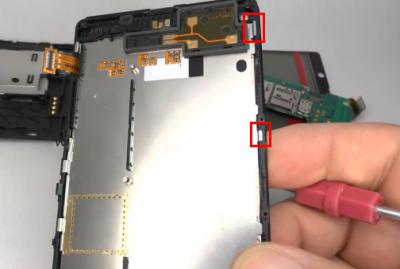 How to Repair a Cracked Nokia Lumia 820 Screen
  Lumia 1525 Said to Be Coming to T-Mobile, AT&T and Verizon
  New Photos of Black and White 4.7-inch iPhone 6 Screen Glass Leaked
  Android L: A More Unified Design
  Samsung Galaxy S5 Mini Rumored to Be Available on Mid-July
  How to Reassemble iPhone 5C for Parts Replacement
  How to Find Samsung Galaxy S5 Model Number
  Android L New Features
 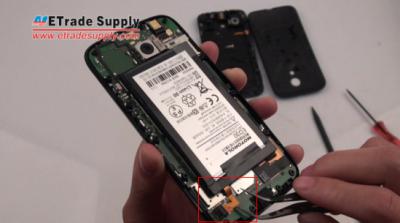 How to Disassemble Motorola Moto G to Repair Screen and Other Parts
 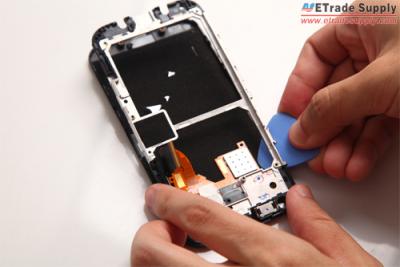 How to Repair a Cracked Motorola Moto X Screen
 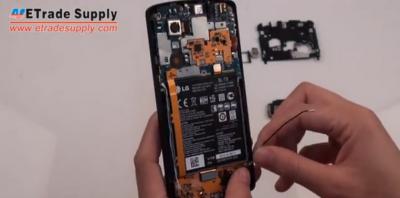 How to Reassemble Nexus 5 for Parts Replacement
  5 Steps to DIY Make a Cellphone Waterproof Bag
 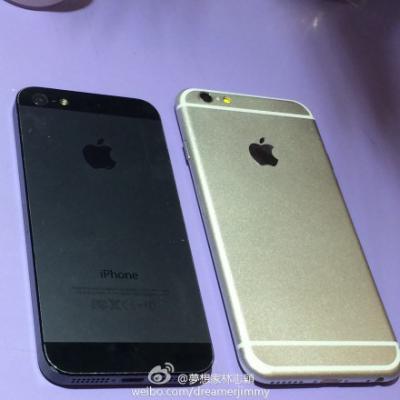 New Leak about Differences between iPhone 6 and iPhone 5S
  How to Reassemble HTC One M8 for Parts Replacement
  How to Reassemble Samsung Galaxy S5 for Parts Replacement
  How to Repair a Broken HTC One M8 Screen
  How to Install iPhone 5, 5C, or 5S Tempered Glass Screen Protector
  How to Install Samsung Galaxy S5 Tempered Glass Screen Protector
  How to Fix Broken Galaxy S5 Screen and Other Parts after Teardown
 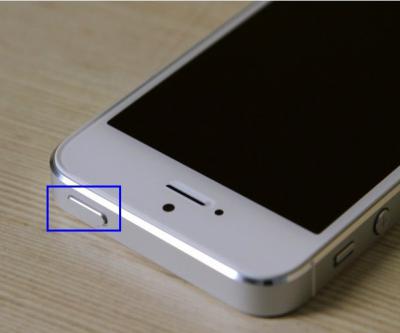 Ways to Replace Broken iPhone 5 Power Button
  How to Boost iPhone Speed to Solve Slow Problems
  How to Repair a Cracked Samsung Galaxy S5 Screen
  How to Fix iOS 7.1 Battery Problems After Update
  Top Five New iOS7.1 Features You Should Know
  The New HTC One M8 Repairability Review
  HTC One M8 VS HTC One M7: Is It Worth Upgrading
  How to Fix LG G2 Problems
  Bulk scratched Housings?-Give to ETrade Supply for Value Recovery
  How to Fix Slow Problem on Android Phone
  How to Repair a Cracked Samsung Galaxy S4 Mini Screen
  How to Fix Motorola Moto G Problems
  How to Scan Documents with Your Smartphone
  iPhone 6 rumors-to include Ultra Retina screen with 389ppi, 2.6GHz A8 processor, 5.5mm-thin body
  Top Five Moto G Tips and Tricks You Must Know
  5 Tricks That Make Your iPhone Perform Better
  How to Reassemble Motorola Moto G for Parts Repair
  Apple has released the iOS 7.1
  Top 5 Helpful Motorola Moto X Tips and Tricks
 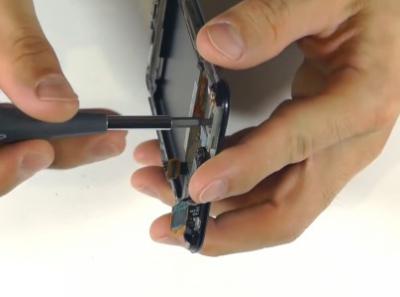 LG Optimus G pro disassembly
  How to Fix LG Nexus 5 Wi-Fi Problems
  How to Block Phone Number in iOS and Android Phones
  Possible iPhone 6 Screen Leaked
  How to Disassemble Nexus 5 for Screen or Parts Repair
  Samsung Galaxy S5–All New Features You Need to Know
  How to Deal with Your Broken Screen? Send to ETS for Refurbishment
  Nokia Lumia 520 Disassembly for Screen Replacement or Other Parts Repair
  Samsung Galaxy S5 VS Galaxy S4: Is It Worth Upgrading
  Nokia Lumia 1020 Reassembly Guide
  Cost of Repairing a Cracked iPhone 5C or 5S Screen
  What to Expect on Mobile World Congress 2014?
  Broken Smartphone Parts You Can DIY Repair
 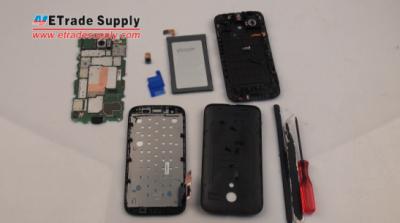 How to Repair a Cracked Screen on Motorola Moto G
  Does Flappy Bird Kill Your Phone? Repair the Broken Screen
  iPhone 5S or 5C cracked screen repair guide
 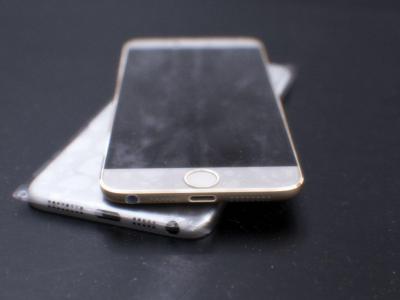 The Alleged iPhone 6 Pictures Leaked Again
  iPad Mini Tops List of Most Easily Broken Gadgets
  Repair Guide for iPhone 5S or iPhone 5C Back Replacement
  How to Reassemble LG G2 for Parts Repair
  How to Fix a Broken LG G2 Screen
 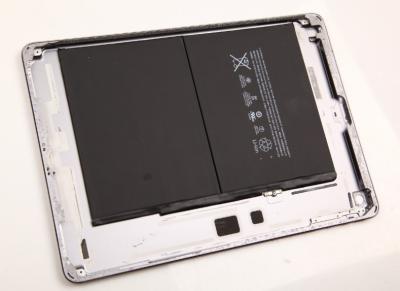 How to Solve iPad Air Battery Problems
 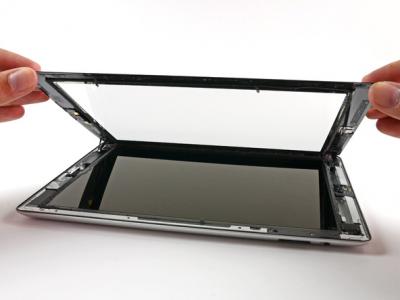 iPad 4 Cracked Screen Repair Guide
  How to Replace a Cracked HTC One X Screen
  iOS 8 and iWatch are rumored with fitness functions
  Lenovo to Buy Motorola Mobility for USD 2.9 Billion
  How to Take Apart the Nokia Lumia 1020
  How to Fix iPhone 5C Charging Problems
  LG G Pro 2 to be Unveiled in February
  Google Reportedly Stops the Nexus Line in 2015
  Nexus 7 Screen Replacement Repair Guide (2013 Edition)
 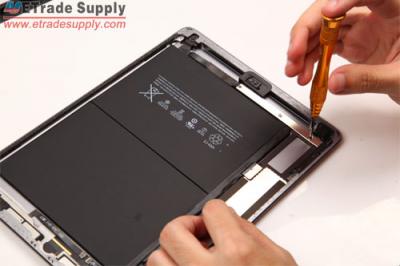 How to Save iPad Air Battery Life
  iPad 3 Screen Replacement Repair Guide
  Solutions to Common iPad Air Problems
  The Importance to Find LG G2 Model Numbers
  How to Solve the Common iPad Mini Problems
 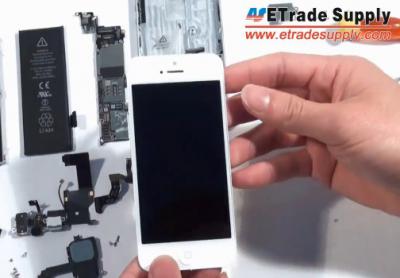 iPhone 5 Screen Repair Problems
  How to Fix the Broken iPhone Home Button
  How to Find LG Optimus G Model Number
  How to Repair the Cracked Nokia Lumia 720 Screen
 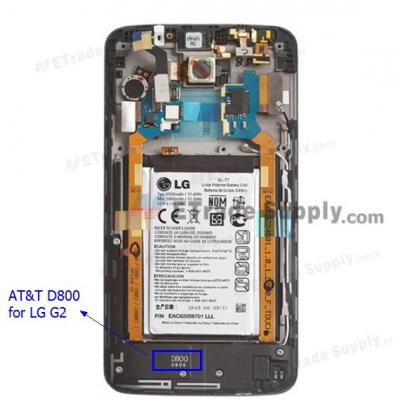 How to Find LG G2 Model Number
  Samsung Galaxy S5 Release Date, Specs, Price and Rumors
  How to Fix the WIFI Problems for Samsung Galaxy Smartphone
  Nexus 5 Models D820 and D821 Comparisons
 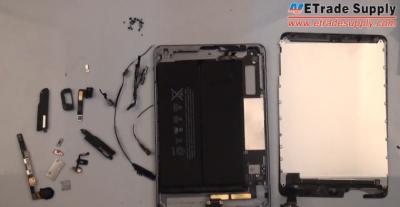 How to Fix a Cracked iPad Mini 2 Screen
 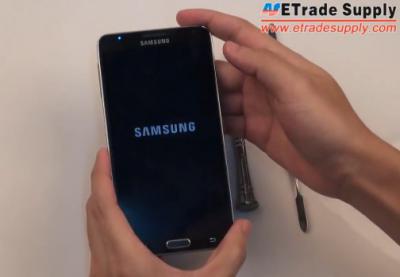 The Cost of Repairing a Cracked Screen on the Galaxy Note 2 or Note 3
  How to Take Apart iPad Mini Retina for Screen or Parts Replacement
  Apple iPhone 5S Touch ID Sensor Repair Problems
  How to Fix the iPhone 5S/5 Wifi Problems
 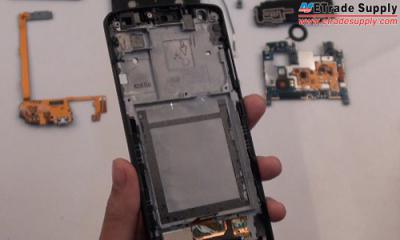 How to Replace the Nexus 5 Cracked Screen
 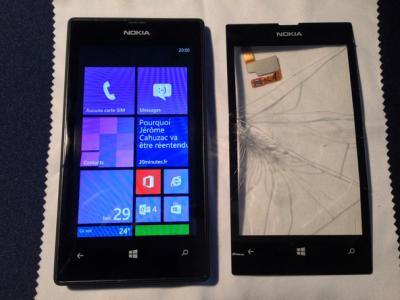 How to Repair A Cracked Lumia 520 Screen
  How to Fix the iPhone 4S Wifi Problems After iOS 7 Update
  Top 10 Helpful LG G2 Tips and Tricks
  Nexus 4 Android 4.4 KitKat Update Causing Problems for Some Users
  Apple iPhone 6 Price, Release Date, Features and Rumors Roundup
 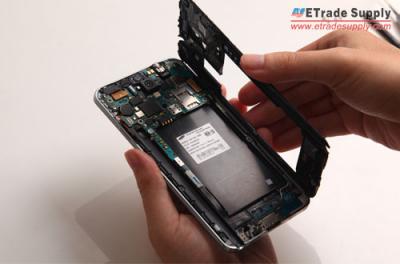 How to Fix the Samsung Galaxy Note 3 Screen Problems
  Tutorial: How to Repair Cracked Nokia Lumia 920 Screen
  Problems of Fixing the Samsung Galaxy Note 3 Screen
  How to Fix: If Your iPhone Can’t Charge
  How to Solve the Common Nexus 5 Issues
  Intelligent Energy Launched Upp, A Fuel Cell Charger for Smartphone
  How to Solve the Common Samsung Galaxy Note 3 Problems
  How to Unlock SIM /Solve Region Lock Problem for Galaxy Note 3
  Samsung Confirmed to Debut Folding Display Device in 2015
  How to Fix the Cracked Screen on HTC One
  Android 4.4 KitKat Review: What are the New Features?
  Nexus 5 vs. Nexus 4: What’s the Difference?
  Google Nexus 5 is available on Google Play
  Nokia Lumia 929 to Come with Aluminum Frame and 5-inch 1080p Display
  Helpful Samsung Galaxy Note 3 Tips and Tricks
  iPad Air Review: Lighter, Thinner and Faster
  How to Replace the iPhone 5S Charging Port with Earphone Jack
  Find Your Samsung Galaxy Note 3 Model Number
 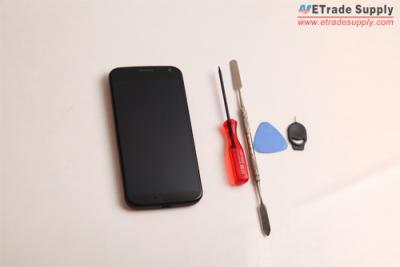 How to Take Apart the Moto X for Screen/Parts Repair
  How to Get More Storage Space for Your iPhone and iPad
  How to Solve the Common iPhone 5S Problems
  iPad 5 to Feature Touch ID Fingerprint Scanner
 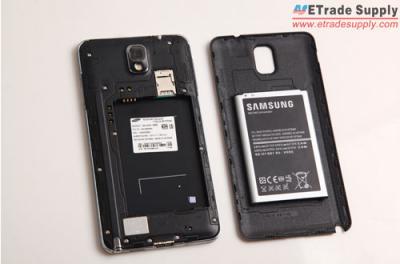 How to Repair a Cracked Screen on the Galaxy Note 3
 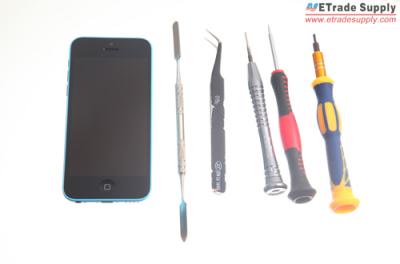 How to Fix a Cracked iPhone 5C Screen
  How to Replace the Nokia Lumia 620 Screen
  Samsung Releases the First Curved Display Smartphone: Galaxy Round
  Space Gray iPad 5 Leaked in High Resolution Photos
  How to Reassemble the Samsung Galaxy Note 3
  How to Disassemble Galaxy Note 3 for Screen/Parts Repair
  How to Assemble the iPhone 5S for Damaged Parts Repair
  Curved-display LG ‘G Flex’ Smartphone to Launch in November
  How to Replace Only the Glass Screen on the Galaxy Smartphones
  Samsung Galaxy Tab P1000 Repair Tutorial: Step-by-Step Disassembly
 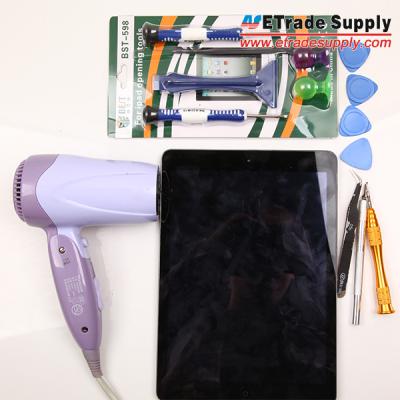 How to Tear Down an Apple iPad 3: Step-by-Step Disassembly Guide
  Apple is Testing its “iWatch” Display Now!
 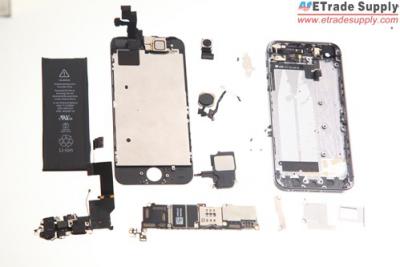 iPhone 5S Repair: Step-by-Step Disassembly Instruction
  Retina iPad mini 2 Could be Available in Gold with Touch ID Fingerprint Scanner
  How to Replace the iPhone 5S Cracked Screen
  iOS 7 Troubleshooting: How to Extend iPhone 5, iPhone 4S Battery Life and Reduce Lag
 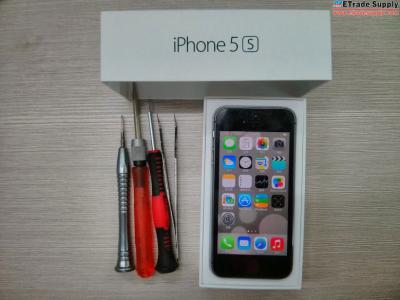 iPhone 5S Review: Did the Components Upgrade?
  Samsung Galaxy S5 Could Feature Metal Body and 64-bit Processor
 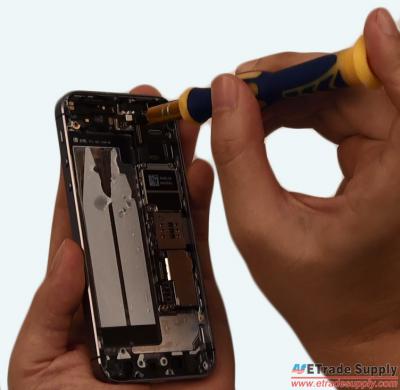 Apple iPhone 5S and iPhone 5C Score Lower Than the iPhone 5 in Repairability
  Helpful Apple iOS 7 Tips and Tricks
  How to Choose and Apply a Screen Protector for Your Smartphone
  Sony Starts to Work on the Next Flagship: Sony Xperia Z2
  Nexus 5 Leaked in High Resolution Pictures
  Solutions to the Common Nokia Lumia 1020 Problems
 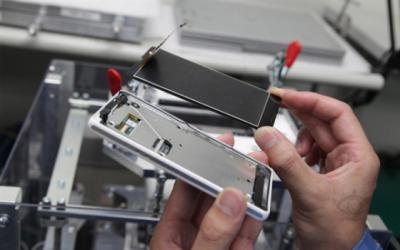 Sony Official Reveals the Waterproof Cellphone Repair Process
  How to Save Water Damaged Galaxy S
  Apple Unveils Two New iPhones: iPhone 5S and iPhone 5C
  No Surprises Found inside the Apple iPhone 5C
  How to Check the Waterproof Cellphones Get Wet
  How to Change the Battery on Your Nexus 4
  Samsung Galaxy Note 3 VS Galaxy Note 2: Is It Worth Upgrading?
  Video: iPad 5 Casing Detailed Comparison with the iPad Mini 2
  Five Handsets That We Can Expect in September?
  How to Make DIY iPhone Cute Teddy Case
  Samsung Galaxy S4 Screen Repair Reviews
  How to Reassemble the Galaxy Note II Parts
  Leaks Again: White Samsung Galaxy Note III Glass Lens
  iPhone 5S/5C Reportedly to Launch on September 20th
  HTC Droid DNA Teardown Tutorial
  Smartphone Safety Issues: The Top 7 Safety Tips
  Solutions to Nokia Lumia 928 Problems
  5.68 Inches Samsung Galaxy Note 3 Display Leaked in HD Photos
  Anti-Static Wrist Strap
  How to Solve the Common HTC Butterfly Problems
  How to Identify the Original and Fake Cellphone Battery
  Leaked Sony Xperia i1 Middle Frame
 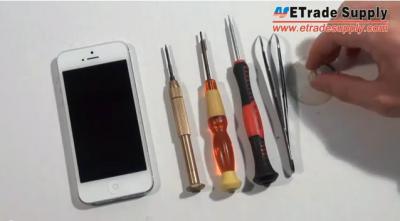 How to Replace the iPhone 5’s Loud Speaker
  Easy to Repair the Cracked Samsung Galaxy S4 Screen Assembly
  Sony Working on Xperia Honami Mini with Snapdragon 800 Processor
  How to Repair Cracked BlackBerry Z10 Screen
  Leaked BlackBerry Z10 Porsche Design Middle Plate
 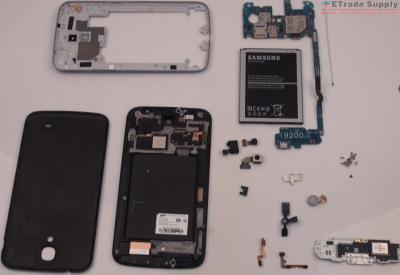 Galaxy Mega 6.3 Repair Guide Step-by-Step Reassembly Instructions
  Why do we use “finger condoms” when working on parts?
  How to Replace the Broken Nexus 4 Back Cover
  Samsung Hennessy Flip Phone Official: Dual Screen, Quad-core CPU
  How to Solve the Issues on Your New Nexus 7 (2013)
  How to DIY a Paper Case for iPad 4
 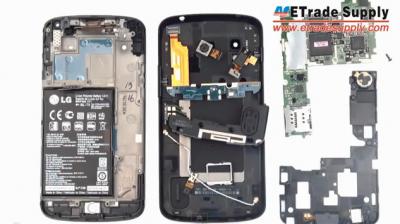 Google Nexus 4 Repair Guide: Step-by-Step Reassembly Instructions
  Leaked BlackBerry A10 Middle Plate – Could Possibly be Called BlackBerry Z30
  Leaked LG G2 5.2-inch Display
  HTC One MAX Will Come with Huge 5.9-inch Display
  DIY: iPhone 5 Case Made from Stones
  Top 8 Tips and Tricks for Your HTC One
  iPad 5 Rear Housing Leaked Showing Much Different
  Next iPad Mini Will Feature A Faster A6 Processor but No Retina Display
  New Features in Android 4.3 Jelly Bean
  Samsung Galaxy Mega 6.3 I9200 Teardown Tutorials
  Helpful Galaxy S4 Tips and Tricks
  Moto X Magic Glass Lens with Frame Leaked
  How to Solve the Common Samsung Galaxy S3 Problems
  New Moto X’s Official Launch Time Confirmed
  iPhone 5C Cell Phone Box Leaked
  Samsung Galaxy Note III Could Be Released in Three Screen Sizes
  Top 5 Issues and Solutions for the Nokia Lumia 920
  Hands-on Photos of Blackberry A10 Revealed
  The Three Most Common Samsung Galaxy Note 2 Issues and Solutions
  Google Released Nex-gen Nexus 7 Sporting Android 4.3
  Motorola Warms Up for the Moto X Event on August 1st
  How to Fix the Common iPhone 5 Problems
  Samsung Galaxy Note III Could Come with A Xenon Flash and Two Processor Options
  Top 5 Issues and Solutions for the Nexus 4
  How to Make A DIY Micro Lens for Camera Cellphone
  BBM for Android Could be Announced by the End of September
  Blackberry A10 LCD Screen and Digitizer Assembly and Battery Door Leaked
  Leaked iPhone 5S Parts Photos and Full Specs
  Nexus 4 Take Apart Tutorial
  Solutions to Common Samsung Galaxy S4 Problems
  Sony Xperia i1 Rumored to Come with Quad-core, 1080p Display
  HTC One Mini Rumored to Come With Dual-core CPU and 4.3-inch Display
  THE Moto X Video Got Leaked and Confirmed August Release
  iPad Mini 2 With Retina Display Reportedly Delayed Until Next Year
  Cellphone Black Screen Guideline – The Whys and Hows
  BlackBerry’s Next Flagship: BlackBerry A10 Coming This Fall
  How to Prolong the Battery Life of Your Cell Phone
  Nexus 5 Rumored to be Announced on October 5th with Android 5.0 Key Lime Pie
  How to Make A DIY Hellokitty-style Case for Samsung Galaxy S Models
  iOS 7 Beta 3 Finally Available
  Find Your Models – Samsung Galaxy Note II Series
 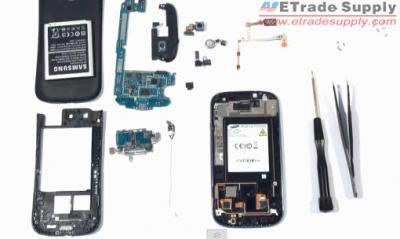 Samsung Galaxy S3 GT-I9300 Assembly Tutorials
 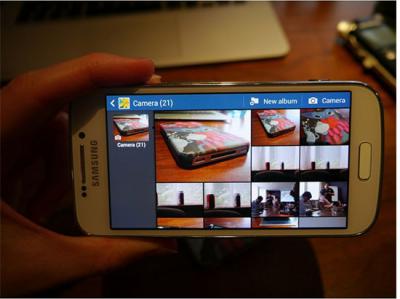 Samsung Galaxy Note III to Come with Four Models
  LG Sent Out Invitation for LG G2
  New Samsung Galaxy S4 Commercial Slams iPhone
  Nokia EOS to be named Nokia 909?
 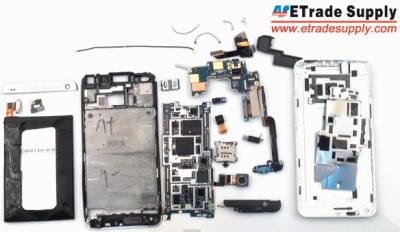 How to Disassemble/Tear Down/Repair Your HTC One
  BlackBerry 10.2 Will Feature Notification Actions and Wi-Fi Direct
  Leaked Photo Hints the Release Date of Verizon’s HTC One
  Galaxy Note III Coming with Flexible Display?
  Apple Failed to Add Galaxy S4 to Latest Samsung Patent Lawsuit
  Sprint Announced HTC 8XT and Samsung ATIV S Neo as Its First Windows Phone 8 Devices
  New Galaxy S4 for Active People = S4 Active
  How to Protect Your Cellphone on the Beach This Summer
  Sony Xperia Z Ultra – Waterproof with Specs to Dominate the Phablet Market
  Nokia EOS to be Announced as the Lumia 1020
  With the Galaxy S4 LTE-A, SK Telecom Launches the World’s First LTE-Advanced Network
  Another iPhone 5S Part Leaked
  Next-gen LG Optimus G to Come with a Snapdragon 800 Chipset
  Android 4.3 Jelly Bean Still on the Horizon
  Three Things Your Cellphone Could Do Besides the General Functions
  HUAWEI Ascend P6 Unveiled as the World’s Slimmest Smartphone
  Android 4.2.2 Jelly Bean Update Confirmed for HTC One
  iPhone 5S LCD Assembly Photos Leaked
  How To Repair LG Nexus 4 Microphone By Replacing Charging Port Cable Ribbon
  BlackBerry To Release 3 Or 4 New BlackBerry 10 Models Later This Year
  iPhone 5S LCD Display Assembly Leaked
 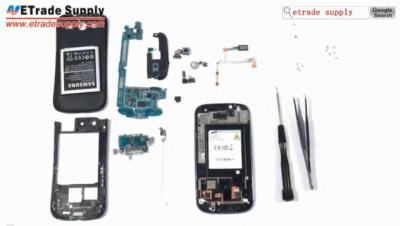 Find Your Samsung Galaxy S3 Model Number
  HTC One Mini Finally Confirmed by Official UA-Profile, Coming to T-mobile?
  Android 5.0 Reported to be Released In October
  Apple Planning to Make Larger-Screen Phones and Cheaper Phones Next Year
  Major iOS 7 Lockscreen Security Bug Found
  What’s new? The new iOS 7
  More iPhone 5S Parts Leaked
  Top 5 Destruction Tests on iPhone 5
  Samsung Galaxy S4 Zoom Photos Appear Online
  How to Solve Water Damaged iPhone Problems
  Apple Rumored To Begin iPhone Trade-In Program To Boost Sales
  Your iOS Device Could Become Infected by A Simple Charger
  HTC Mini Speculated To Announce Next Month
  Next Generation Apple iPad to be Mass Produced Next Month
  Low-cost iPhone To Come With Curved Design And Lightning Connector
  How to Make a DIY Touchscreen Stylus for Cellphone
  HTC Said To Be Releasing A Couple New Models And Some New Colors To The HTC One
  Galaxy Note III Appears on Samsung’s Kazakhstan Website
 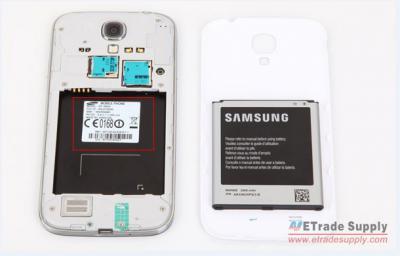 Find Your Samsung Galaxy S4’s Model Number
  Samsung Smartphone Sales Pushed Ahead of Apple in Q1 2013
  White Nexus 4 Appears in the Indian Market Before Officially Released
  Samsung Sales Topping China Market in the First Quarter of 2013
  Samsung to Announce New Android and Windows Devices on June 20
  Samsung Galaxy S4 Mini Accidentally Shows Up on Samsung’s Official Website
  Jony Ive’s iOS 7 Redesign to Feature Black and White
  HTC Also Wants to Release A HTC One Google Edition
  Samsung Galaxy S4 Ranks No.2 on Camera Test, Surpassing iPhone 5
  Android 4.3 is FINALLY Around the Corner
  Nex-gen iPhone and Lower-Range iPhone Rumored to be Multicolored
  Samsung Galaxy S4 Developer Edition Coming Out Soon
  Apple’s iPad 5 Rear Mic Design Leaked
  Microsoft Updates Youtube Apps, But Not Addressing all Google’s Concerns
  Microsoft’s New Ad Campaign. “We are Better, Trust Us.”
  BlackBerry Co-CEO Believes Users of iOS and Android Will Embrace BBM
  Fingerprint Protection Likely to Appear on Future Samsung Models
  Sprint Nextel Confirms the Launch of BlackBerry Q10 This Summer
  Apple is still the most valuable brand in the world
  LG’s 5-inch Flexible Display to Debut in the Q4 of 2013
  Dual SIM HTC Desire 600 Spotted in Benchmarks
  Nokia EOS Is Rumored to Be Coming Out This Summer
  Nokia Lumia 928 Disassembly Photos
  Apple iPhone 6 Concept Features
  White Nexus 4 May Launch with Android 4.3
  iPhone 5S Interior Design Leaked
  With Your Smartphone You Can See, You Can Hear, and Now You Can Smell
  iPhone 4/4s Power Buttons Worth $5 Million
  Google Continues on its Path to World Domination
  BBM to be Available on iOS and Android this Summer
  6-inch Samsung Galaxy Note 3 screen?
  iPhone 5S Rumored to Feature Sapphire Crystal Home Button
  What to Expect at this Year’s Google I/O
  Bad Idea, Bad Sales. HTC and Facebook Fail Together. AT&T Clearly Regretful.
  Samsung Galaxy S4 Mini Leaks Flooding the Internet
  Sony Xperia ZR Announced as a Waterproof Device
  Samsung to Launch 5G Network by 2020
  Ever heard of WET FINGER TRACKING?
  Google X Smartphone– Reports Say it’s Real, but Motorola is Going Solo
  iPhone 5S Parts Leaked Hinting an Updated Camera
  $237 to Build A Samsung Galaxy S4
  Nokia Lumia 625 or Lumia 928 to be unveiled?
  Nokia Confirms New Lumia 928
  HTC One’s April Success
  Samsung Announced the Galaxy Core on May 06, 2013
  Confirmation: Apple Will be Releasing Lower Range Models
  Red BlackBerry R10 Image Leaks out
  How to Repair the Damaged iPhone 4 Screen
  LG is cooperating with Google on new Nexus 5
  Is This The New Google X Phone?
  How to Update Your Galaxy Note 2 GT-N7100 to Android 4.2.2 Jelly Bean now? SlimBean Build 4.2 ROM is the choice!
  Apple iPhone 6 To Be Launched in June 2014
  Galaxy S4 Breaks Easier than iPhone, Galaxy S3
  Samsung Galaxy Note III Latest Specs Leaked
  Apple Reportedly Bringing the Flat Design to Upcoming iOS 7
  Apple iPhone Supposed to Conquer Android by 2015
  iPhone 5S Coming in Early September ?
  With Extra $500 Million Spent in R&D, the New Apple Coming?
  T-Mobile’s Galaxy S4 Online Sales Delayed to April 29th
  Apple Called “Poison Apple” by Angry Apple Suppliers
  Google’s X Phone, Nexus 5 Rumored won’t unveil at Google I/O
  iPhone 5S Front Facing Camera Leaked
  Picture of Low-End iPhone Leaked, Looking Similar to the White iPhone 3G
  Apple iPhone 6 Concept Features Transparent Display, 10MP Camera and A7 Processor
  Verizon, Sprint and MetroPCS Said To Release the Galaxy S4 Together?
  What We Now Know About iPad 5 Body-Slimmer and Narrower?
  iPhone 5S Will Come With 2GB RAM and A7 Quad-core Processor?
  Samsung Galaxy Note 3 Will Ditch Plastic for A New Design?
  Nokia Lumia 928 LCD Screen and Digitizer Assembly Leaked!
  iPad 5 To Be Unveiled Later This Month?
  Apple Reportedly Delays the Launch of Next Generation Lineup to Q3
  Survey Reports Samsung Galaxy Phones Simpler than iPhone
  Facebook Phone Coming Out As HTC First
  iPhone 5S Reportedly Coming in June with “At Least” Two Screen Sizes
  82.6% of Americans Don’t Know BlackBerry 10 has Announced
  USPTO Withdraws Objections to the iPad mini’ Trademark Application
  Samsung Galaxy S4 Digitizer and LCD Screen Assembly, What’s Different?
  Former Apple’s Advisor Admits Apple’s Naming System is Weak and Awkward
  Hands on: Facebook Home review
  Android IS Starting to Lose Ground to Apple
  Google’s Second-gen Nexus 7 Tablet Reportedly to Come in July
  iPhone 5S Production to Start This Quarter
  RUMOR: Samsung to unveil the Galaxy S4 mini this week
  Apple Said to Work Hard to Launch “iRadio” This Summer
  Apple Ready to Drop Samsung for iPad Mini Display Supplier
  Apple iOS 6.1.3 Users Complain about Battery Drain Problems and Wi-Fi Issues
  iPhone Found to Be Most Vulnerable to Virus
  Apple’s Plan in India indicates the existence of Cheaper iPhone
  4.3-inch Samsung Galaxy S4 Mini Details Leaked
  BlackBerry CEO says Samsung’s smartphone security will never be ‘top-notch’
  Samsung GALAXY Note III, Samsung Galaxy Tab 3 rumored to be unwrapped in September at IFA
  HTC Confirms the Delay of HTC One Release Date
  Purported LG Nexus 5 Image Leaked
  Apple Said to Equip iPhone 5S with ‘killer feature’
  Apple Responded to Galaxy S 4 Announcement, “There’s iPhone and then there’s everything else.”
  Samsung Galaxy S6 Futuristic Look Ahead
  HTC’s CMO Says the Galaxy S4 is just “More of the Same”
  Samsung Revealed the Galaxy S IV: Eight cores, 13 Megapixels, One Gorgeous HD Display
  “LG Optimus G is here ‘4’ you now” Ad on Samsung Galaxy S IV Billboard in Times Square
  Protective Cases for Samsung Galaxy S IV Appear Online
  Apple Marketing Chief Attacks Android One Day before Galaxy S IV Launch
  Galaxy S IV called Samsung’s ‘last act in Apple’s shadow’
  HTC One Will Be Released on March 29th
  Samsung Galaxy S IV Final Design Leaked!
  Sprint Will Announce an All-Touch Smartphone in 2013, but Not the BlackBerry Z10
  iPhone 5S Will Come with Both NFC and A Fingerprint Sensor for Enhanced Security
  HTC Myst Specs Leaked as Another Facebook Phone
  Samsung Galaxy S4–Launch with Energy Efficient Green PHOLED Display
  Android Accounted for 79% of All Mobile Malware Last Year
  Next Samsung Galaxy Note Rumored to Feature An even Bigger, 5.9-inch Screen
  Samsung’s Galaxy S IV to Be Made Out Of Plastic?
  Apple Could Release Thinner, Lighter iPad 5 in April
  Netflix Has No Plan of Developing BlackBerry 10 Operating System
  Samsung Galaxy S IV Many Specs Confirmed by Antutu Benchmark Leaked Results
  iPhone 5S and Cheaper iPhone Will be Released in August
  What Will Samsung Galaxy S4’ Specs Look Like?
  Canadian Retailer said that Blackberry Z10 outselling iPhone 5 and Samsung Galaxy SIII
  Alleged iPad 5 Cases Suggest New iPad mini-inspired Design
  Samsung Sends Out Press Invites for March 14: Ready 4 The Show
  Samsung Galaxy Note 8.0 Announced: Detailed Features (Can Make Calls)
  Analyst Sees “iPhone mini” as a New Growth Point for Apple
  Photos of Rumored iPad Mini II Rear Shell Leaks
  LG Announces the LG Optimus F7 and F5 with Mid-range Specs and Features
  Rumor: iPad Mini Display Production Increased and Next-gen Display Already in Development
  HTC One Event, Will it save HTC?
  Few Hours Before HTC One (M7)
  Google Is Committed to Making Nexus Phones Insanely Great Cameras
  The Rumored Black HTC Handset (M7) Looks Like an iPhone 5 in Leaked Photo
  Transparent Smartphone Prototype Is Coming
  Purported Verizon Samsung Galaxy S IV Details
  Purported HTC M7 Image
  New HTC M7 to be fit with “Ultrapixel” Camera
  iPhone 5 Transparent and Colorful Rear Housing On Sale Now!
  New Proof for A Cheaper iPhone
  HTC M4 and G2 Details Leaked after HTC M7
  Samsung’s GT-B9150 Smartphone Specs Leaked
  Samsungs’s $58 Million Says Stylus Pens are Here to Stay
  RIM Announced Its First BlackBerry 10 OS Devices, BlackBerry Z10 and Q10
  White Nexus 4 Release?
  70% of the Smart Phone Share Has Been Taken Up by Android in 2012, Q4
  iPad 5 Back Plate Leaked?
  Lower Price iPhone will Have Brand New Design with A 4-inch Retina Display?
  HTC M7 Housing Parts Leaked
  Purported Images to Show Parts for Apple iPhone 5S and iPhone 6
  Top Three Largest Smartphone Manufacturer–Samsung, Apple and Huawei
  Apple to Announce Global iPhone 5 4G LTE with 36 New Carriers Next Week
  Mozilla has Joined the Battle–Two Firefox OS Developer Phones Have Been Released
  Sony Will Announce A Smartphone with 6.44-inch Screen?
  Motorola X Phone with Key Lime Pie or LG Nexus 5 and Nexus 7.7 to Debut at Google I/O?
  HTC M7 Render and Specs
  Samsung Will Announce An 8 Inches Galaxy Note Tablet?
  Samsung Galaxy Note III Rumored with 8-core Processor and 6.3-inch Screen
  LG Says Its Not To Blame For Erratic Nexus 4 Supply
  Upcoming Samsung Galaxy S IV Will Feature A Bigger Screen with 440 PPI?
  Samsung Galaxy S Series Phones’ Sales Hit the Record of over 100 Million Units
  Rumor: iPad 5 and iPad Mini 2 to Debut in March
  Samsung Release Galaxy S II Plus into the World
  Samsung Unveils Youm Flexible OLED Display Tech at CES 2013
  Cheaper Version of iPhone May Be Released in Second Half, 2013
  Sony Xperia Z Phablet Leaks Again
  Starting from Scratch, It’ll Be Tough for RIM to Make People Care with BB10
  2013 Won’t Be Too Bad–HTC CEO Predicted Its Company Performance in the Coming Year
  iPhone 5S Will Feature New ‘Touch -on Display’ Technology?
  Sony Xperia Z Reportedly to Launch on January 15th, Beating out Next Apple iPhone and Samsung Galaxy S IV
  More BlackBerry N-Series images surface, appeases QWERTY lovers with sharper focus
  Blackberry Z10 Specs Emerge, 1.5GHz Dual-core Processor, 2GB RAM, 8MP Camera
  Two Blackberry 10 Devices Parts Leaked
  Apple Loses Its Shine
  Fifth-Gen iPad Rumored to Come in March with Retina iPad Mini
  Apple Take the Leadership in US Smartphone Market, While Android Still Tops in Europe
  New Changes for the iPhone 5S or 6’s Camera? Duel-led, What’s That?
  White BlackBerry 10 L-Series Picture Leaked
  Samsung Is the Biggest Manufacturer of Cell Phone in 2012
  Another Security Threat Found for Samsung’s Galaxy S III and Galaxy Note II
  China iPhone 5 Sales Hit Two Million Units in The First Weekend
  Even Bigger Samsung Galaxy Note 3; No “Unbreakable” Screen for Galaxy S IV
  Christmas Bonus Discounts – Save on Christmas Orders
  Though Many Complains, iPhone 5 Is Still the Bestselling LTE Phone in the World
  Samsung Galaxy IV Features a Durable Screen
  LG and Google Are Surprised By the High Demand for the Nexus 4
  iPhone 5S Rear Housing Leaked
  Nokia Lumia 920 Soon to Be Sold with China’s Largest Carrier
  Next Windows Phone 8 Device-HTC Titan III
  Some New iMacs Marked “Assembled in USA”
  12-18 Months Needed for Apple to Move Away from Samsung Processors
  iPhone 5S’ Wireless Power
  5 Inches HTC Deluxe Will Not Launch In Europe
  Differences Between the Store of Microsoft and Apple on Black Friday
  Black Friday Deals for Apple Product: $101 for Laptop, Up to $61 for iPad, iPhone Excluded
  Android Will Own More Than Seventy Five Percent Markets Around The World
  Jolla OS, Be the fourth Choice?
  Apple Opens Its First Refurbished Store On Ebay
  Another Five-inch 1080P Phone, Now is Lenovo!
  ETrade Supply Thanksgiving Day Campaign
  Samsung Galaxy S III and Galaxy Note v. Apple lawsuit
  Samsung 1080P Amoled Screen
  iPhone 5S Will Be Announced In The First Quarter of 2013
 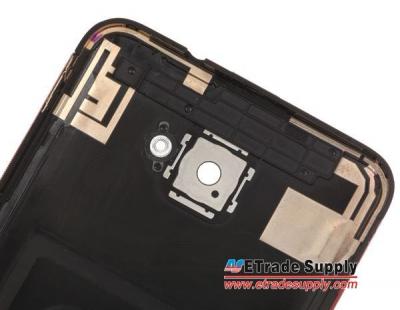 HTC Droid DNA Parts Leaked
  Smartphone Crown Of iPhone Was Stolen By Samsung Galaxy S III
  iPad 4 Back Cover
  HTC+Verizon+Nov,13th=?
  Motorola Droid Razr XT910/ XT912 Repair Tutorial
  HTC Droid Incredible 4G LTE Disassembly Tutorials
  Nokia Lumia 822 Unveiled
  Google Delay the Event Due to Hurricane
  LG Nexus 4, Much Tougher Screen?
  Nokia Lumia 920 Disassembly
  Apple Would Announce Its Pandora Competitor In 2013
  iPad Mini News (Collected)
  iPad Mini Preview Before Apple’s Event
  Rumored iPad 4 Rear Housing Leaked?
  iPad Mini GPS, Wifi, Bluetooth Antennas Leaked
  Apple Lightning Authentication Chip Cracked
  iPad 4 Dock Connector Leak?
  The New Google Nexus Tablet–Nexus 10 (Rumored)
  How to Disassemble HTC One X(AT&T Version)
  Nokia Said Ecosystem Would Be Stimulated By Microsoft Surface Phone
  iPad Mini OEM Parts Leaked—8-inch iPad Mini LCD Screen and 4490mAh Battery
  Official Announcement for “iPad mini”
  Rumored LG Nexus 4 Reviewed by Belarusian Site
  There are now exceed 6 billion cell phone users around the world
  iPad Mini Rumored to Be Wi-Fi Only
  Huawei and ZTE Deny the Accusation Made by US Congress
  Samsung Galaxy S III is Best Selling Device For T-Mobile of All-time
  Sony Will Release a 6 Inches Phone in 2013
  Samsung Galaxy S3 Mini
  Best iPhone 5’s Apps
  Is Your iPhone 5 Eco-friendly?
 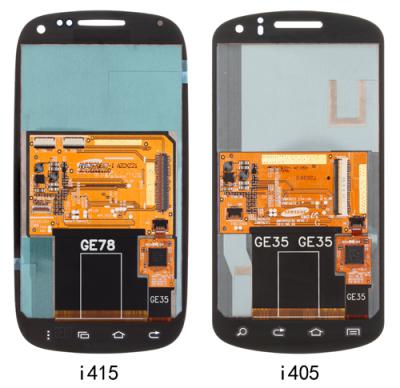 Android 4.0 Slide Phone: Samsung Stratosphere II — Upgrade Version of Stratosphere
  Huawei Ascend P1 LTE — EE
  iPhone 5 Defeats Samsung’s Galaxy S III in Display Test
  Motorola Razr i: First Moto Phone with Intel Processor
  iPhone 5 Easier to Repair
  HTC Windows Phone 8X And 8S
  iPhone 5 Pre-order Hit the Record!
  iPhone 5 Overall Features
  What to expect from the iPhone 5
  Nokia Lumia 920 Announcement
  Prepare for iPhone 5 – Apple Invites Media for the Event on September 12th
  iPhone 5 A6 Processor
 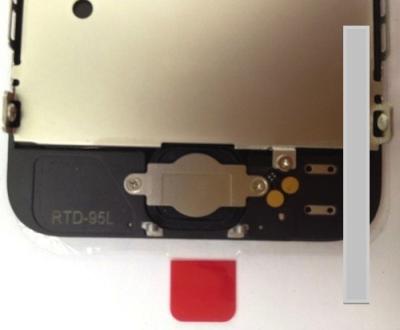 iPhone 5 LCD and Digitizer Touch Panel with Frame Leaked
 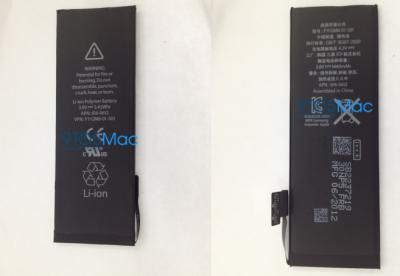 iPhone 5 battery?
  Samsung Galaxy Note 2?
 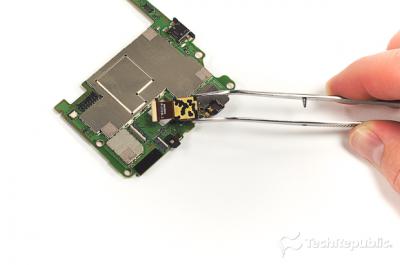 HTC One X disassembly tutorial(Part 3)
 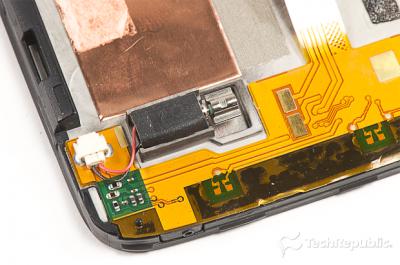 HTC One X disassembly tutorial(Part 2)
 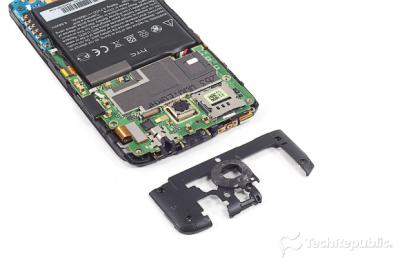 HTC One X disassembly tutorial(Part 1)
  Latest news of iPhone 5
  iPhone 5 resolution is 1136×640
  Samsung-quit Android soon?
 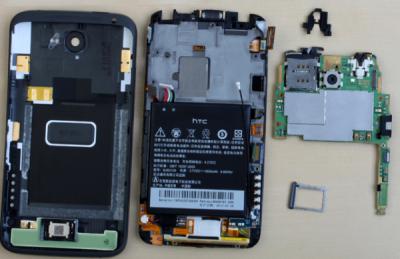 HTC Acknowledges One X WiFi bug on Tegra 3 models
  Redisigned new generation iPhone-iPhone 5
  Explosion? How to Distinguish Between Original and Aftermarket Cell Phone Battery
  Iphone 5 coming to release?
  Live at Samsung Unpacked 2012 for the Galaxy S III Unveiling
  iPad 3 Parts unveiled!
  Successfully submitted!