


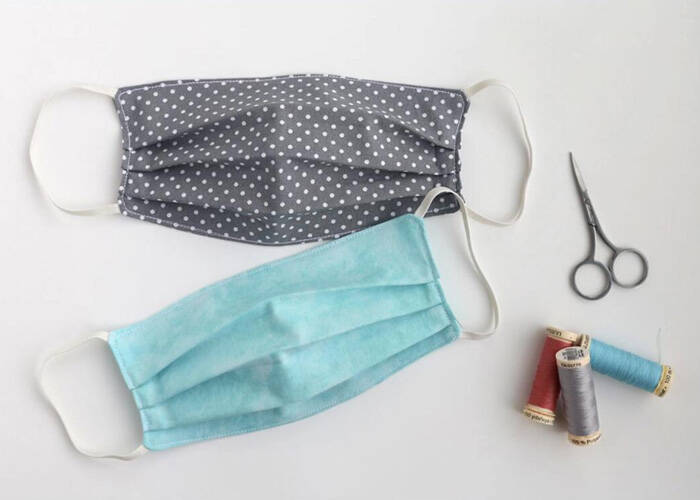
3 Ways to Make DIY Face Masks at Home
BY kaye | 五月 6th, 2020 | 0 | 1
The COVID-19 has been spread around the world, for which we have to make the best protection to our respiratory health. As we can see, the surgical face masks and respirators become necessary to our daily life since the orders were placed by the government. Personal protective equipment like face masks become fast-selling goods and the price is madly high on the market. Based on the reason, we would like to share some DIY tutorials on how to make face mask ourselves at home with simple materials. We can make three good looking styles face mask with our wear out T-shirts or clothes as the process below.
1. How to make bandana face mask
The bandana is a popular clothing decoration for ladies. We can use our bandana to make a face mask. This is the easiest and practical method to make your unique face mask at home. The thing you have to notice is that your bandana or scarf is too thin to filter the harmful pollutions in the air. You have to make fold it to three or more layers and embed a filter material inside the face bandana mask, or else your face mask won’t be effective. Filter materials of tightly woven and 100% cotton are the best.
Here are the tools we will need:
- 1.a bandana or a scarf
- 2.two elastic, flexible rubber band or hair ties
- 3.coffee filter, cotton yarn cloth, melt blown or paper towel
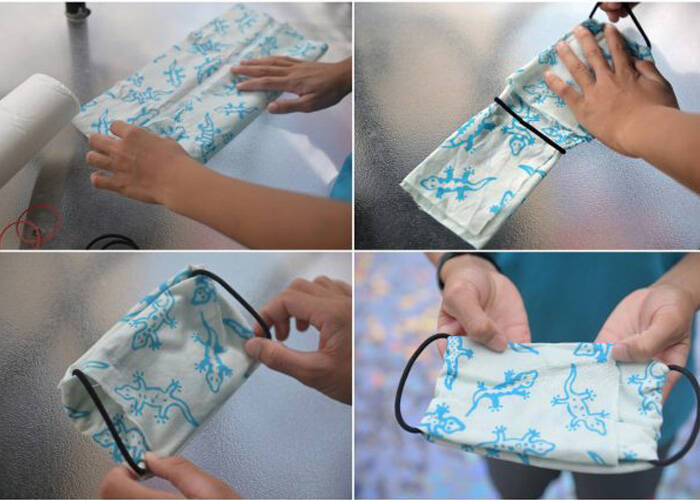
Firstly, we fold our bandana in half, then fold top-down and bottom-up to make it as a strap. Place two elastic or rubber band on each side of the bandana strap and make a suitable distance between the two elastic. Fold the two sides into the middle, tuck the ends into the gap. The bandana face mask is completed. Put it on to try and make it comfortable on your face.
2. How to make T-shirt face mask
Using T-shirts to make face masks is another brilliant method. Your wear out T-shirt or new T-shirt that you don’t mind cutting up is the good material for making face masks. Choosing 100% cotton T-shirts is better.
Tools you require here:
- 1.T-shirts
- 2.Scissors, silk, and needle
- 3.Coffee filter, cotton yarn cloth, melt blown or paper towel
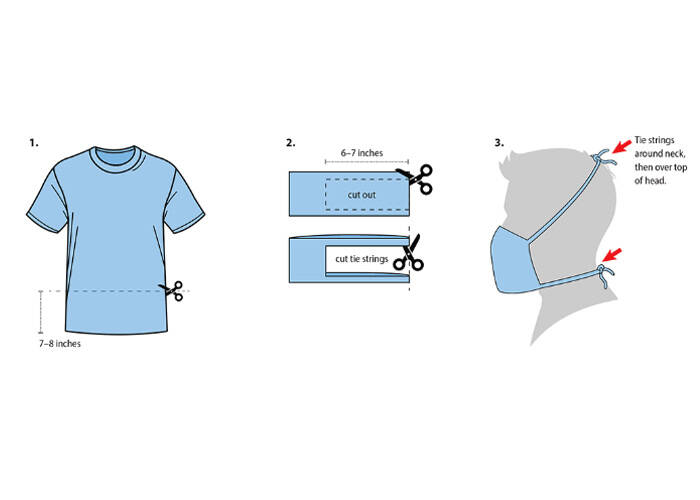
Before we start to cut off our T-shirts, we need to estimate the length from our nose bridge to our whole chin. Normally, this length for an adult would be around 7 to 8 inches, and 4 to 6 for children. It is better to leave 3-5cm for error. To start, simply cut the bottom off your T-shirt in the height as your estimate length. Cut into the T-shirt around 6-7 inches which left the rest part wide enough to cover around your face. Next, cut two strings so that you can tie around your head and neck. Adjust until you get a snug fit around your nose and chin. For effective filtering harmful particles sake, we’d better place a coffee filter or paper towel layer into the face mask, and secure it with safety sew.
3. How to make cloth face mask with sewing machine
If you want to make a surgical mask style with your favorite colors and patterns, this method would be your best choice. There are various ways to make a cloth face mask, of varying difficulty. The simplest patterns require just two pieces of cloth and some elastic, or something that you will use as ties. If you want your DIY face mask to stand out, try using bright or patterned fabric.
Tools you will need:
- 1.Cotton fabric cloth (10 x 6-inches or 25 x 15 cm)
- 2.Coffee filter or cotton yarn cloth
- 3.2 * 6-inch (15cm) pieces of elastic or rubber bands, hair ties or strips of cloth
- 4.Sewing machine
- 5.Needle and thread
- 7.Scissors
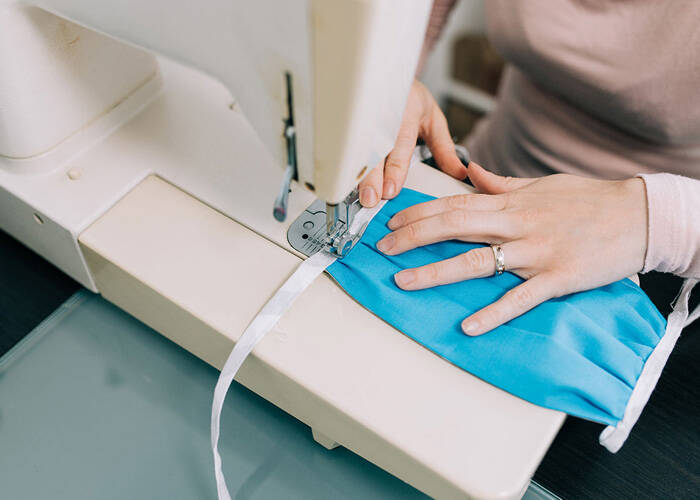
Firstly, place and piled two pieces of cloth or fabric on top of each other and a filter material layer in the middle. The pattern side should be on the bottom and the cloth material side on the top towards you. Cut the three-layer cloth into a suitable shape and size based on your face coverage, here we take the square shape as an example. Cut the cloth into 10 inches length and 6 inches height, fold the top and bottom side in about 0.25 inch and stitch with the sewing machine. Hem along in 0.5 inches and stitch the left and right sides, make gaps for two strings’ penetration on each side. Tread two elastic strings through the face mask and knot. Tuck the knot inside and stitch the gaps with needle and silk. Now a new cloth mask is made, try it on and make it comfortable on your face.
It is recommendable to make the DIY face mask ourselves at home because it only cost us time and patience. One thing we have to notice is that DIY face masks made of cloth do not meet the standard of CDC, which requires our frequent disinfection. Besides, you may also go to our site for KN95 face mask or surgical mask. All our medical supplies are CE and FDA certificated. Contact us via email if you need any antivirus protective equipment.


RECOMMENDED PARTS
POPULAR ARTICLE
- 3 Things You Need to Know About Personal Protective Equipment
- 12 Terms You Need to Know About the COVID-19
- Must We Wear Face Shield and Goggles Outdoors?
- KN95 Mask Vs Normal surgical Mask, Which One is Better?
- iPhone X Water Damage Repair Guide (Still Work in 2019)
- How Much Does It Cost To Replace An iPhone XS Display?
- iPhone X Explosion: 7 Small But Important Things To Note
- 7 Ways To Fix Your iPad Not Charging In 2018
- iPhone 7 Screen Replacement | iPhone 7 Repair
- Which Parts of iPhone X and iPhone XS Are Exchangeable?
- iPhone X, XS, XS Max, and XR Battery Comparison
- How To Fix iPhone XS/XS Max, And XR Bluetooth Connection Issue
- Apple Will Fix the iPhone 8/8 Plus/X Auto Brightness Issue in iOS 12
- iPhone got exploded too?! How to protect your phone from battery explosion
- HTC 10 DIY Teardown for screen, charging port, battery replacement
- 6 Quick Tips To Distinguish Between Real And Fake iPhone SE
- Analysis on: Are China made LCDs for iPhone 5S Compatible with iPhone SE?
- How to Replace the Galaxy S7, S7 Edge Battery Replacement
- How to Disassemble the Galaxy S7 LCD Assembly to Replace Screen, Charging Port and Home Button
- How to Repair Samsung Galaxy S7 Edge Cracked Screen
- How to Tear Down/Disassemble the Galaxy S7 for Screen Replacement
- How to Fix Phone Gets Hot and Battery Drains Fast
- Xperia Z5 Premium USB Charging Port Replacement Tutorial
- How to Replace Your Broken Sony Xperia Z5 Premium Screen Step by Step Guide
- 15 Tips to Improve Your Galaxy Note 5’s Battery Life
- How To Replace A Cracked Motorola Droid Turbo 2 Screen
- How To Fix iPhone 6S Auto Shutdown When It Still Has Battery?
- How To Replace A HTC One A9 Cracked Screen
- How to Distinguish the Fake Apple Earpod from the Real One
- How to Replace the LG V10 Screen in 5 Steps
- How To Solder/Replace A Samsung Galaxy or iPhone Charging Port
- The Cost of Repairing a Cracked Galaxy S6, S6 Edge Screen
- How To Fix Cracked Xperia Z5 For Screen Replacement
- What’s Need to Be Prepared As a Startup Cell Phone Repair Shop
- *Update* The Root of Differences among Copy iPhone LCDs: Structure
- Important Info: Pay Attention To Defective Recycled iPhone LCDs
- How to Replace Galaxy Note 5, S6 Edge Plus Battery
- Are The Flood of New High Copy iPhone LCD Screens as Good as The OEM Ones?
- iPhone 6+ and iPhone 6S+ Screen Comparison Report
- How to Recover Photos and Data with Broken Screens
- How To Identify Different LG G4 Model Numbers
- How to Fix Cracked iPhone 6S for Screen Replacement
- Cost of Repairing a Damaged Screen on the LG G4
- How To Fix LG G4 Digitizer Touch Screen Issue
- As a Newbie, What You Should Know About Jailbreaking
- How To Tear Down/Disassemble Galaxy S6 Edge Plus For Screen Replacement
- 90% Of People Don’t Know These Cellphone Battery Information
- Insider Tips to Save Your Water-damaged Device
- How to Set Up ETrade Supply’s Adhesive Dispenser Robot
- Top 10 iPhone 6 Problems and Solutions
- How To Fix Vertical Lines On An iPhone Screen After Replacement
- How to Replace Sony Xperia Z3+ Screen/Screen Replacement Guide
- How To Disassemble/Tear Down Sony Xperia Z3+
- How to Assemble Small Parts on iPhone 6 LCD Screen Assembly
- Reasons Behind & Solutions for iPhone 6 Frame and LCD Separation Issues
- How to Replace The LG G4 Charging Port
- How to Replace the Cracking LG G4 Screen in 10 Minutes
- How To Replace An Oneplus One Cracked Screen
- iPhone 5 LCD Screen Assembly Small Parts List
- How to Replace the HTC One M9 Charging Port
- How to Replace HTC M9 LCD Screen Assembly
- Top 5 Most Common iPhone 6 Issues You May Come Across
- How To Tear Down The Samsung Galaxy S6 In 10 Steps
- The Cost Of Repairing A Cracked Nexus 6 Screen
- How To Repair A Nexus 6 Cracked Screen
- How To Disassemble Nexus 6 In 10 Steps
- The Cost Of Repairing A Broken iPhone 6 Screen
- Five Minutes Work to Replace Your iPhone 6 Plus Broken Screen
- How to Repair a Cracked Samsung Galaxy S5 Screen
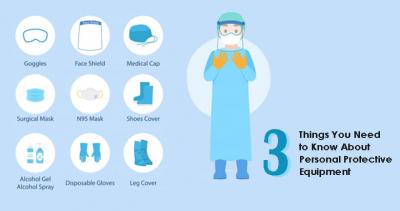 3 Things You Need to Know About Personal Protective Equipment
  12 Terms You Need to Know About the COVID-19
  Must We Wear Face Shield and Goggles Outdoors?
  KN95 Mask Vs Normal surgical Mask, Which One is Better?
  IOS 17.4 official version pushed to block battery vulnerability
  Is the Chinese-made rear case for the iPhone 15 series going on the market?
  New products coming:USB to MFI Lightning Cable
  Big BUG of iPhone 15
  How Chinese celebrate Christmas?
  Disadvantages of iPhone 15 Standard Edition
  Rumors about the Samsung Galaxy S24 Ultra
 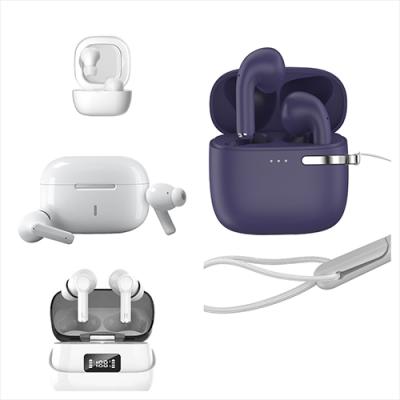 TWS Wireless Bluetooth Headset: Connect Your Wireless World
  iPhone 15 Black Screen Self-Rescue Guide
  Comparison of LCD screens of different mobile phones
  Successfully submitted!